Walking into a hallway and seeing a blank, cold wall feels like a missed opportunity to tell your story. Last year, I helped a friend transform a narrow corridor that felt like a tunnel into a warm, inviting gallery, and the shift in the home’s energy was immediate. Family photos wall decor isn’t just about hanging frames; it’s about anchoring your memories in a way that feels intentional rather than cluttered. Whether you are working with a tight budget or a massive staircase, creating a soulful display is the fastest way to make a house feel like a home. Are you tired of looking at empty walls that lack personality? Do you have boxes of prints gathering dust because you’re afraid of making too many holes in the drywall? I’ve seen how a few strategic layout shifts can turn a chaotic pile of snapshots into a professional-grade installation that looks like it cost thousands in interior design fees.
Executive Summary
In this guide, you will discover 23 distinct ways to elevate your space using personal photography and strategic design elements. We will cover everything from integrated Pooja Room Design aesthetics to incorporating a Door Design Modern approach that frames your entryways. You can expect to learn how to save roughly $500 by sourcing affordable materials and using DIY layout techniques that professional decorators use. We’ll explore the “Rule of Three” for large-scale displays, the “Grid Method” for modern minimalism, and how to weave a Family Tree Design into your living room without it feeling dated. Whether you have $50 or $500 to spend, these ideas offer a roadmap to a more stylish, memory-filled home within a single weekend.
1. Minimalist Black Frames
A uniform set of thin black frames creates a cohesive look regardless of the photo content. In my experience, using identical frames allows the eye to focus on the faces rather than the hardware. This setup works perfectly for a Family Photo Wall in a modern hallway.
- Real Example: Target’s Room Essentials frames ($5 each) used in a 3×3 grid.
- Action: Measure your wall and purchase 9 identical frames for a symmetrical grid.
- Cost/Time: $45; 1.5 hours.
- Contrarian Note: Do not mix frame thicknesses in a grid; it ruins the clean line.

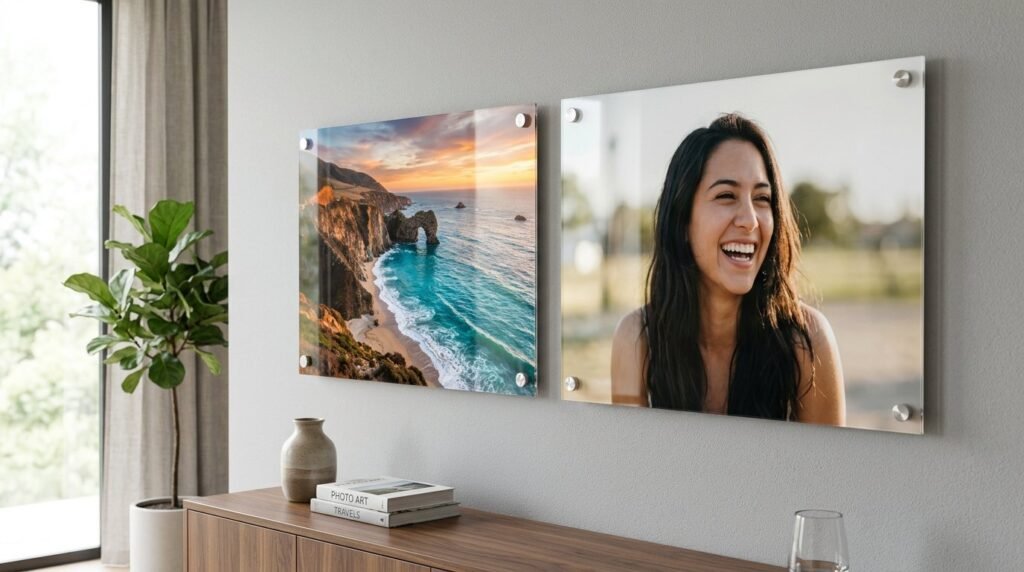
2. Floating Acrylic Panels
Acrylic frames give the illusion that your photos are floating in mid-air. This adds a touch of Stylish Room Decor that feels high-end and airy. I’ve noticed these work exceptionally well in rooms with lots of natural light.
- Real Example: Wexel Art floating frames used for wedding portraits.
- Action: Use stand-off hardware to mount acrylic sheets 1 inch off the wall.
- Cost/Time: $120; 2 hours.
- Common Mistake: Forgetting to peel the protective film from both sides of the acrylic.
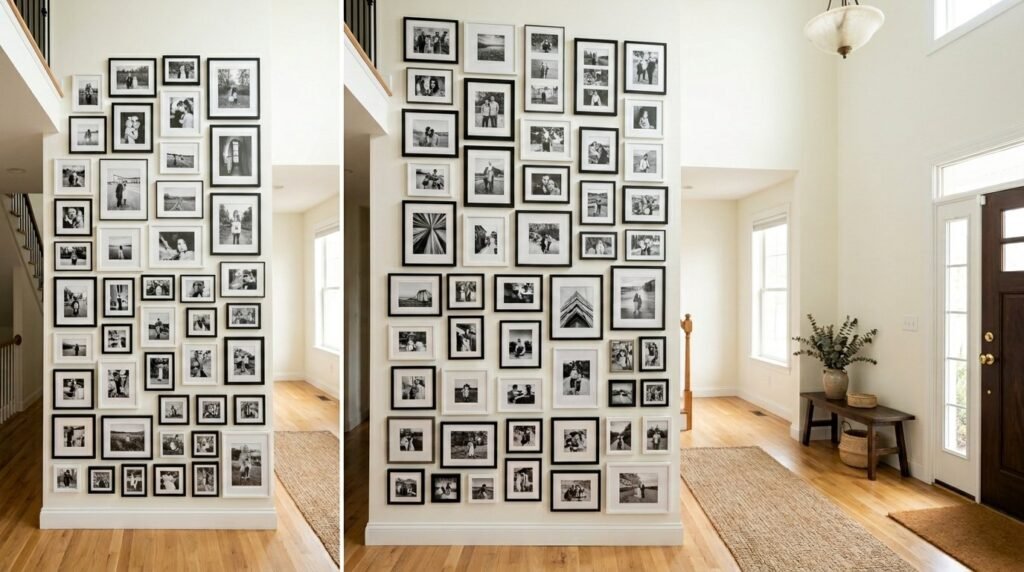
3. Floor-to-Ceiling Gallery
Using the full height of a wall makes a small room feel much taller. Start your photos 6 inches from the floor and go all the way to the ceiling. This is a bold move that functions as a feature wall.
- Real Example: A 12-foot entryway wall covered in black and white family candids.
- Action: Use a laser level to ensure the vertical columns stay perfectly straight.
- Cost/Time: $200 (printing costs); 4 hours.
- Contrarian Note: This can feel overwhelming if the photos are too colorful; stick to a single filter.
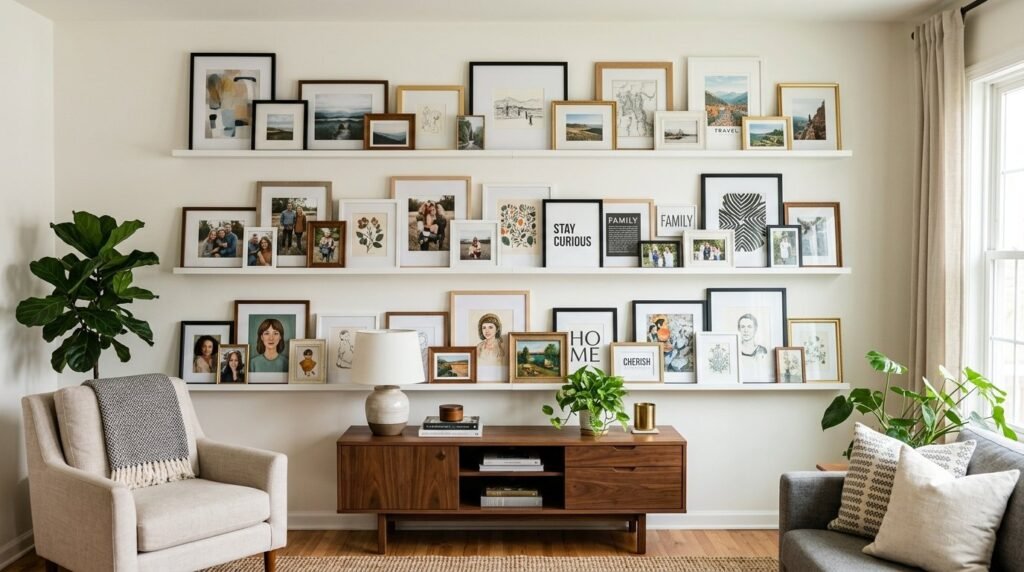
4. Layered Picture Ledge
Picture ledges allow you to swap photos without ever drilling another hole. I’ve tried this in my own living room, and it’s the best solution for people who love to update their decor seasonally.
- Real Example: IKEA Mosslanda ledges stacked three high.
- Action: Overlap different frame sizes to create depth and visual interest.
- Cost/Time: $60; 1 hour.
- Common Mistake: Choosing ledges that are too shallow for thick frames.
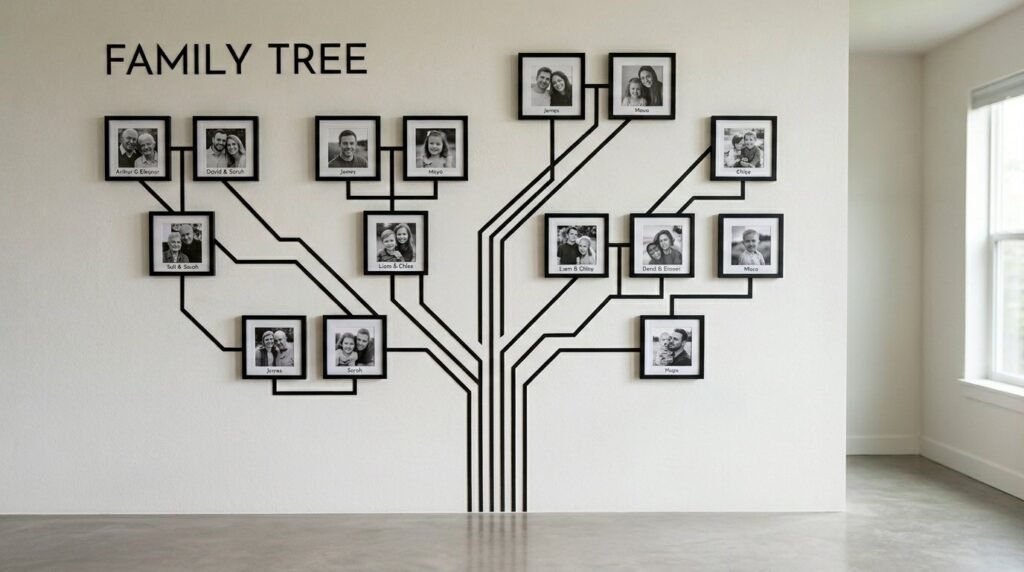
5. Modern Family Tree
Move away from the literal “tree with leaves” decal. A modern Family Tree Design uses geometric lines or simple vinyl tape to connect generations in a sleek, architectural way.
- Real Example: Using Washi tape to create a “lineage map” on a playroom wall.
- Action: Map out your genealogy on paper before applying any lines to the wall.
- Cost/Time: $30; 3 hours.
- Practical Tip: Use different frame colors for different generations (e.g., gold for grandparents).
6. Symmetrical Stairway Grid
Staircases are notorious for being difficult to decorate. A stepped grid that follows the angle of the stairs provides a sense of rhythm and movement.
- Real Example: A set of 12 framed prints following a 45-degree ascent.
- Action: Use a long piece of painter’s tape to mark the “base line” of the stairs.
- Cost/Time: $100; 2.5 hours.
- Common Mistake: Hanging frames too high; they should be at eye level relative to the step you are standing on.

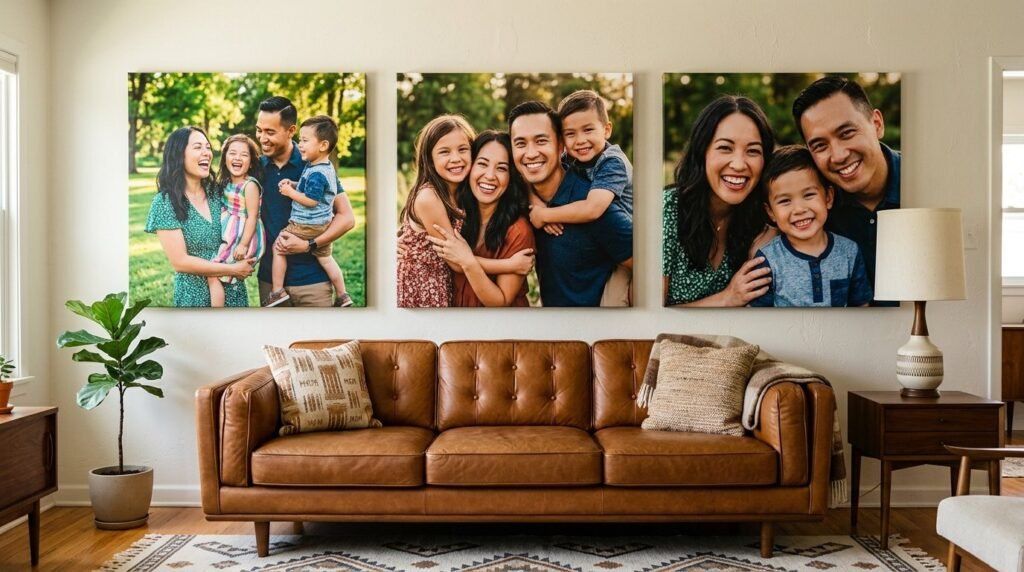
7. Oversized Canvas Trio
Sometimes less is more. Three massive canvases of your favorite family moments can anchor a sofa better than twenty small ones. This provides a clean, gallery-like feel.
- Real Example: 24×36 inch canvases from CanvasPop.
- Action: Select photos with high resolution (at least 300 DPI) to avoid blurring.
- Cost/Time: $180; 30 minutes.
- Contrarian Note: Canvases without frames can look “cheap” if the wrap isn’t done perfectly.
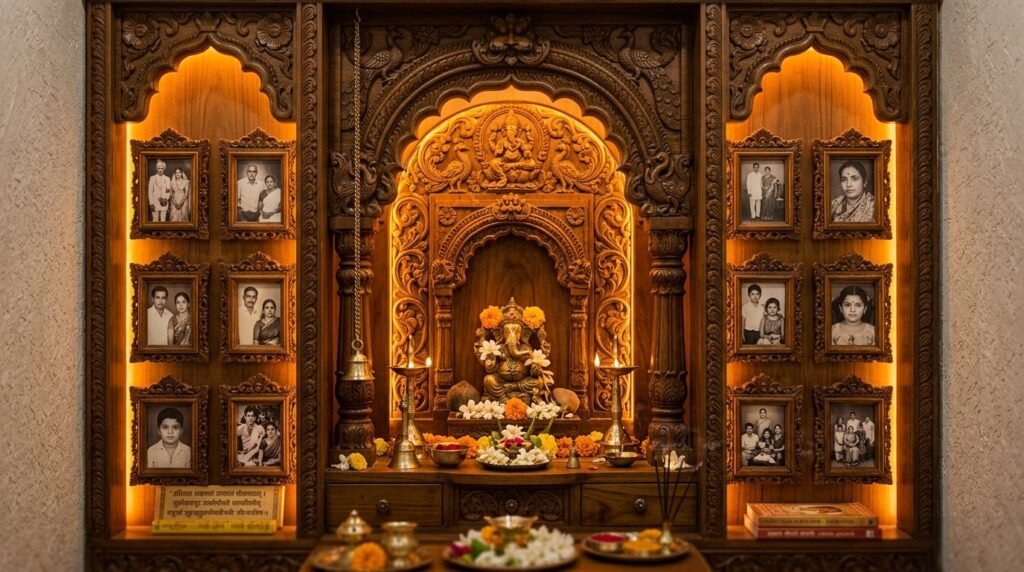
8. Integrated Pooja Niche
In homes where a Pooja Room Design is central, incorporating family photos near the sacred space adds a sense of ancestral blessing. Use ornate frames that match the wooden carvings of the mandir.
- Real Example: Teak wood frames surrounding a small marble home temple.
- Action: Place older, ancestral photos higher up as a sign of respect.
- Cost/Time: $70; 1 hour.
- Practical Tip: Use warm LED spotlights to highlight the display.
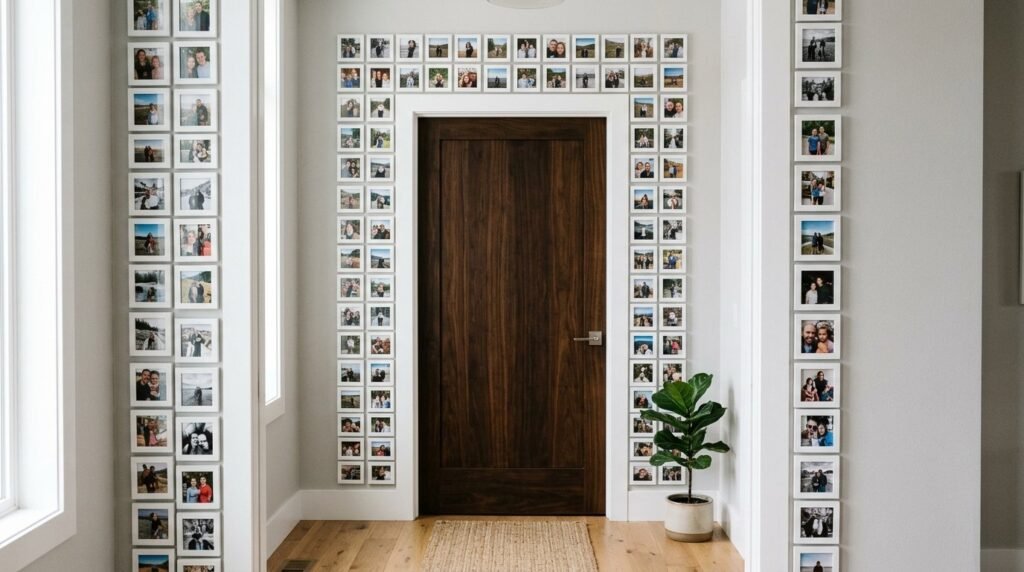
9. Entryway Door Frame
Don’t ignore the space around your doors. A Door Design Modern aesthetic involves framing the doorway itself with photos, creating a “portal of memories” as you enter a room.
- Real Example: Small 4×4 frames outlining a bedroom door frame.
- Action: Use Command strips to avoid damaging the door trim.
- Cost/Time: $40; 2 hours.
- Common Mistake: Using frames that are wider than the door casing.
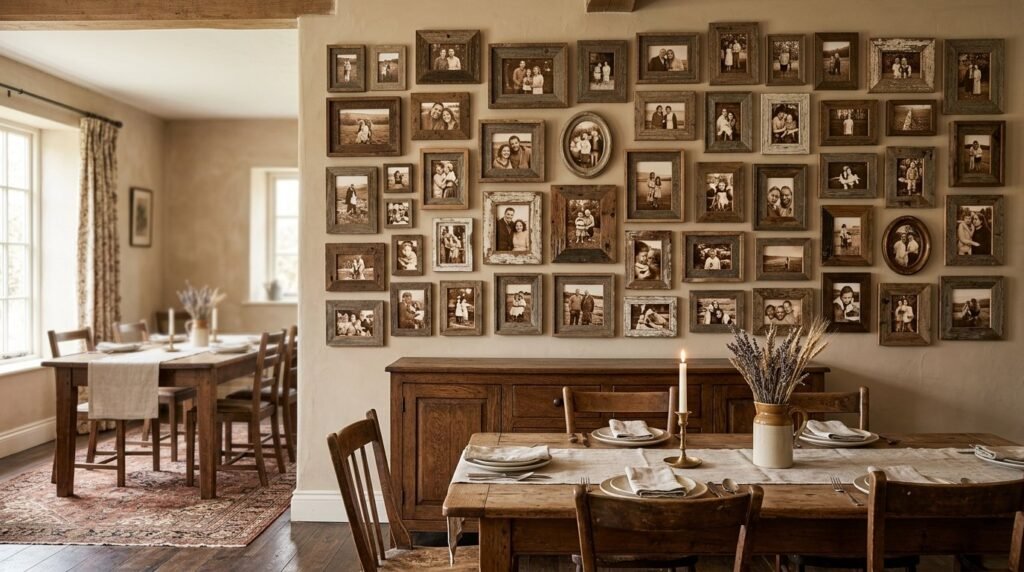
10. Monochromatic Sepia Theme
For a vintage or farmhouse feel, convert all your photos to sepia. This creates an instant sense of history and warmth, making even new photos look like heirloom pieces.
- Real Example: A rustic dining room featuring 15 sepia prints in reclaimed wood frames.
- Action: Use a free app like Lightroom to apply a consistent filter to all images.
- Cost/Time: $20 (printing); 1 hour.
- Practical Tip: Mix in a few handwritten letters or old postcards for texture.
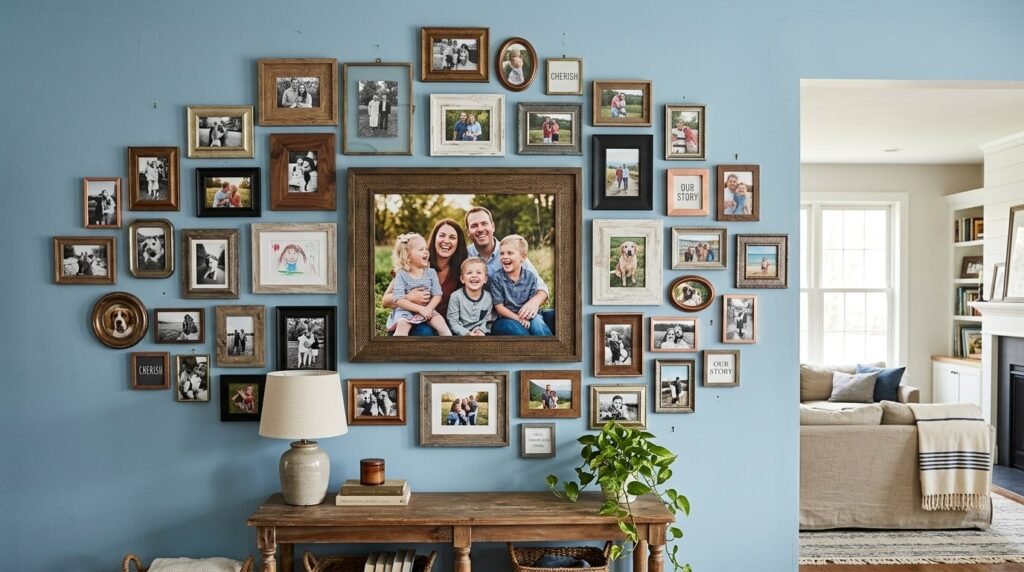
11. Clustered Organic Arrangement
Unlike the grid, an organic cluster grows from the center outward. This is perfect for the “eclectic soul” who wants to add more photos over time without rearranging everything.
- Real Example: A “growing” wall in a family den with mixed metals and woods.
- Action: Start with your largest “anchor” photo in the middle and work outward.
- Cost/Time: Variable; 2 hours.
- Contrarian Note: You still need a consistent spacing (about 2 inches) to keep it from looking messy.
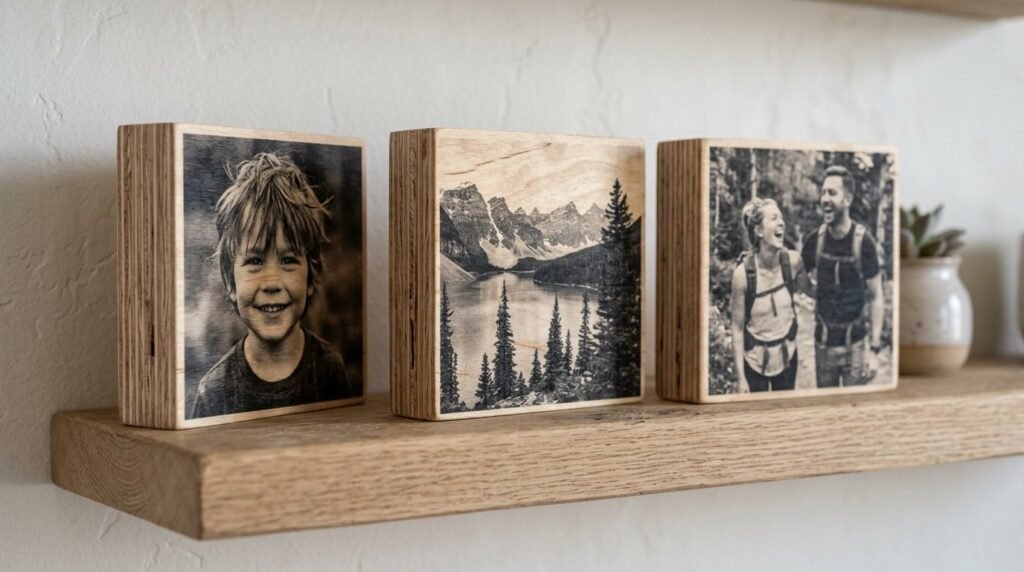
12. Frameless Wood Blocks
For a tactile, earthy look, have your photos mounted directly onto birch plywood blocks. It removes the “barrier” of glass and makes the memories feel more touchable.
- Real Example: Artifact Uprising wooden photo blocks.
- Action: Sand the edges of your wood blocks for a professional finish if DIYing.
- Cost/Time: $90; 2 hours.
- Common Mistake: Using thin wood that warps over time.
13. Mixed Media Wall
Combine your family photos with other meaningful objects like travel maps, clock faces, or bronzed baby shoes. This creates a 3D story of your life.
- Real Example: A travel-themed wall with photos pinned to a cork world map.
- Action: Ensure the largest item on the wall is a photo to keep the focus on the family.
- Cost/Time: $50; 3 hours.
- Practical Tip: Use shadow boxes for the 3D items.
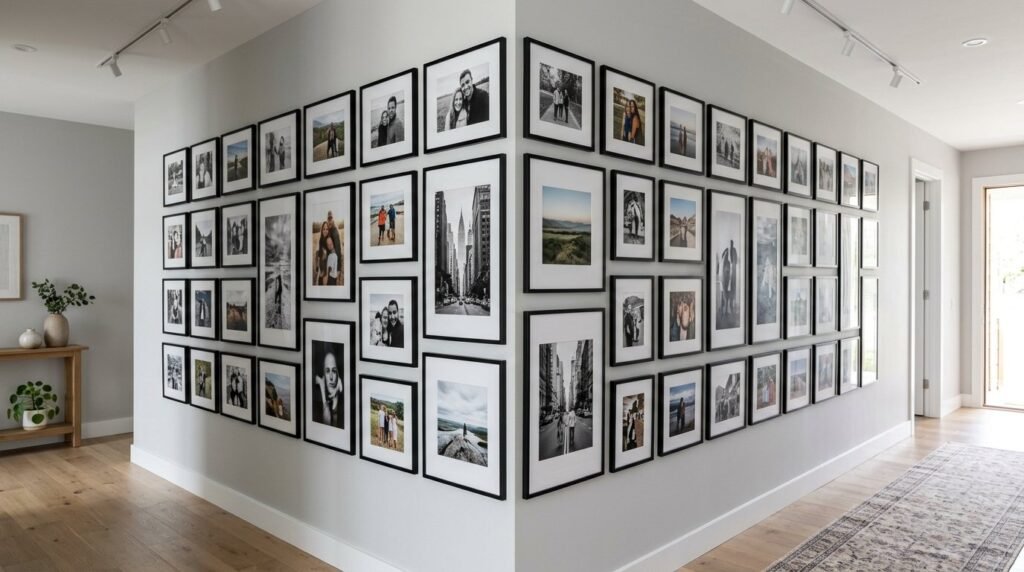
14. Corner Wrap Gallery
Why stop at the corner? Wrapping a gallery around a 90-degree turn is a sophisticated way to utilize dead space in a hallway or landing.
- Real Example: 10 frames split across a corner in a home office.
- Action: Align the center-line of both walls to create a continuous flow.
- Cost/Time: $80; 2 hours.
- Common Mistake: Leaving too much gap at the actual corner seam.
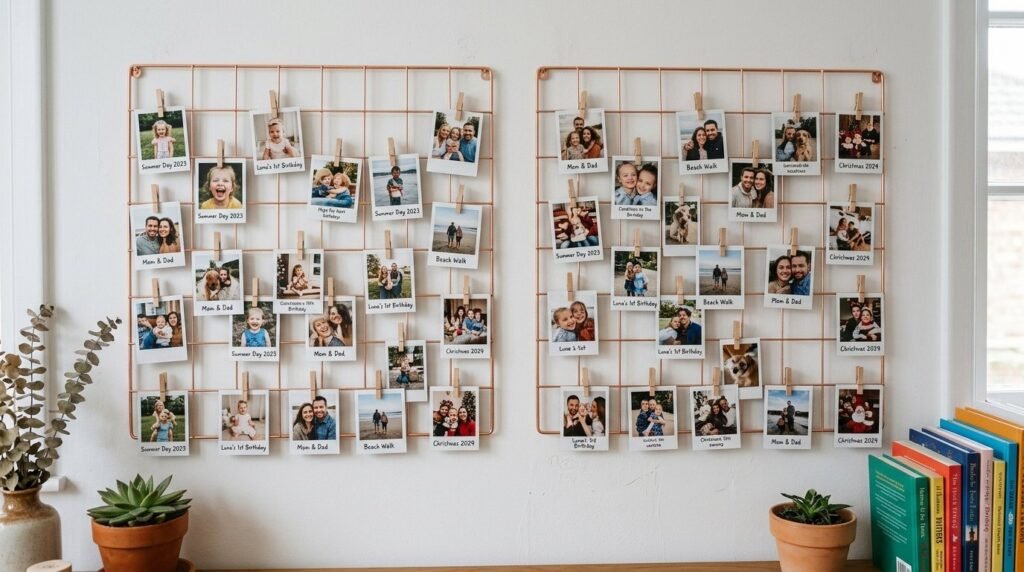
15. Hanging Metal Grids
Industrial and trendy, metal grids allow you to clip photos on and off with tiny clothespins. This is ideal for a teenager’s room or a casual kitchen nook.
- Real Example: Rose gold wire grids from Amazon.
- Action: Use “Instax” style small prints for a cute, retro vibe.
- Cost/Time: $25; 30 minutes.
- Contrarian Note: This look can feel “temporary,” so it’s best for non-formal areas.
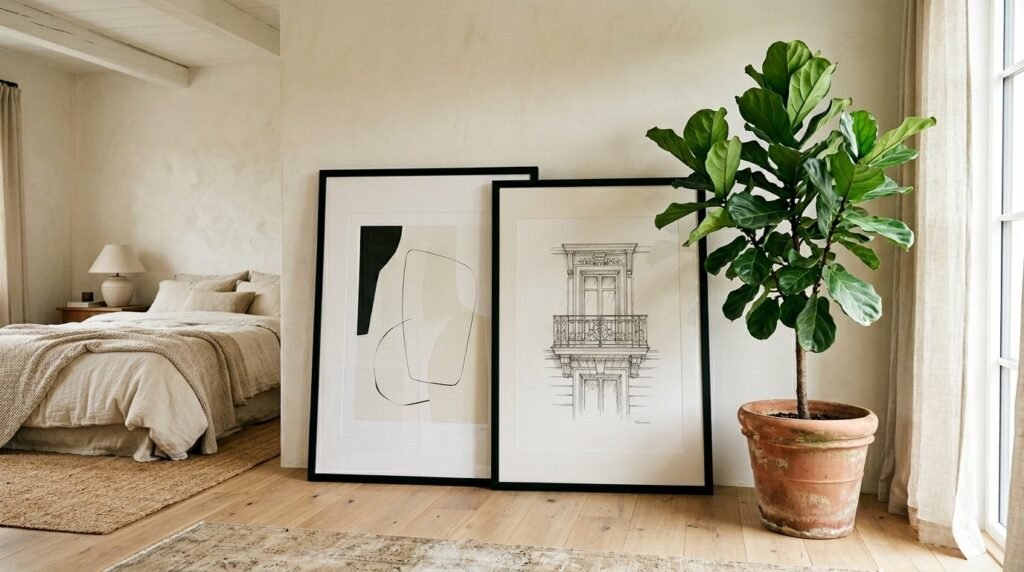
16. Floor-Leaning Large Frames
If you’re renting and can’t drill, lean massive frames against the wall. This “effortless” look is very popular in European design and feels very high-fashion.
- Real Example: Two 40×60 inch frames leaning against a master bedroom wall.
- Action: Use rubber bumpers on the bottom of the frame to prevent sliding.
- Cost/Time: $150; 10 minutes.
- Common Mistake: Leaning frames that are too small; they just look like you forgot to hang them.
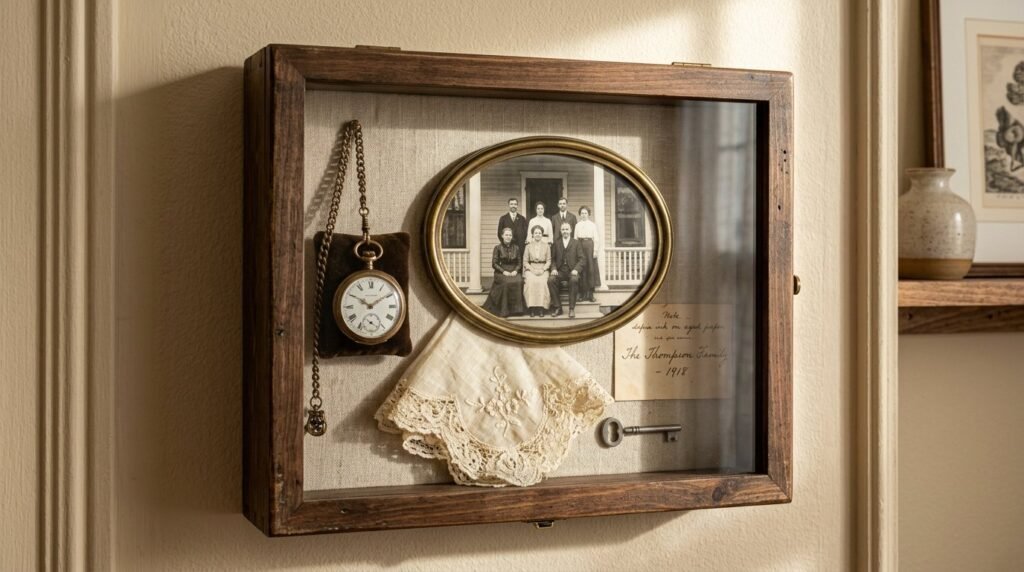
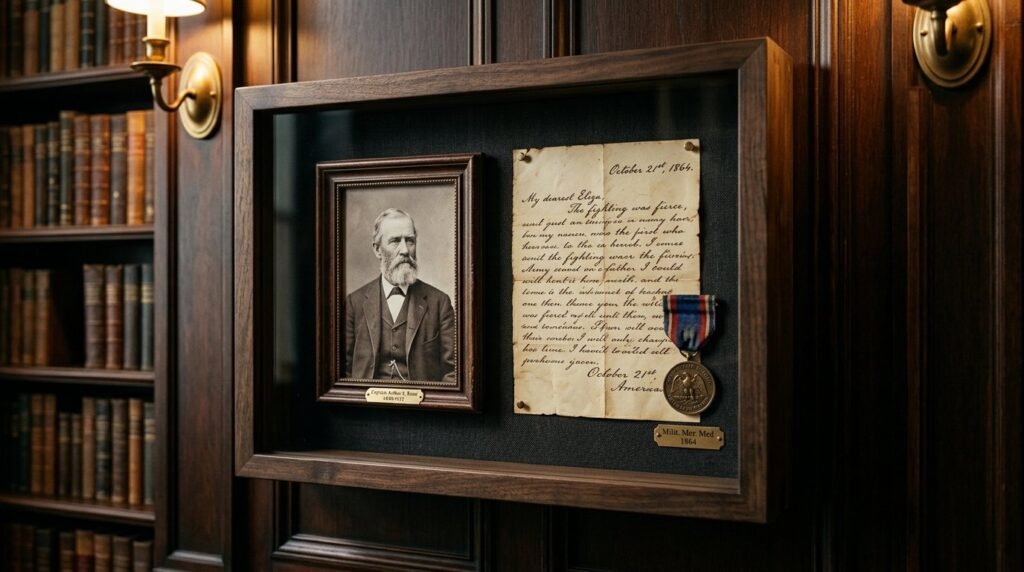
17. Shadow Box Heritage
Use deep shadow boxes to display a photo alongside a physical heirloom, like a grandmother’s necklace or a father’s watch. It turns a wall into a museum of your lineage.
- Real Example: Three deep-set frames in a formal library.
- Action: Use acid-free mounting tape to protect the heirlooms.
- Cost/Time: $110; 3 hours.
- Practical Tip: Place these at chest height so people can see the details inside.
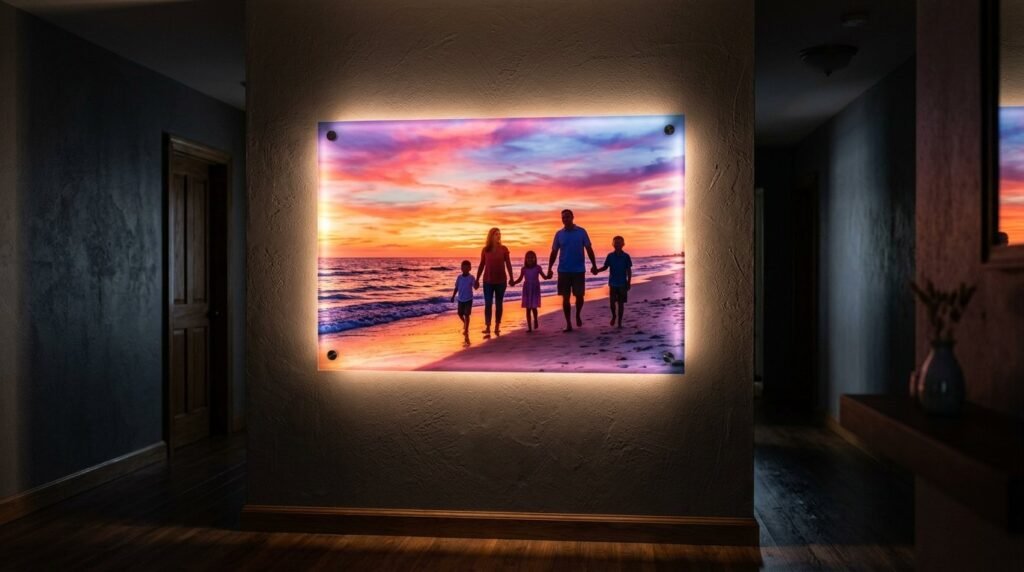
18. Backlit Glass Prints
Printing photos onto glass and installing LED strips behind them creates a luminous effect. It’s perfect for darker hallways that need a light source and a decor boost.
- Real Example: Fractal Glass prints in a windowless corridor.
- Action: Ensure you have a nearby outlet or use battery-powered LED pucks.
- Cost/Time: $250; 4 hours.
- Common Mistake: Using overly bright LEDs that wash out the photo colors.
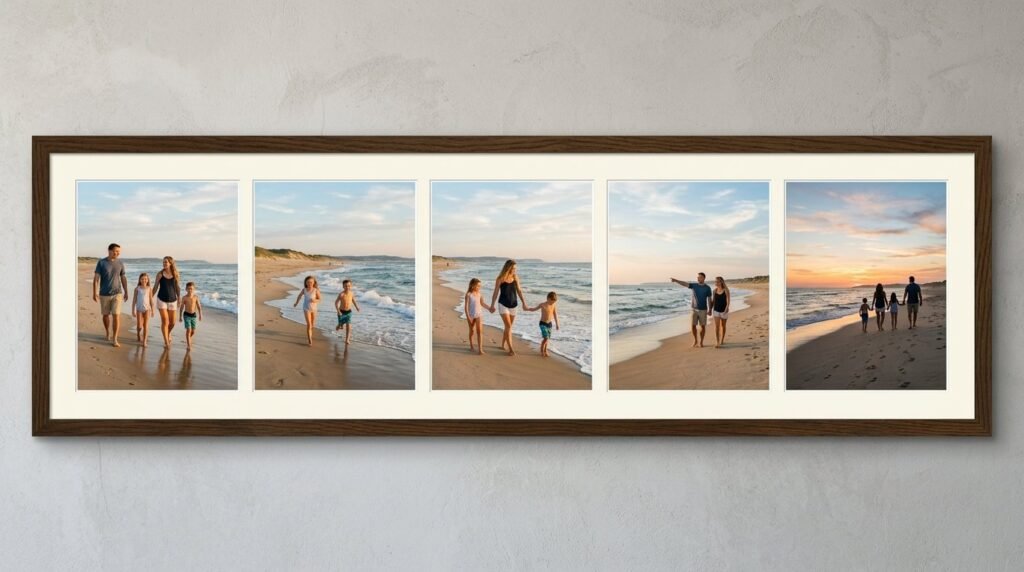
19. Panoramic Storyboard
Take a series of photos from one event (like a beach day) and frame them in a long, horizontal panoramic frame. It tells a chronological story of the day.
- Real Example: A 5-photo sequence of a child running into the ocean.
- Action: Maintain the same horizon line in every photo for a seamless look.
- Cost/Time: $55; 1 hour.
- Practical Tip: Black and white works best for sequence shots.
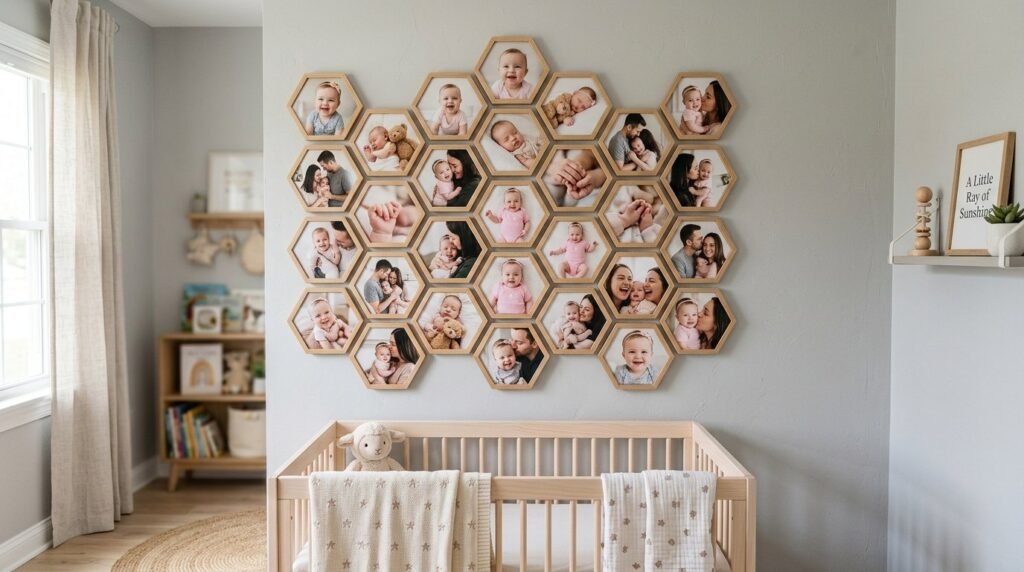
20. Geometric Collage
Arrange small hexagonal or diamond-shaped photo tiles into a honeycomb pattern. It’s a modern take on the traditional collage and fits into small, awkward wall segments.
- Real Example: Mixtiles hexagon sets in a nursery.
- Action: Start from the top-middle and build the “honeycomb” downwards.
- Cost/Time: $120; 45 minutes.
- Common Mistake: Crowding the tiles too close to furniture.
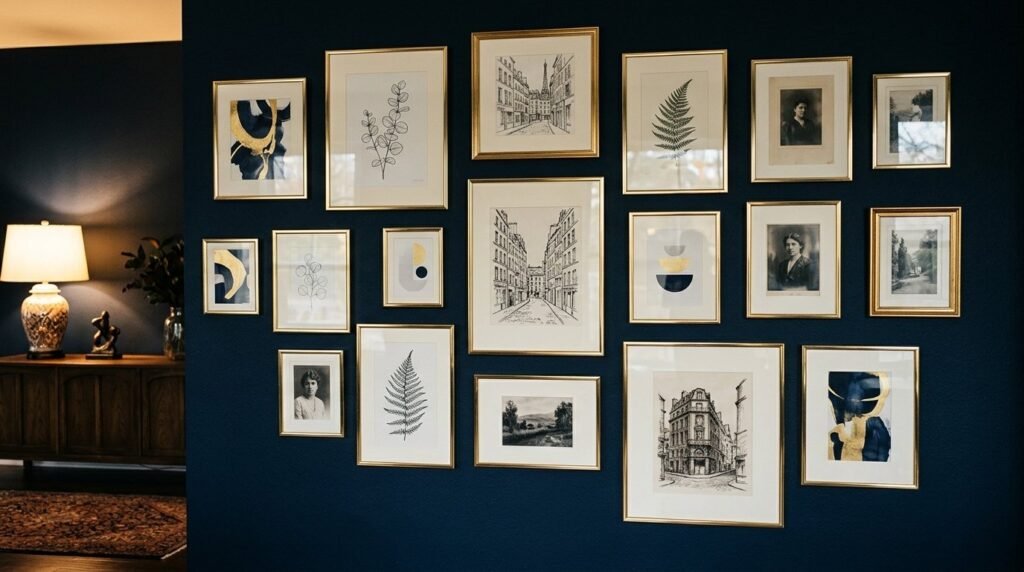
21. Brass Profile Frames
Thin brass frames offer a timeless elegance. They look particularly stunning against dark-painted walls like navy or forest green, providing a pop of warmth.
- Real Example: Floating brass frames from West Elm.
- Action: Polish the brass once a month to keep the “gold” shine bright.
- Cost/Time: $140; 1 hour.
- Practical Tip: Use “warm white” lighting to enhance the metal tones.
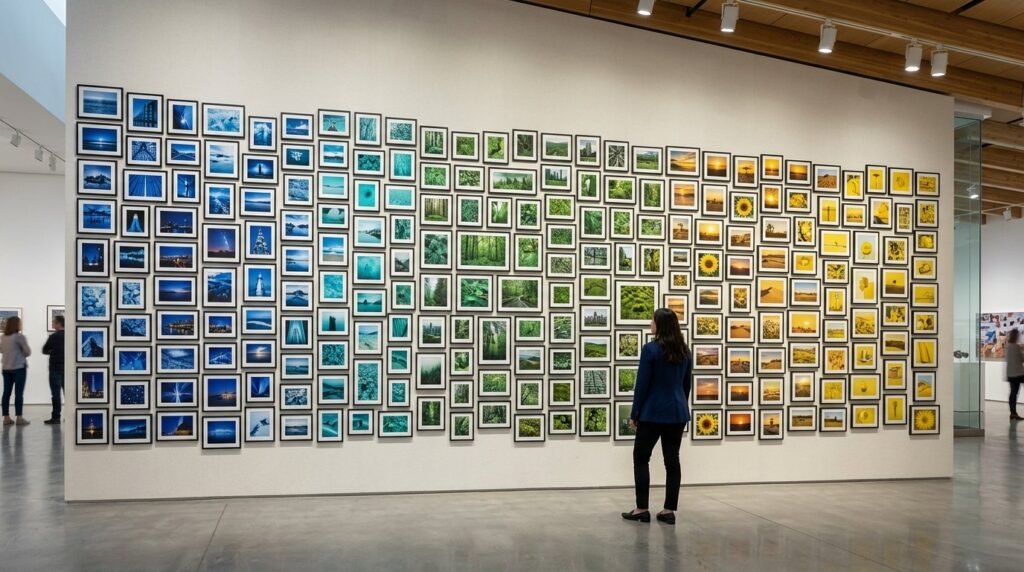
22. Color-Coded Collections
Group photos by the dominant color in the image. One section for “beach blues,” another for “autumn oranges.” This creates a rainbow effect that is visually stunning.
- Real Example: A 20-photo wall organized by color gradients.
- Action: Use a digital photo organizer to sort your images by color before printing.
- Cost/Time: $40 (printing); 2 hours.
- Contrarian Note: This requires a lot of photos to pull off effectively.
23. Digital Art Frame
For the ultimate space saver, use a high-resolution digital frame that looks like real art. You can cycle through 1,000 photos on a single spot on the wall.
- Real Example: The Samsung Frame TV or Aura Mason Luxe.
- Action: Choose a frame with a “matte” finish screen to avoid glare.
- Cost/Time: $350+; 30 minutes.
- Practical Tip: Set the timer to turn off at night to save energy.

Frequently Asked Questions
How do I arrange family photos on a large wall?
The most successful arrangements start with a focal point at eye level (approx. 57 inches from the floor). Use a “grid” for a formal look or a “cloud” for a casual feel. I always recommend laying the frames on the floor first to test the spacing before hammer meets nail.
What is the best height for a photo gallery?
The center of the gallery should be at eye level. For a standard 8-foot wall, this usually means the midpoint of the entire display sits around 58 to 60 inches up. If hanging above a sofa, leave 6–10 inches of “breathing room” between the top of the couch and the bottom of the frames.
How can I make my photo wall look professional?
Consistency is the secret. Use the same frame color, the same matting width, or the same photo filter (like all black and white). Professional designers often use oversized mats—placing a 5×7 photo in an 11×14 frame—to give it that “art gallery” breathing space.
Are canvases still in style for home decor?
Yes, but the trend has shifted toward “framed canvases.” A thin floater frame around a canvas prevents it from looking unfinished and adds a layer of sophistication that modern homes require.
How do I avoid damaging my walls with frames?
Command Strips are the gold standard for renters or those who change their minds often. For heavier frames, use “no-stud” hangers which distribute the weight without creating massive holes in the plaster.
What photos work best for a large display?
A mix of “posed” portraits and “candid” action shots creates the most balanced narrative. I’ve noticed that photos where people aren’t looking directly at the camera often feel more artistic and less like a school yearbook.
Conclusion
Transforming your home doesn’t require a renovation; it requires a story. By using these family photos wall decor strategies, you aren’t just filling space—you are creating a sanctuary that reflects your journey. I’ve seen how these small design choices can turn a house into a place of daily inspiration. I encourage you to pick just one of these 23 ideas this weekend and start small. Whether it’s a simple grid of black frames or a modern family tree, your future self will thank you for the warmth you’ve added to your daily life. Save this post on Pinterest to keep these layouts handy for your next project, and share your finished walls with us—I’d love to see how you’ve made these ideas your own!
