Staring at an empty space feels overwhelming and intimidating. You want to fill that blank drywall with beautiful framed pieces and canvases. Buying expensive pieces without knowing your exact dimensions causes costly mistakes and returns. Pieces look tiny and ridiculous when they finally arrive in the mail. Giant frames overwhelm your sofa and make the room feel cramped. I see this exact situation happen constantly with new homeowners. You need a precise blueprint before spending your money on decor. Proper measurement saves you hours of time and intense frustration. Knowing how to measure a large blank wall turns a bare room into a tailored sanctuary. Possessing the exact math gives you complete confidence in your choices.
You will master exact spatial mapping for any room in your house. This guide walks you through finding true center points and creating precise paper templates. You will see exact furniture to art ratios for balanced layout placement. I outline how to map spaces for a gallery wall layout without drilling unnecessary holes. You get exact spacing rules for different ceiling heights and tight corners. I share specific cleaning and moisture prevention steps to protect your investments over time. You will possess the exact measurements needed to interior design your home with absolute confidence.
The Exact Tools You Need for Accurate Wall Measurement
Precision starts immediately with the right physical gear. Guessing with a short school ruler ruins your layout completely. You need reliable contractor grade tools to capture exact dimensions. Flimsy tools yield sloppy spacing every single time.
Essential Physical Measuring Gear
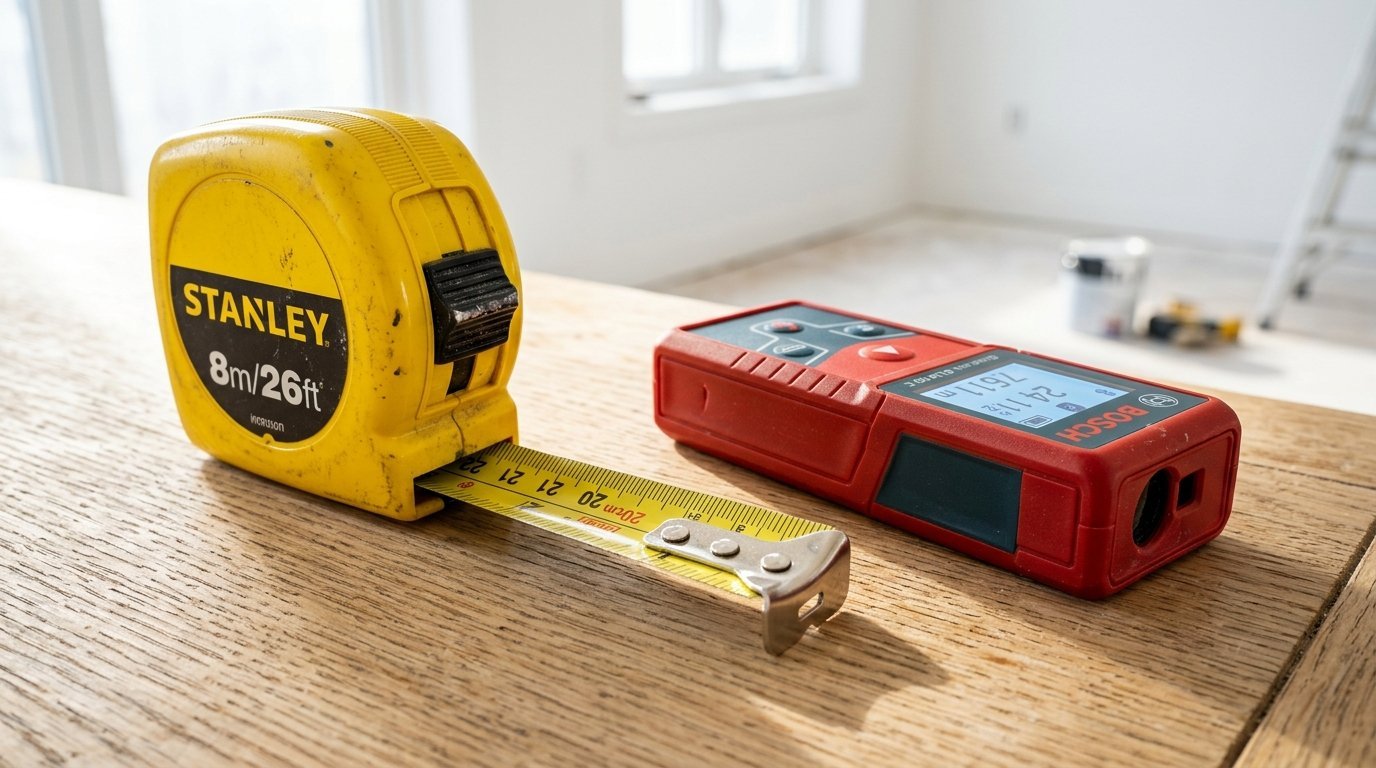
A standard contractor measuring tape serves as your primary and most trusted tool. Grab a Stanley 25 foot metal tape measure for all large spaces. The rigid metal blade stays perfectly straight across long horizontal distances. Flimsy fabric sewing tapes bend easily and give completely false numbers. You also need a large metal carpenter T square. This heavy tool guarantees straight right angles in tricky room corners. Keep a dedicated notebook and a sharp pencil nearby at all times. Write down every exact fractional number immediately upon reading it. Memory fails quickly when dealing with multiple fractions and room angles. You must track width and height precisely on paper. Grab multiple rolls of Scotch blue painters tape. You will use rolls of this specific tape to mark physical boundaries. Blue tape peels off cleanly without pulling up your expensive drywall texture. Masking tape leaves a sticky yellow residue that ruins paint.
Digital Options for Huge Spaces
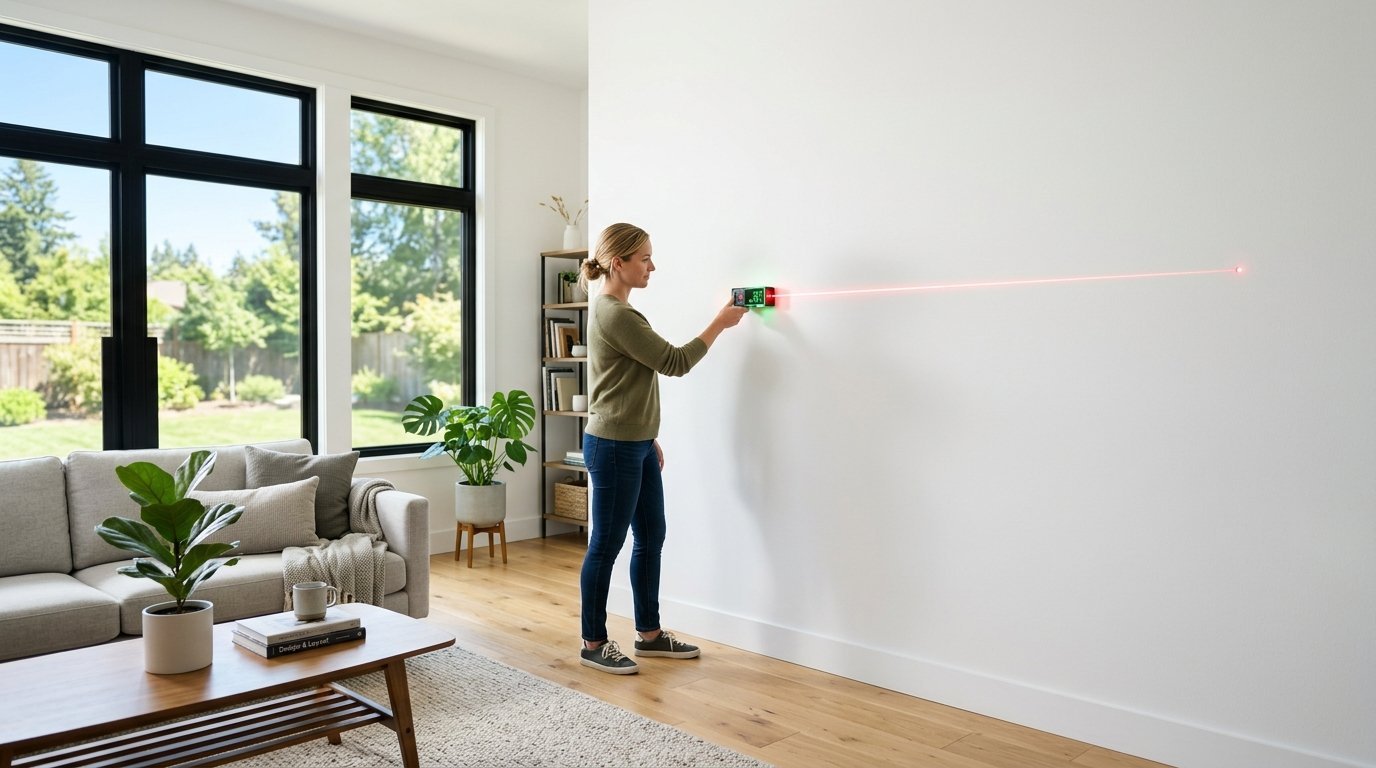
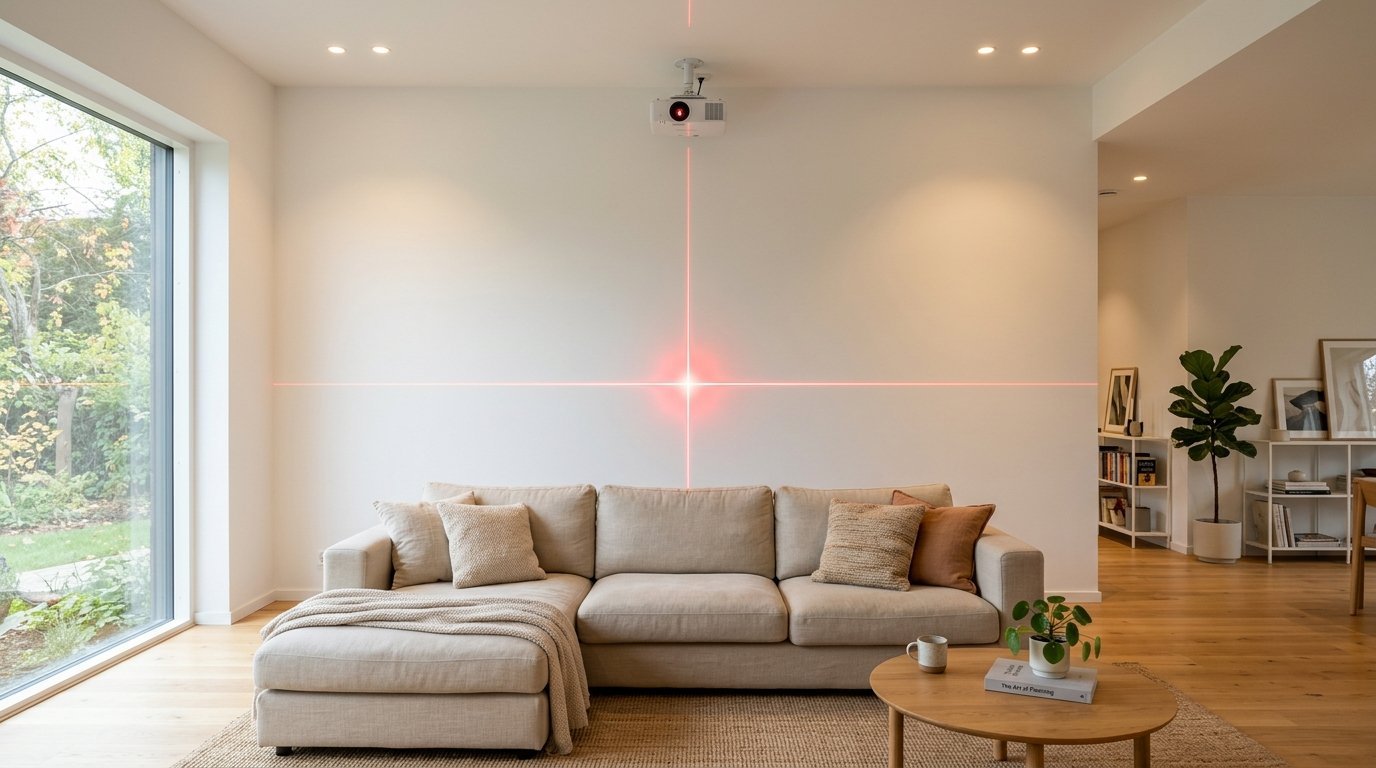
Massive living rooms require advanced digital precision. A Bosch laser measure captures exact long distances instantly. You press a button and a red dot marks the opposite side of the room. The digital screen displays the exact fractional distance to the millimeter. This prevents the metal tape measure from sagging in the middle of the air. Sagging creates a false larger number that throws off your math completely. A Levelpro3 digital laser level projects a straight glowing line across the entire room. You align your pencil marks directly with this straight beam. This guarantees your art hangs perfectly straight across twenty feet of bare drywall. Digital tools save hours of frustrating double checking and manual leveling. You never have to step back and ask if a frame looks crooked.
Finding the Center Point of Your Room Planning
Visual balance requires finding the exact true middle of your specific canvas. Hanging art off center ruins the visual flow of the entire room. You must calculate the exact mathematical focal point before hammering a single nail.
Locating the True Middle Point
Measure the entire width of your drywall from corner to corner. Divide that specific number exactly in half using a calculator. Mark that spot lightly on the paint with a pencil. Measure from the floor baseboard straight up to the ceiling. Divide that vertical number exactly in half. Mark that intersecting spot lightly. The exact intersection becomes your absolute mathematical center. Most standard residential ceilings measure 96 inches high from the floor. The vertical center naturally sits at exactly 48 inches. You anchor your main large piece strictly around this specific coordinate. This simple math dictates the entire room planning phase. Ignoring this exact center makes the room feel subconsciously tilted.
Working Around Outlets and Air Vents
Surfaces rarely stay perfectly flat and uninterrupted. Electrical outlets and metal return vents interrupt your clean space frequently. Measure the exact distance from the floor to the bottom edge of the outlet. Measure from the adjacent corner to the side edge of the metal vent. Mark these permanent obstacles precisely on your paper sketch grid. You cannot hang delicate frames directly over blowing air thermostats. You must shift your layout grid intentionally to compensate. Move the center point slightly to the left or right to balance the visual weight. Treat large windows and wooden doors as permanent unmoving boundaries. Adjust your math to treat the space between a door and a corner as its own independent canvas.
Mapping Out a Gallery Wall Layout With Tape

Arranging multiple frames together requires extreme patience and precision. You cannot guess where to place the nails and hope for a clean look. Mistakes leave your drywall looking like swiss cheese filled with extra holes.
Creating Life Size Paper Templates
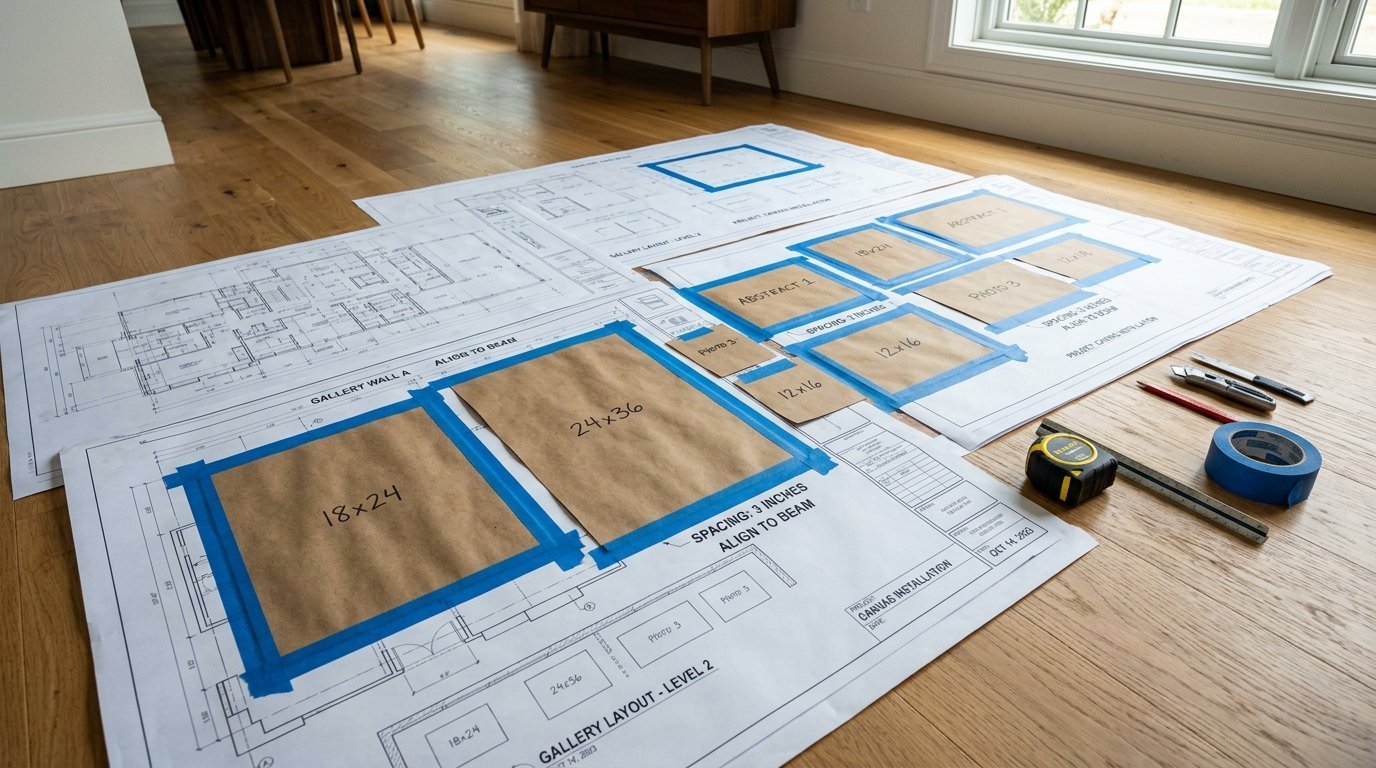
Trace every single wooden frame onto thick kraft paper. Cut out the exact rectangular shapes with sharp scissors. Label each paper shape with a brief description of the specific art piece. Mark the exact spot where the nail must sit on the paper. Measure from the top edge of the physical frame down to the hanging wire. Pull the metal wire tight upwards before reading the measurement. Transfer that exact nail hole measurement directly to your paper cutout. Stick the paper shapes securely to your drywall using loops of blue tape. Stand back across the room and look at the whole arrangement. You can move paper shapes endlessly without doing permanent damage.
Strict Spacing Rules for Multiple Frames
Keep exact numerical distances between each individual piece. Two solid inches of empty space works perfectly for standard medium frames. Three solid inches of empty space works best for massive gallery frames. Small art needs exactly one and a half inches of space between edges. Cut a small block of scrap wood to your exact spacing dimension. Use this wooden block as a physical spacer wedged between your paper templates. This guarantees uniform gaps everywhere across the entire arrangement. Uneven and sloppy spacing destroys the visual harmony completely. A tight gallery wall layout feels deliberately curated and expensive. Sloppy asymmetrical gaps look chaotic and rushed.
Scaling Your Art to Match Dining Room Interiors
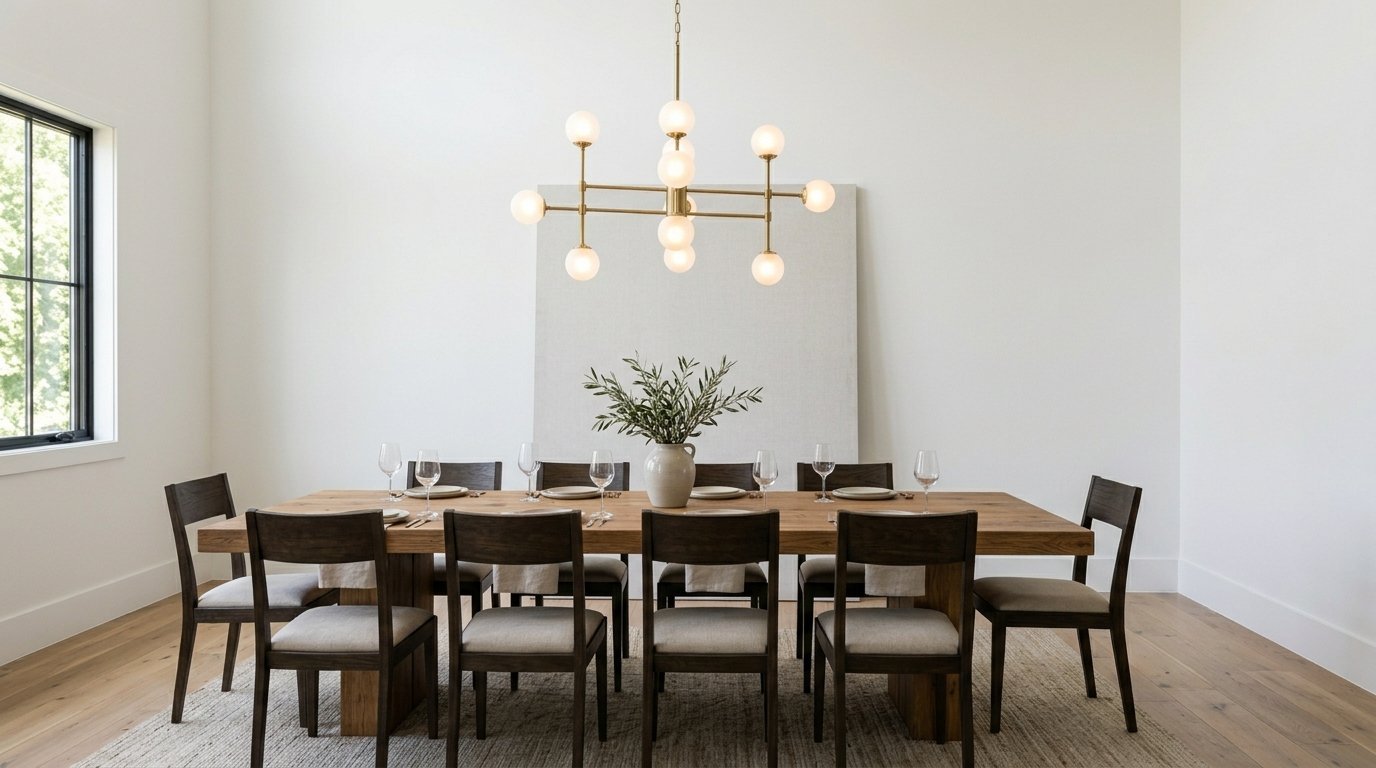
Heavy furniture dictates the proper size of your chosen art. You must coordinate hanging pieces directly with your solid tables and fabric chairs. Hanging tiny prints over a massive oak buffet looks ridiculous and awkward.
Exact Furniture to Art Ratios
Your art should fill roughly two thirds of the total blank space above any furniture piece. Measure the total width of your wooden dining buffet. Multiply that specific number by 0.66 on your phone calculator. That final number equals your target ideal art width. If your heavy wooden table measures 60 inches wide then your canvas should measure exactly 40 inches wide. This simple math creates perfect architectural proportion. Dining room interiors demand this exact mathematical visual balance. Centering a tiny 20 inch print over a 60 inch wide table leaves too much empty blank space. The room feels completely unfinished when you ignore this specific ratio.
Adjusting for Tall Ceilings
Ten foot ceilings swallow standard art sizes completely. You must fill the massive vertical space intentionally. Hang pieces starting exactly 60 inches from the hardwood floor. Stack multiple frames vertically to eat up the blank drywall sitting above eye level. Measure from the top edge of your wooden chair rail to the bottom edge of the crown molding. Find the exact midpoint of that specific vertical section. Anchor your bottom heavy frame right there. Stack the layout upward to draw the human eye toward the tall ceiling. Leaving the top half of a tall room completely empty makes the lower half feel excessively heavy.
How to Visualize Small Art on Massive Walls
Tiny pieces get completely lost on huge expanses of white paint. You must rethink exactly how to display these delicate items. Strategic tight grouping turns small items into a massive heavy focal point.
Grouping Tiny Pieces Effectively
Treat a matched collection of small frames as one single giant piece of art. Measure a massive rectangle on your drywall using straight lines of blue tape. Fill that entire taped boundary completely with your tiny frames. Keep the outer edges of the total grouping perfectly straight and aligned. This tight arrangement creates a neat and tidy visual grid. The grid acts as one large visual anchor in the room. Four tiny 8×10 frames placed closely together command immediate attention. A single solitary 8×10 frame looks abandoned and sad. Measure the total combined width of the grid to ensure it matches your furniture ratio math perfectly.
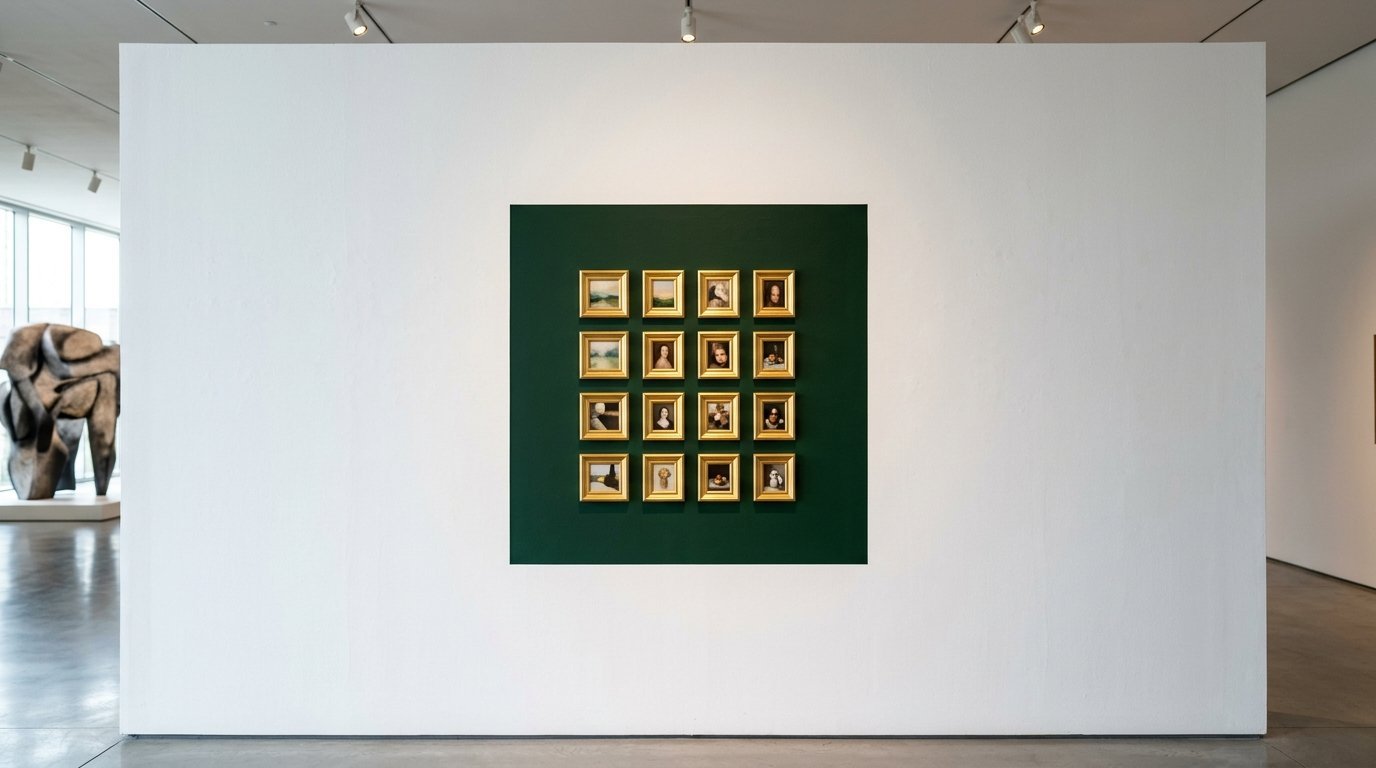
Layering Over Strategic Paint Options
Paint creates a permanent visual frame for tiny delicate pieces. Paint a large crisp square section in a dark contrasting color. Hang your tiny matched frames strictly inside that painted box boundary. This specific tactic anchors the entire collection beautifully. The painted boundary gives the tiny pieces artificial visual weight and deep presence. Green paint colors work beautifully for this specific architectural trick. A deep rich hunter green painted box makes shiny brass frames stand out perfectly. Always measure and tape the paint boundary strictly using your digital laser level to guarantee perfectly straight lines.
Coordinating Green Paint Colors With Your Dimensions
Color entirely alters how human eyes perceive physical size. You must factor your paint choices heavily into your dimensional measurements. Dark hues physically shift the perceived visual boundaries of the room.
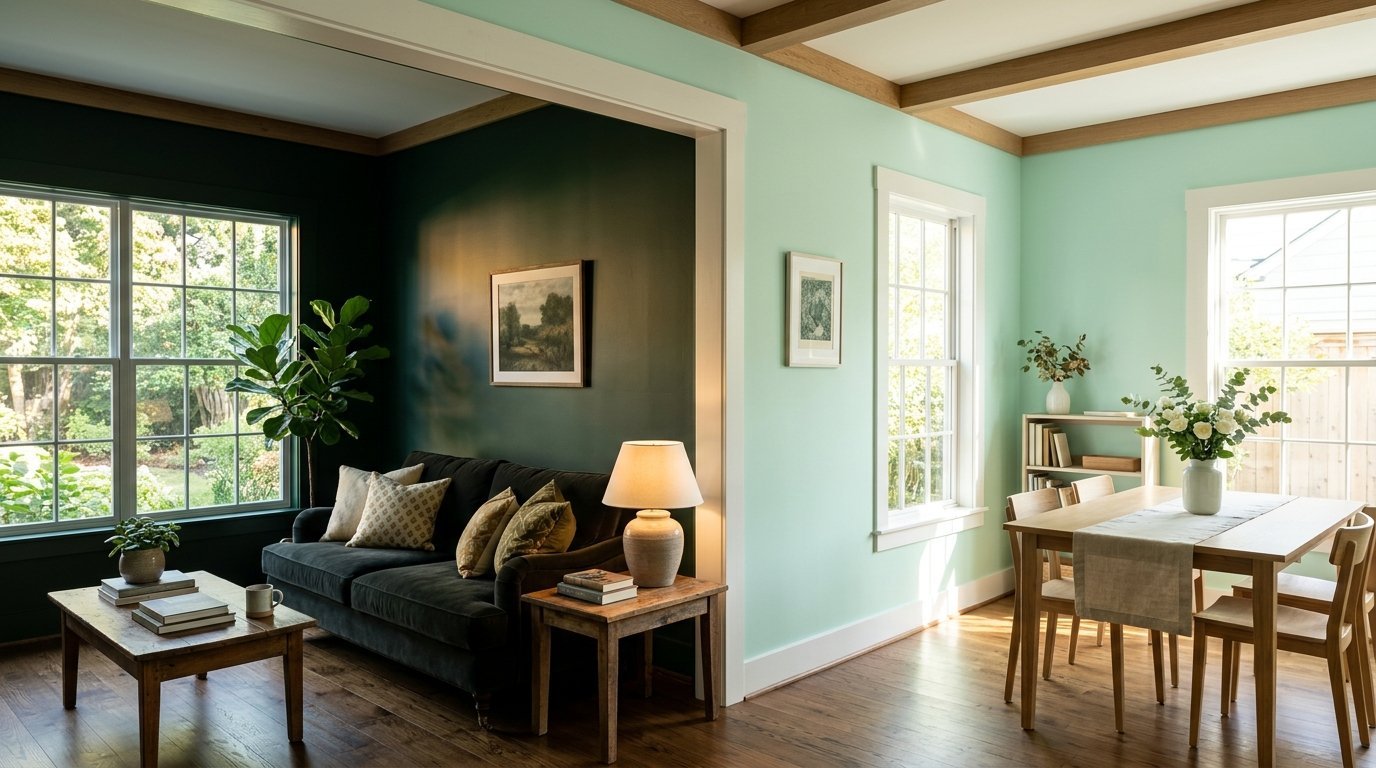
Dark Hues Make Surfaces Recede
Deep intense colors physically absorb ambient light. Painting a massive expanse in dark forest green makes it feel much further away. This optical trick makes tight square rooms feel longer and deeper. You can hang larger heavy art on a dark painted surface without it feeling oppressive or heavy. Measure your natural light sources carefully before painting. Dark paint strictly requires massive clear windows to prevent a depressing cave feeling. I love specifying Benjamin Moore dark hues for dramatic moody dining spaces. Light colored frames pop beautifully against these dark moody backgrounds.
Light Hues Expand the Visual Space
Soft mint or pale sage shades reflect sunlight actively. This makes the physical space feel taller and much wider visually. Small frames look even smaller and more delicate against light reflective surfaces. You must scale up your chosen frame dimensions when using pale green paint colors. Use Sherwin Williams light soothing tones for cramped dark spaces. Measure the exact length of the shadows cast by your metal lighting fixtures. Shadows play heavily against light paint and alter the visual symmetry of your hanging frames.
Designing Cute Diy Room Decor to Fit Exact Specs
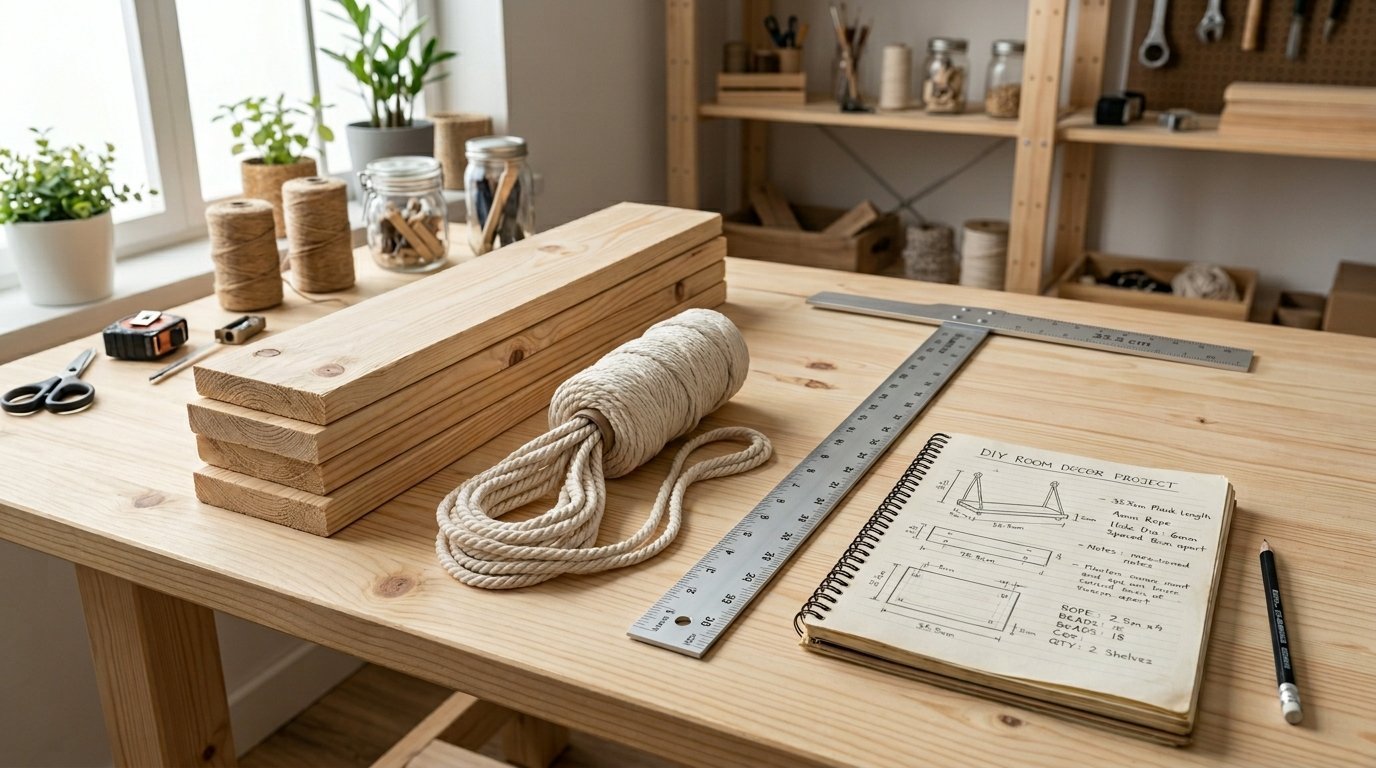
Making your own custom pieces guarantees an absolutely perfect fit. You control every single physical dimension and proportion. Custom sizing totally prevents the awkward gaps caused by standard store bought items.
Sizing Custom Wood Signs Precisely
Measure your target space precisely before ever buying raw lumber. I tried making a custom farmhouse welcome sign from raw pine wood a while back. I did not measure my tight entryway first. I finished the entire heavy project and it looked incredibly mass produced and awkwardly cheap. I threw the entire heavy piece away in extreme frustration. You must size your raw materials directly to your specific architecture. Cut your raw wood to leave exactly six inches of empty breathing room on all four sides. This strict spacing makes cute diy room decor look expensive and custom made.
Planning Macrame Wall Hangings
Soft textile art requires entirely different math than hard wood. Heavy yarn and cotton rope stretch downward over time due to gravity. Measure the horizontal wooden dowel first. The dowel must align perfectly with your existing furniture ratio math. Measure the total vertical drop of the hanging fringe. Ensure the bottom fringe stops at least four solid inches above any wooden table surface. Dragging strings look incredibly messy and catch dust quickly. Account for the hanging string triangle at the very top. This triangle drops the main woven piece down several inches from the nail. Factor this exact physical drop into your total vertical math calculations.
Incorporating Home Design Floor Plans Into Wall Measurements
Human traffic patterns strictly dictate where you can hang bulky heavy items. You cannot treat a busy walkway exactly like a quiet living room feature zone. People will bump shoulders into deep protruding frames.
Aligning With Daily Traffic Flow
Walk through your physical space exactly as you do every single day. Measure the strict clearance between your moving shoulder and the flat drywall. Narrow tight hallways require perfectly flat canvases. Do not hang deep glass shadow boxes in tight moving corridors. Home design floor plans heavily prioritize smooth human movement. Mark high traffic danger zones clearly on your paper sketch. Keep deep decorative wooden ledges completely out of these specific zones. Measure the exact swing radius of every interior wooden door. Never hang fragile glass exactly where a solid metal doorknob might strike it repeatedly.
Factoring in Harsh Natural Light
Direct intense sunlight destroys expensive artwork slowly over time. Track the sun movement closely across your physical space. Mark the specific areas that receive direct afternoon blinding glare. Do not hang original watercolor paintings in these hot sunny spots. UV rays bleach colorful pigments incredibly quickly. Measure the exact physical footprint of the harsh sunlight at high noon. Reserve these hot sunny zones strictly for cheap mirrors or solid metal sculptures. Proper placement preserves your expensive delicate pieces for decades.
Guarding Your Decor Against Moisture and Damage

Precise measurement means absolutely nothing if your beautiful pieces get ruined. Harsh environmental factors destroy delicate decor quickly. You must place and clean items with extreme disciplined care.
Avoiding Damp Architectural Zones
Heavy humidity ruins framed paper art and warps solid wood. Three years ago damp air destroyed a beautiful piece in my hallway. I did not realize that specific spot lacked proper air ventilation. Water gathered at the bottom curve of a gold framed circle mirror in my bedroom last summer. You must measure the exact distance from hot bathrooms and damp exterior doors. Keep expensive wooden frames at least ten feet away from steamy hot showers. Use a digital hygrometer to test ambient humidity levels before hanging anything truly expensive.
Safe Distance Cleaning Routines
Harsh chemical sprays destroy delicate finishes instantly. I ruined a beautiful vintage wood frame once. The strong acid in a vinegar based cleaning spray peeled the bright gold paint completely off the wood. A dirty dusty frame and cloudy mirror glass ruined the feel of my home last year. Now I strictly maintain a Vida De Luxo home standard with exact disciplined care. I use specific measured distances when spraying anything. Never spray wet chemicals directly onto the mirror glass. Spray Sprayway or Invisible Glass or Method glass cleaner directly into a Norwex microfiber cloth or a thick 3M cloth. Stand exactly two feet back from the drywall. Wipe the glass in a precise rigid zig zag pattern. Use purely distilled water and plain rubbing alcohol for highly sensitive metallic finishes.
Frequently Asked Questions
How high should I hang a single picture?
Hang a single piece so the exact mathematical center sits exactly 57 inches from the floor. This specific height represents the average human eye level. Professional art museums use this exact rigid measurement globally. Measure 57 inches straight up from the floor and mark it. Measure the back wire drop on your specific frame. Combine that exact wire drop measurement to the 57 inch mark. This tells you exactly where to hammer the metal nail.
Does the 57 inch rule apply above a sofa?
No. Heavy furniture changes the standard math completely. Hang art exactly 8 to 10 inches straight above the top back of your sofa. This tight spacing connects the art securely to the furniture visually. Placing it much higher makes the art look completely disconnected and floating in space. Measure strictly from the highest specific point of the soft couch cushions.
How do I measure for a matching triptych?
A standard triptych consists of three equally sized related panels. Treat the three individual panels as one single massive piece of art. Measure the total horizontal width of all three panels pushed together. Count the exact empty spaces between them and place that into your total number. Use exactly two inches of empty space between each separate panel. Center this entire massive measured block using the standard 57 inch rule or the sofa rule.
Should my frames match the exact width of my table?
Never match the table width exactly. This makes the space look incredibly heavy and awkwardly blocky. Your complete art grouping should measure about two thirds to three quarters the width of the solid table. If your table is 72 inches wide then target a strict 48 inch art width. This creates a highly pleasing visual step down shape.
How do I handle awkward sloping ceilings?
Sloping angled ceilings create highly awkward visual triangles. Ignore the awkward slope entirely. Measure the lowest vertical point of the straight flat drywall. Use that straight flat section to find your mathematical center point. Hang the art aligned perfectly with the straight vertical sections. Let the triangular angled slope remain completely empty.
What size art fits a tiny half bathroom?
Tiny tight rooms need strictly scaled down delicate pieces. A massive heavy canvas feels incredibly claustrophobic in a tiny powder room. Use small 8×10 or 11×14 delicate frames. Center them precisely and rigidly above the porcelain toilet tank or the metal towel bar. Leave exactly six solid inches of empty breathing room above the plumbing fixtures.
How far apart should gallery wall pictures sit?
Keep your spacing incredibly tight and completely uniform. Leave exactly two solid inches between every single wooden frame. Use a literal two inch block of scrap wood to manually check every single gap. Inconsistent lazy spacing makes the entire arrangement look like a terrible mistake. Strict uniform identical gaps make cheap plastic frames look like high end custom pieces.
Can I hang art directly above a hot radiator?
You should avoid this placement completely. Extreme dry heat warps solid wood frames and totally melts canvas bindings. The rising hot air also carries thick dust directly onto the glass surfaces. Measure a strict safe zone sitting at least three full feet away from any active heating element.
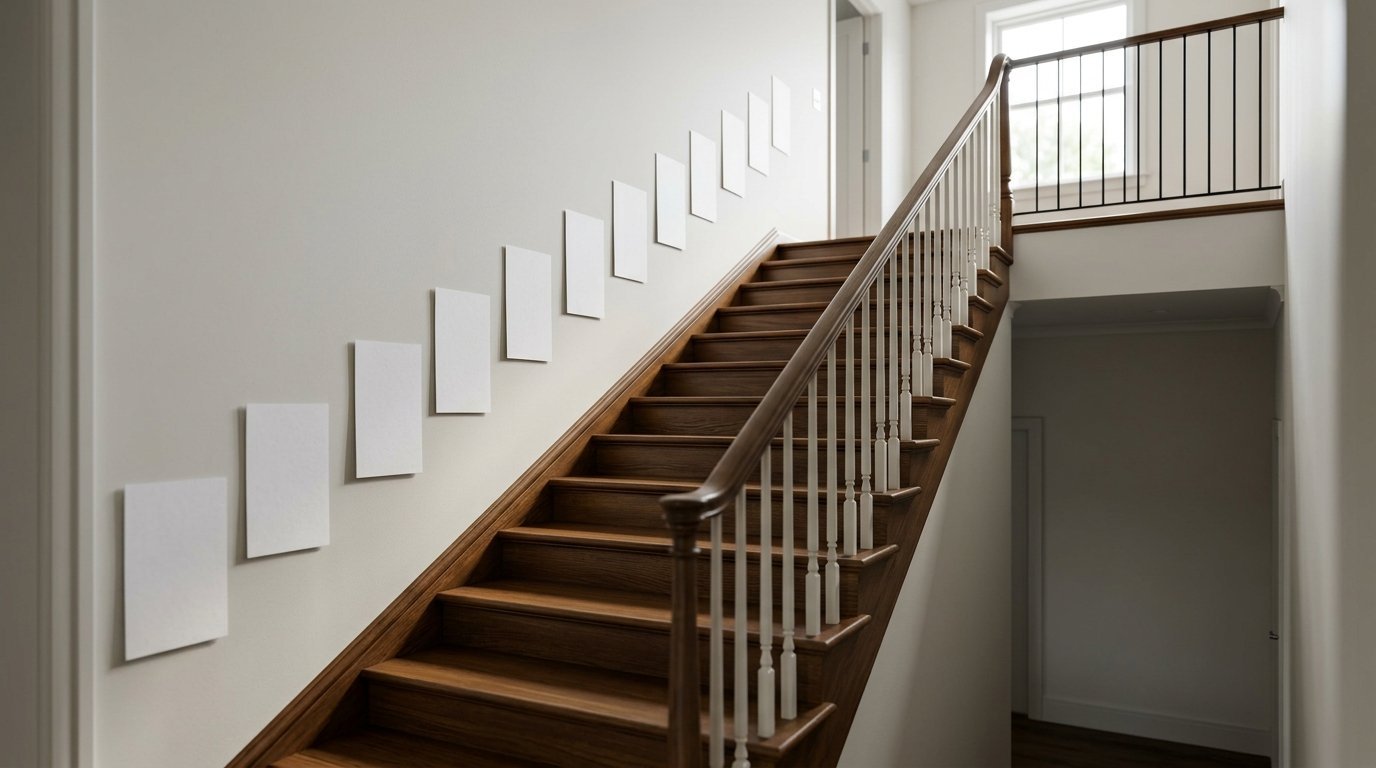
How do I measure a stairwell for pictures?
Angled stairwells require highly specific diagonal math. Measure exactly 57 inches straight up from the center of each individual flat stair tread. Connect these specific marks lightly with a long strip of blue tape. This creates a perfect diagonal line that identically matches the pitch of your wooden stairs. Hang your matched frames centered strictly along this diagonal blue tape line.
What is the best tool for leveling huge frames?
Ditch the tiny cheap plastic torpedo levels immediately. Buy a heavy 24 inch metal spirit level. Place this long metal level entirely across the flat top edge of the wooden frame. The longer the level the more highly accurate the reading becomes. Digital laser levels work best for massive horizontal multi frame groupings.
How do I calculate weight limits for drywall?
Weigh your heavy framed piece on a standard digital bathroom scale first. Standard thin drywall holds about 20 pounds safely with a basic angled metal nail. Use heavy duty thick drywall anchors for anything heavier than that. Read the exact weight rating firmly printed on the Command Strips packaging. Subtract two full pounds from their printed maximum rating to be totally safe.
Should art placement change with wainscoting?
Wainscoting splits the entire visual plane completely in half. Do not center art based on the entire floor to ceiling total height. Center your pieces strictly inside the blank painted space left above the wainscoting trim. Treat the top flat edge of the wood trim as your brand new floor line for measurement purposes.
How do I handle centering between two different windows?
Measure the exact blank drywall space strictly between the two window casings. Do not include the window trim in your math. Divide that exact blank space in half to find the true center. Hang your pieces tightly within that specific centered column. Leave at least four inches of empty space between the art edges and the window trim to prevent a crowded look.
Do I include the frame matting in my size calculations?
Yes. Always measure the extreme outer physical edge of the solid frame. The white paper matting sits entirely inside the frame and does not change the physical footprint on your drywall. Base all your spacing block measurements and ratio math strictly on the outer wooden dimensions.
What if my room has absolutely no architectural focal point?
Construct your own distinct focal point using math. Pick the largest longest blank drywall expanse in the room. Find the exact mathematical center of that massive space. Construct your heaviest largest gallery grouping right there. This intentional massive anchor instantly becomes the focal point that the rest of the room visually orbits around.
Final Steps to Interior Design Your Home

Taking exact rigid measurements transforms a stressful frustrating chore into a simple predictable formula. You no longer have to guess nervously where sharp nails should go. Blue tape and paper templates eliminate the severe fear of ruining your smooth drywall completely. You fully grasp the exact mathematical ratios needed for tight dining areas and long hallways. Scaling small delicate pieces into large tight grids gives you absolute total control over your visual space. Use your rigid metal tape and digital laser tools strictly on every single room project. Following these specific mathematical rules guarantees a pristine professional finish every single time.

Anya Castellan is the Founder and Editor-in-Chief of Home Wall Trends. An art history graduate of the Rhode Island School of Design with twelve years of experience writing for leading American design publications, she specializes in composition, gallery wall theory, and the quiet architecture of domestic space. A former contributing editor at Architectural Digest and guest lecturer at Parsons School of Design, Anya personally reads and signs off on every piece before it is published.