You stare at a massive blank space in your living room. You hold a stack of art prints, a few family photos, and a vintage mirror. You feel completely stuck. You want a cozy space. You want a room that looks like a magazine cover. In my experience, a dusty frame or cloudy glass ruined the feel of my home last year. I know how frustrating a bare or poorly styled room feels. You just need a clear plan to place every item perfectly.
You will map out a stunning arrangement in one afternoon. You will spend less than fifty dollars on hanging supplies. I will show you exact spacing rules for small and large rooms. You will master the 4 picture collage layout for tight corners. You will tackle a massive 7 frame gallery wall layout for your main living space. We will cover mirror care, frame selection, and visual balance. You will walk away with a completed room you love.
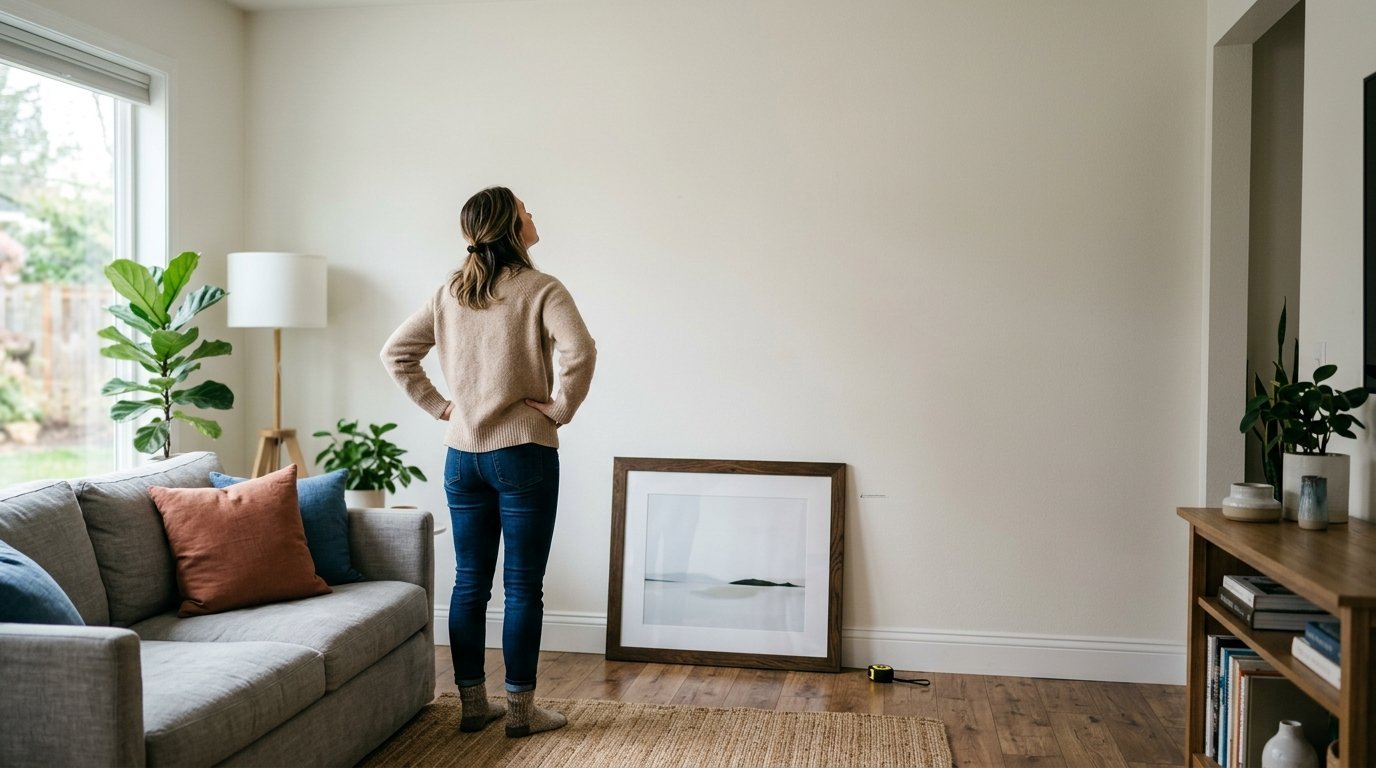
Planning Your Core Wall Gallery Layout
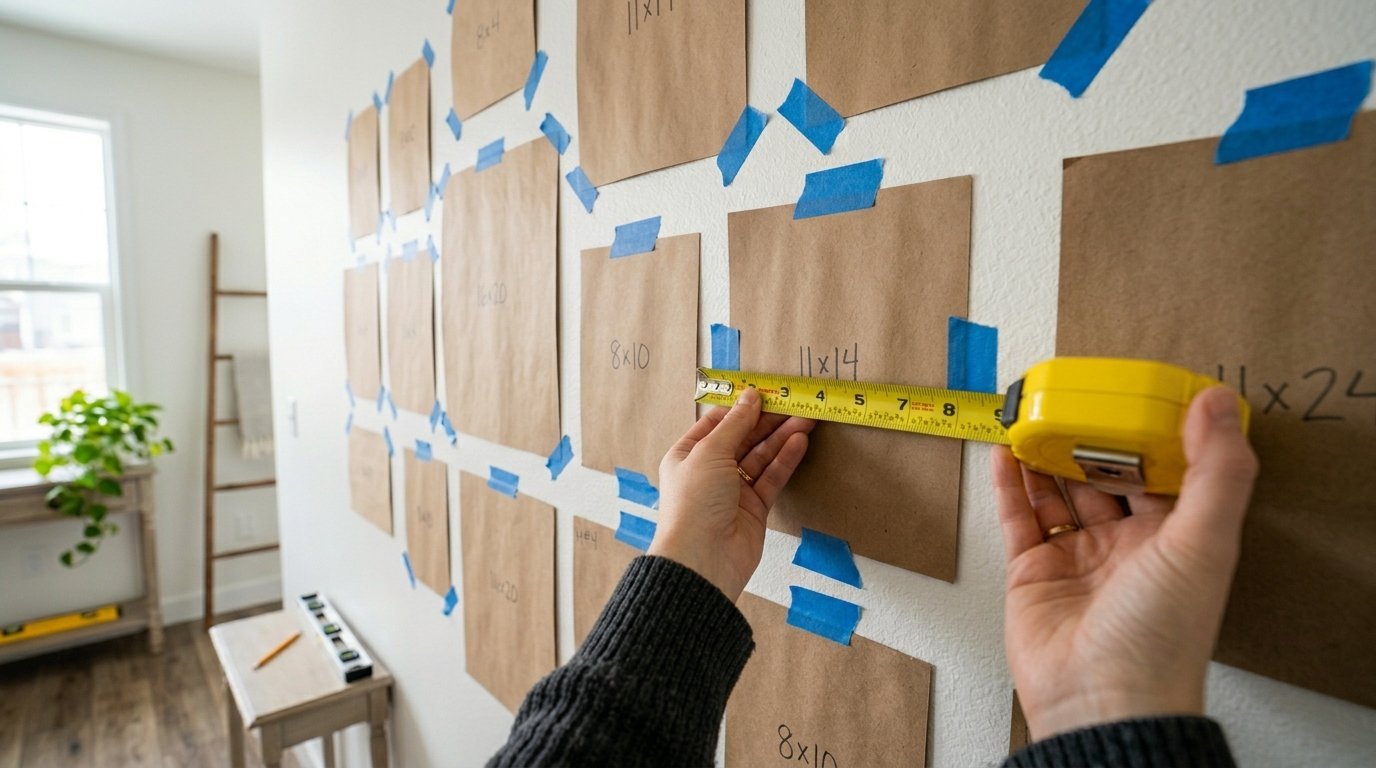
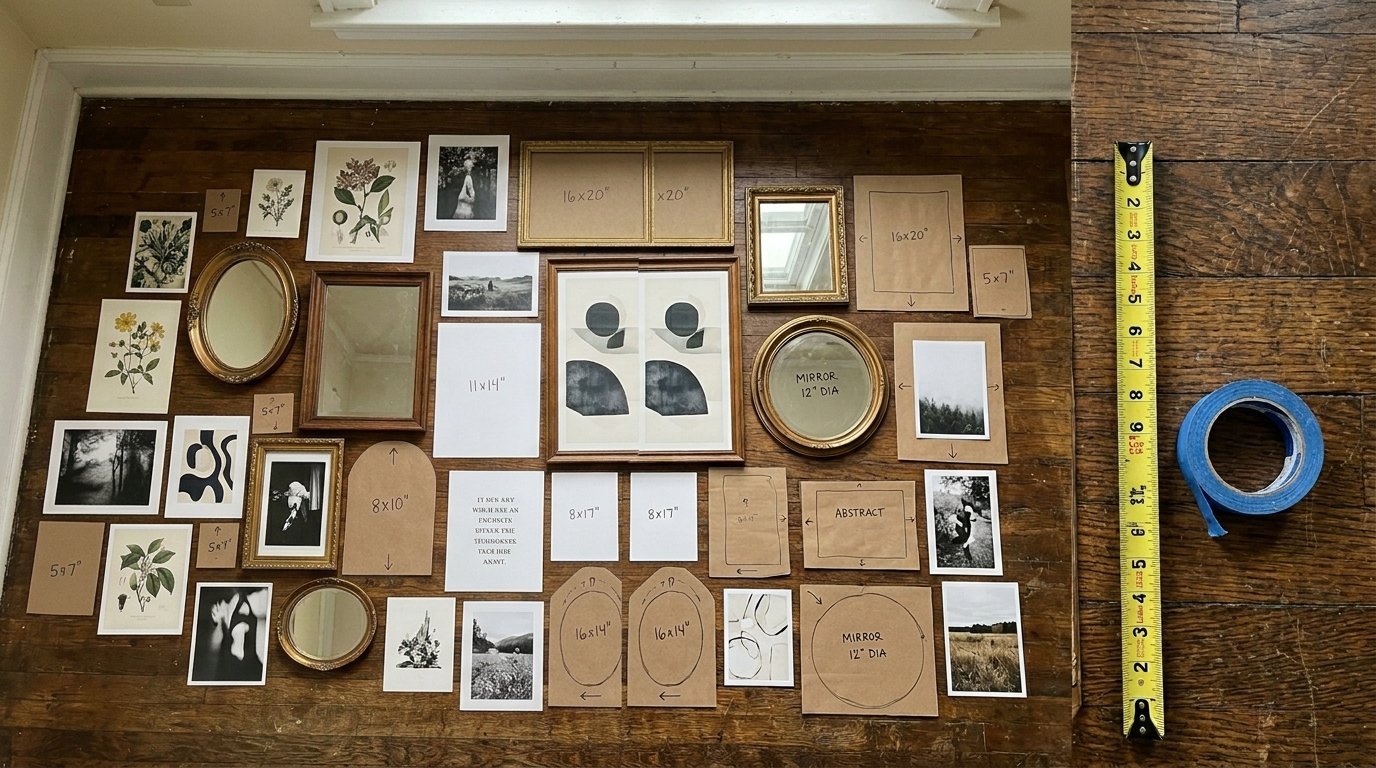
You need a solid plan before you pick up a hammer. Hanging items randomly leaves extra holes in your drywall. You must trace every frame onto kraft paper first. Cut out these paper rectangles. Write the frame color on each paper piece.
Grab a roll of blue painter’s tape. Tape the paper templates to your drywall. Step back and look at the arrangement. You can move the paper easily. You cannot move a nail without patching the drywall.
Keep a consistent gap between your items. Two inches works perfectly for small rooms. Three to four inches works best for large living spaces. Use a standard tape measure to check every gap. A crooked layout ruins the visual appeal of the room. You want straight lines and clear spacing.
I recommend starting with your largest piece. Place it slightly off-center. Build the rest of the layout around this main anchor. This keeps the eyes moving across the display.
Mastering the 4 Picture Collage Layout
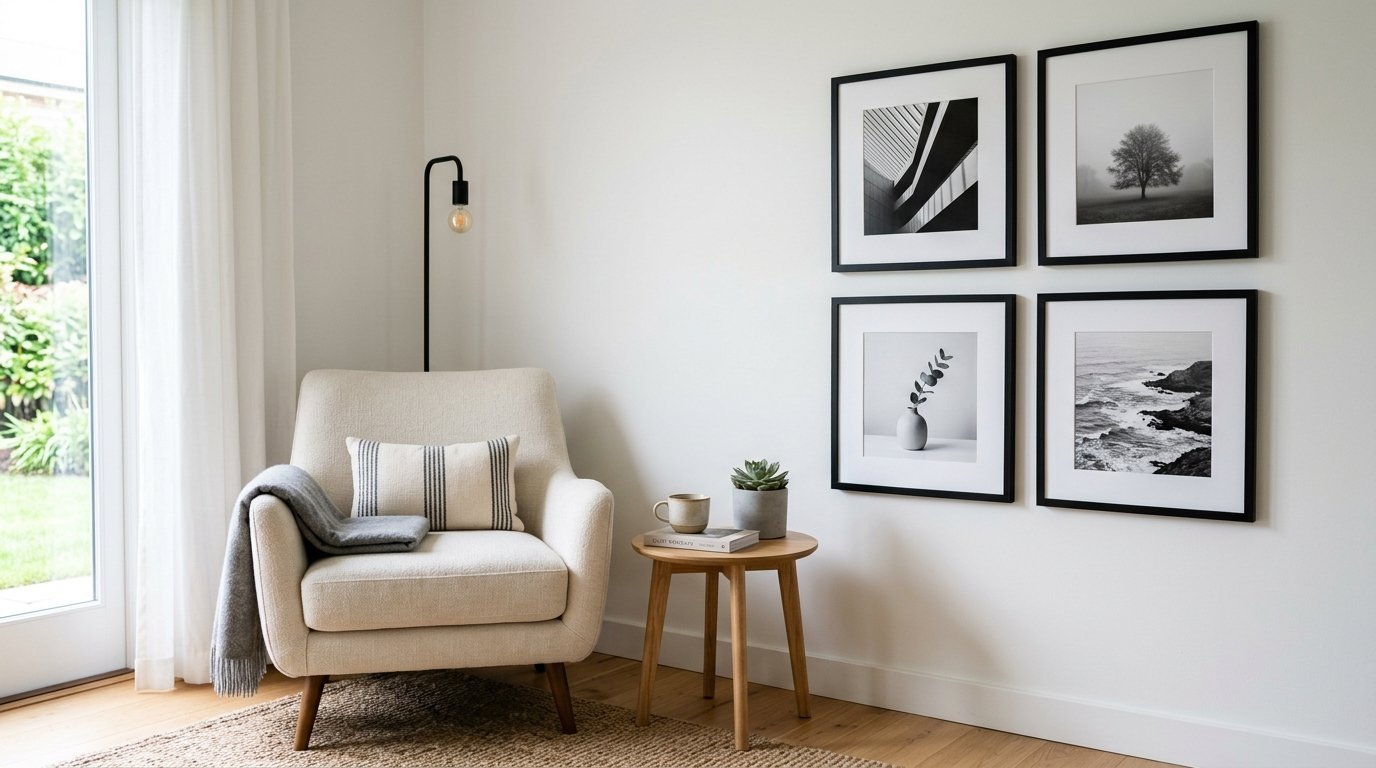
Small walls need a specific approach. A tight corner feels cluttered with too many tiny frames. The 4 picture collage layout fixes this problem perfectly. You create a clean, square grid using four identical frames.
Buy four identical frames in an 11×14 inch size. Frame sizes must match exactly. Use black frames for a modern look. Use warm wood frames for a cozy feel. Place them in a two-by-two square. Keep exactly two inches of space between all sides.
This tight grid acts like one massive window. It anchors a small reading nook. It fills the empty space above a tiny entry console. You can swap out the photos easily when seasons change.
I always put family portraits in this layout. The matching frames keep the busy photos looking clean. You avoid visual clutter. You give the eyes a place to rest.
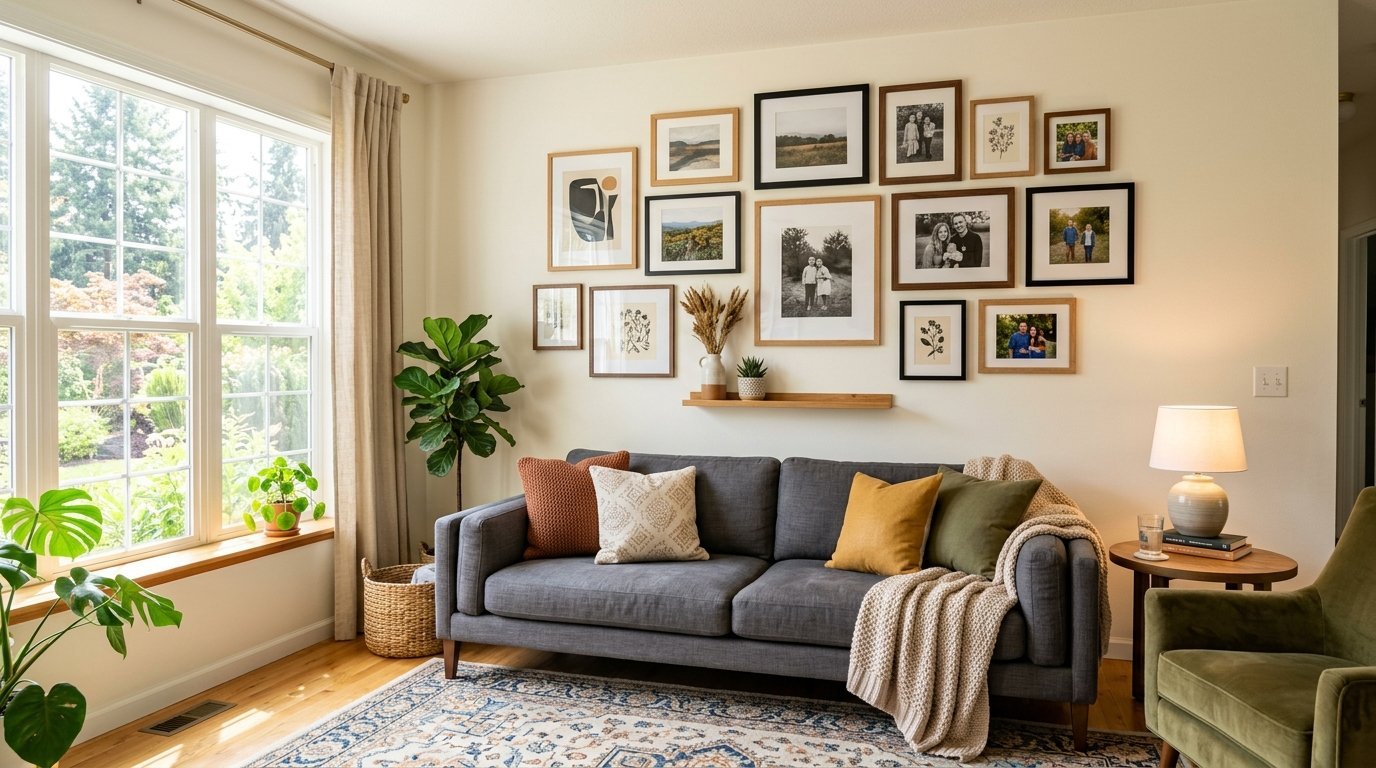
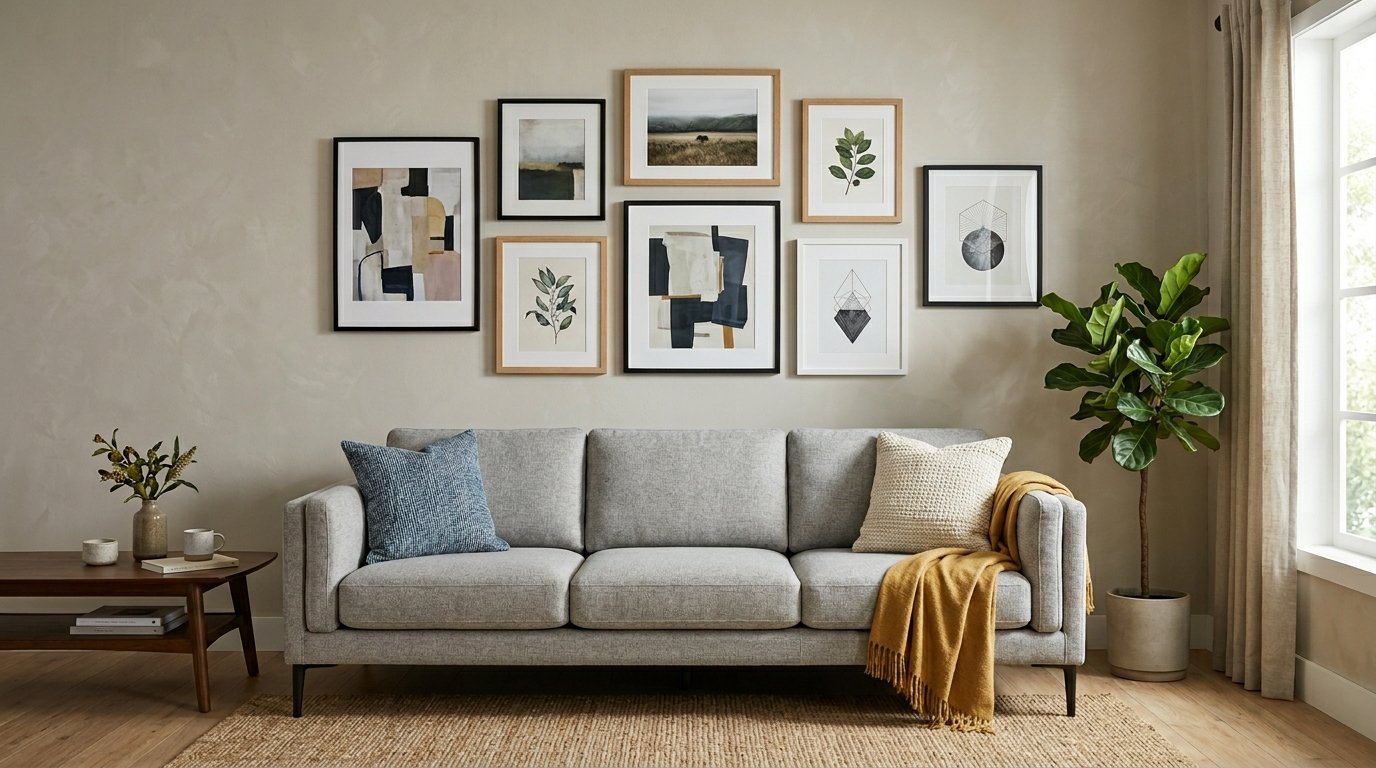
Building the 7 Frame Gallery Wall Layout
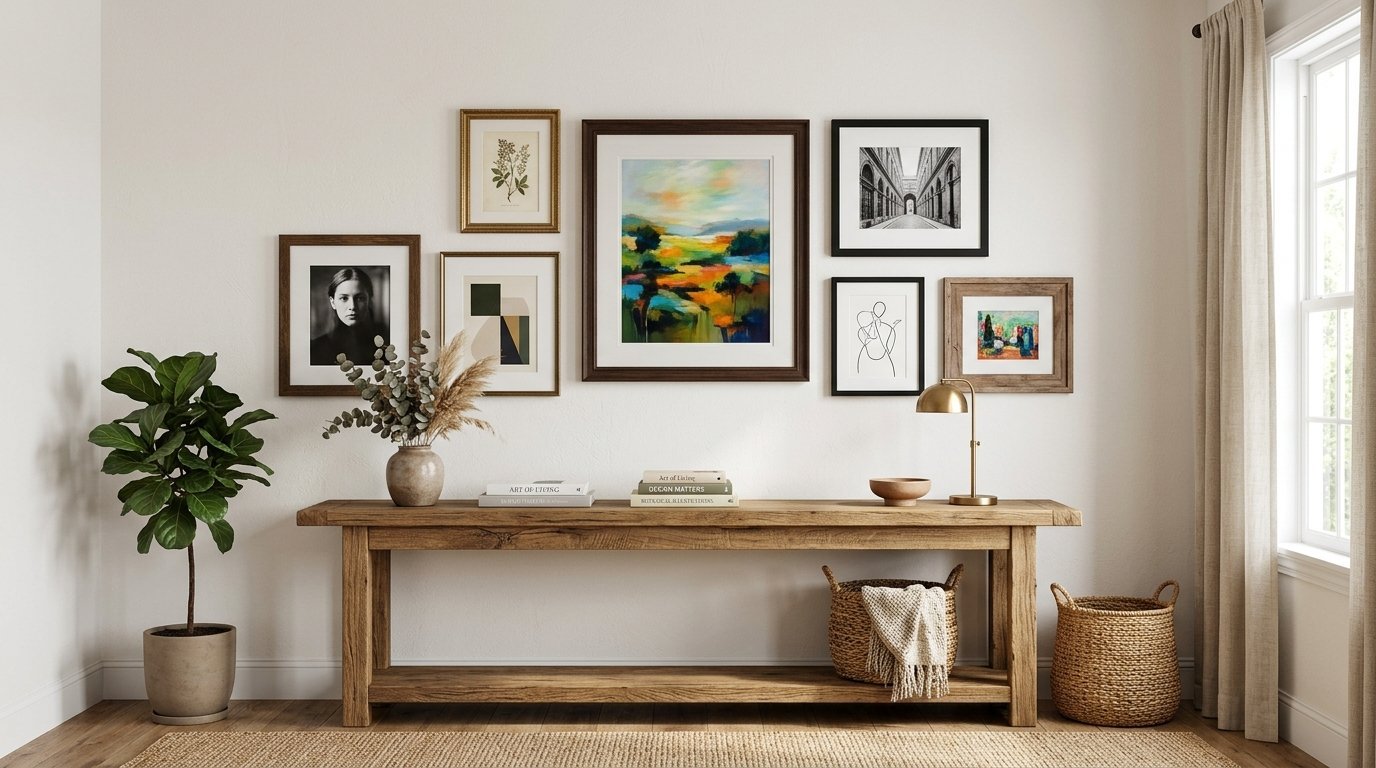
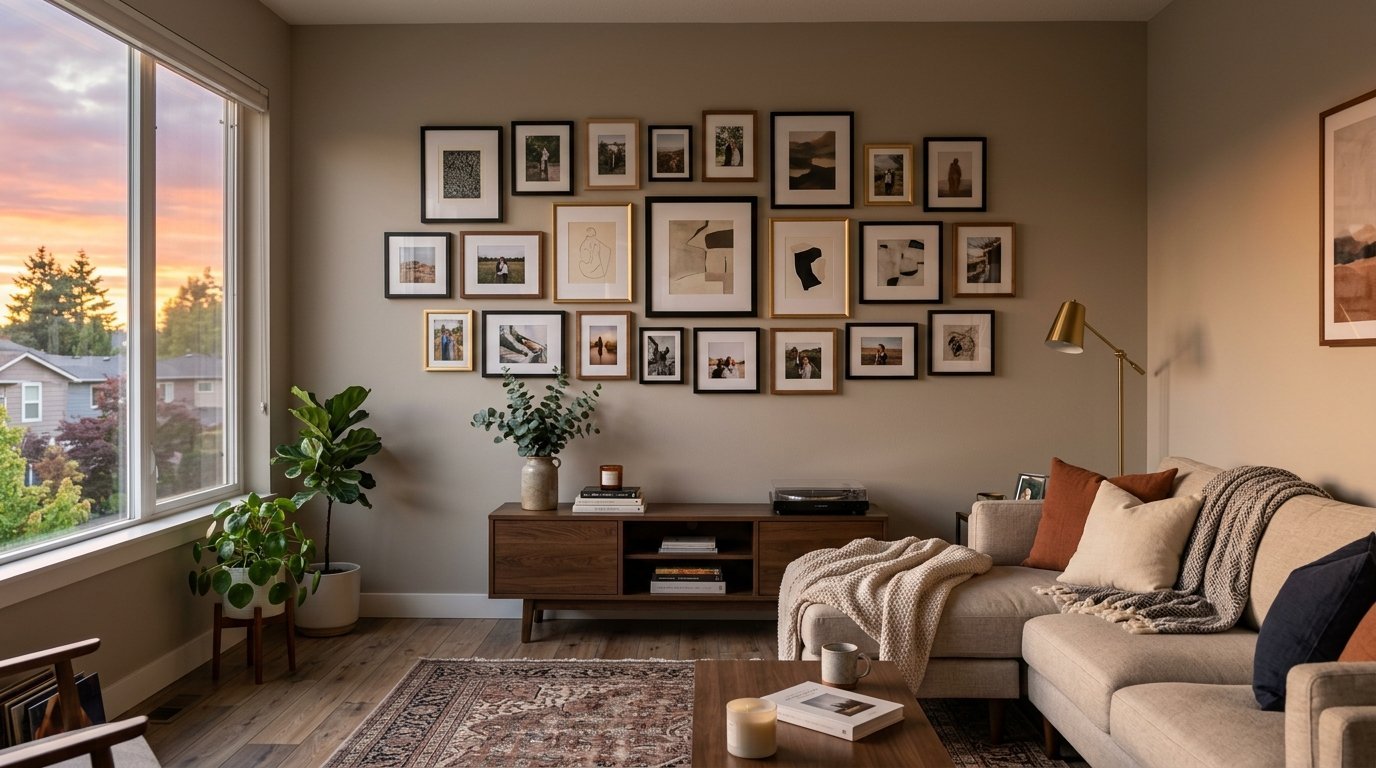
Large rooms demand a bold statement. A massive wall swallows tiny frames. You need the 7 frame gallery wall layout to fill the space. This layout requires a mix of sizes and shapes.
Start with one giant 24×36 inch frame. Place this piece slightly to the left of the center. Add two 16×20 inch frames to the right side. Add four 8×10 inch frames around the outer edges. This creates a balanced, organic shape.
You want a mix of horizontal and vertical shapes. Place a horizontal frame above your large vertical anchor. Stack two small vertical frames on the far edge. This prevents the display from looking like a stiff box.
I use this layout above a large seventy-two-inch sofa. The entire collection stretches about fifty inches across the drywall. It fills the vertical space without hitting the ceiling. It makes the room feel completely finished.
Matching Your Design Aesthetics
Your frames must match your room style. A modern frame looks wrong in a rustic room. You must pick materials that fit your daily life.
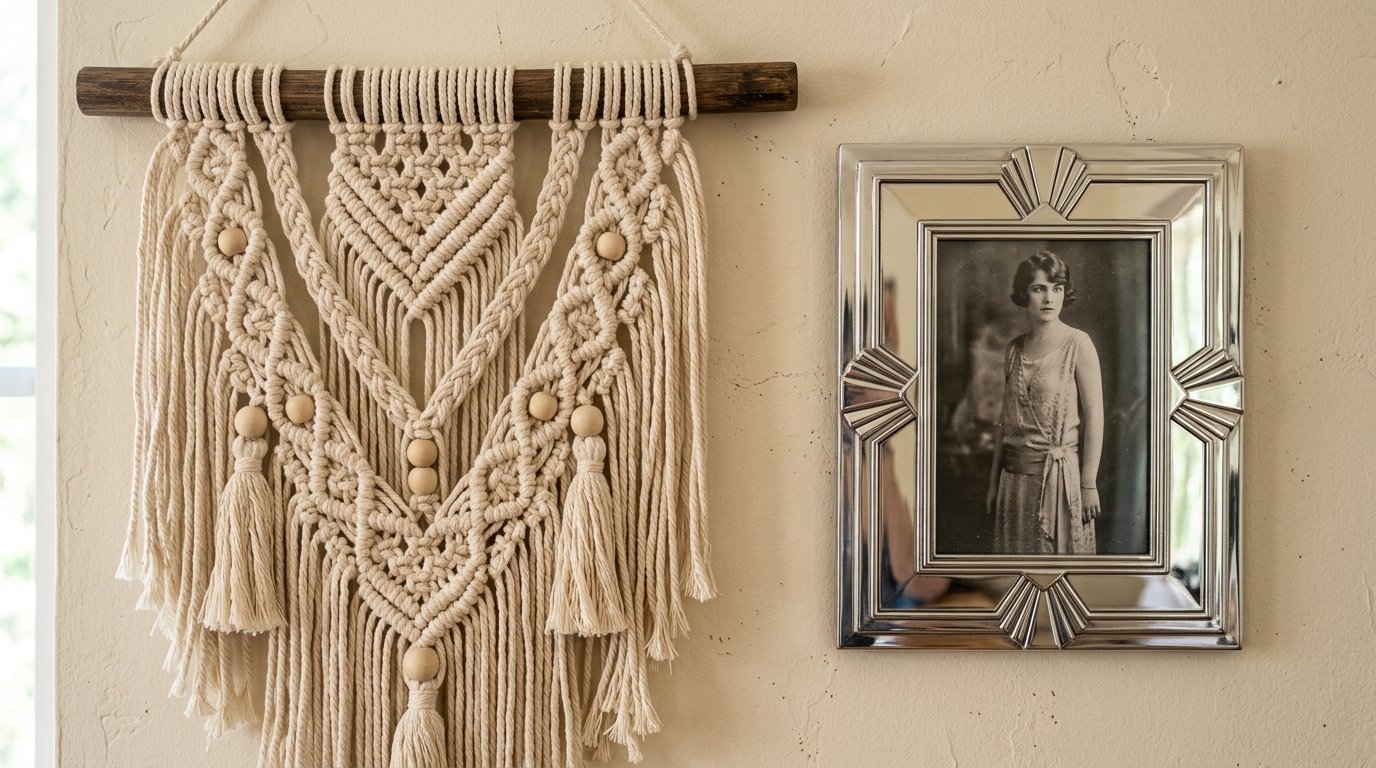
I love mixing textures for depth. Add a bohemian macrame wall hanging next to a sleek metal frame. The soft yarn breaks up the hard glass lines. It makes the space feel warm and lived-in.
Farmhouse rooms need natural wood. Three months ago, I threw a fresh piece of pine right into the trash. I tried to craft a farmhouse welcome sign. The wood warped heavily. The stain bled everywhere. I learned you must buy properly sealed wood frames. Raw pine ruins your art prints over time.
Art Deco rooms need metallic finishes. Mix silver and brass pieces. The shiny metals catch the morning sunlight. They add a rich, heavy feel to simple line art. Keep the art simple if the frames are loud.
Incorporating Mirrors into Your Display
Mirrors make a room look twice as big. They bounce natural light into dark corners. You should always include at least one mirror in a large display.
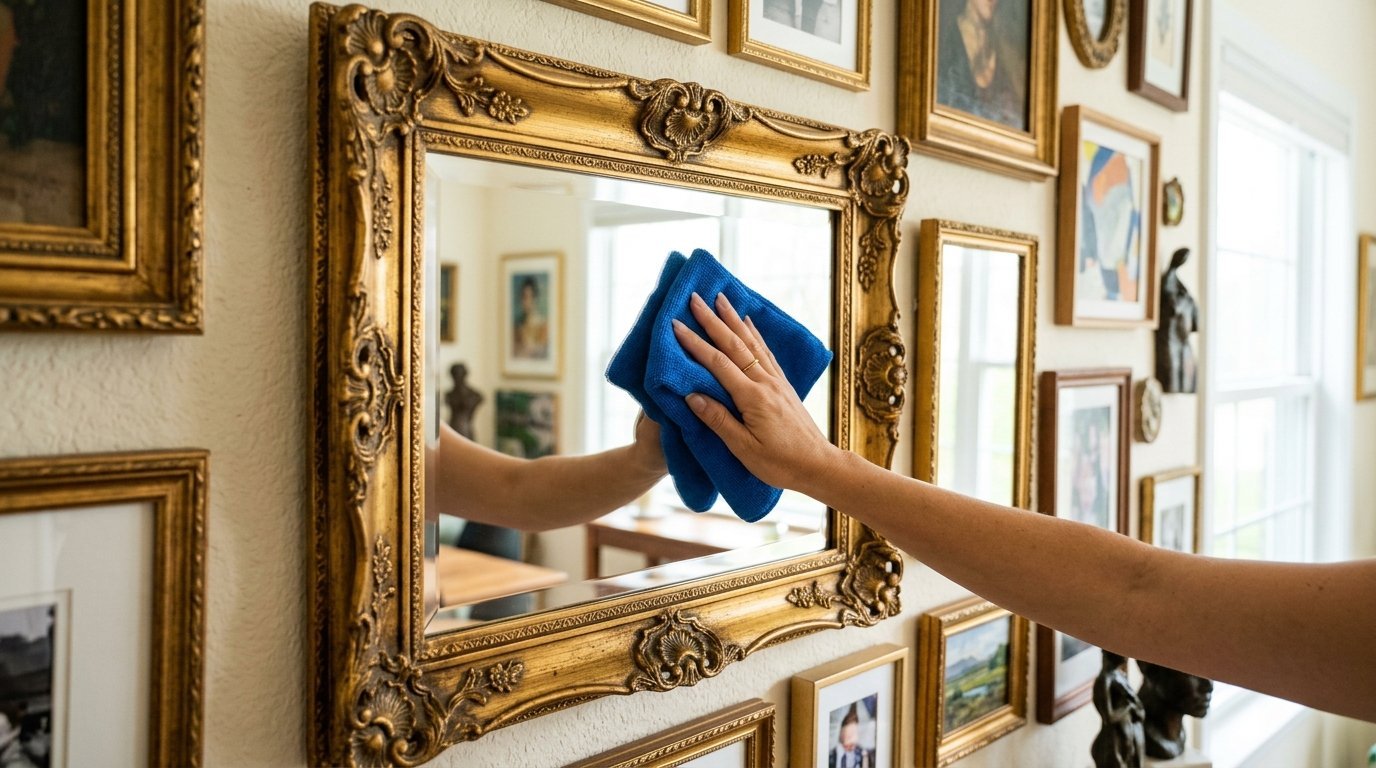
Mirrors require serious upkeep. You must protect the delicate backing. I noticed a moisture issue with a gold frame in my Classy Bedroom last summer. You must keep moisture away from the edges. I saw black spots destroy a beautiful piece in my hallway three years ago. The silver backing peeled completely off.
I wipe my glass pieces with distilled water and isopropyl alcohol. I use a Norwex or 3M microfiber cloth. You must wipe in a simple “S” shape from top to bottom. Never spray liquid directly onto the glass. It runs down and ruins the frame edges.
My favorite cleaners are Sprayway, Method, and Invisible Glass. These cleaners leave zero streaks behind. This keeps them ready for photography backgrounds. A clean mirror provides the perfect surface for a daily outfit photo.
Finding the Best Hanging Tools
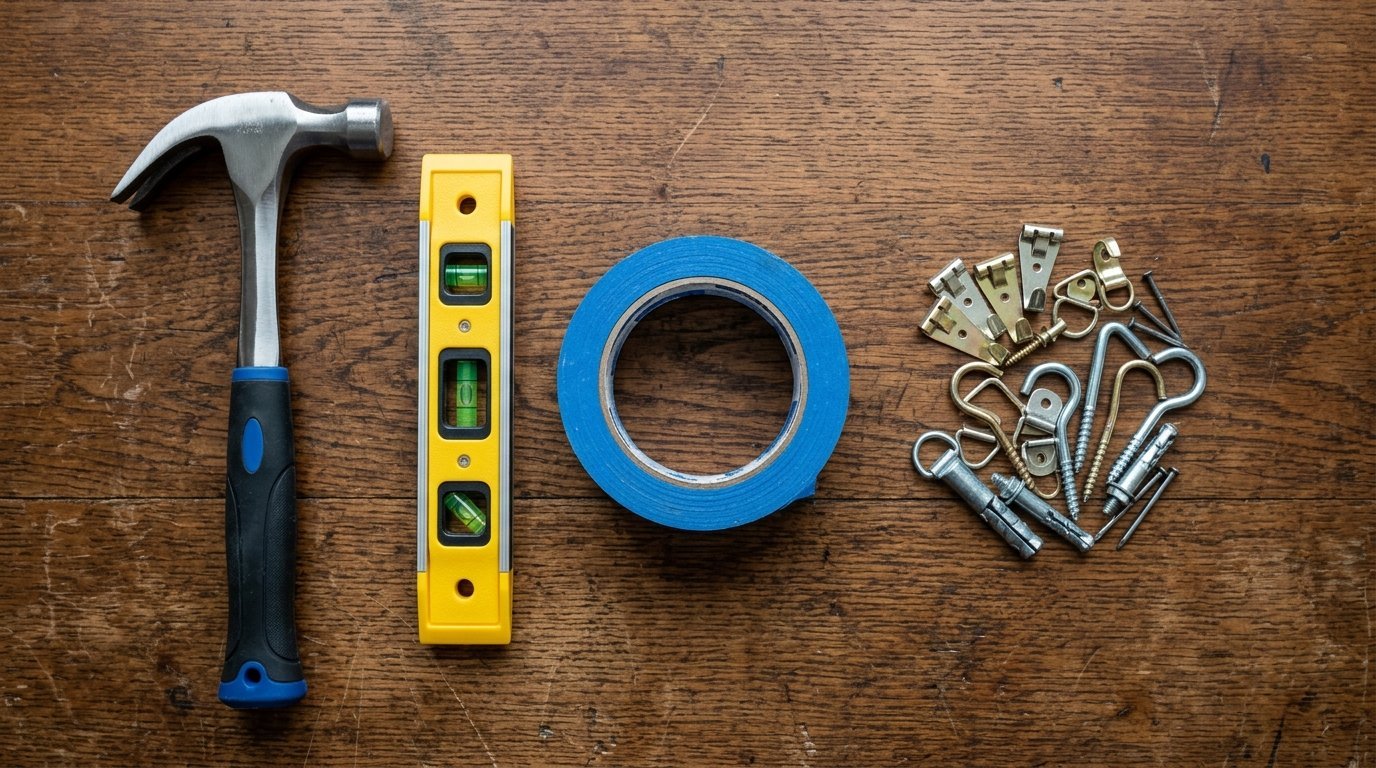
You cannot hang heavy frames with cheap plastic tacks. You need real hardware. I have watched frames crash to the floor at 2 AM. You want peace of mind.
Go to the hardware store. Buy a standard sixteen-ounce hammer. Buy a pack of picture hanging hooks rated for fifty pounds. These hooks go into drywall at a sharp downward angle. They lock tightly into place.
You need a small bubble level. A laser level works great, but a simple liquid level does the job just fine. A six-inch level costs about ten dollars. Place it on top of every frame before you walk away.
Buy a pack of sticky putty. Place a tiny ball of putty on the bottom corners of each frame. Press the frame into the drywall. This stops the frames from tilting when doors slam. It keeps your layout looking perfect for months.
Setting Up Above Large Furniture
Hanging items above a sofa requires specific measurements. The layout must feel connected to the furniture. If you hang it too high, the art looks like it is floating away.
Keep the bottom edge of your lowest frame six to eight inches above the back of the sofa. This leaves room for your head when sitting down. It keeps the visual weight grounded.
The entire layout should span about two-thirds the width of the sofa. If your sofa is eighty inches wide, your layout should be around fifty-three inches wide. Center the entire collection over the middle seat cushion.
Use the same rules for a console table. Keep the bottom frames close to the tabletop. Place tall lamps on the ends of the table. Let the art sit between the lamps. This creates a cozy, contained vignette.
Shopping for Budget Frames
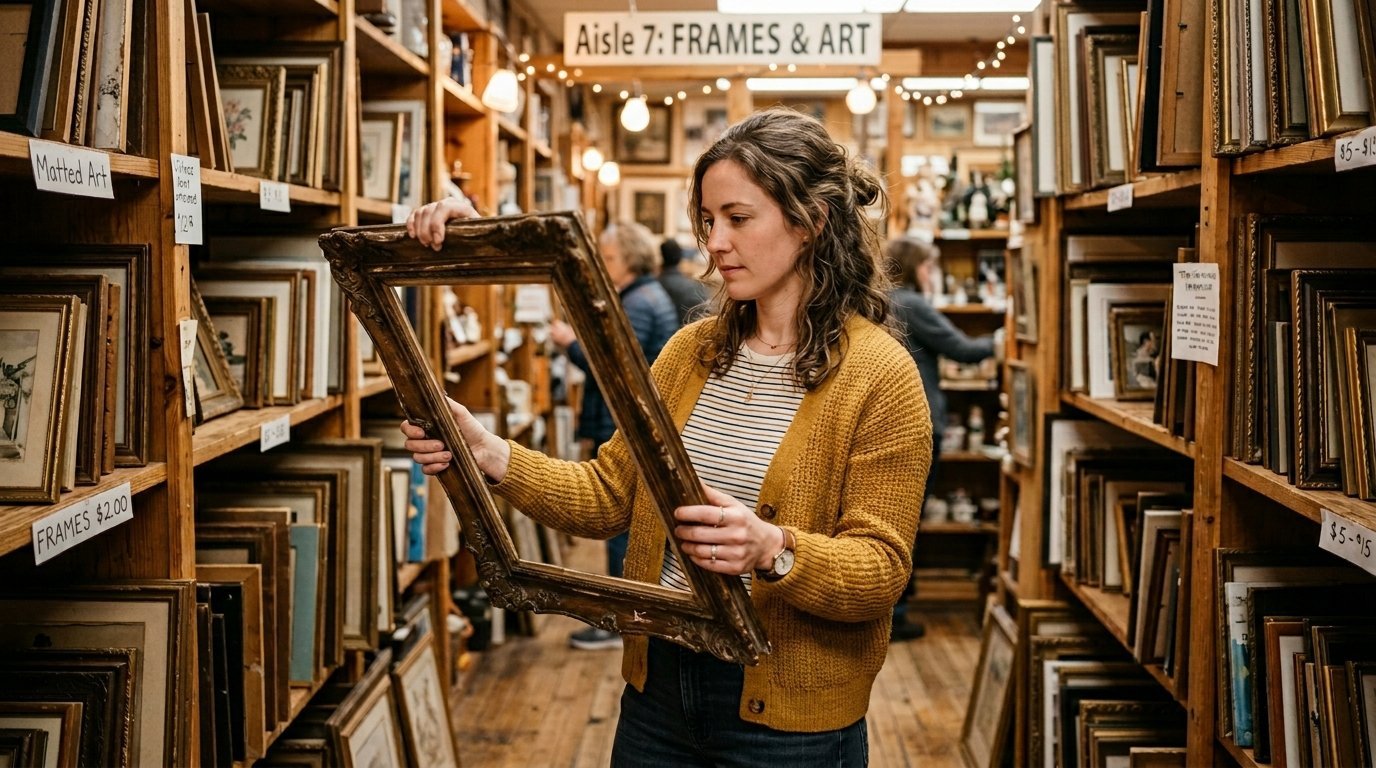
Custom framing costs hundreds of dollars. You do not need to spend that much money. You can find beautiful pieces on a strict budget.
Visit local thrift stores on Tuesday mornings. Look for large, ugly paintings in beautiful frames. Buy the painting for five dollars. Remove the old canvas. Paint the wooden frame with a flat black spray paint. Insert your own modern art print.
Buy cheap digital art files online. Send the files to a local pharmacy printer. A large 16×20 inch poster print costs about fifteen dollars.
Mix expensive and cheap pieces. Buy one beautiful, high-end frame for your center anchor. Surround it with cheap thrift store frames. Nobody will notice the cheap frames. The anchor piece elevates the entire wall.
Creating Theme Based Displays
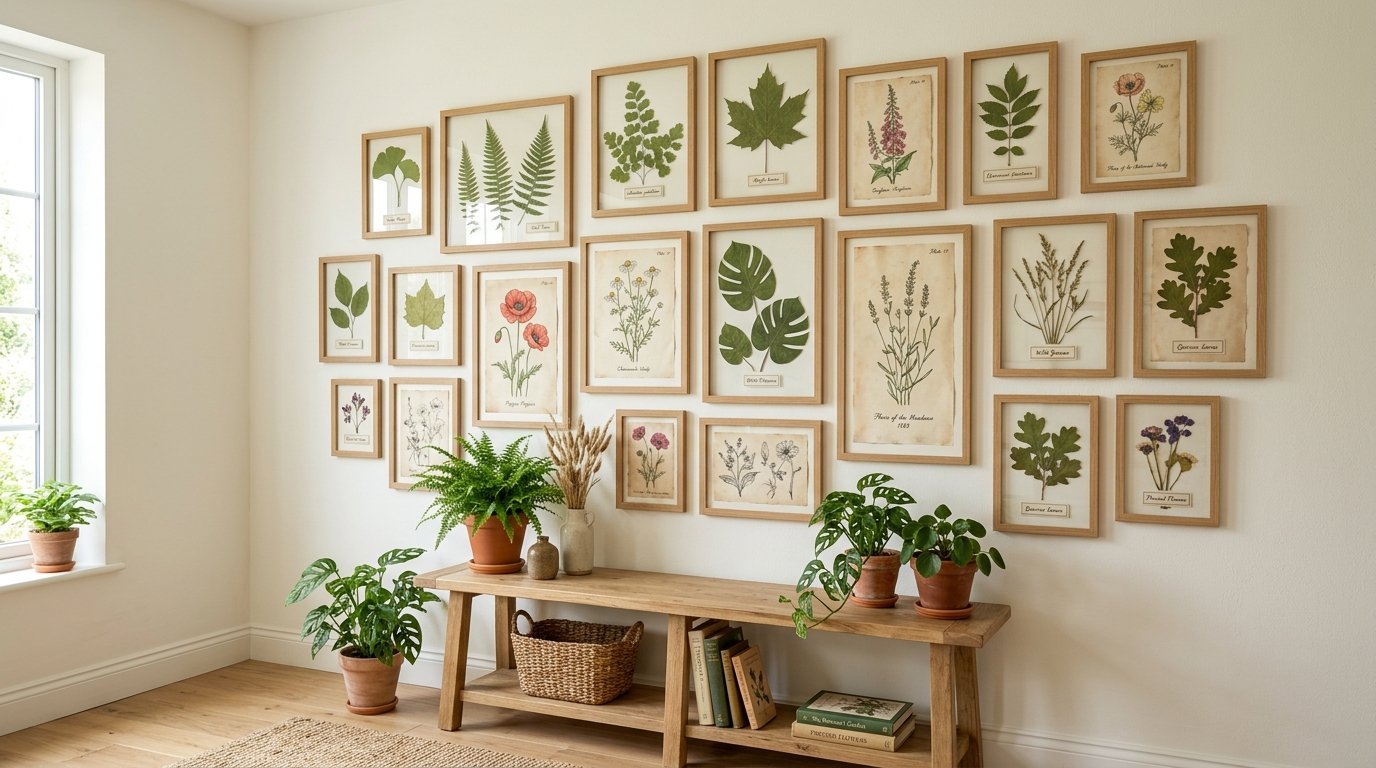
A random collection of photos looks messy. You need a central theme to tie the pieces together. Color is the easiest theme to use.
Try a black and white theme. Print all your family photos in heavy black and white contrast. Use plain black frames with bright white mats. This makes screaming toddlers and messy kitchens look like high-end art.
Try a botanical theme. Frame pressed leaves, vintage flower sketches, and bright green landscape photos. Use light oak frames. This brings the outdoors directly into your living room.
Try an architectural theme. Frame photos of old buildings, bridges, and city streets. Use raw metal frames. This works perfectly for a downtown apartment or an industrial loft space.
Frequently Asked Questions
How high should I hang my art?
Hang the center of your entire layout at exactly fifty-seven inches off the floor. This matches the average human eye level. Galleries and museums use this exact measurement. Do not measure from the top or bottom of the layout. Find the visual center of your grouping. Place that center point at fifty-seven inches.
Can I mix black and gold frames?
Yes, mixing metals looks very natural. Use a ratio to keep it balanced. Make seventy percent of your frames black. Make thirty percent of your frames gold. This keeps the gold looking like a special accent. Scatter the gold frames evenly throughout the layout. Do not clump them all in one corner.
What is the best spacing between pictures?
Use a two-inch gap for frames smaller than 11×14 inches. Use a three-inch gap for larger frames. Use a four-inch gap if you have a massive, soaring ceiling. Keep the spacing exactly identical between every single frame. Uneven gaps make the layout look accidental and messy.
How do I hang items without making holes?
Use heavy-duty adhesive strips for frames under ten pounds. Clean the drywall with rubbing alcohol first. Let the wall dry completely. Press the strip firmly for thirty seconds. Wait one full hour before hanging the frame. Never use adhesive strips over beds or cribs.
Can I use Command strips for heavy mirrors?
No, you should never trust adhesive strips for heavy glass mirrors. Mirrors shift and change weight distribution with temperature changes. A fallen mirror ruins floors and causes injuries. Always use real drywall anchors or heavy metal hooks screwed directly into a wooden wall stud.
What do I do if my ceiling is slanted?
Follow the angle of the ceiling with the top edge of your layout. Step the frames down like a staircase. Keep the bottom edge straight if it sits above a sofa. Keep the bottom edge slanted if it follows a staircase. Use a level to keep the individual frames perfectly straight.
Should all my photos be black and white?
Black and white photos fix busy rooms. If your rug has a loud pattern, use black and white photos to calm the space down. If your room feels boring and gray, use full-color photos to add life. You can mix them, but keep the color photos separated by black and white ones.
How do I clean my gallery mirrors safely?
Never spray cleaner right on the glass. The liquid drips down and destroys the frame backing. Spray your microfiber cloth until it feels damp. Wipe the mirror gently. I prefer Norwex cloths and distilled water for a streak-free finish. This keeps the glass perfectly clear for photos.
What goes in the center of the display?
Place your largest, darkest, or most visually heavy piece near the center. It does not need to be in the dead center. Place it slightly off-center for a natural look. This piece acts as an anchor. The eye lands here first before traveling to the smaller outer frames.
How do I align frames over a sofa?
Find the exact middle of your sofa cushions. Measure up six to eight inches from the top of the sofa back. Start your bottom row of frames on that line. Make sure the total width of your frames covers about two-thirds of the sofa width.
Can I put canvas and glass frames together?
Yes, mixing canvas and glass creates beautiful texture. The glass reflects light and looks sharp. The canvas absorbs light and looks soft. Place a thick, frameless canvas next to a thin, metal glass frame. The contrast makes both pieces look better.
How much does a custom layout cost?
You can build a huge layout for under one hundred dollars. Buy cheap digital prints for twenty dollars. Buy thrift store frames for thirty dollars. Spend fifteen dollars on hanging hooks and tape. Do the labor yourself. Custom framing shops charge hundreds of dollars for the exact same look.
How do I prevent frames from tilting?
Doors slamming and heavy footsteps make frames vibrate and tilt. Buy a pack of sticky wall putty. Roll a pea-sized ball of putty. Place one ball on the bottom left corner of the frame back. Place another on the right corner. Press the frame firmly into the wall.
What size should my anchor piece be?
Your anchor piece should be at least 16×20 inches for a medium wall. Use a 24×36 inch piece for a massive living room wall. The anchor must be noticeably larger than the other pieces. If your anchor is 8×10, the whole layout will look like tiny postage stamps.
Can I mix vintage and modern pieces?
Yes, this creates a highly collected look. Place a sleek, modern line drawing inside a heavy, ornate vintage frame. Place a vintage oil painting inside a crisp, thin black modern frame. This tension makes the wall look like it took years to curate.
Wrapping Up Your Wall Project
You now have the exact blueprint to tackle that blank space. Start by cutting out those paper templates right now. Move them around until the shape feels right. Grab your hammer, your level, and your tape measure. Follow the two-inch spacing rule. Secure your corners with putty so nothing tilts. You will completely change the feeling of your room by dinner time.

Anya Castellan is the Founder and Editor-in-Chief of Home Wall Trends. An art history graduate of the Rhode Island School of Design with twelve years of experience writing for leading American design publications, she specializes in composition, gallery wall theory, and the quiet architecture of domestic space. A former contributing editor at Architectural Digest and guest lecturer at Parsons School of Design, Anya personally reads and signs off on every piece before it is published.