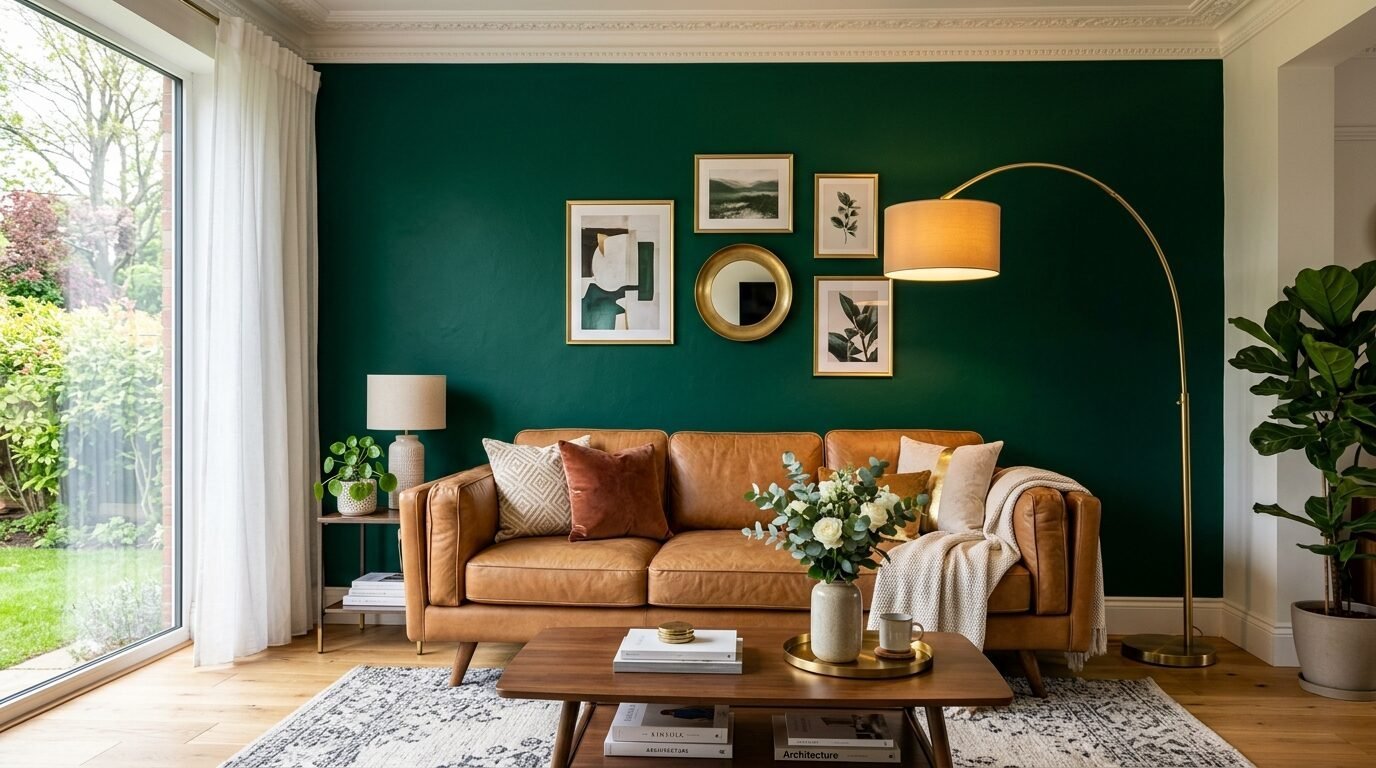
You stand in your living room. The walls are fine but they feel empty. You want that pop of color you saw on Pinterest last night. Maybe it was a deep forest green or a soft terracotta. You have the vision but the fear of messy edges or patchy spots stops you. I know that feeling well. Five years ago I tried to paint my first accent wall in a small guest bedroom. I used cheap tape and a roller that left lint everywhere. It was a disaster. Since then I have painted dozens of walls. I have figured out what works and what just wastes your time. This guide will show you how to get that professional finish without the professional price tag.
Executive Summary of Your Painting Project
You can change the entire feel of a room in just one Saturday. Most people think they need a whole week to paint. In my experience you only need about six hours of active work. You will spend about 100 dollars on high quality supplies if you start from scratch. If you already have some tools you might spend only 40 dollars on paint. This project requires focus on prep work. If you prep well the painting part is easy. You will walk away with a crisp and clean focal point that makes your furniture look expensive. We will cover tool selection and wall prep and the actual rolling. You will see how to avoid the mistakes that scream amateur.
1. Planning Your Accent Wall Like a Strategist
Pick the right wall first. This sounds simple but people often choose the wrong spot. Look for the natural focal point of the room. Usually this is the wall behind your bed or the one with the fireplace. I once saw a friend paint a wall with two large windows and a radiator. The color was beautiful but the busy wall made the room feel cluttered. Choose a wall without too many interruptions.
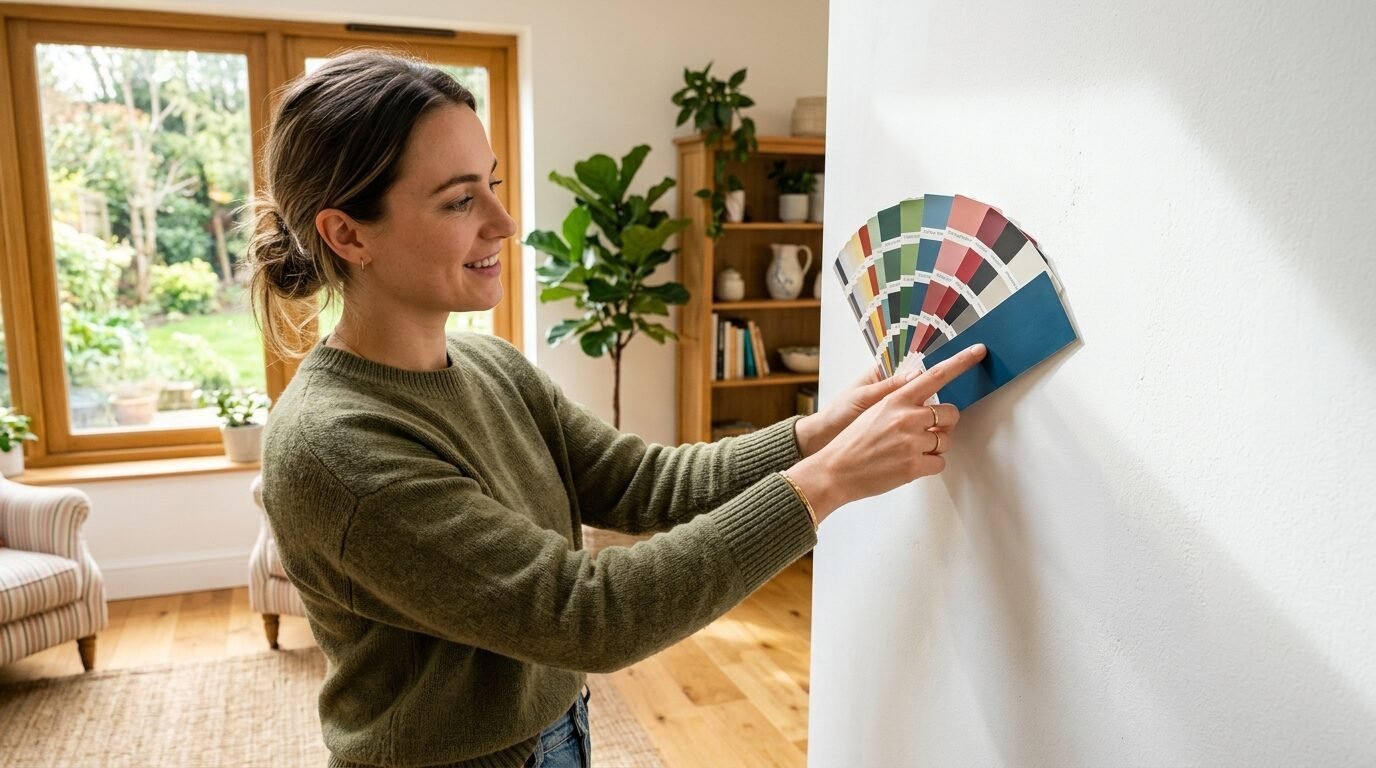
Check the light at different times of the day. A dark navy might look like a rich ocean at noon. At 8 PM it might look like a black hole. Get a few sample pots. Paint big squares on the wall. Watch how the sun hits them. I always tell people to live with the samples for two days. This prevents the regret of a color that feels too bright once it covers ten feet of space.
2. Tools Needed To Paint A Room
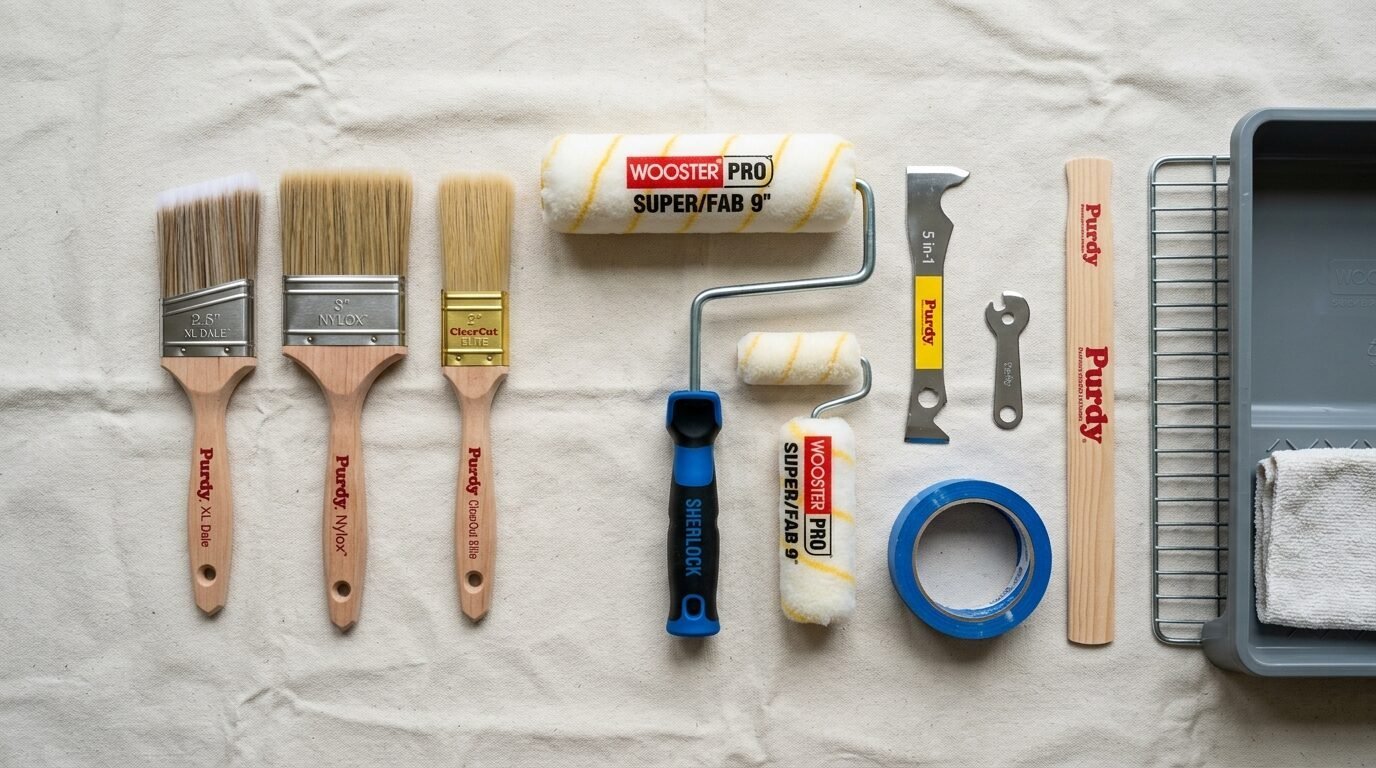
Do not buy the cheapest kit at the big box store. Those rollers shed. Those brushes leave streaks. I only use the Purdy XL Series brushes. They hold paint well and give you a sharp line. For the roller get a Wooster Pro Duo-Liner tray. It makes cleanup fast.
You need a high quality roller cover. A Purdy White Dove cover is my favorite for smooth walls. It does not leave fuzz behind. For paint I stick with Sherwin-Williams Emerald or Benjamin Moore Regal Select. These paints cover well in two coats. You also need a sturdy ladder and a drop cloth. Use a canvas drop cloth rather than plastic. Plastic is slippery and paint stays wet on it for a long time. If you step on a wet drop of paint you will track it across your floors. I learned this lesson the hard way in a kitchen with white tile.
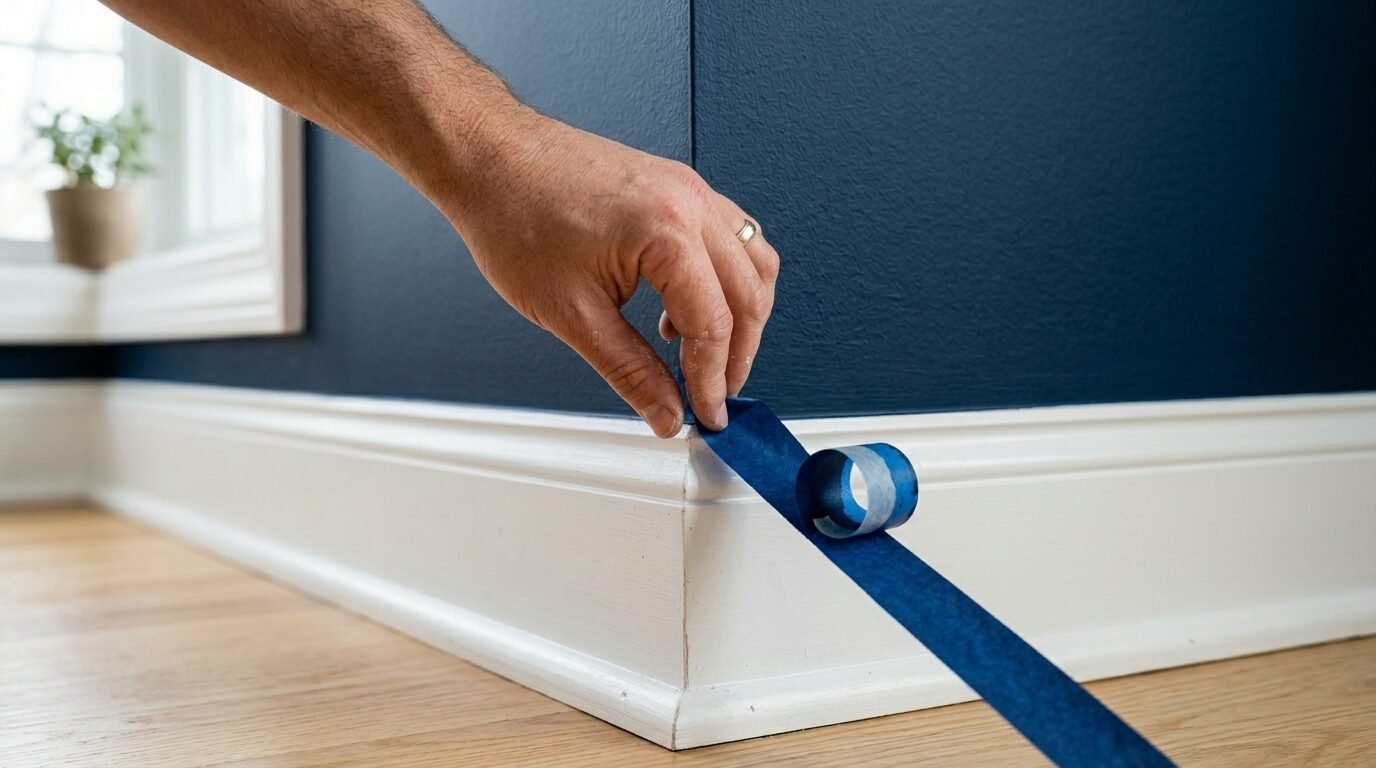
3. How To Choose Painter’s Tape
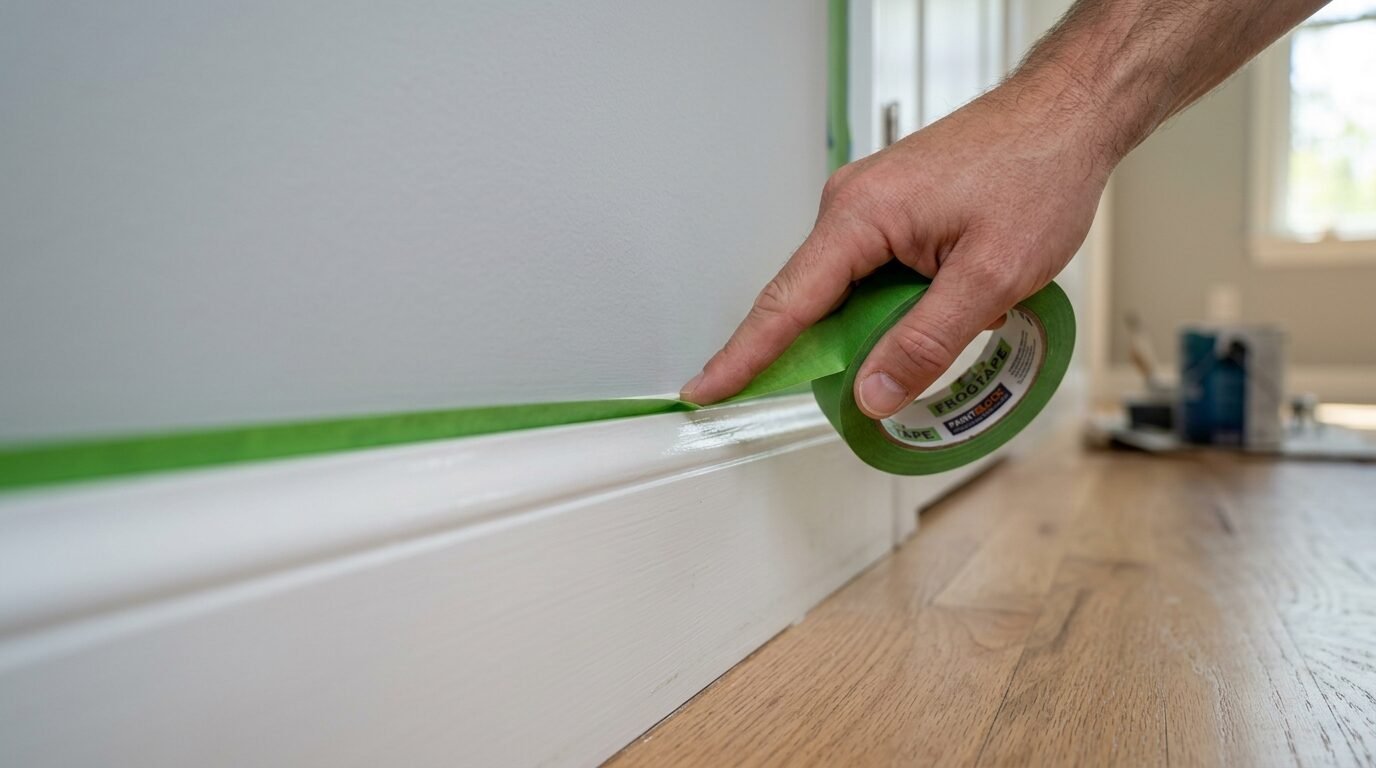
Not all tape is the same. I have tested many brands over the years. FrogTape Multi-Surface is the best for most projects. It has a special powder that reacts with water in the paint. This creates a gel barrier that stops leaks.
If you have very delicate surfaces use the yellow FrogTape. For standard baseboards the green version is perfect. Some people prefer ScotchBlue Original but I find it can sometimes tear the paint off if left too long. In my experience the extra two dollars for the premium tape saves you an hour of touch ups later. Always press the edge of the tape down with a clean putty knife. This creates a tight seal.
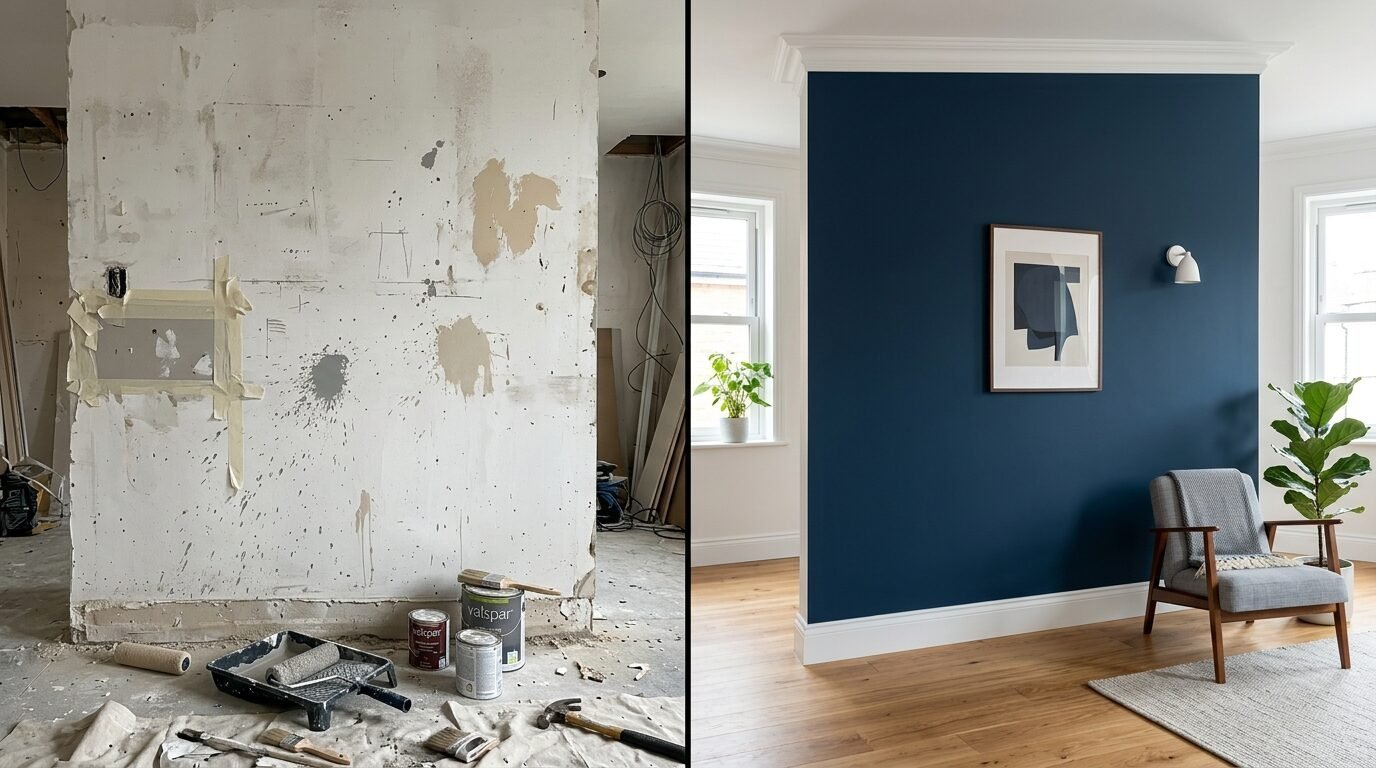
4. Prepping Your Canvas
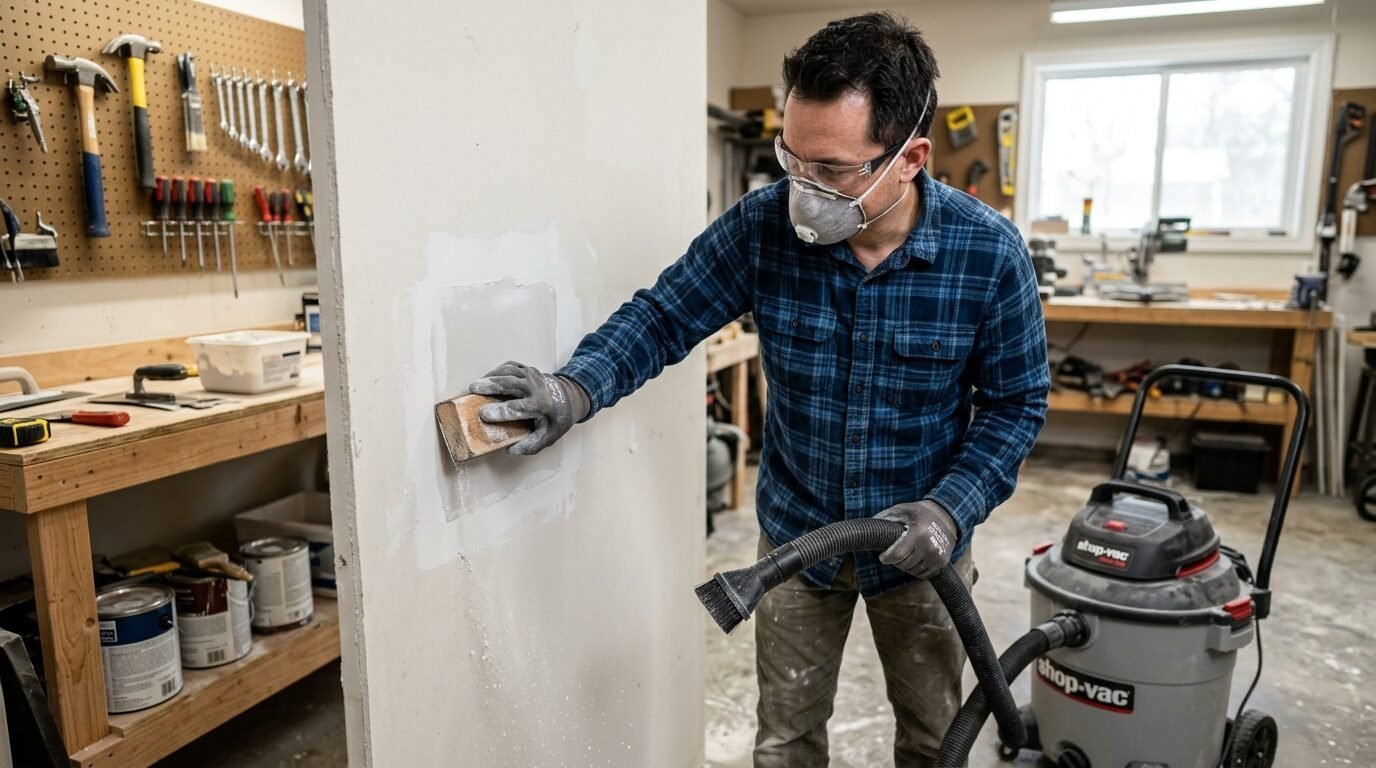
Clean the wall before you do anything else. Dust and cobwebs prevent paint from sticking. Use a damp cloth with a little dish soap. If there are holes from old pictures use 3M Patch Plus Primer. It dries in thirty minutes.
Sand the patches smooth once they are dry. Use a fine grit sanding block. Run your hand over the wall. If you feel a bump it will show up in the final finish. Remove outlet covers and switch plates. Put the screws in a small plastic bag so you do not lose them. I once lost a single screw for a vintage brass plate and it took me weeks to find a match. Tape off the ceiling and the baseboards. Take your time here. This is the foundation of your professional look.
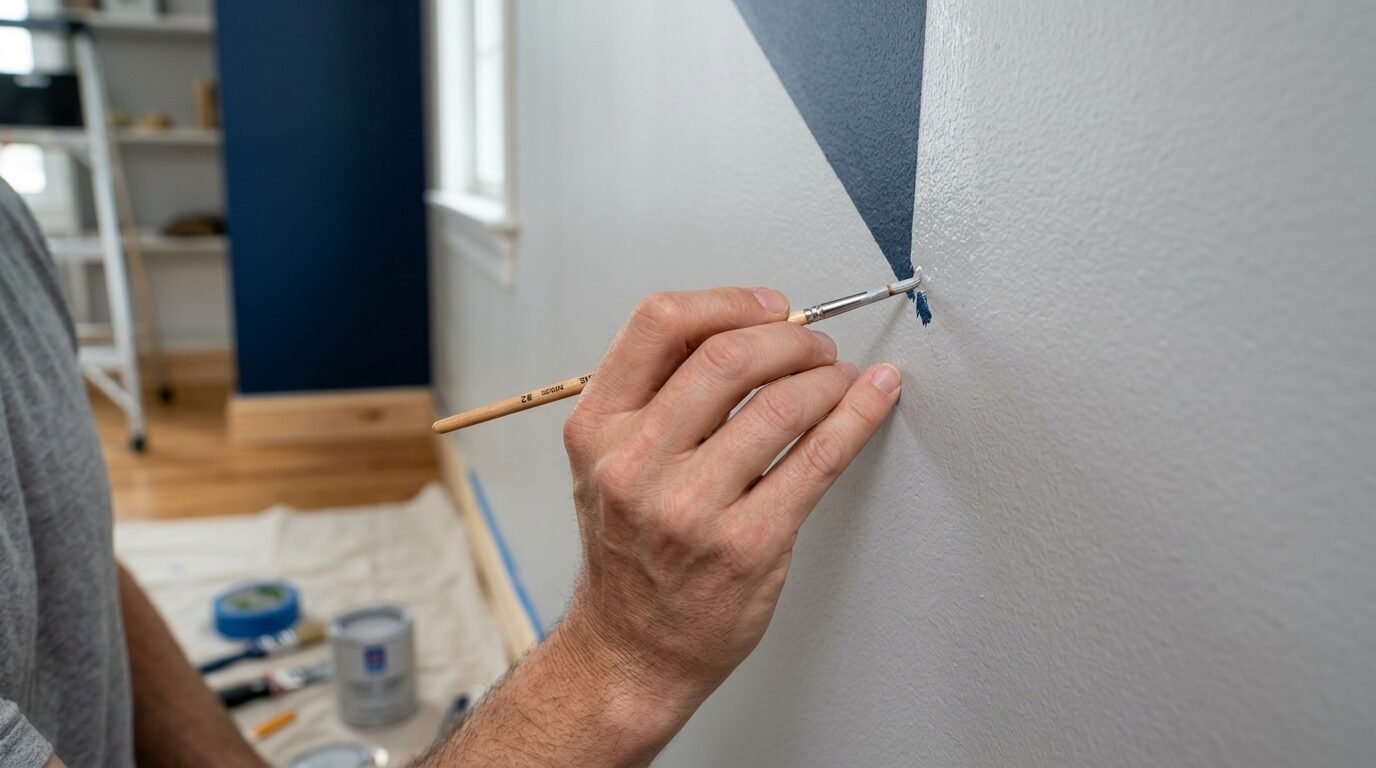
5. Cutting In Like An Expert
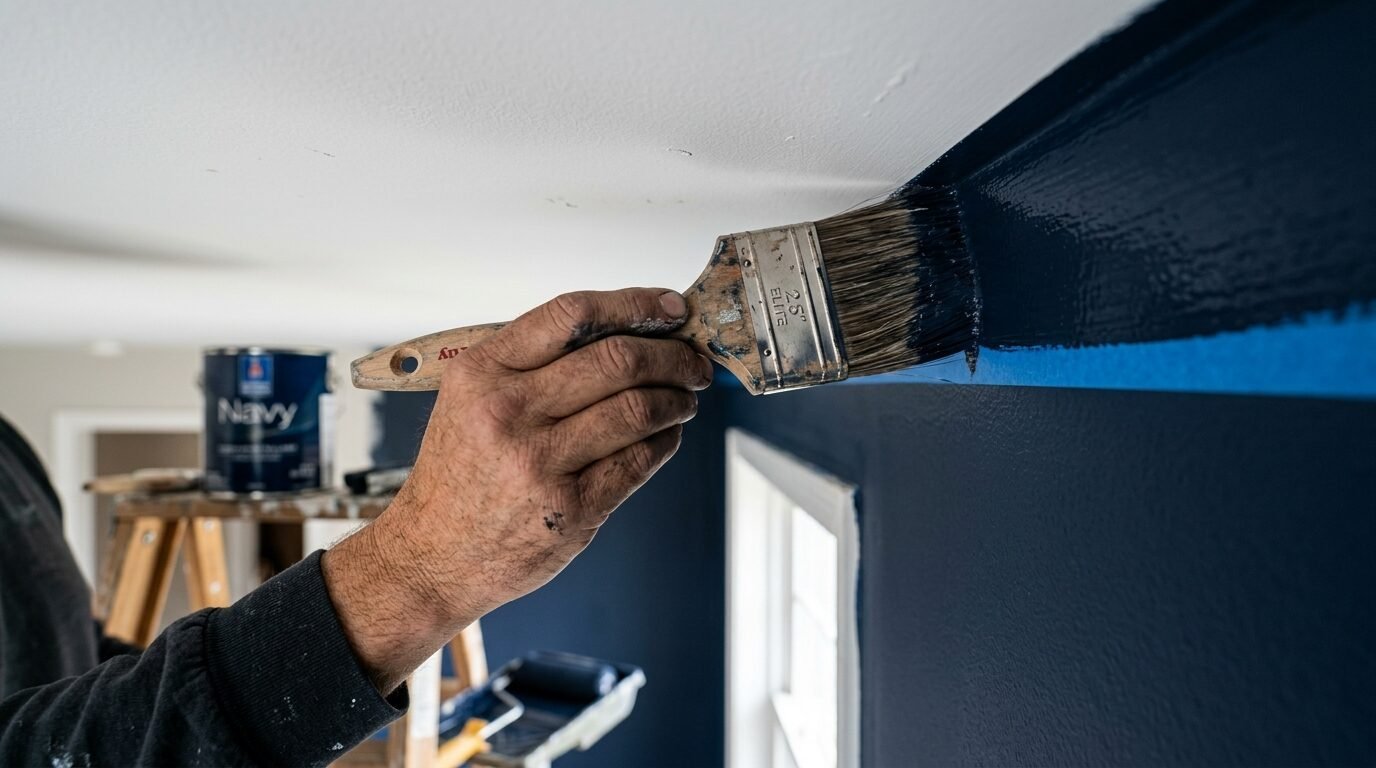
Cutting in is the part where you paint the edges. Many people are terrified of this step. Use your Purdy brush. Dip it only two inches into the paint. Tap the brush against the side of the can. Do not wipe it. You want the brush to be full but not dripping.
Start an inch away from the edge. Move the brush toward the tape. Let the bristles fan out. Slow and steady wins here. I usually cut in a two inch border around the whole wall. This gives me a safe zone for the roller. Do not let the cut in areas dry completely before you start rolling. This helps the paint blend together without a visible line. Professionals call this keeping a wet edge.
6. Rolling The Paint For A Smooth Finish
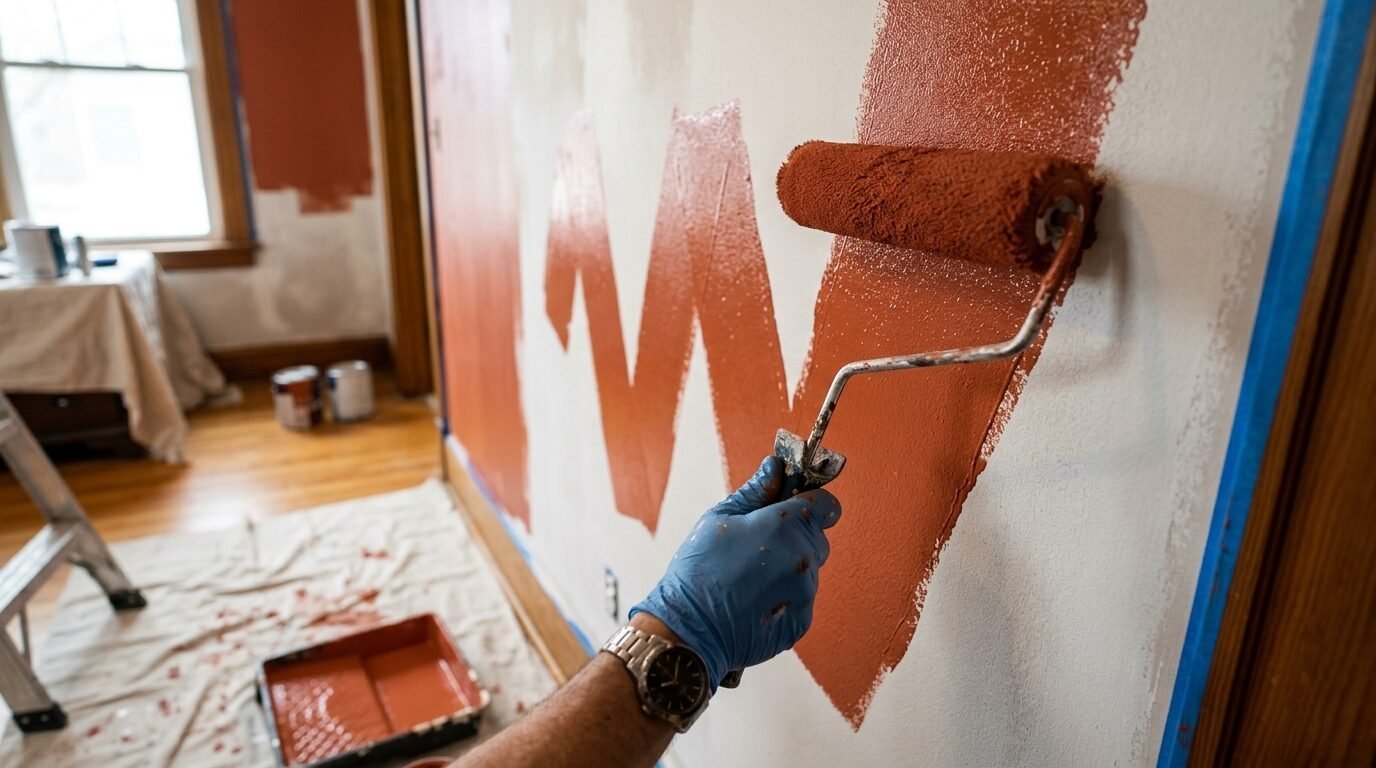
This is the most satisfying part. Dampen your roller cover slightly with a wet rag first. This helps the fabric pick up paint. Pour your paint into the tray. Only fill the well halfway. Roll the cover into the paint and then back and forth on the ramp. The roller should be fully loaded but not dripping.
Start in the middle of the wall. Make a large W shape. Fill in the gaps of the W without lifting the roller. This spreads the paint evenly. Always work from the top down. Do not press too hard. If you see lines on the edges of your roller you are pressing too hard. Light pressure is all you need. I saw a neighbor try to squeeze every drop of paint out of a roller. Her wall ended up with light and dark patches that looked like clouds. Use more paint than you think you need.
7. Painting Project Planning Tips
Timing is everything. Check the humidity before you start. If it is raining outside the paint will take much longer to dry. High humidity can also cause the paint to sag or drip. I prefer to paint on a clear day with the windows cracked for fresh air.
Set up a dedicated station for your tools. Use a piece of cardboard to hold your paint cans and trays. This keeps your floors safe. If you need to take a break wrap your brush and roller in plastic wrap. Put them in the fridge. This keeps the paint wet for hours. I have left brushes in the fridge overnight and they were perfect the next morning. Just let them warm up for ten minutes before you start again.
8. How To Paint A Room Quickly
Speed comes from preparation. Group your tasks. Do all the cleaning at once. Do all the taping at once. If you want to move fast use a Wagner PaintSmart roller. It pulls paint directly from the can. This saves you from constantly dipping into a tray.
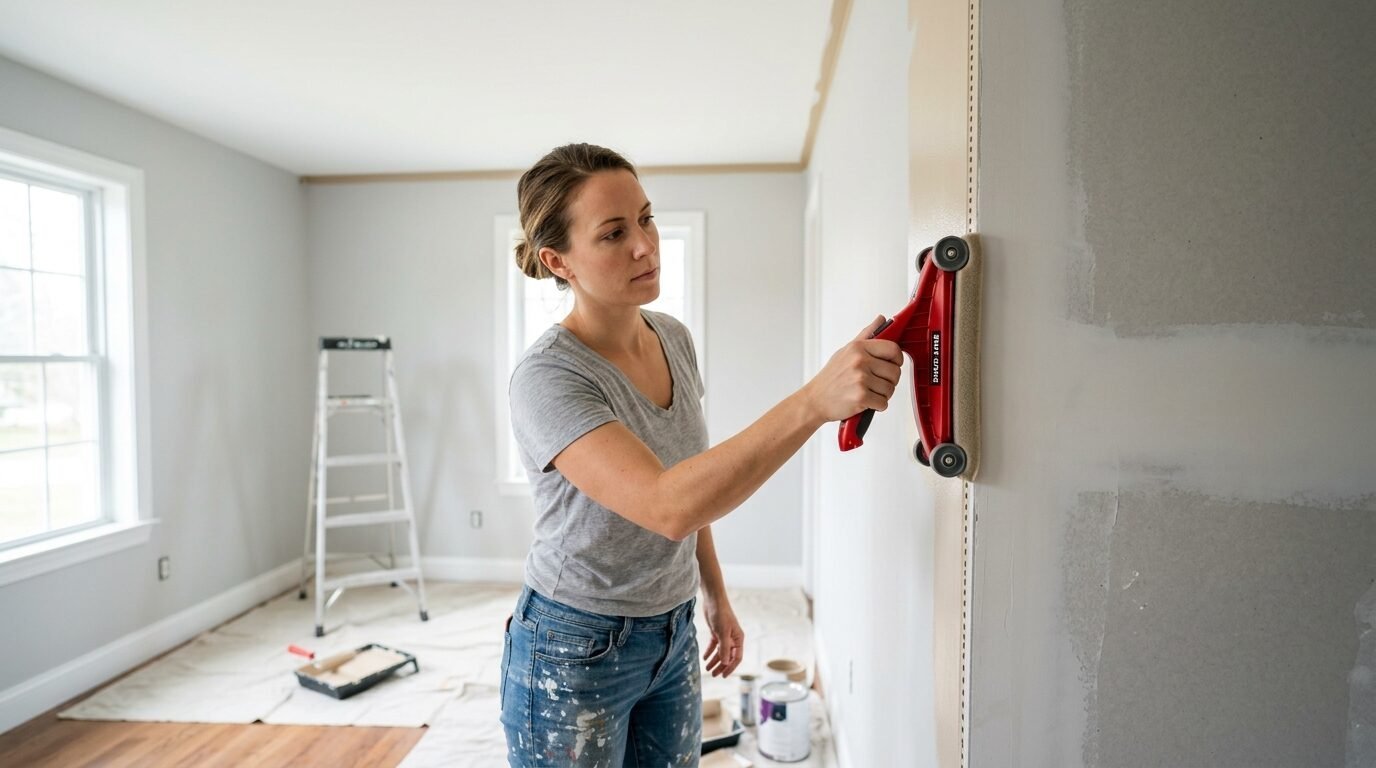
Another tip is to use a paint edger tool like the Shur-Line Pro. It has small wheels that guide you along the ceiling. In my experience it works well if you are very careful. If you get paint on the wheels it will leave a streak on your ceiling. If you are a beginner stick to the brush and tape method. It might feel slower but it is safer.
9. Affordable Paint Roller Deal
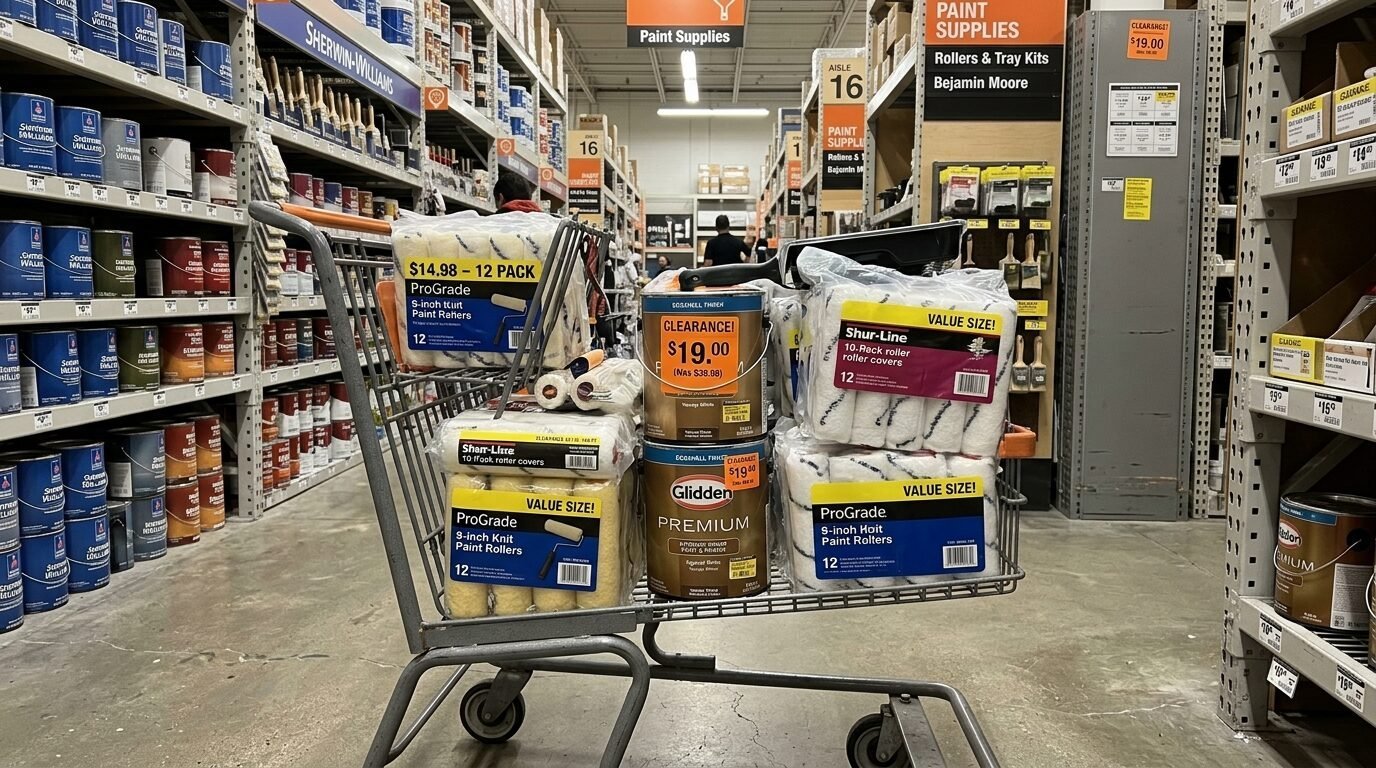
You do not need to spend a fortune to get good results. Look for multi packs of roller covers. Brands like Pro Grade offer bulk packs that are much cheaper than buying single covers. These are great for one time use.
Check the clearance section at your local hardware store. Often people return paint because the color was slightly off. You might find a high quality gallon of paint for half the price. If you are doing a dark accent wall this is a great way to save money. I once found a gallon of dark charcoal grey for fifteen dollars. It worked perfectly for a bedroom wall. Just make sure the paint is the right finish. Eggshell or satin is best for living areas.
10. Home Painting Tips From An Expert
Remove the tape while the paint is still slightly tacky. If you wait until the paint is bone dry the tape might pull chips of paint off the wall. Pull the tape back at a forty five degree angle. This gives you the crispest line possible.
If you see a drip catch it immediately. Use your brush to lightly smooth it out. If the drip has already started to dry leave it alone. You can sand it down and touch it up after the whole wall is dry. Trying to fix a semi dry drip usually makes a bigger mess. I have seen many people ruin a good wall by fussing with it too much. Trust the coat of paint to level out as it dries.
11. Troubleshooting Common Accent Wall Mistakes
Paint bleed is the most common issue. If paint gets under your tape do not panic. Use a small artist brush to touch up the line with the original wall color. It takes a steady hand but it works.
Another issue is lap marks. These are the dark lines where two sections of paint overlap. To avoid this keep your roller moving. Do not stop in the middle of a wall. Finish the entire wall in one go. If the paint looks patchy after one coat wait for it to dry completely. A second coat fixes almost every problem. I once thought I had ruined a guest room because the first coat looked thin. After the second coat it looked like a professional had done it.
Frequently Asked Questions
How long should I wait between coats of paint?
Wait at least two to four hours. Check the back of your paint can for specific instructions. If the room is cold or humid wait longer. If you paint over wet paint you will pull the first layer off. This creates a texture that is hard to fix.
Can I paint an accent wall without tape?
You can if you have a very steady hand. This is a skill that takes years to master. Professionals use a technique called cutting in by hand. For a beginner I always recommend tape. It provides a safety net that leads to a better result.
What is the best finish for an accent wall?
Eggshell is the most popular choice. It has a slight glow but hides imperfections well. Satin is a bit shinier and easier to clean. Avoid high gloss for a whole wall. It shows every bump and crack in the drywall.
Do I really need a primer?
If you are painting a light color over a dark wall you need a primer. Use KILZ 2 All-Purpose primer. It blocks the old color from showing through. If your new paint has primer built in you might be able to skip this step. In my experience a separate primer always leads to better color accuracy.
Final Thoughts On Your New Space

You now have the knowledge to transform your home. Painting an accent wall is a low risk project with a high reward. You will feel a sense of pride every time you walk into the room. Remember to invest in good brushes and take your time with the tape. The small details are what make a project look professional. Grab your supplies this weekend and start. You will be surprised at how much a single wall can change your mood and your home.

Anya Castellan is the Founder and Editor-in-Chief of Home Wall Trends. An art history graduate of the Rhode Island School of Design with twelve years of experience writing for leading American design publications, she specializes in composition, gallery wall theory, and the quiet architecture of domestic space. A former contributing editor at Architectural Digest and guest lecturer at Parsons School of Design, Anya personally reads and signs off on every piece before it is published.