You want that high end look you see on Pinterest. You want the warm wood tones and the clean lines of Vertical Wooden Slats. But you live in an apartment. Or maybe you just do not own a circular saw. You might even be afraid of power tools. I know that feeling well. When I first moved into my condo, I wanted a Modern Wooden Wall behind my bed. I did not have a garage or a workspace. I only had a small closet and a few hand tools. I felt stuck. Most guides tell you to buy a miter saw and a nail gun. I found a different way. You can get professional results using simple hand tools and strong glue. This guide shows you exactly how to do it. You will save money and your neighbors will not complain about the noise.
Why You Do Not Need a Saw for Vertical Wooden Slats
Many people think a Modern Wooden Panelling project requires a workshop. In my experience, the secret is in the sourcing. You can buy wood that is already cut to the right length. Many home centers like Home Depot or Lowe’s offer a cutting service. You bring your measurements and they do the hard work for you. I have seen this work for dozens of people who want a Fluted Tv Wall Design but lack tools. You can also buy acoustic panels that come in standard heights. These Acoustic Timber Wall Panels often fit standard eight foot walls perfectly.
I once helped a friend who was terrified of even a hand saw. We ordered pre-finished slats from a brand called The Wood Veneer Hub. They arrived at her door ready to go. We did not make a single cut. The project took four hours. It looked like a professional team did it. This path is perfect if you want to avoid dust and loud noises. You get the same aesthetic without the mess.
The Best Pre-Cut Options for Modern Wooden Panelling

If you want to skip power tools, you must pick the right products. You have three main choices. The first choice is individual pine or oak strips. You can find these at local lumber yards. Ask them to cut the strips to your exact ceiling height. The second choice is peel and stick wood planks. Brands like Stikwood make real wood products with adhesive backings. These are very thin and you can cut them with a sharp utility knife.
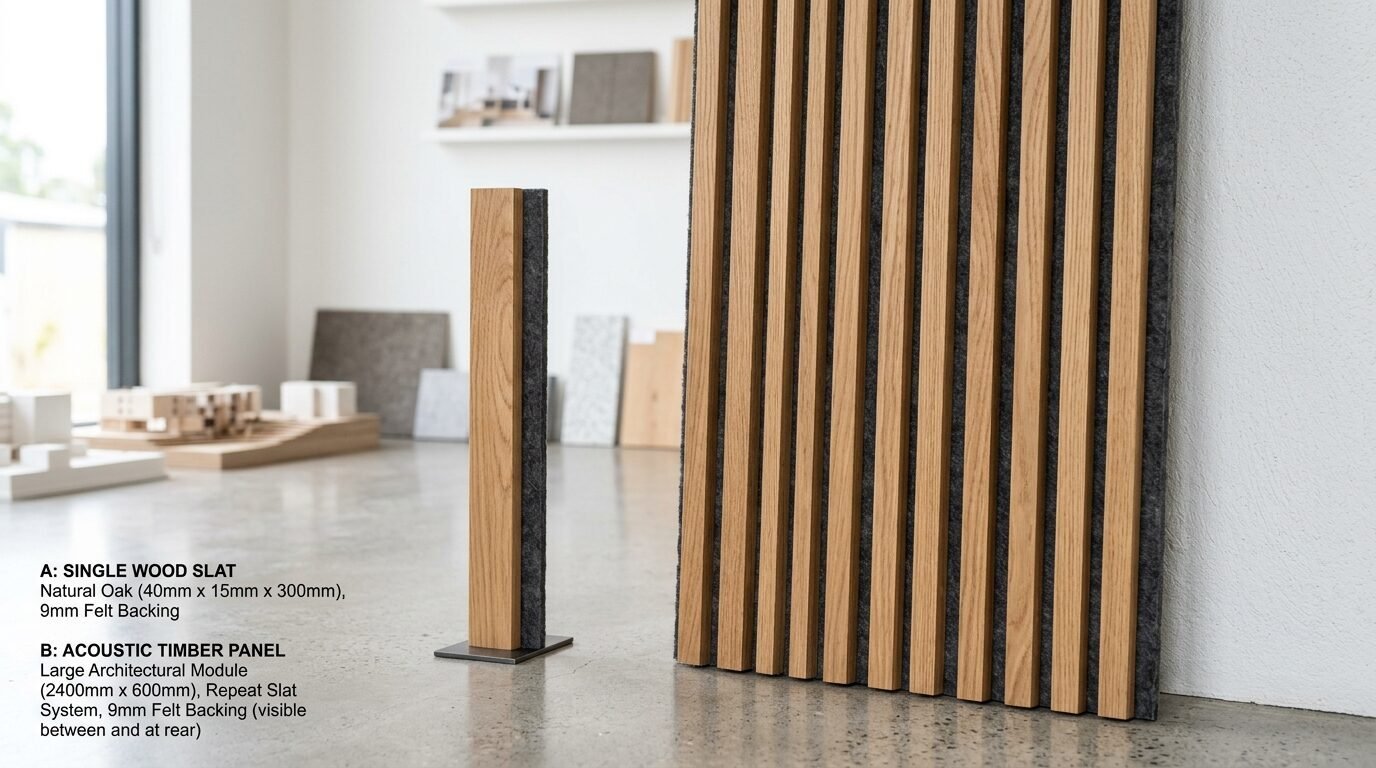
The third choice is Acoustic Timber Wall Panels. These are very popular on Pinterest right now. They feature wood slats attached to a felt backing. They are great for a Wood Slat Tv Wall Design because they hide wires. Brands like Art3d offer these on Amazon. They are easy to handle. I tried these in a home office last year. The felt backing makes them light. You can stick them to the wall with heavy duty construction adhesive.
Essential Supplies for a No-Tool Modern Wooden Wall
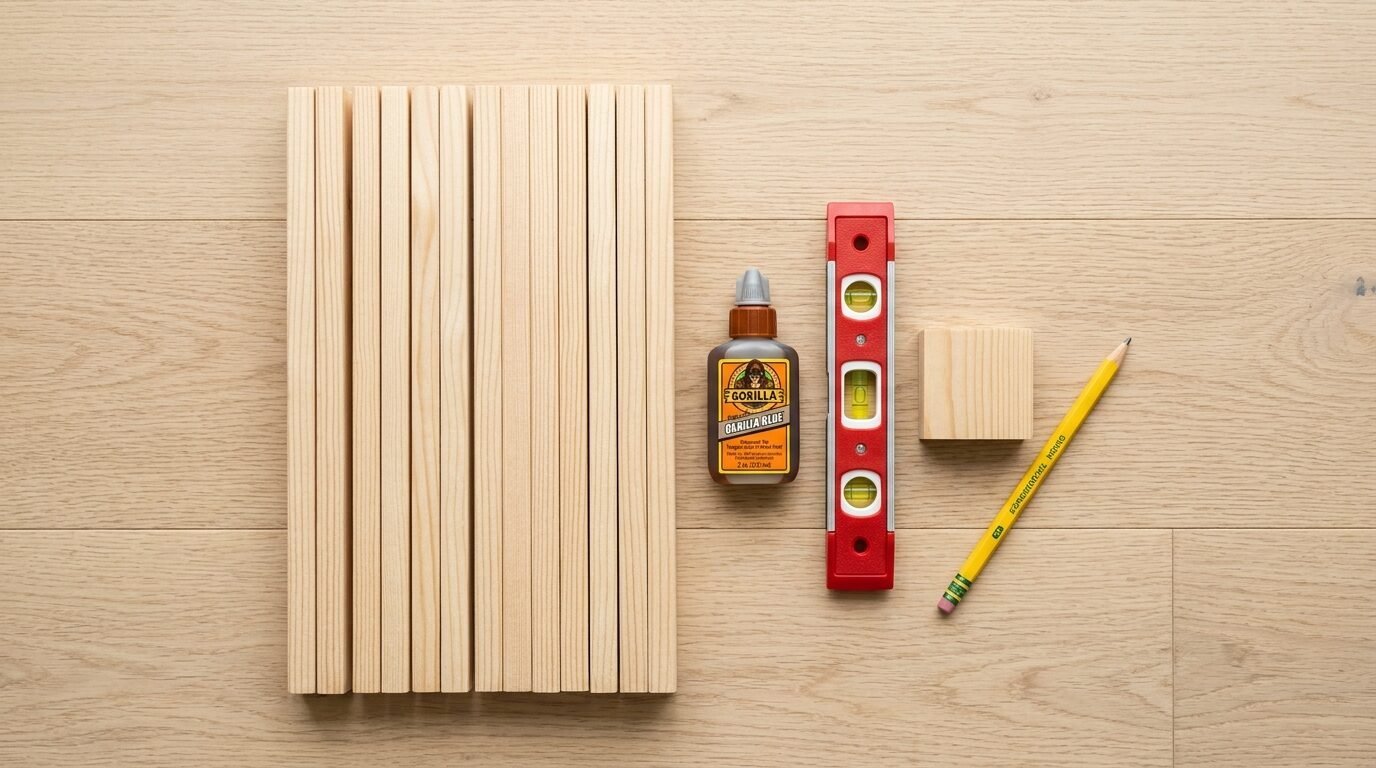
You still need a few things even without power tools. You need a way to stick the wood to the wall. I always keep Gorilla Heavy Duty Construction Adhesive in my kit. It grabs fast. You also need a level. A simple bubble level from Stanley works fine. It ensures your Slated Walls stay straight. You need a measuring tape and a pencil. For the finish, I like Minwax Wood Finish cloths. They are pre-soaked and easy to use.
You also need spacers. You can use scraps of wood or even plastic spacers used for tile. This keeps the gap between your Interior Wall Wood Paneling even. I suggest buying a pack of 1/2 inch wood dowels to use as spacers. They are cheap and consistent. Lastly, get some blue painter’s tape. This holds the slats in place while the glue dries. I learned this the hard way when a slat slid down a wall in the middle of the night.
Step 1 Prep Your Interior Wall Wood Paneling Surface
A good project starts with a clean wall. If your wall is greasy or dusty, the glue will not hold. I use a mix of warm water and a little dish soap. Wipe the area down and let it dry. If your wall has a high gloss paint, you might need to scuff it up. Use a piece of 120 grit sandpaper. You do not need a machine for this. Just a few passes by hand will help the adhesive bond.
In my experience, people skip this and regret it later. I saw a Wooden Panel Wall Ideas project fail because the wall was too cold and damp. Make sure the room is at a normal temperature. If you are doing a Wood Slat Tv Wall Design, mark where your TV mount goes first. You do not want to glue wood where the mount needs to sit. Use a pencil to draw a faint line where each panel will go. This gives you a roadmap.
Step 2 Calculate Spacing for Slated Walls
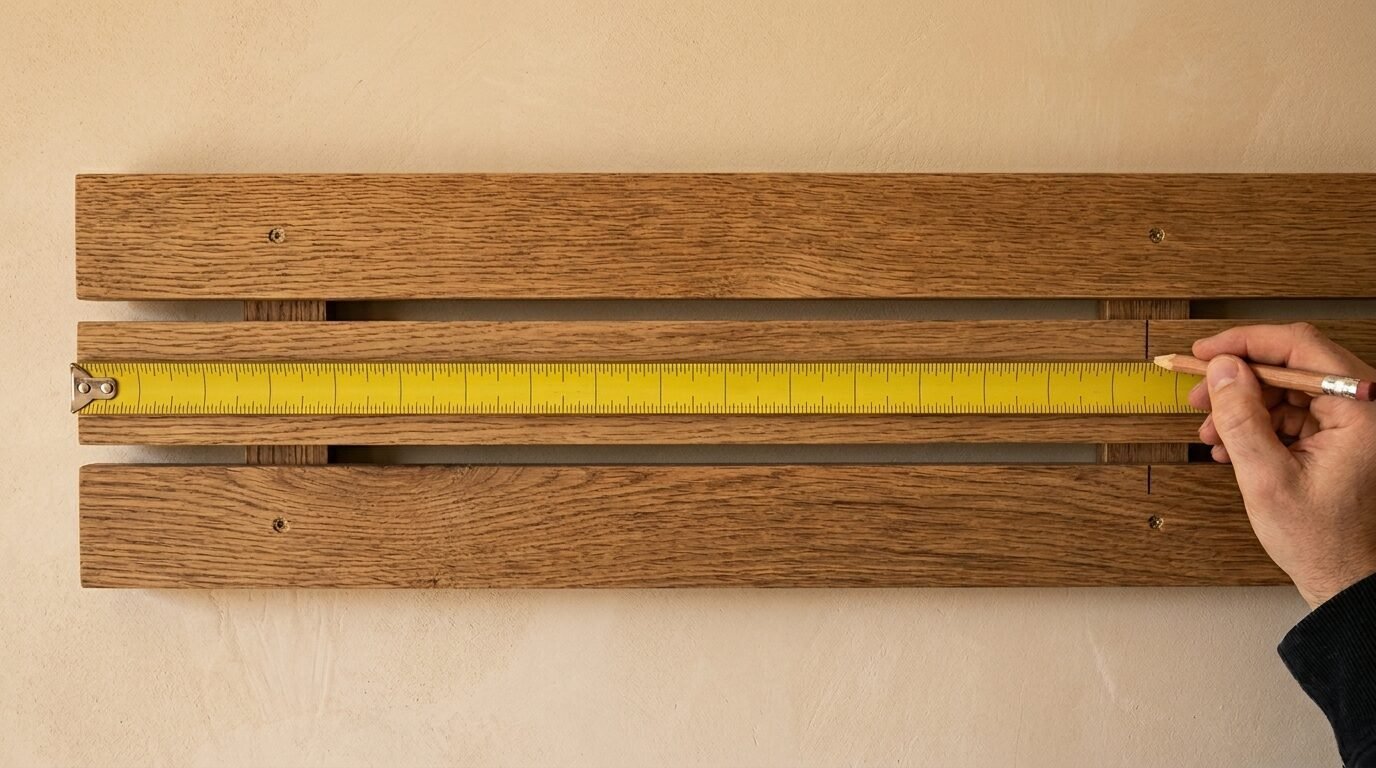
Spacing is what makes a Modern Wooden Wall look professional. Most people go for a 1/2 inch or 3/4 inch gap. Take the total width of your wall. Subtract the width of all your slats. Divide the remaining space by the number of gaps. This gives you the perfect spacing. I always do a dry run on the floor first. Lay out your Vertical Wooden Slats to see how they look.
I once worked on a project where we realized the last slat would be only a sliver wide. We adjusted the spacing by just 1/8 of an inch on each gap. That small change saved the whole look. If you use Acoustic Timber Wall Panels, the spacing is already done for you. But if you are using individual pieces of Interior Wall Wood Paneling, consistency is everything. Use your spacers at the top, middle, and bottom of every slat.
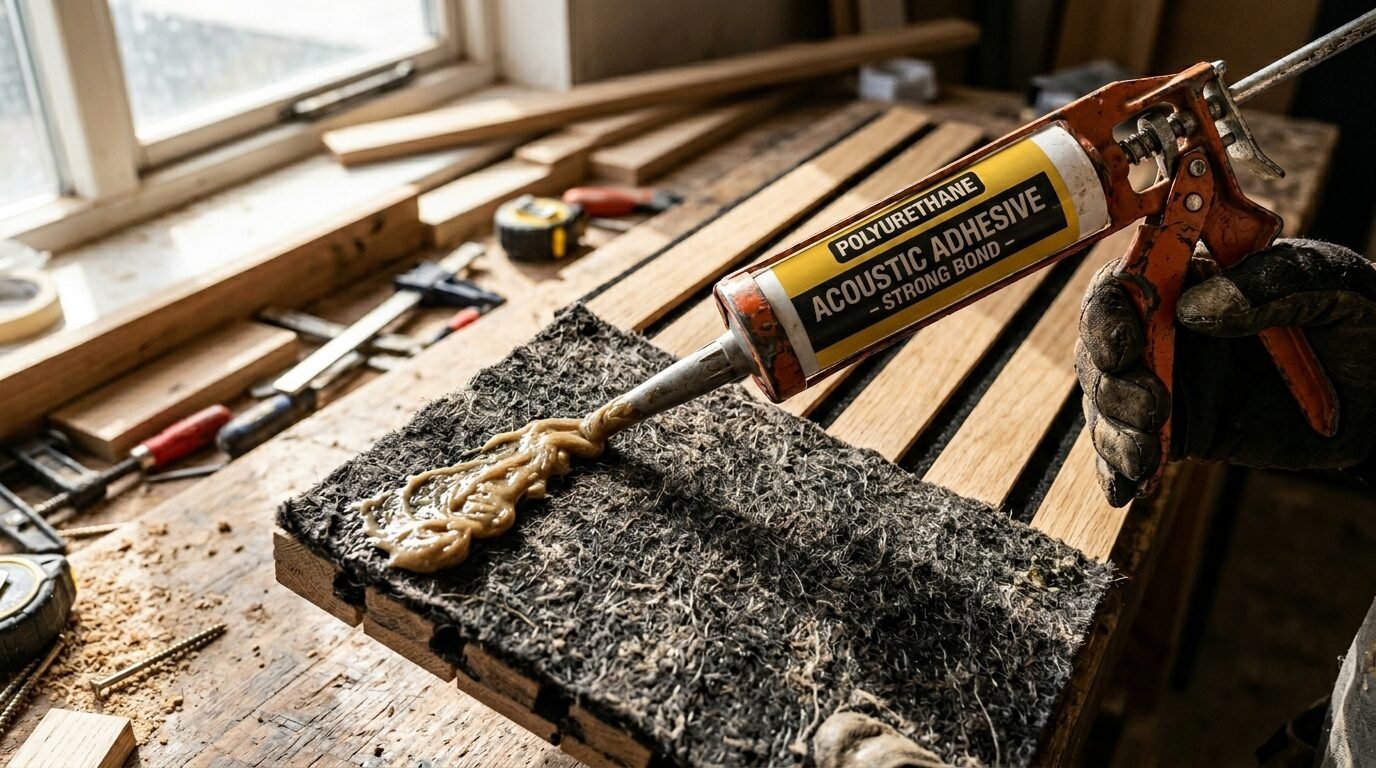
Step 3 Apply Adhesive to Acoustic Timber Wall Panels
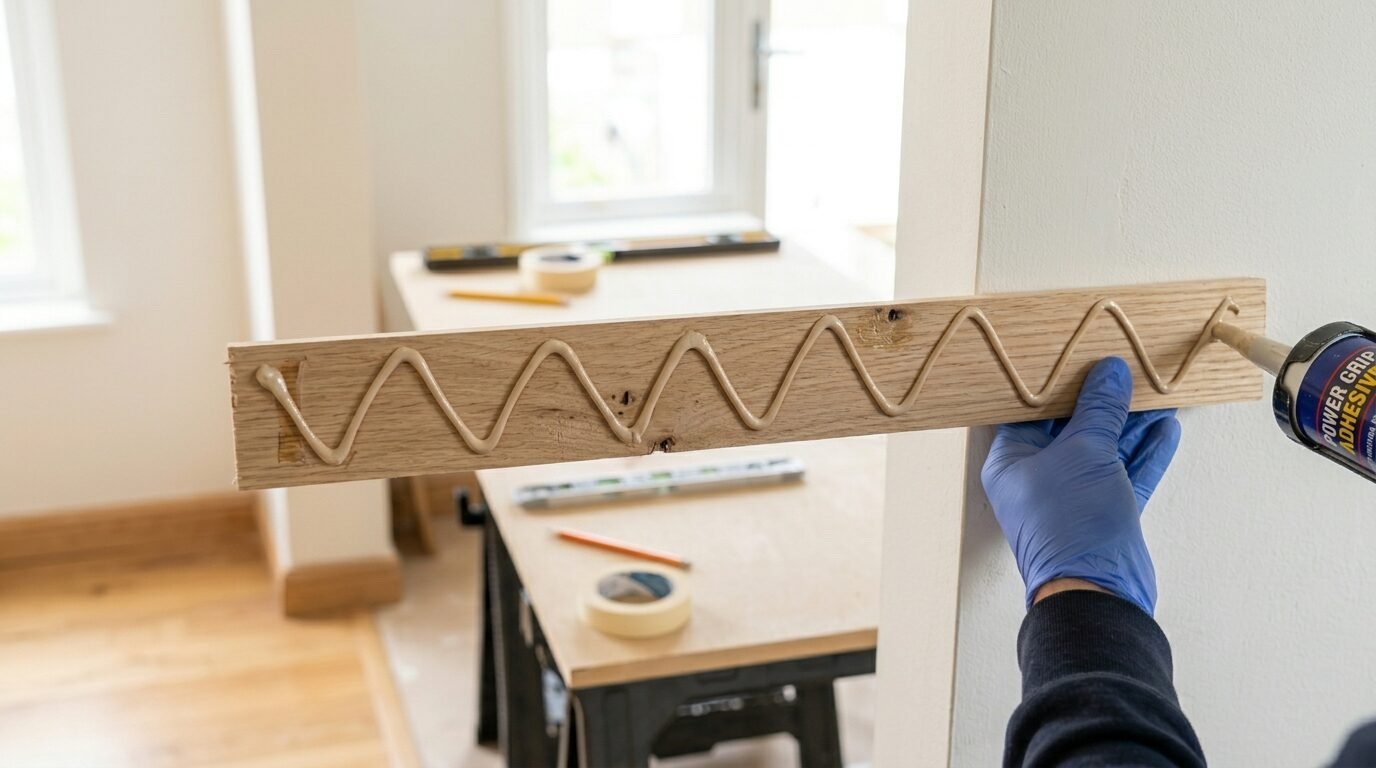
Now comes the fun part. Put your glue into a caulking gun. Apply a zigzag bead of adhesive to the back of the wood. Do not put the glue too close to the edges. You do not want it to ooze out and ruin the look of your Modern Wooden Panelling. I found that a “dot and dab” method also works well for lighter wood.
Press the slat against the wall. Wiggle it slightly to spread the glue. Use your level to make sure it is perfectly vertical. This is the most critical moment. If the first one is crooked, the whole wall will look off. Use blue tape at the top to hold it while the glue sets. For Acoustic Timber Wall Panels, you might need a bit more glue because the felt absorbs some of it. I suggest Liquid Nails Fuse It for these panels. It works on almost any surface.
Step 4 Secure the Wood Slat Tv Wall Design
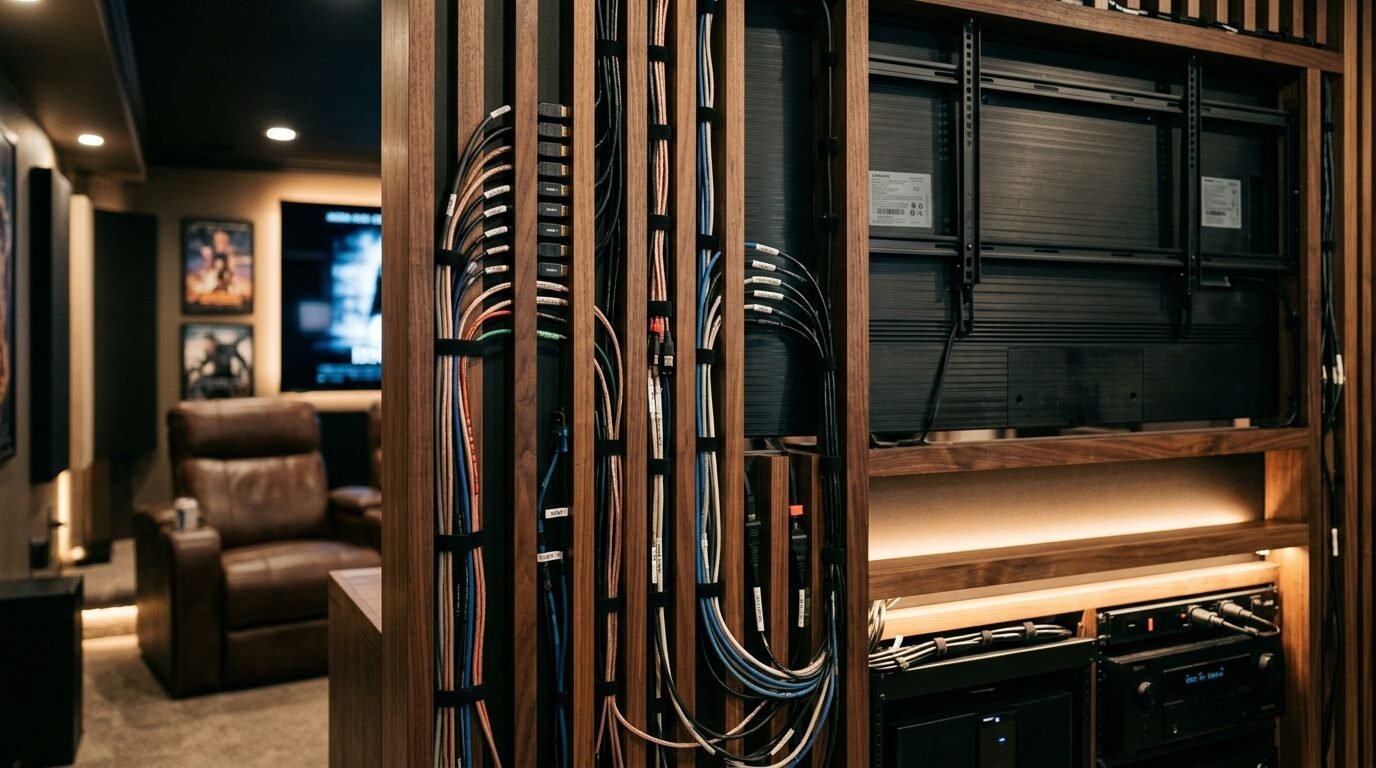
If you are doing a Fluted Tv Wall Design, you have to think about the wires. I like to run the wires behind the slats. You can leave a small gap behind the wood for this. Some people use thin furring strips first. But since we are not using power tools, we can just use thicker beads of glue.
I once saw a great trick for a Wood Slat Tv Wall Design. The owner used Command Large Picture Hanging Strips for the slats around the TV. This allowed her to pop the slats off if she ever needed to add a new cable. It was genius. For the rest of the wall, stick with the construction adhesive for a permanent bond. Make sure you leave enough space for the TV to vent heat. Wood can trap heat if it is too close to the back of the screen.
Choosing the Right Wood for Your Project
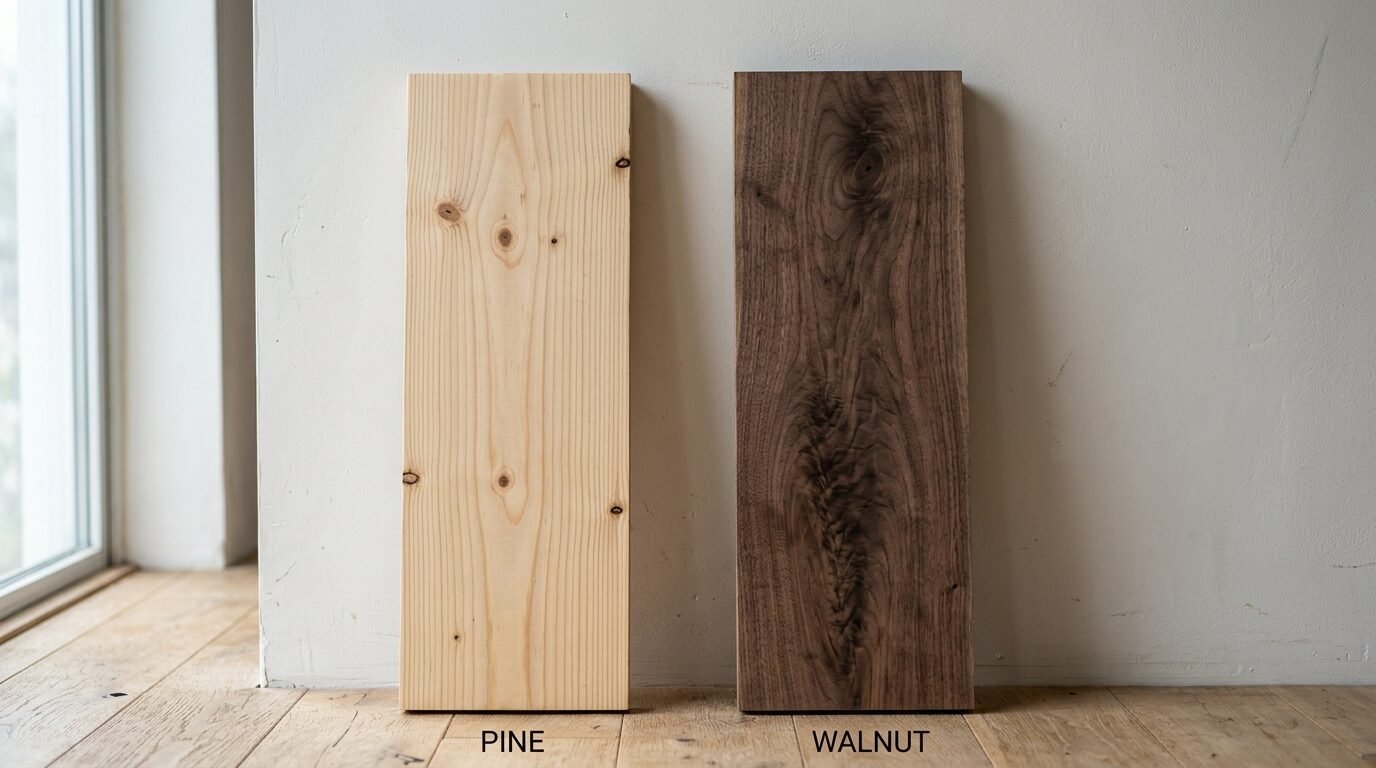
The type of wood matters a lot when you have no power tools. Softwoods like Pine are light and easy to handle. They take stain well. Hardwoods like Oak or Walnut look amazing but are much heavier. If you use heavy wood, you might need more adhesive. I recommend searching for “S4S” lumber. This stands for Surfaced on Four Sides. It means the wood is already smooth and square.
In my experience, Poplar is a great middle ground. It is affordable and has a tight grain. It looks very modern when painted black or dark grey. I have seen many Wooden Panel Wall Ideas using painted Poplar. It creates a bold look for very little money. If you want a natural look, Cedar is also a good choice. It smells great and is naturally resistant to bugs. Just make sure the wood is straight before you buy it. Look down the length of the board like you are aiming a bow. If it bows or twists, leave it at the store.
Rental Friendly Wood Slat Accent Wall Hacks

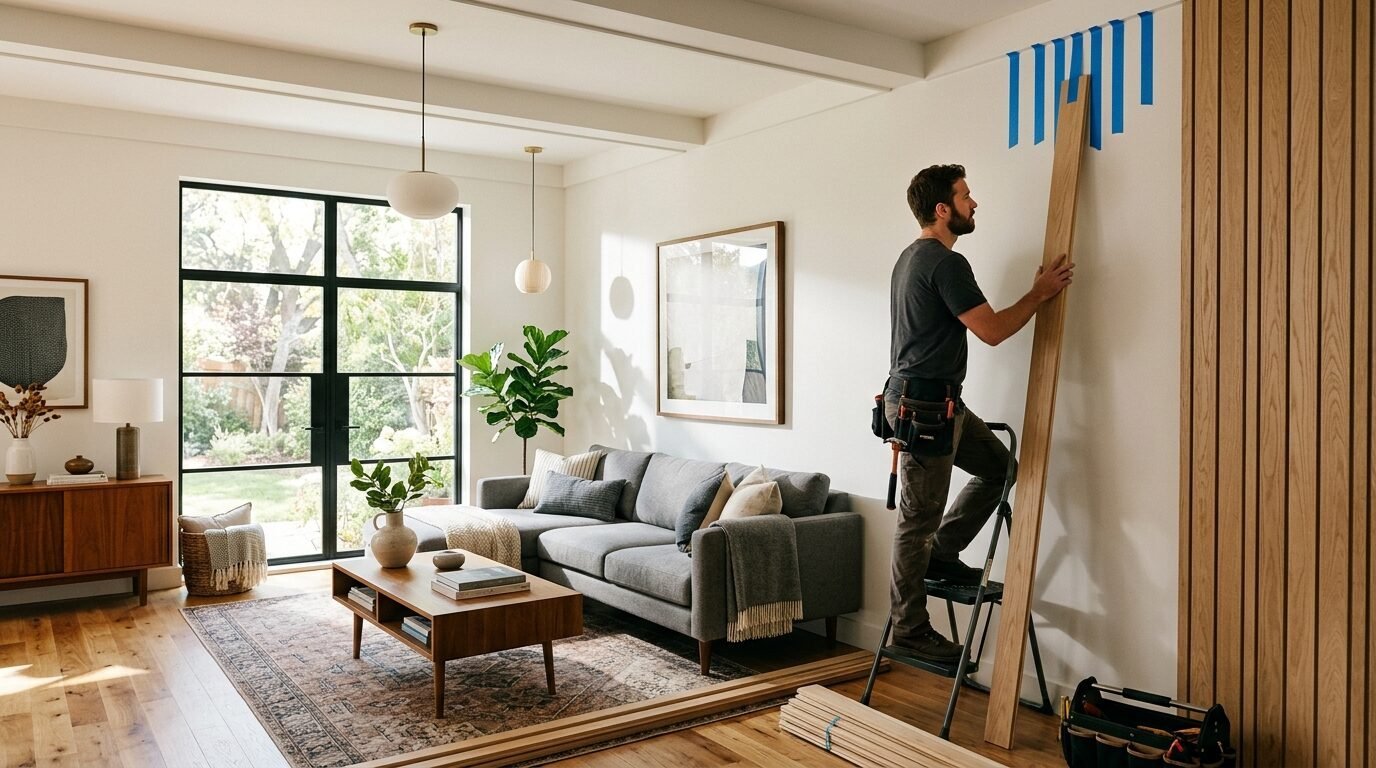
Many people think they cannot have a Modern Wooden Wall in a rental. That is not true. You can use the “leaning” method. Glue your Vertical Wooden Slats to a large piece of thin plywood. Then, lean that plywood against the wall or secure it with just a few small screws. When you move, you take the whole thing with you.
Another way is using heavy duty Command strips. I tried this for a small Modern Wooden Panelling section in a hallway. It held up for two years. You just have to make sure the wood is very light. Balsa wood or thin basswood strips work best for this. You can find these at craft stores like Michaels. They look just like real lumber once you stain them. This keeps your security deposit safe and your home looking beautiful.
5 Common Mistakes I See in Fluted Tv Wall Design
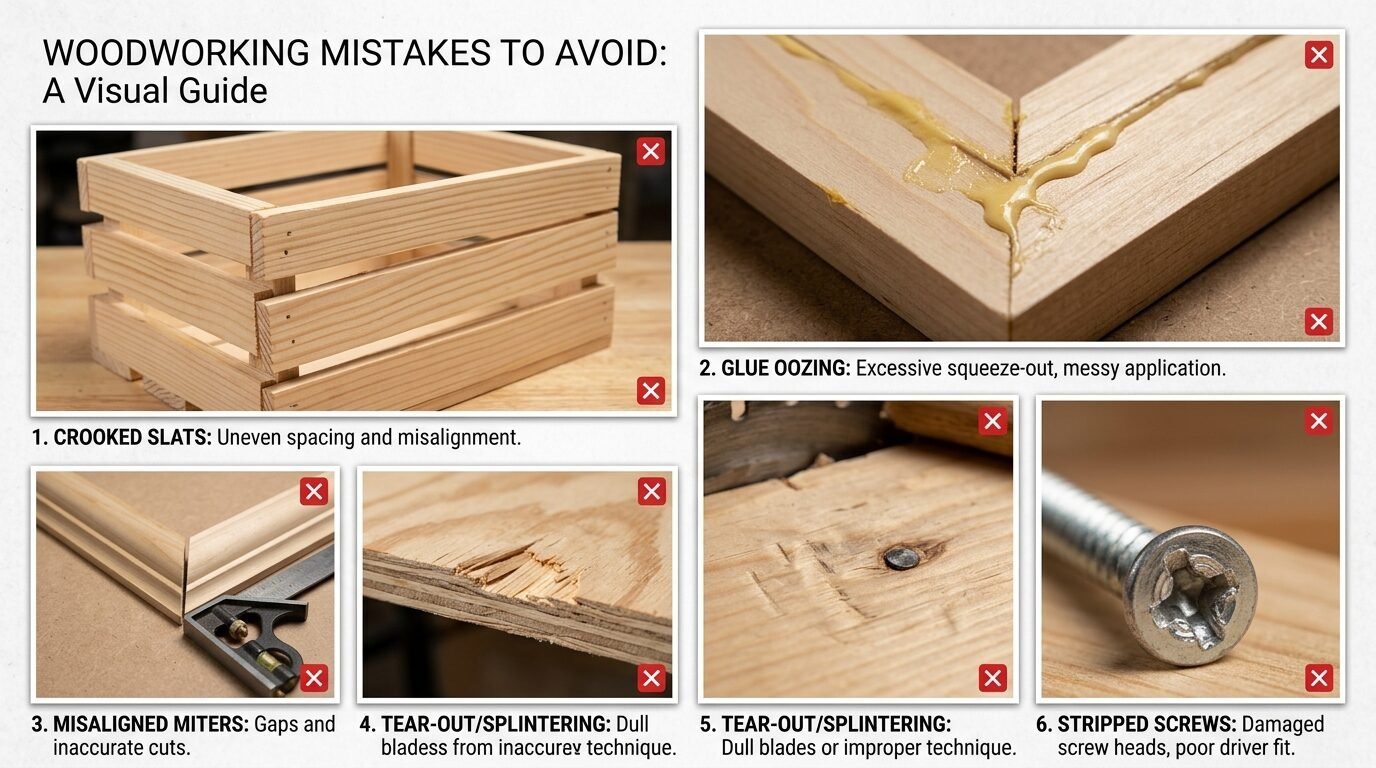
I have seen many DIY attempts at a Wood Slat Tv Wall Design. The biggest mistake is uneven spacing. If one gap is wider than the others, your eye will go straight to it. Always use spacers. The second mistake is not checking for level often enough. Walls are rarely perfectly straight. You must check every third slat with your level.
The third mistake is using too much glue. I once saw a project where the glue dried in thick yellow clumps between the Slated Walls. It looked terrible. Use just enough to hold. The fourth mistake is forgetting about the baseboards. Some people stop the slats right above the baseboard. I think it looks better if you remove the baseboard and run the slats to the floor. Since we have no power tools, you can just butt the slats against the top of the baseboard for a clean look. The fifth mistake is not staining the wall behind the slats. If you have a white wall and dark slats, the white might peek through in a distracting way. Paint the wall a dark color first.
Cost Comparison of DIY Wood Slat Walls

Doing this yourself saves a lot of money. A professional might charge $15 to $25 per square foot for labor alone. For a standard 10×8 wall, that is $1,200 to $2,000 just for the work. If you buy the materials yourself, you can do a Modern Wooden Wall for much less.
Pine slats might cost you $200 for the whole wall. High end Acoustic Timber Wall Panels cost around $150 per panel. You might need four panels for a TV area. That is $600 total. Adhesive and a few hand tools will add another $50. You are looking at a total cost of $250 to $700. This is a huge saving. Plus, you get the pride of saying you did it yourself. I found that spending a bit more on pre-cut wood is still cheaper than buying a saw you will only use once.
Acoustic Timber Wall Panels vs. Individual Wood Slats
You have to decide which look you prefer. Individual Vertical Wooden Slats give you more control. You can pick the exact wood and the exact gap. This is better for a custom Wooden Panel Wall Ideas project. But it takes more time. You have to glue every single piece.
Acoustic Timber Wall Panels are much faster. They also help with sound. If you have a noisy neighbor or a loud TV, these are a great choice. They are made of recycled materials and real wood veneer. They look very high end. I think they are the best choice for a Wood Slat Tv Wall Design. They hide the cords perfectly in the felt gaps. The only downside is they come in set sizes. If your wall is a strange shape, you might have to trim them. You can do this with a sharp utility knife and a lot of patience.
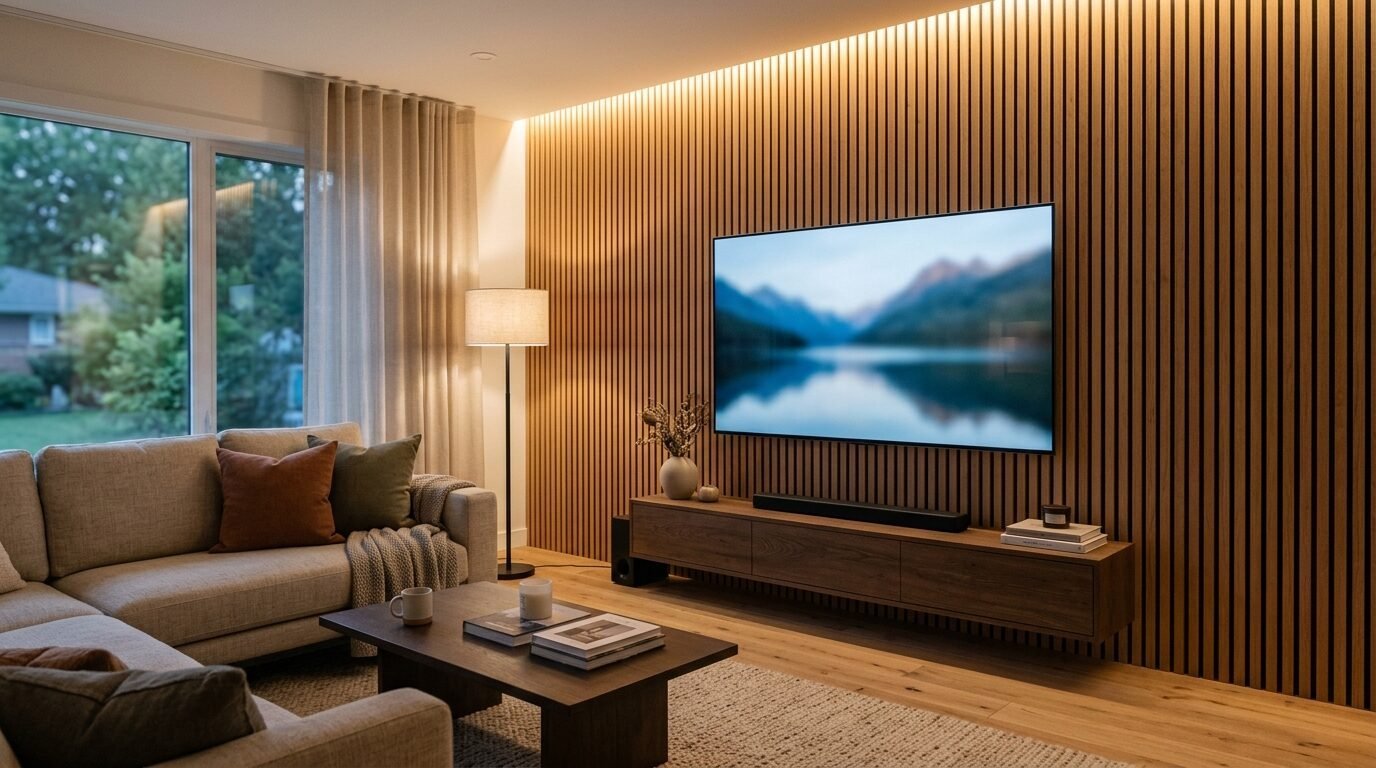
Styling Your New Wood Slat Tv Wall Design
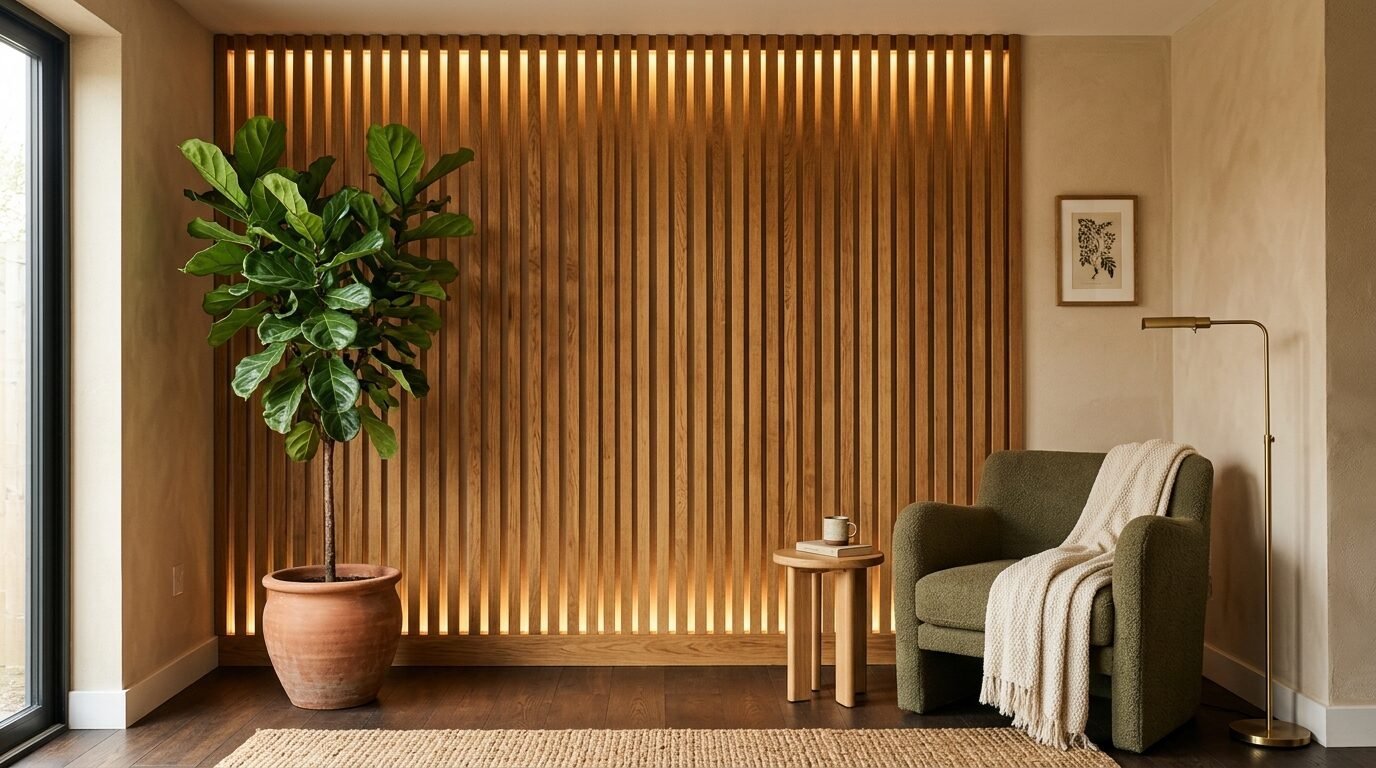
Once the wall is up, you need to style it. I love adding LED strip lights behind the edges of the Vertical Wooden Slats. It creates a soft glow that makes the wall pop at night. You can buy these for $20 on Amazon. Just stick them to the back of the outer slats.
Add some greenery. A tall plant like a Fiddle Leaf Fig looks amazing against a Modern Wooden Wall. The green leaves contrast perfectly with the wood grain. For a Wood Slat Tv Wall Design, keep the decor simple. You do not want to distract from the screen. A low profile media console in a matching wood tone works well. I have seen people add floating shelves between the slats too. Since you are not using power tools, look for shelves that use a simple bracket system.
Maintenance Tips for Interior Wall Wood Paneling
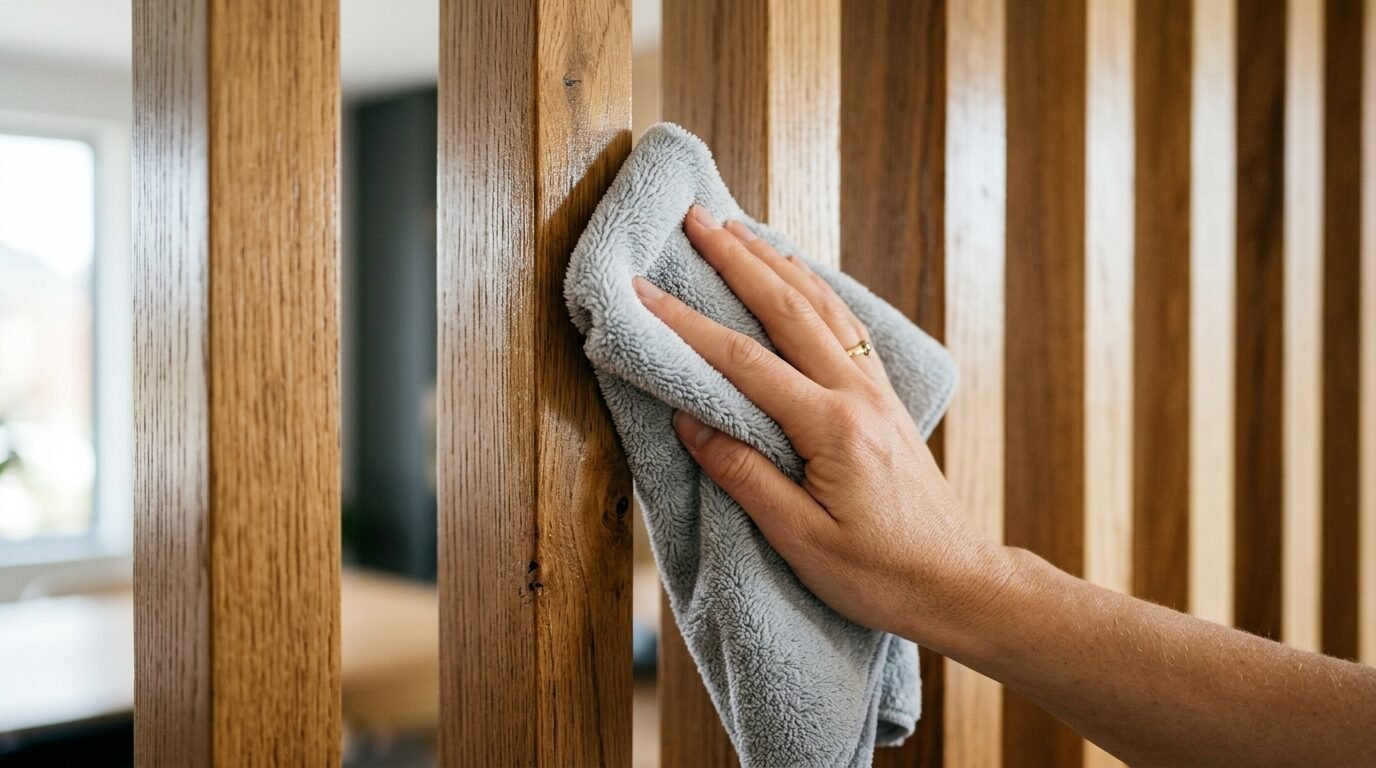
Taking care of your wall is easy. Use a soft brush attachment on your vacuum to get dust out of the gaps. Do this once a month. If you get a mark on the wood, a damp cloth is usually enough. Do not use harsh chemicals. They can ruin the finish of your Modern Wooden Panelling.
If the wood starts to look dry after a few years, apply a little wood oil. I like Howard Feed-N-Wax. You just wipe it on and wipe it off. It keeps the wood looking fresh. In my experience, Interior Wall Wood Paneling stays looking great for a long time if you keep it out of direct sunlight. If your wall gets a lot of sun, consider using a UV-resistant finish. This prevents the wood from fading or turning yellow.
Frequently Asked Questions
Can I install wood slats over wallpaper?
It is not a good idea to glue heavy wood over wallpaper. The weight of the Vertical Wooden Slats might pull the paper off the wall. I suggest removing the wallpaper first. If you cannot remove it, you might need to use small finish nails. Since we are avoiding power tools, you can use a small hammer and thin brad nails. This is more work but much safer.
How do I hide the wires in a TV wall?
The best way is to use Acoustic Timber Wall Panels. The felt backing is thick enough to hide thin wires. If you use individual slats, you can glue them over a flat cord cover. Paint the cord cover the same color as the wall first. This makes it invisible in the gaps. I have seen this work perfectly for many Wood Slat Tv Wall Design projects.
What glue is best for wood to drywall?
I always use Gorilla Heavy Duty Construction Adhesive. It has a very strong initial grab. This means the wood stays where you put it. Liquid Nails is another good brand. Make sure you get the version that is safe for interior use. It should say “Low VOC” on the tube. This prevents strong smells in your home.
Can I do this on a curved wall?
Yes, but you must use thin slats. Thin Vertical Wooden Slats can bend slightly to follow a curve. You will need to use more tape and perhaps some heavy objects to hold the wood against the curve while the glue dries. I saw a beautiful curved wall in a hotel that used very thin oak strips. It looked incredible.
How do I finish the edges of the wall?
You can buy matching wood trim to cover the ends of the slats. But for a Modern Wooden Wall, I think a raw edge looks better. Just make sure the ends of your slats are sanded smooth. You can also paint the side of the last slat to match the wall. This makes it blend in.
Is this project okay for bathrooms?
You can do it, but you must seal the wood well. Use a water-resistant finish like Spar Urethane. Bathrooms get very humid. Without a good seal, your Modern Wooden Panelling might warp or grow mold. I suggest using teak or cedar wood for bathrooms as they handle moisture better.
Conclusion
Creating a Modern Wooden Wall does not have to be scary. You do not need a garage full of tools to get the Pinterest home of your dreams. By choosing pre-cut wood and using strong adhesives, you can change your space in a single weekend. I have seen people with zero DIY experience finish a Wood Slat Tv Wall Design and feel like experts. It is about taking your time and measuring twice.
Start small if you are nervous. Do a small section in a hallway or a nook. Once you see how easy it is to work with Vertical Wooden Slats, you will want to do every room. The warmth and texture of Interior Wall Wood Paneling make a house feel like a home. Are you ready to try a tool-free accent wall this weekend?

Anya Castellan is the Founder and Editor-in-Chief of Home Wall Trends. An art history graduate of the Rhode Island School of Design with twelve years of experience writing for leading American design publications, she specializes in composition, gallery wall theory, and the quiet architecture of domestic space. A former contributing editor at Architectural Digest and guest lecturer at Parsons School of Design, Anya personally reads and signs off on every piece before it is published.
