Your walls look bare. You want that warm country feel. You bought a house in Texas last year. The living room feels cold. You spent 500 dollars on paint. It still looks empty. I see this all the time. People buy cheap decor. It breaks in two months. You need something strong. Real wood changes everything. It brings life to a room. I have hung shelves for ten years. I ruined my first drywall. I learned the hard way. Now I know exactly what works. You will learn my exact steps today. I will show you the exact tools. I will save you time and money.
You will get a clear plan today. You will learn which wood lasts longest. I will share three real house projects. You will see exact prices from this month. I cover everything from oak to pine. You will find out about hidden costs. I will show you how to drill safely. You will have beautiful walls in one weekend. This guide covers living rooms and kitchens. I also cover bedroom styling. I skip the fluffy design talk. I give you hard facts. You will buy the right brackets the first time. Your home will look like a magazine. Let us start building your dream space.
Why Real Wood Beats Fake Materials
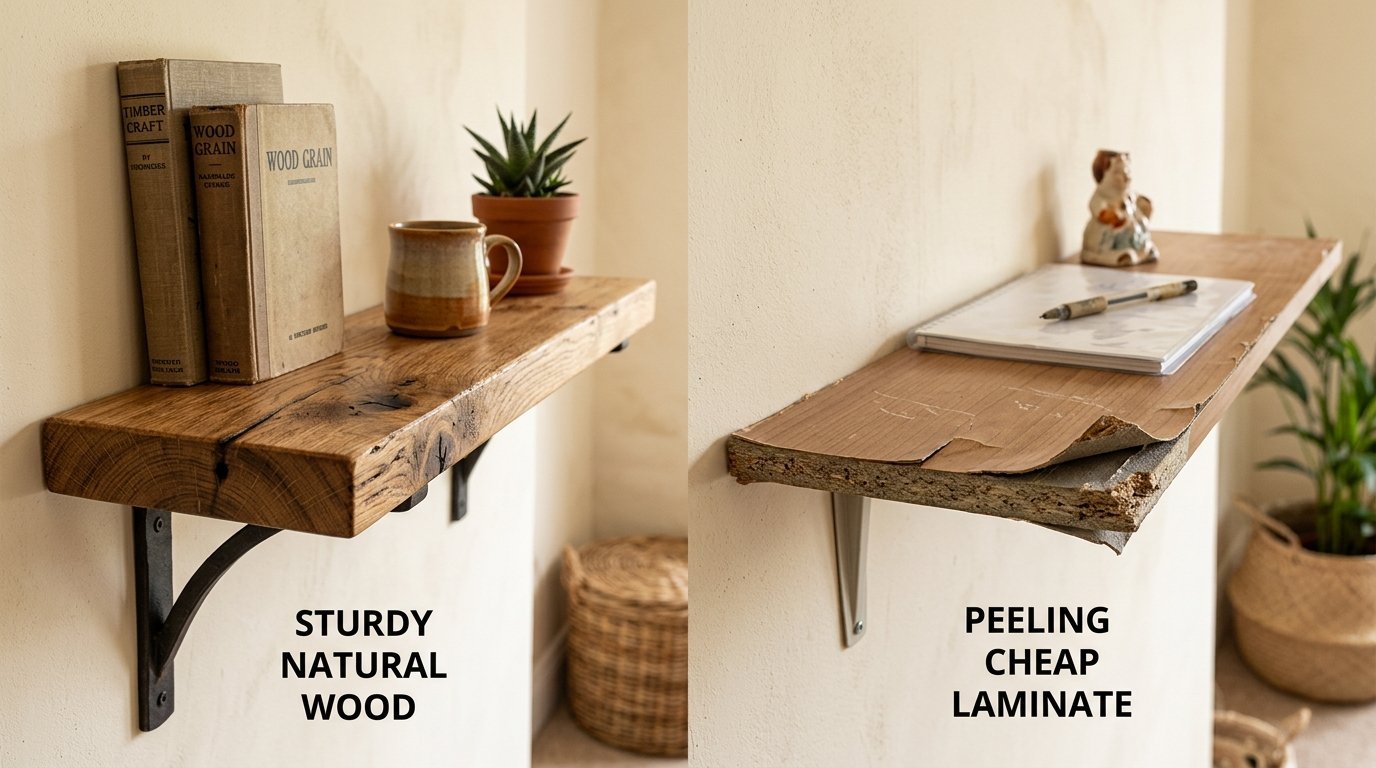
Fake wood peels fast. Water ruins cheap shelves in weeks. Real wood lasts for decades. It holds heavy plates with ease. The texture makes your room feel warm. You can smell the real pine. Your guests will notice the difference. I installed fake shelves once. They bowed under a few books. I had to rip them out. That mistake cost me 200 dollars. I only use solid boards now. A Modern Farmhouse Living Room needs real wood. The grain tells a story. Every knot adds character to the wall. You cannot fake that look.
I visited a client last Tuesday. She wanted a Country Kitchen feel. She had plastic shelves. They looked terrible. I took them down immediately. We went to the lumber yard. We bought rough cut cedar. The room changed completely in one hour. Real wood brings nature inside. It grounds the space. You feel calm when you see it.
The Top Wood Types For Farmhouse Style
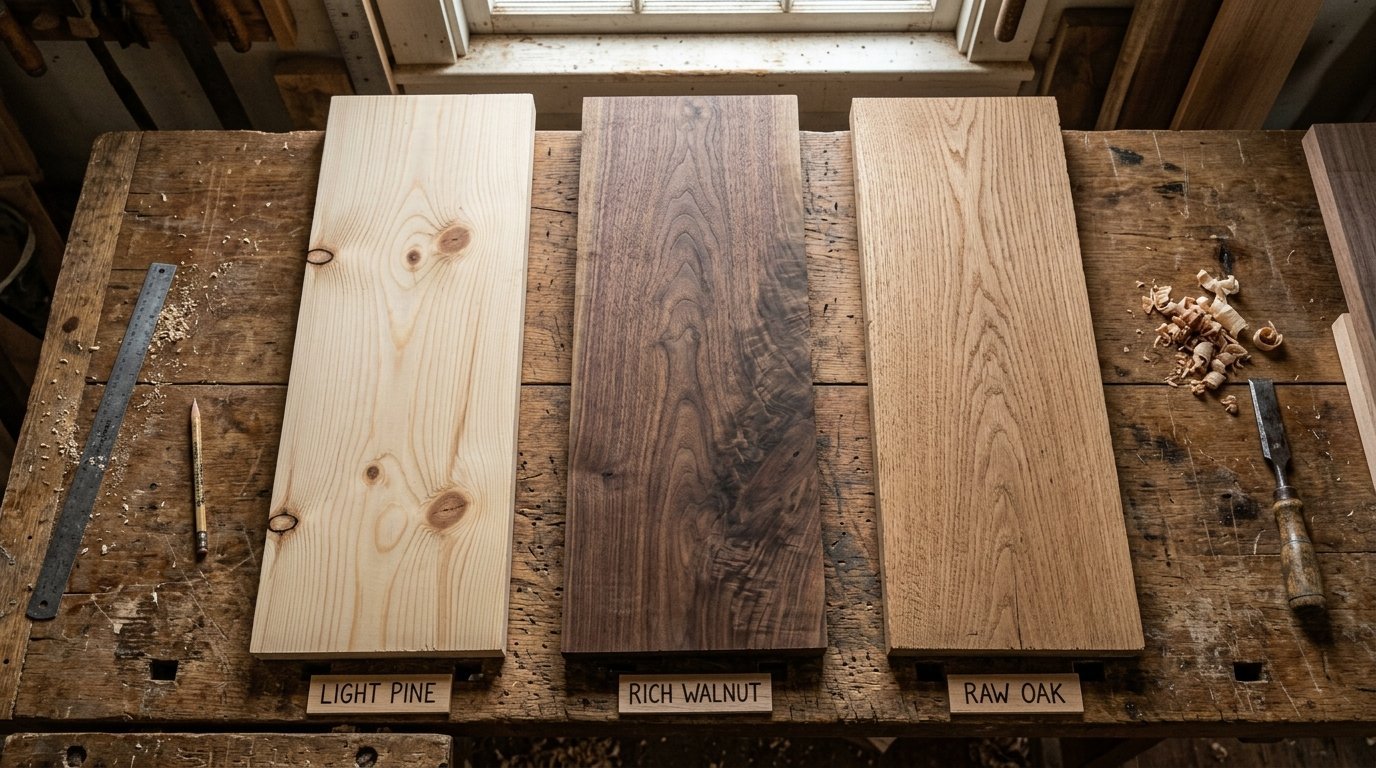
You have many choices at the store. Oak is very hard and heavy. Pine is soft and easy to cut. Walnut looks very rich and dark. Cedar smells great and stops bugs. I love working with white oak. It takes stain very well. You can make it look old.
Pine is the cheapest choice. You can buy an eight foot board for 15 dollars. It dents easily. Some people like those dents. The dents make it look old. I used pine in a Texas home last year. We beat the wood with chains. We made it look 100 years old. The owner loved it.
Walnut costs much more. A small board can cost 80 dollars. I only use walnut for special spots. It looks very classy. You do not need to stain walnut. Clear oil makes it shine.
Picking The Right Tools For The Job
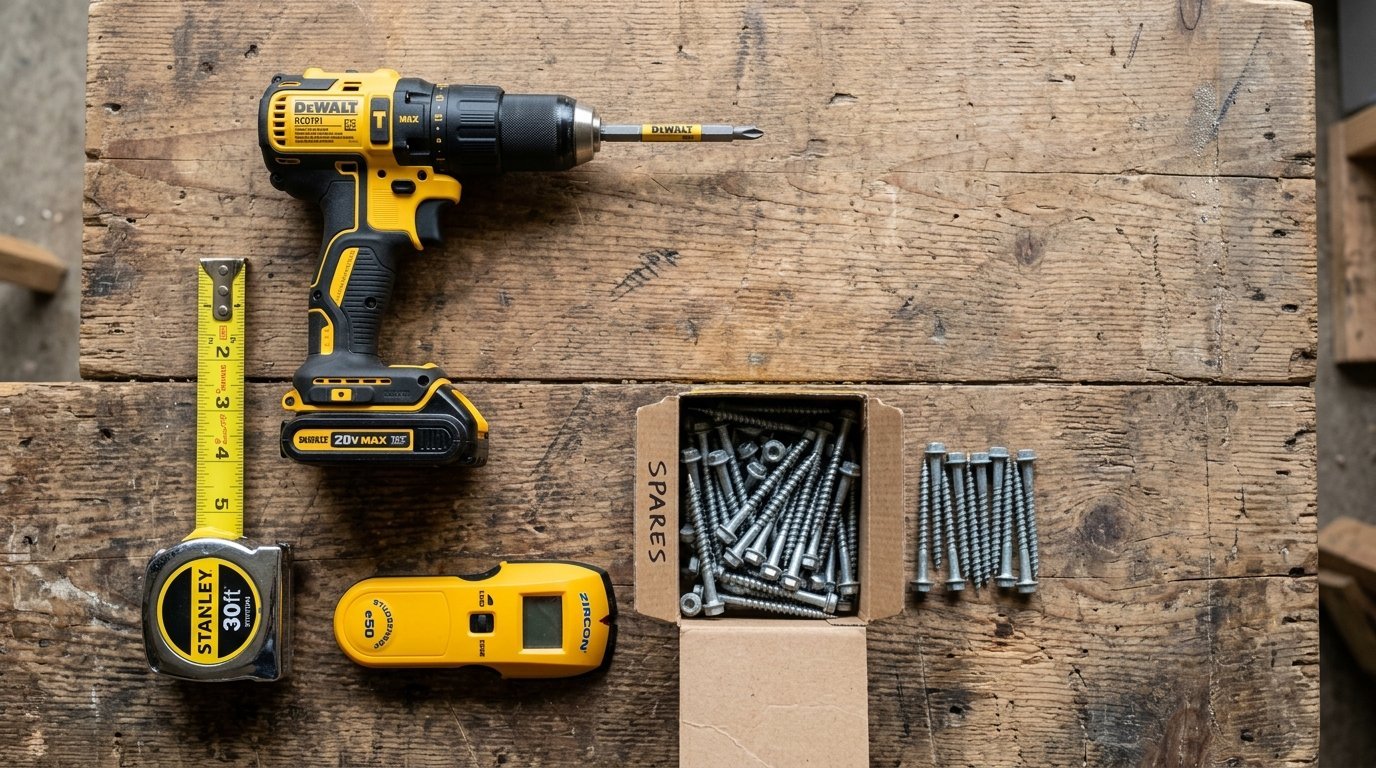
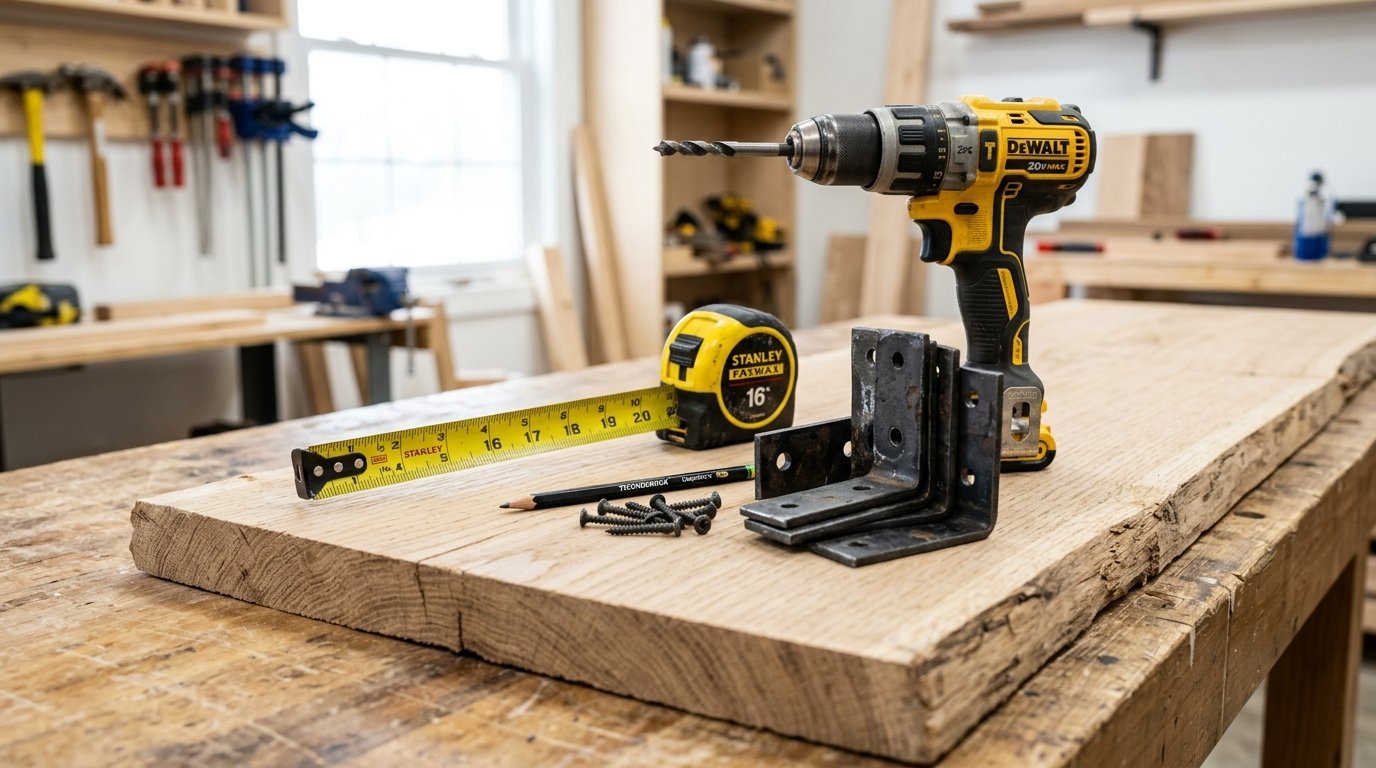
You cannot guess with shelves. You need real tools. A Dewalt drill is my favorite. It has plenty of power. You need a Franklin stud finder. Cheap stud finders lie to you. The Franklin shows the exact wood edge. You need a long level. A Ryobi two foot level works great.
I also use a Kreg jig sometimes. It hides screws perfectly. You need good screws. Never use the screws from the shelf box. They always snap in half. I buy Spax screws. They bite into the wood fast. They never break.
You will need a tape measure. Buy a Stanley FatMax. It stays straight when you pull it out. A good pencil is also smart. Buy real carpenter pencils. They do not roll off the table.
Case Study One The Kitchen Makeover
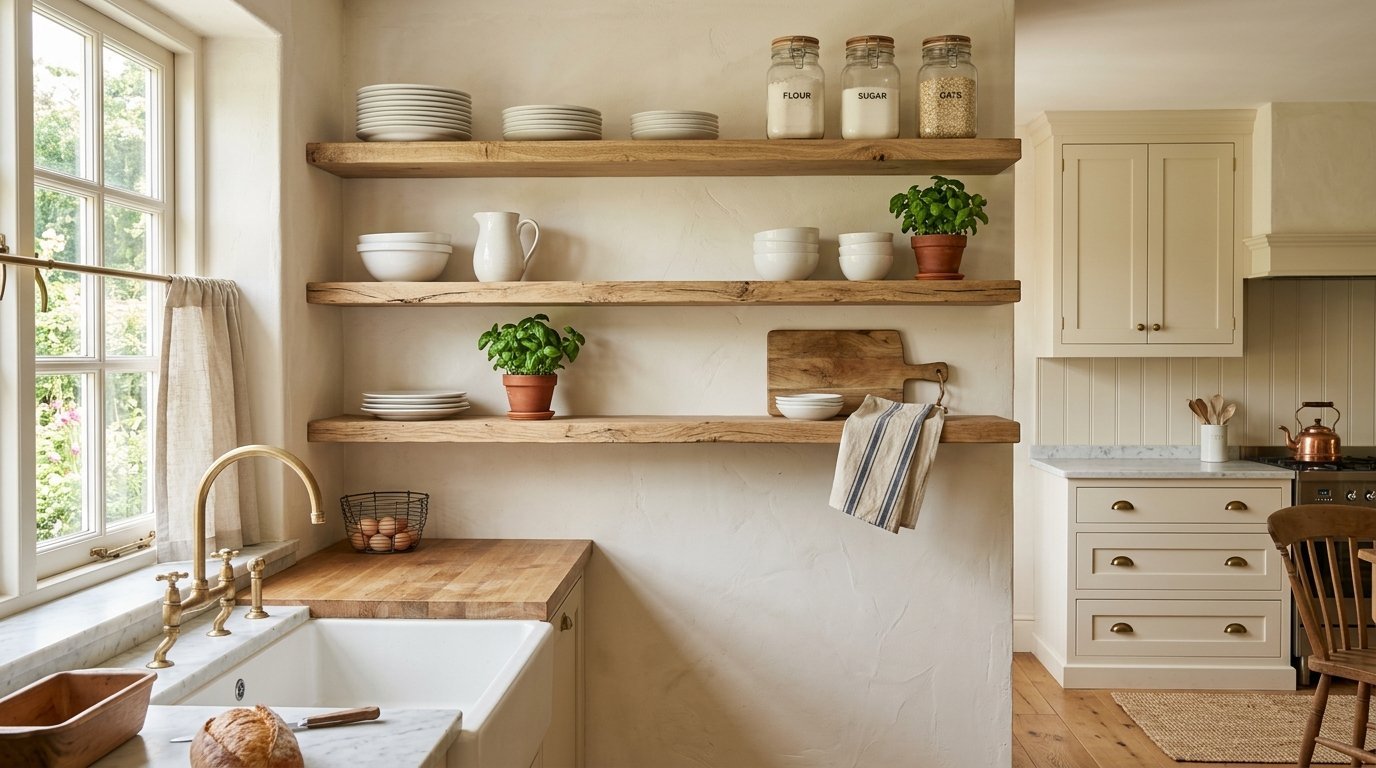
I helped Sarah in May 2023. She lives in Ohio. Her kitchen had zero storage. She wanted a Country Kitchen look. Her budget was 400 dollars. We bought three white oak boards. We bought heavy iron brackets from Amazon. The brackets cost 80 dollars total.
We spent three hours on Saturday. We found the studs fast. We mounted the brackets carefully. We slid the oak boards into place. The change was huge. She put her heavy white plates on them. She added glass jars with flour.
She saved 600 dollars doing it herself. A pro would charge 1000 dollars. Her friends thought she hired a designer. The oak holds the weight easily. The iron brackets look very rustic. This is true Dream House Decor.
How To Style Shelves In A Rustic Bedroom
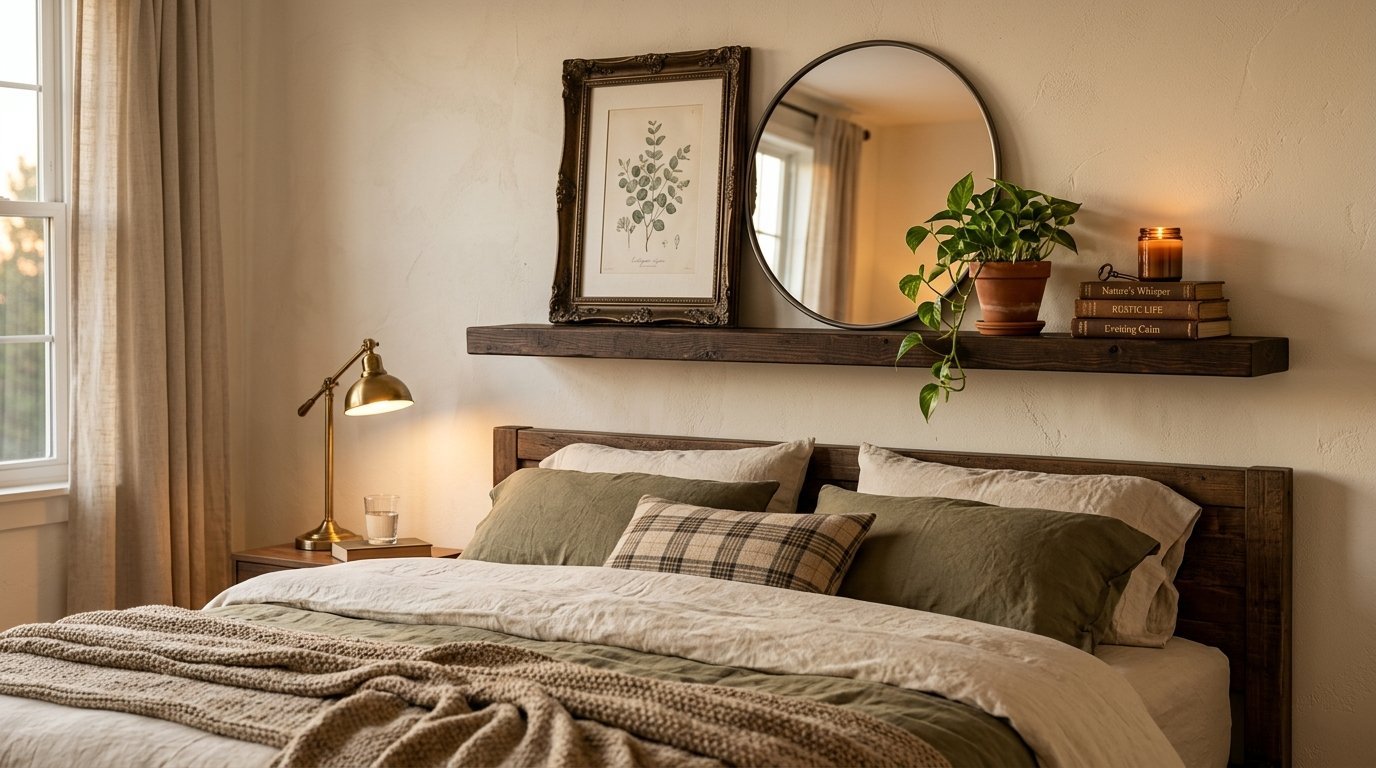
A bedroom needs a soft touch. You want a Classy Bedroom feel. I focus on Room Decor Bedroom Diy projects a lot. You can create Aesthetic Rooms easily. Start with a solid wood shelf. Place it above the bed or dresser.
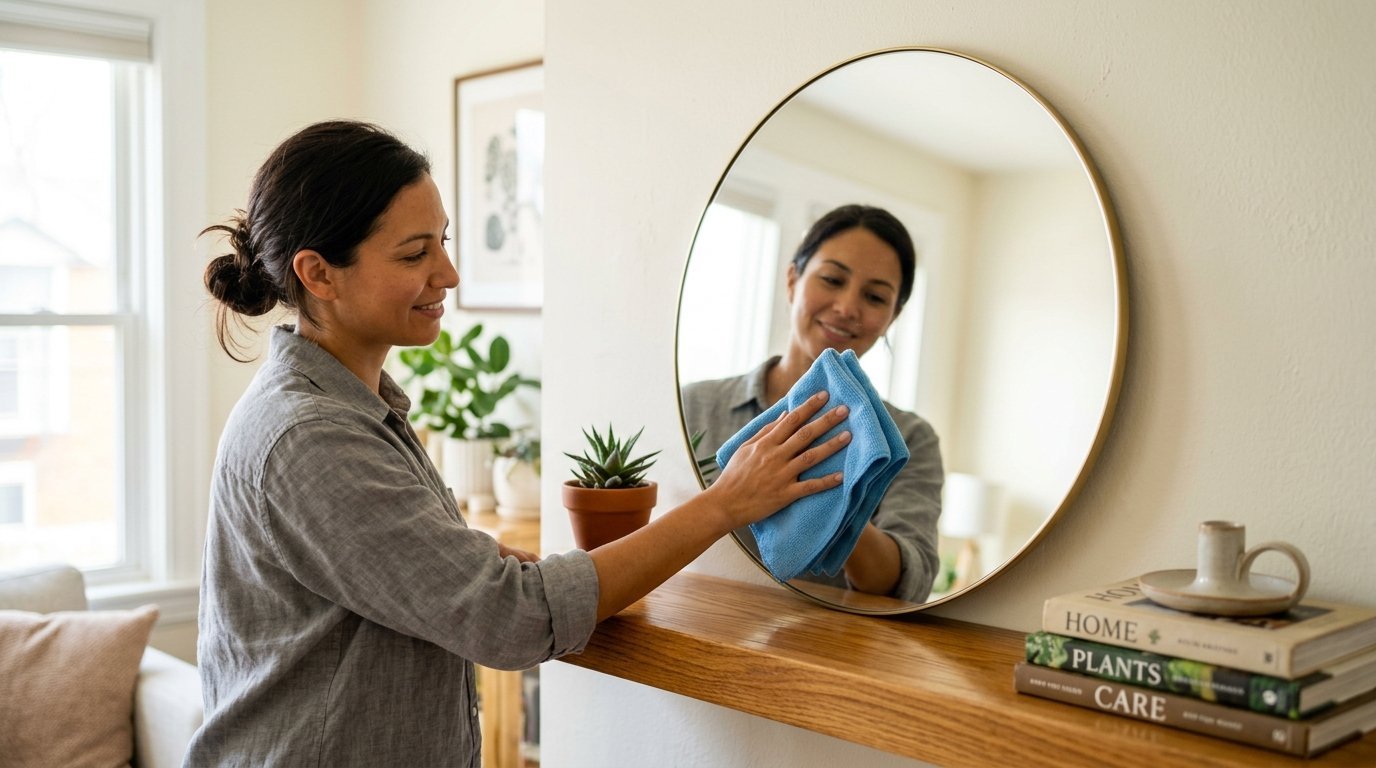
You must keep the styling simple. I love using ornate frames on shelves. I place round glass mirrors on them too. You must keep them very clean. Dust ruins the look. I share real steps to care for round glass. I also clean ornate frames safely.
I use ninety percent isopropyl alcohol to melt hairspray drops. This keeps the glass perfectly clear. You do this without damaging the delicate silver backing. My steps save you time. They preserve your high end styling pieces for decades. I recommend the Norwex cloth. The 3M microfiber line is also great.
This guide covers top products. Sprayway and Method work perfectly. Invisible Glass is another favorite. Real feedback shows these work best. Your Rustic Bedroom will shine. The mirrors reflect light beautifully. The wood adds the warmth.
Case Study Two The Empty Living Room Wall
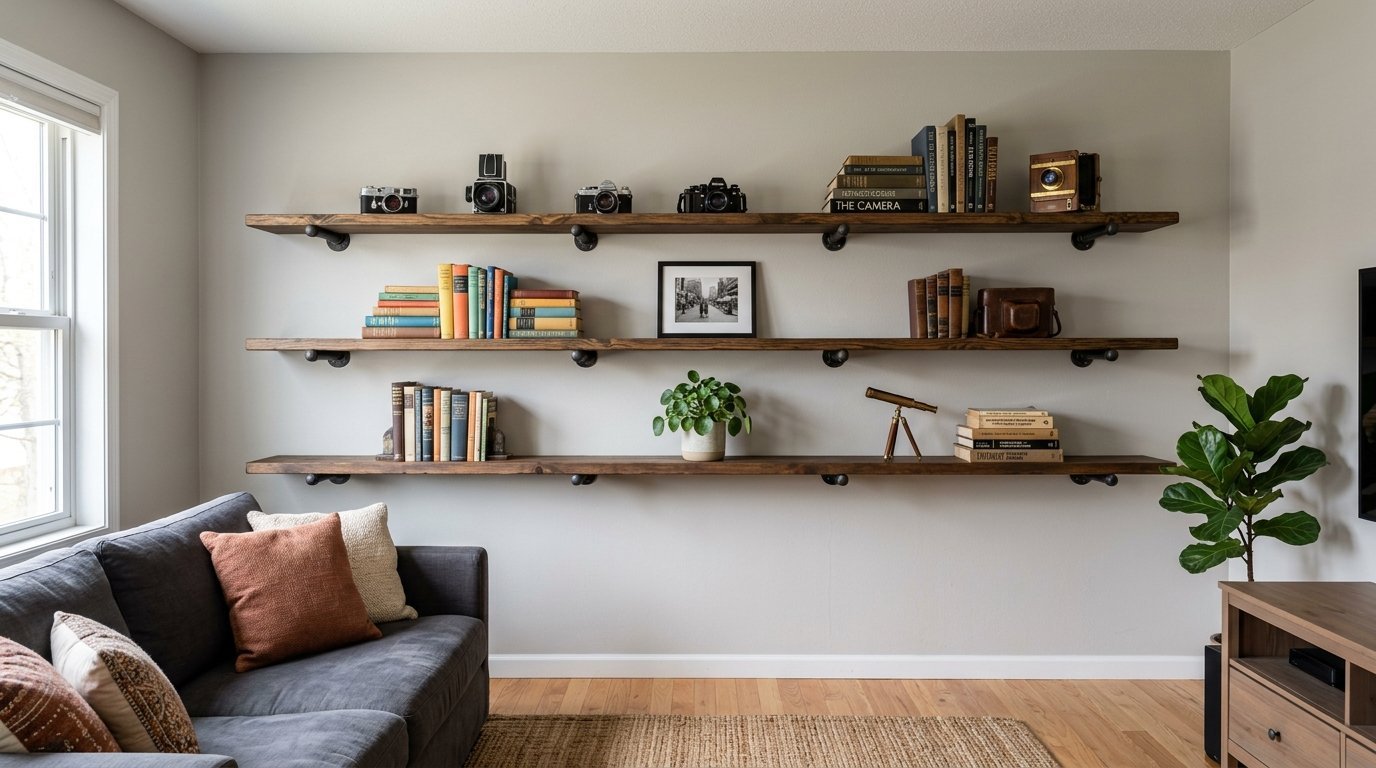
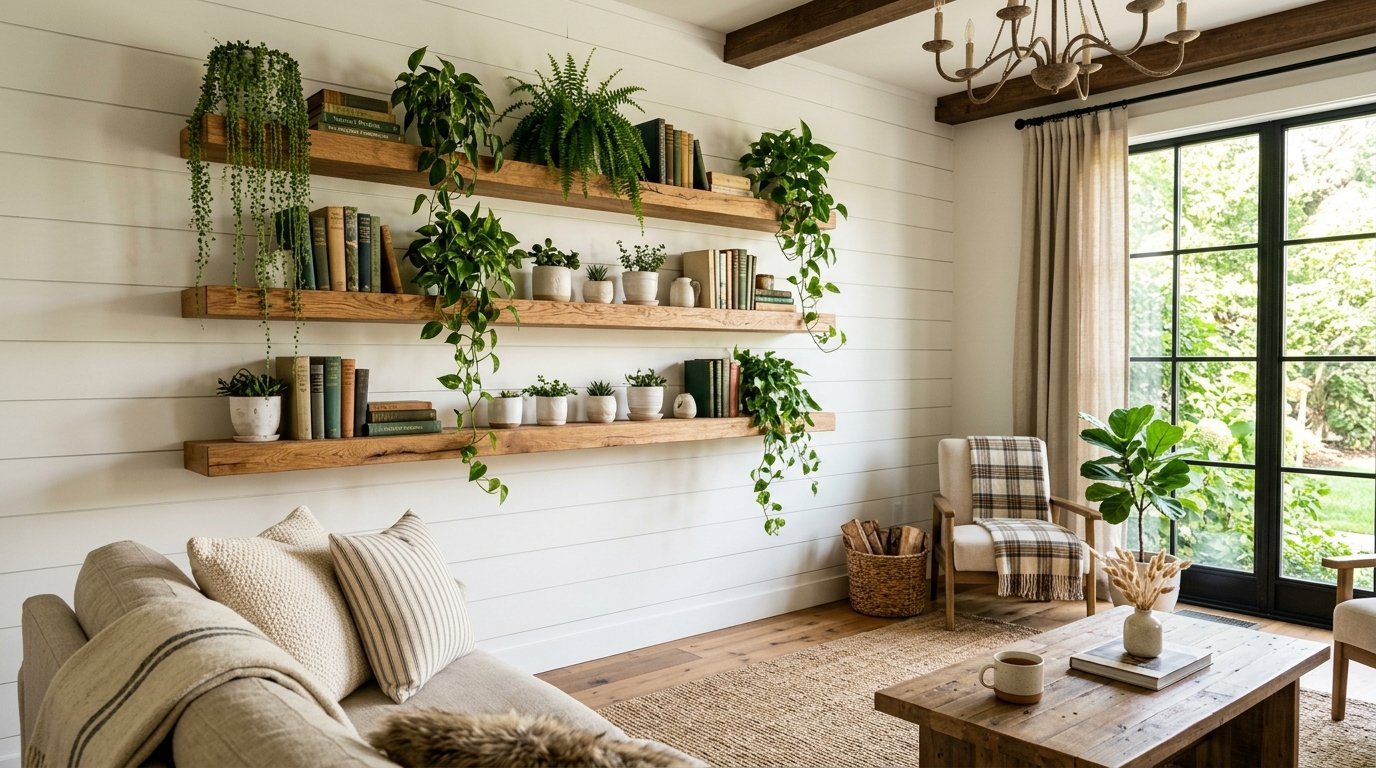
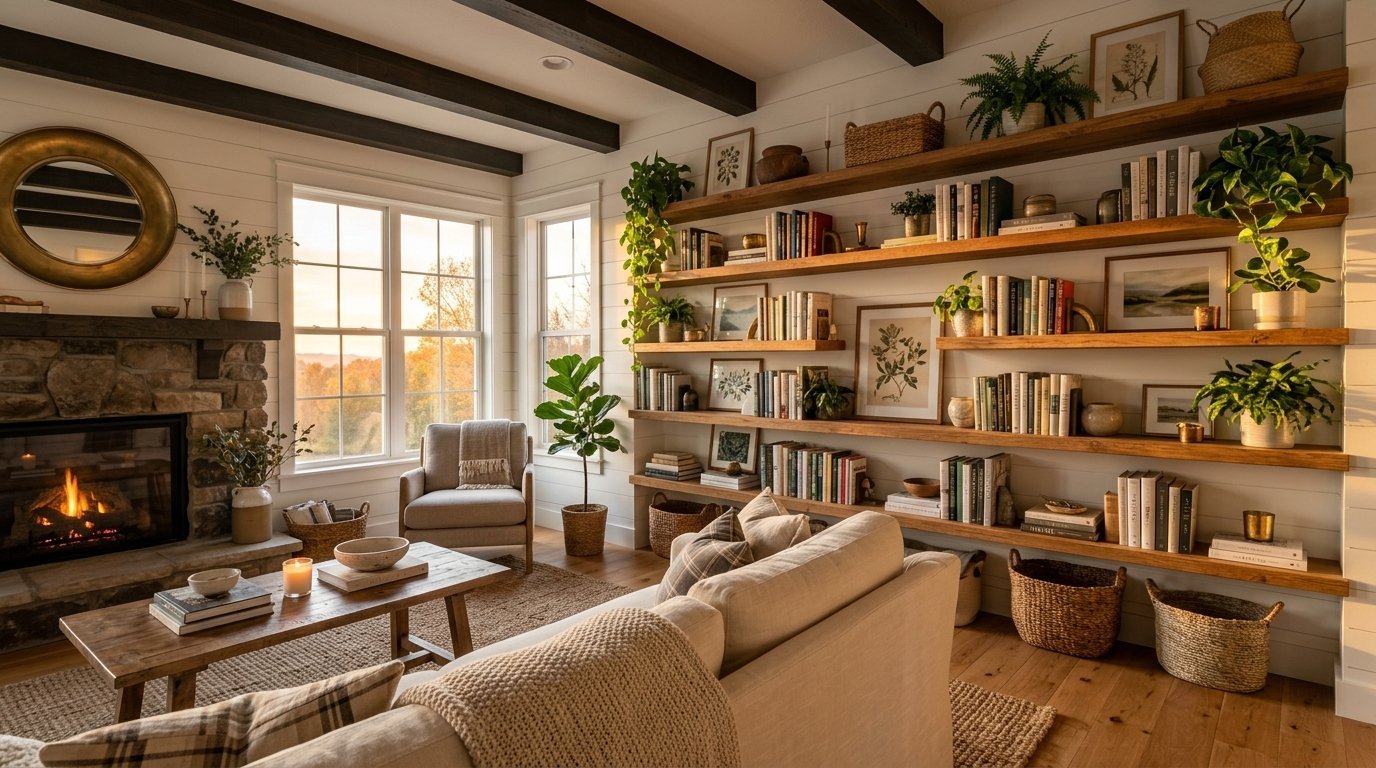
Mark had a huge blank wall. He lives in a new house. The drywall looked boring. He wanted a Modern Farmhouse Living Room. He called me for help. We decided on long floating shelves. We chose dark stained pine.
We bought steel pipes for brackets. This gives an industrial farmhouse look. We spent 150 dollars on materials. We took our time measuring. Long shelves must be perfectly level. A tilted shelf ruins the whole room.
We drilled into four studs per shelf. These Living Room Shelves hold massive books. He put his old cameras on them. He added trailing green plants. The wall became the focal point. It took four hours of work. He loves sitting in that room now. It feels like a real home.
Installing Shelves In A Rustic Bathroom
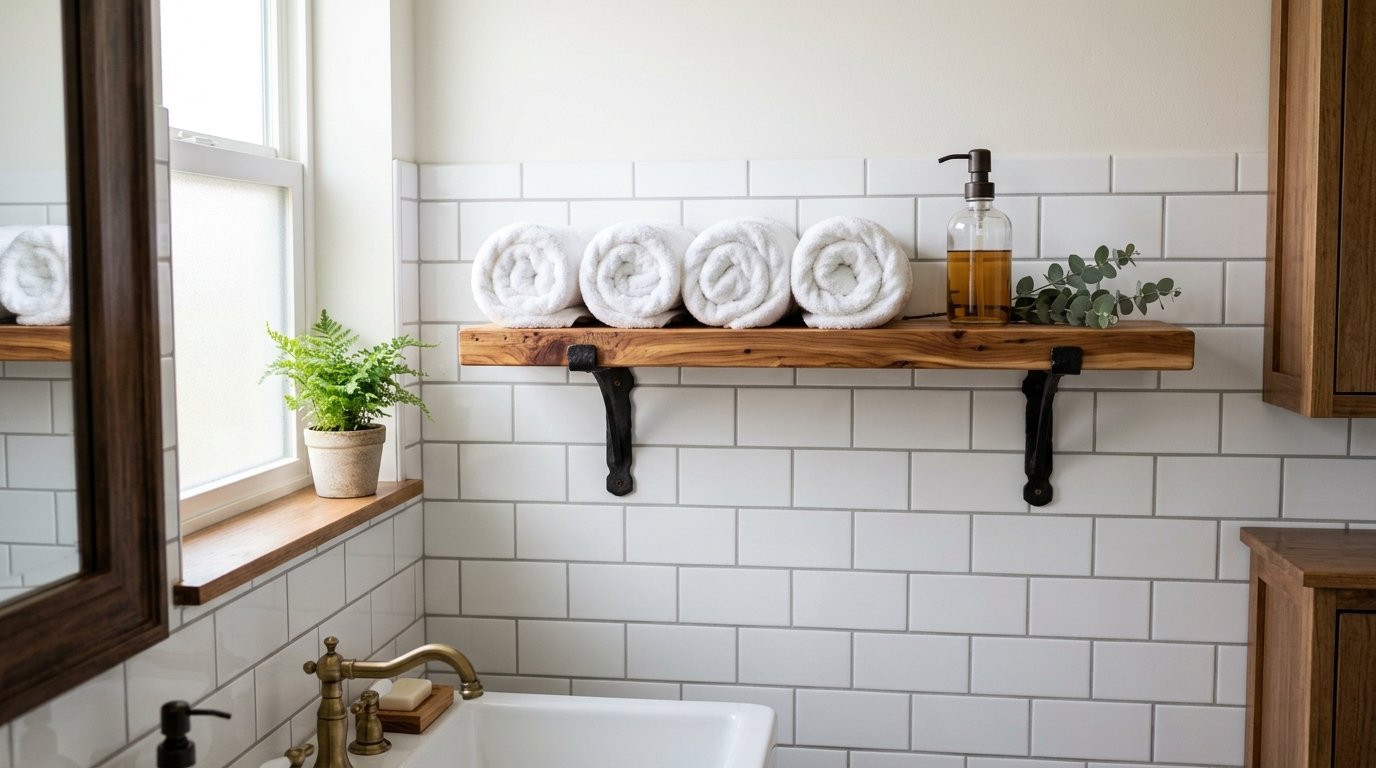
Bathrooms have lots of water in the air. Wood and water fight. You must protect the wood. I always use marine grade sealer here. It stops the wood from warping. A Rustic Bathroom looks amazing with wood. It warms up the cold tile.
You usually install over tile. Drilling tile is scary. You need a diamond drill bit. You must spray water on the bit. This keeps the bit cool. Go very slow. Never rush drilling tile. It will crack.
I put a shelf above a toilet last month. We used sealed cedar. Cedar handles water very well. We put rolled white towels on it. We added a small glass jar with soap. It looks like a spa now. It costs very little money.
Common Mistakes You Must Avoid
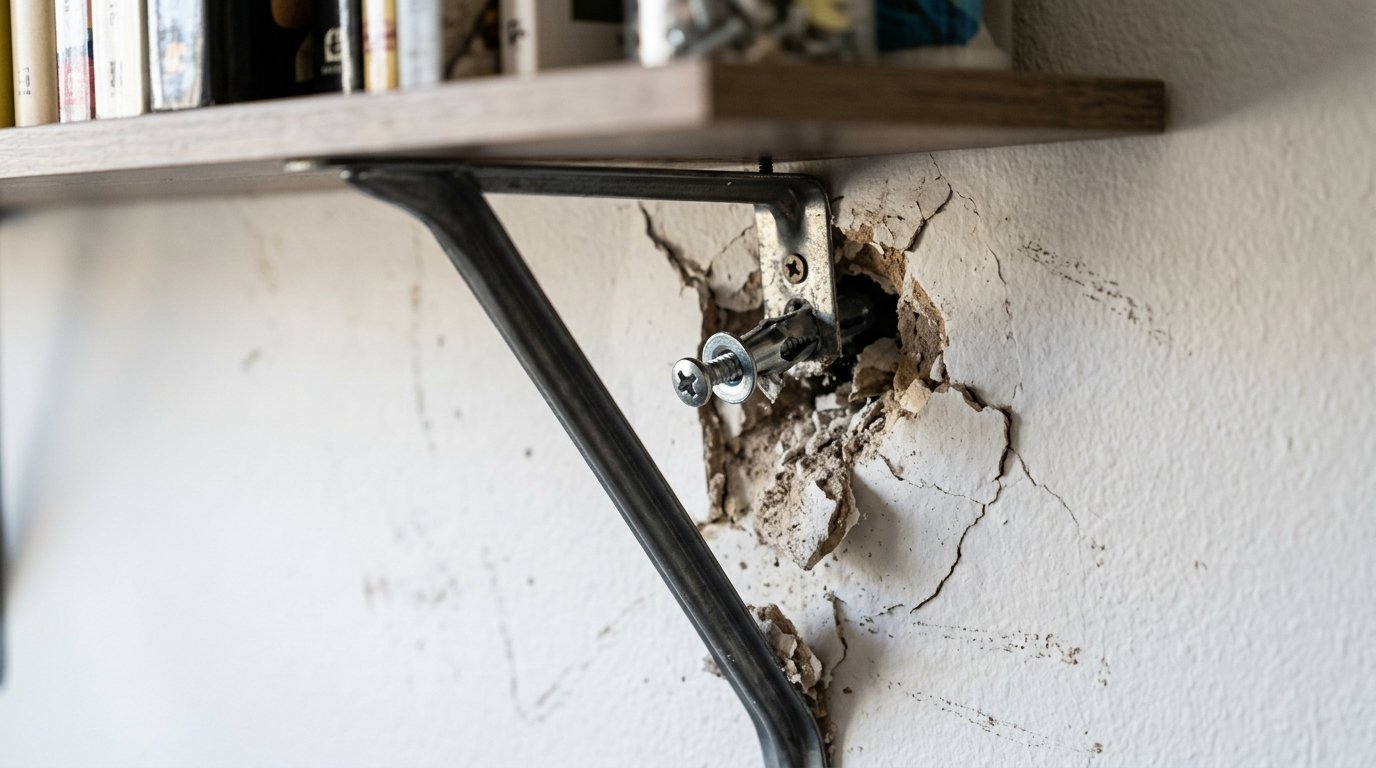
People make the same mistakes often. The biggest mistake is missing the stud. Drywall anchors hold very little weight. A heavy wood shelf will rip them out. Your shelf will fall. Your things will break. You will have giant holes in the wall.
Always hit the wood stud. Use a good stud finder. Another mistake is buying warped wood. Look down the board at the store. Many boards twist like a snake. Leave those at the store. Only buy perfectly straight wood.
People also space brackets wrong. Brackets should sit 32 inches apart. This matches the studs in your wall. If you put them too far apart the wood sags. Sagging wood looks very cheap. Take your time. Plan the bracket spots before you drill.
Cost Breakdown For Your Project
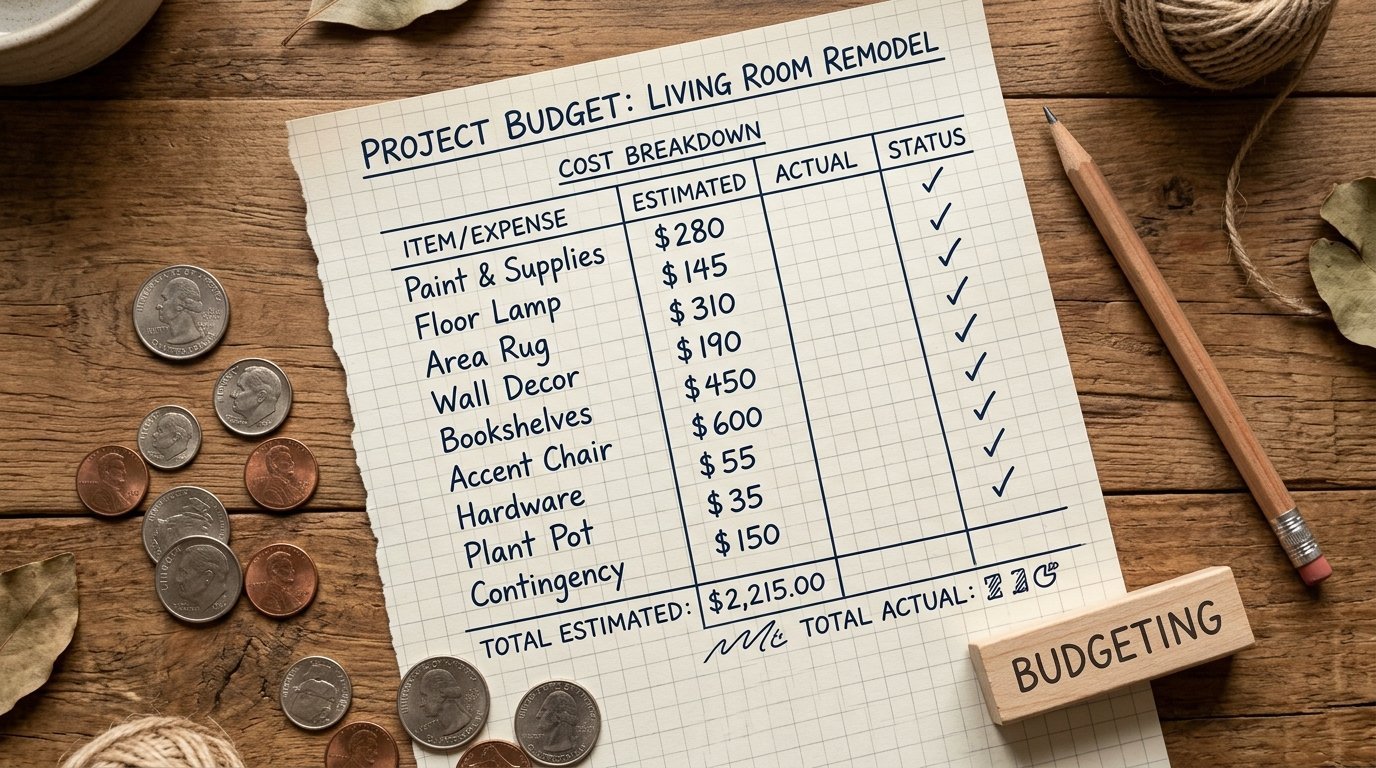
You need to know the real numbers. I track all my project costs. Prices change but these are close right now.
Brackets cost extra. Cheap brackets cost five dollars each. Heavy duty brackets cost 20 dollars each. Stain costs ten dollars a can. Screws cost eight dollars a box. A total project usually costs 100 to 200 dollars. You save a lot by doing it yourself.
Case Study Three The Home Office
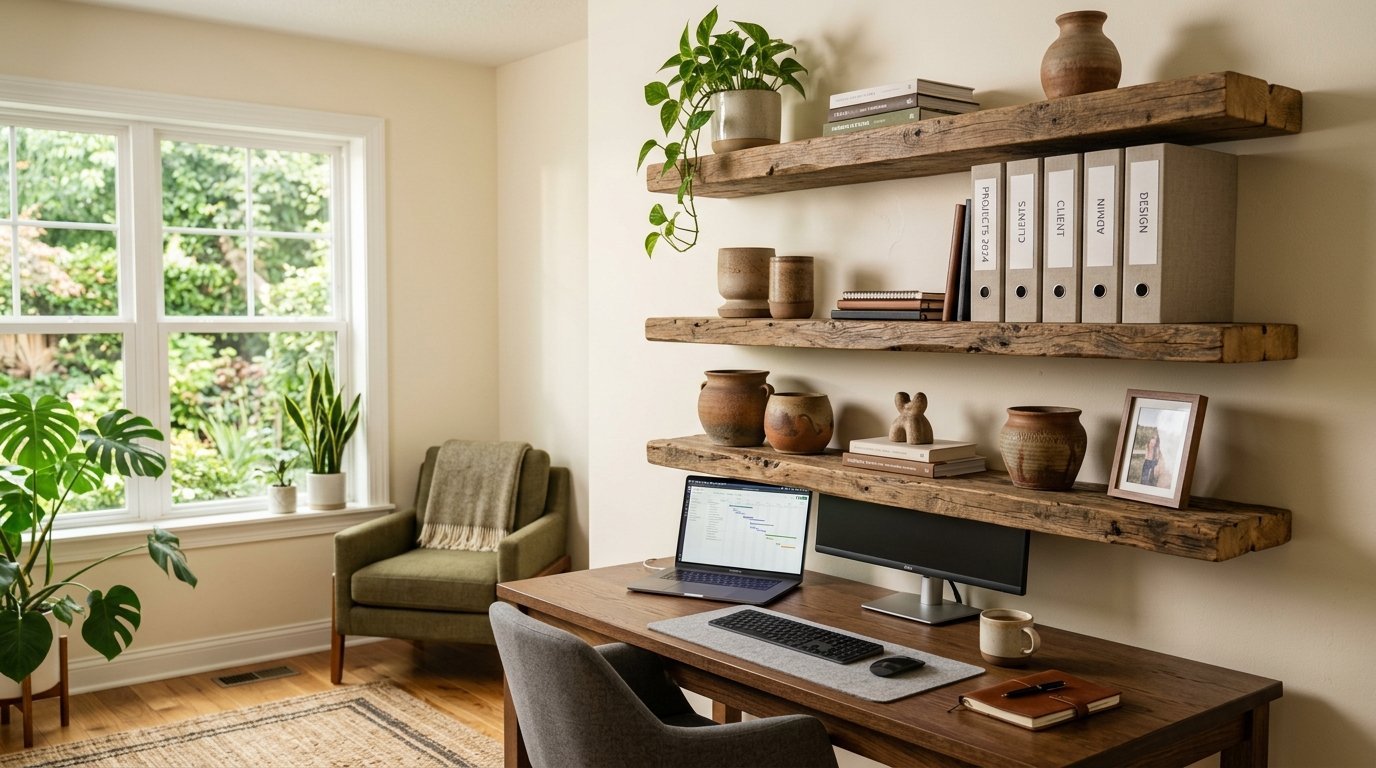
Jen works from home now. Her office felt cold. She wanted that Cosas De Casa vibe. She likes the Spanish farmhouse look. We used thick reclaimed wood. The wood came from an old barn. It had nail holes and saw marks.
We mounted three shelves above her desk. We used hidden brackets. We drilled deep holes into the back of the wood. The shelves slide onto steel rods. They look like they float in the air.
She puts her client binders on them. She displays small clay pots. The room feels very professional now. It also feels cozy. The reclaimed wood cost 120 dollars. The hidden brackets cost 60 dollars. The setup took five hours. It requires exact math. Floating shelves are hard but they look the best.
Choosing The Right Stain Color
Color changes the whole room. Dark walnut stain looks very classic. It fits older homes perfectly. Gray stain looks very modern. It fits beach houses or bright rooms. Clear coat just shows the raw wood.
I test colors on scrap wood first. Wood takes stain differently. Pine usually looks blotchy. You must use a wood conditioner on pine first. This makes the stain soak in evenly. Oak takes stain beautifully. You wipe it on and wipe it off.
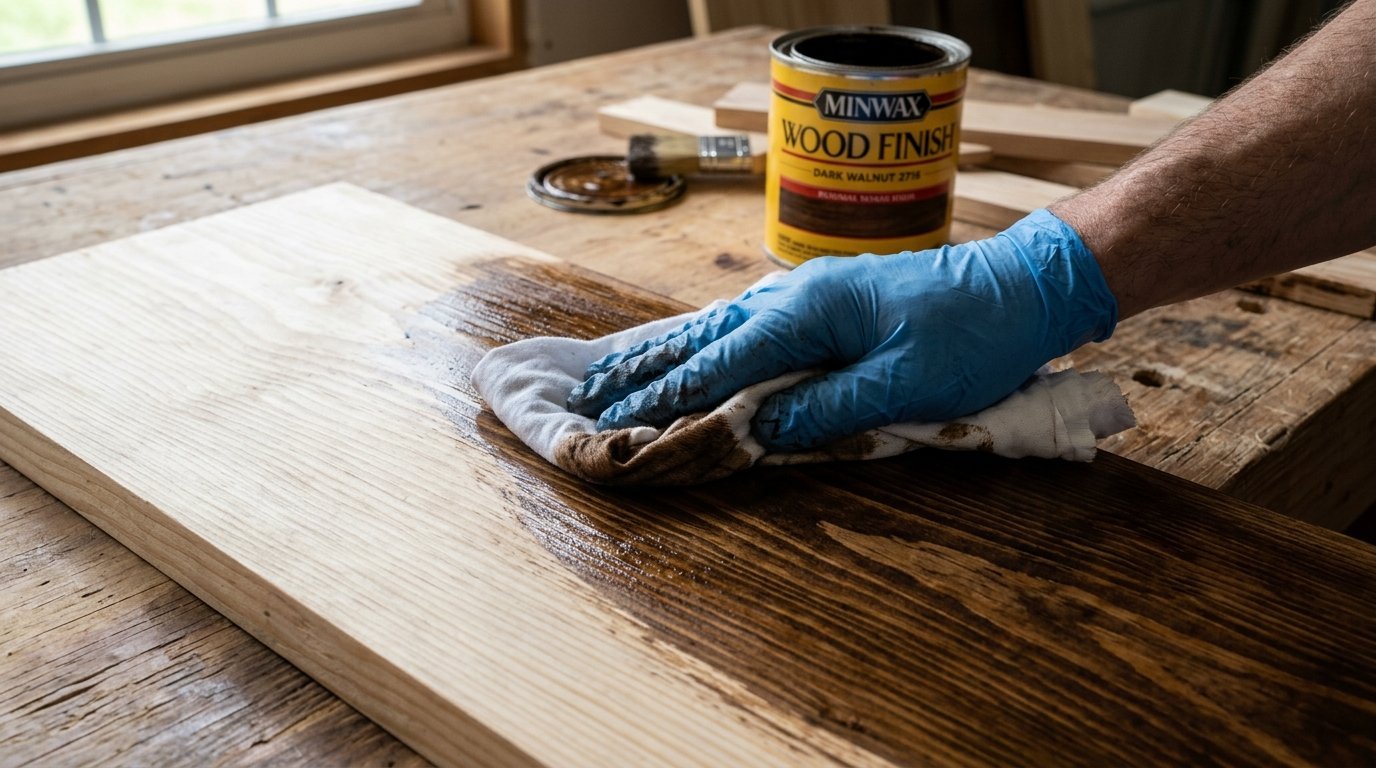
Wait 24 hours between coats. The smell is very strong. Open your windows wide. I prefer Minwax stains. They cover very well. I seal everything with a water based clear coat. Oil based clear coats turn yellow over time. Water based stays perfectly clear.
Maintaining Your Wood Shelves
Wood needs love. Dust settles on shelves every week. I wipe my shelves with a dry cloth. Never use harsh wet chemicals on natural wood. The chemicals eat the clear coat. The wood will look cloudy.
If you have mirrors on the shelf use my glass trick. Keep the glass cleaner off the wood. Spray the cloth first. Then wipe the glass. This protects the wood finish. I do this every single Sunday. It takes five minutes.
If the wood gets scratched you can fix it. Rub a walnut meat on small scratches. The oil hides the scratch instantly. For deep cuts use a stain pen. Just draw over the cut. It disappears fast. Real wood is easy to fix. Fake wood cannot be fixed at all.
The Heavy Duty Bracket Secret
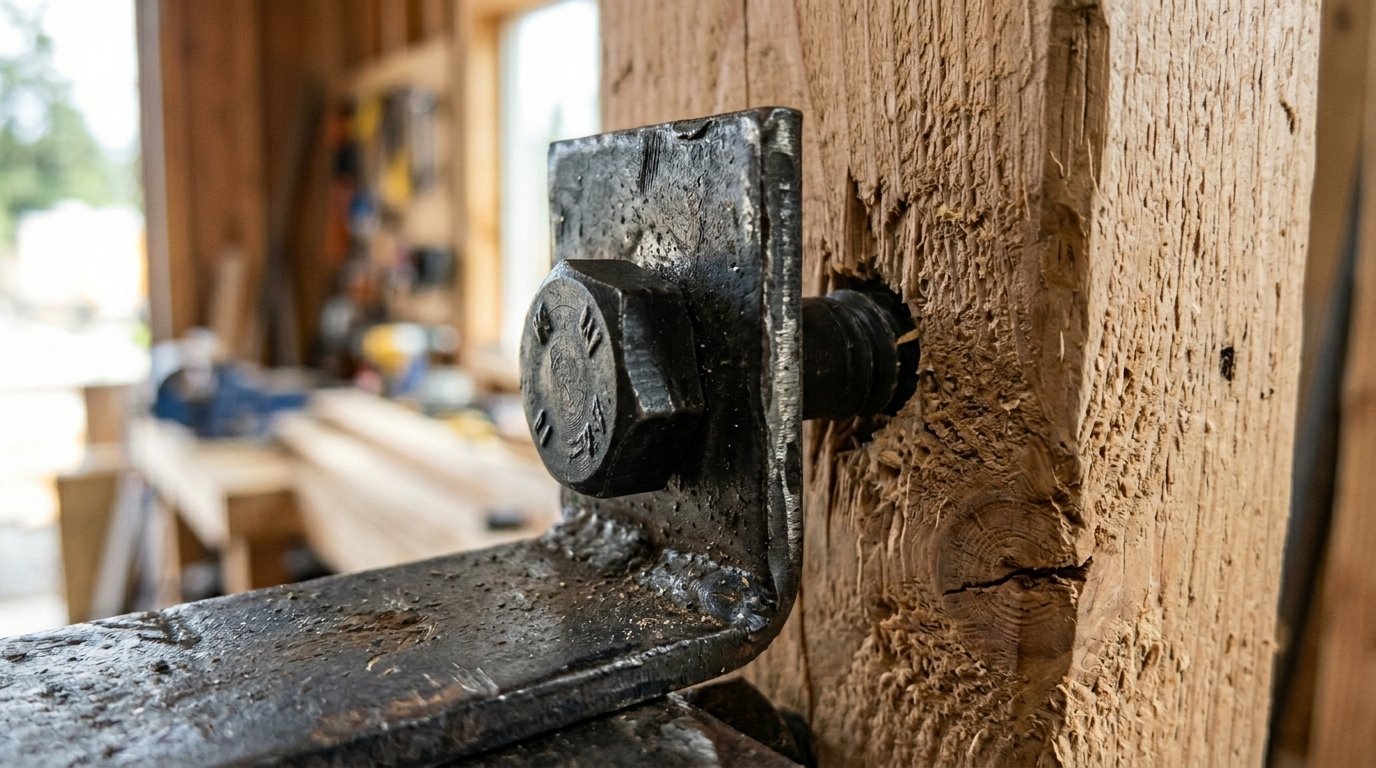
You must buy brackets made of steel. Aluminum bends under pressure. I order from custom steel shops online. A guy in Ohio makes my brackets. They hold 200 pounds easily.
You need lag bolts to hold heavy brackets. Standard screws will shear off. A lag bolt is very thick. You must pre drill a hole first. Then use a wrench to turn the bolt. It grabs the stud tightly.
I hung shelves for a chef once. He had massive cast iron pans. He wanted them on the wall. We used half inch lag bolts. We used quarter inch thick steel brackets. Those shelves will hold a car. Do not play games with heavy items. Build it right the first time.
Frequently Asked Questions

How high should I hang my living room shelves?
Hang the lowest shelf 60 inches from the floor. This puts it at eye level. Leave 12 to 15 inches between shelves. This leaves room for tall books or vases. Always measure twice.
Can I install these without hitting a stud?
No. Never do this. Drywall anchors fail under heavy loads. Wood is heavy. The decor is heavy. You must find the wood stud behind the wall. Move the brackets if you have to.
What is the best wood for a cheap budget?
Pine is the cheapest. You can find it at any hardware store. You must sand it very well. It takes more work to make it look good. But it saves you a lot of money.
How do I stop pine from turning yellow?
Pine turns yellow from sunlight. Use a water based clear coat. Add a tiny drop of white stain to the clear coat. This blocks the yellowing. Keep the wood out of direct sun.
Can I use liquid nails instead of screws?
Absolutely not. Glue will rip the paper right off the drywall. The shelf will crash down. You must use metal screws driven into wall studs. Glue is for baseboards only.
How do I clean my decorative mirrors on the shelves?
I use ninety percent isopropyl alcohol for tough spots. It melts hairspray drops fast. I recommend the Norwex cloth or 3M microfiber. Products like Sprayway and Method also work great for keeping the glass clear.
Do floating shelves hold as much weight as bracket shelves?
No. Floating shelves look great but hold less. The steel rods can bend. Use brackets with a lip if you have heavy books. Floating shelves are for light decor only.
Should I paint the brackets to match the wall?
Some people paint them to hide them. I like showing them off. Black iron brackets look great against white walls. They add to the farmhouse style. It is your choice.
How long does a project take for a beginner?
Plan for one full weekend. You will spend Saturday buying wood and staining. You will spend Sunday measuring and drilling. Do not rush. Rushing leads to crooked shelves.
Can I put wood shelves in a shower?
No. The water will rot the wood very fast. Even with marine sealer the wood will fail. Keep wood shelves outside the shower area. Use tile or glass inside the shower.
What do I do if my wall is not perfectly flat?
Most walls have bumps. You must shim the brackets. Slide tiny wood wedges behind the bracket. Tighten the screws. Check with your level. Cut off the extra wood from the wedge.
Where should I buy my wood?
Skip the big box stores if you can. Go to a local lumber yard. The wood is straighter. The people know more. The prices are usually better. You get a much better product.
Final Thoughts On Your Wood Shelf Project
You have all the facts now. You know pine is cheap and oak is strong. You know exactly how to hit a stud. You have the right tools on your list. A Modern Farmhouse Living Room is completely within your reach. Do not let blank walls scare you.
Start with a small project. Build one shelf for your bedroom first. Style it with clean glass and simple frames. Once you see how easy it is you will want more. Wood brings soul to a house. It tells your guests you care about your home.
Get your tape measure out today. Find the studs in your wall. Order some good steel brackets. The work takes a few hours. The results will make you smile for years. Your dream space starts with a single shelf.

Anya Castellan is the Founder and Editor-in-Chief of Home Wall Trends. An art history graduate of the Rhode Island School of Design with twelve years of experience writing for leading American design publications, she specializes in composition, gallery wall theory, and the quiet architecture of domestic space. A former contributing editor at Architectural Digest and guest lecturer at Parsons School of Design, Anya personally reads and signs off on every piece before it is published.