Last summer I stayed at a rental in Cape May that felt empty. The walls were flat white. The furniture was plain beige. It lacked personality. I spent forty dollars at a local craft store for frames and glue. I spent one afternoon on the beach gathering small treasures. By the time I left that living room felt like a sanctuary. You do not need a huge budget to make your home feel like the ocean is right outside. You just need a bit of time and the right materials. I have seen many people make this process harder than it is. They buy expensive mass produced art that looks fake. In my experience the best coastal homes use items found in nature. This guide shows you how to use shells and natural textures to change your space. We will talk about real projects I have tried. I will share the brands that actually hold up in salt air. You will see how to turn simple Conchas De Mar into high end art.
Executive Summary
This article provides a complete roadmap for creating a coastal living room using natural elements and DIY shell projects. You will learn how to build shadow boxes that look like they came from a gallery. We cover the best ways to arrange Sea Shells Diy art for maximum visual impact. I share my personal failures with adhesives and which brands like E6000 or Gorilla Glue actually work. We look at cost breakdowns for every project from fifty dollars to five hundred dollars. You will find specific paint color recommendations from Sherwin Williams and Benjamin Moore that complement beach decor. I include a troubleshooting guide for cleaning shells so they do not smell. We also compare real shell decor versus resin alternatives. By the end of this read you will have many actionable ideas to start your beach house transformation today.
1. Creating Framed Shadow Boxes with Conchas De Mar
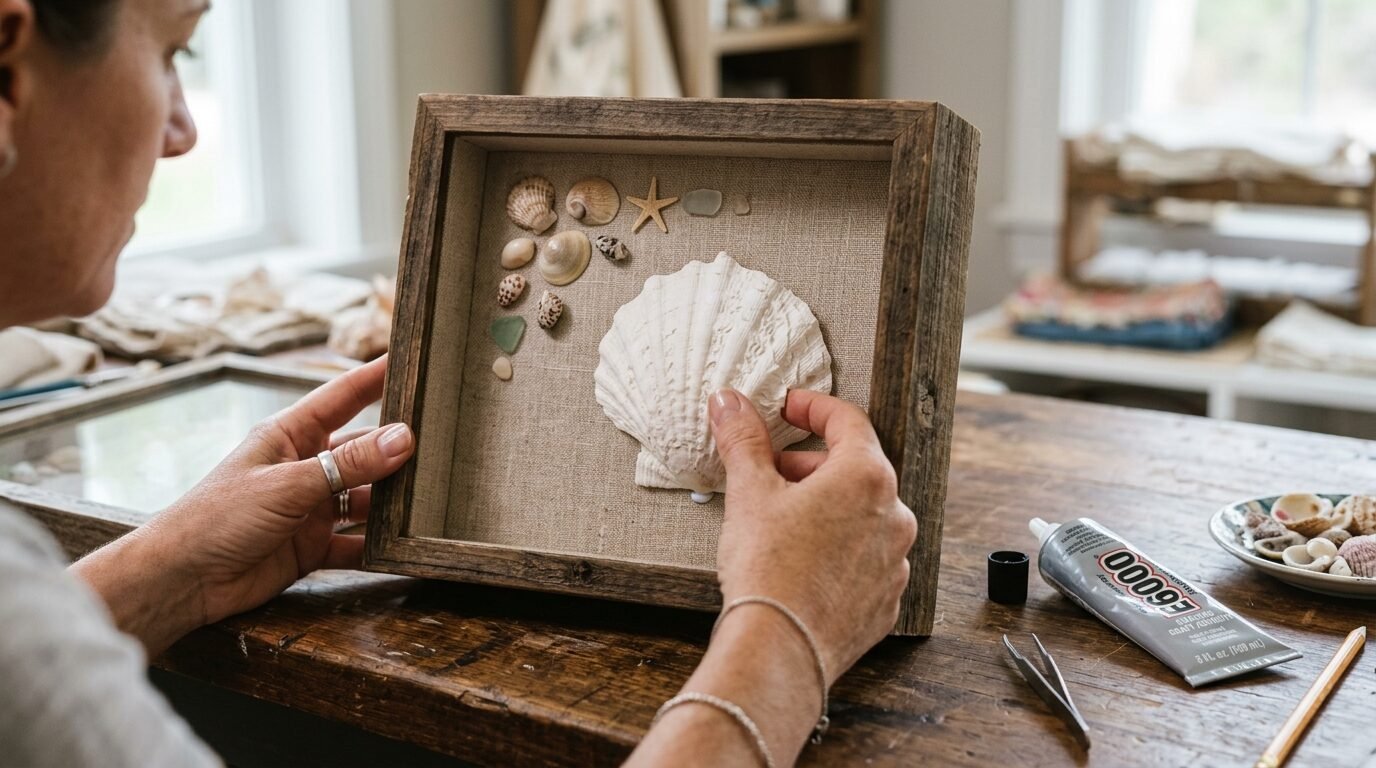
Shadow boxes are the most professional way to display beach finds. I once tried to tape shells to a flat canvas. It looked messy. The shells fell off within a week. Now I only use deep frames. A shadow box protects the shells from dust. It also creates a beautiful 3D effect on your wall.
I recommend the Ribba series from IKEA for a budget friendly start. They are deep enough for most scallops and small conchs. If you want something higher end look at West Elm or Pottery Barn. Their wood frames add a natural warmth.
When you start your Shell Crafts Diy project layout your shells before you touch the glue. I like to group them by color. A frame filled only with white shells looks modern. A frame with mixed browns and pinks feels more rustic. I have noticed that odd numbers work best. Three large shells often look better than four.
For the background avoid plain white paper. Use a textured linen or a light blue cardstock. This adds depth. I use a tiny dot of E6000 glue on the heaviest part of the shell. Let it dry for twenty four hours before you hang it. One mistake I made was hanging a frame too soon. The shells slid down the glass. Take your time.
2. Large Scale Driftwood and Shell Mirrors
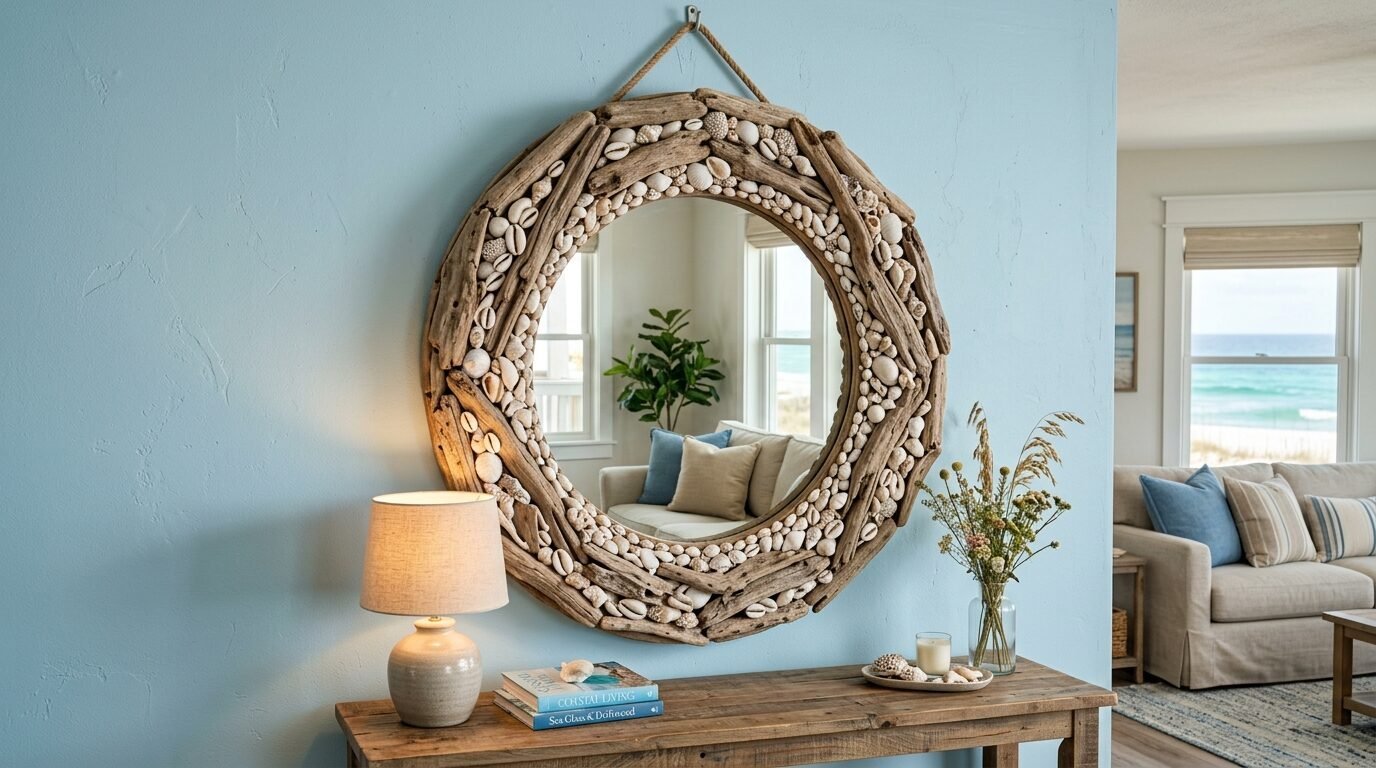
A mirror can make a small living room feel twice as big. A coastal mirror does more than that. It acts as a focal point. You can buy these for six hundred dollars at boutiques. I made mine for under eighty dollars.
Start with a plain round mirror. I found a great one at Target for thirty dollars. You will need a lot of small shells for this. This is where your collection of Sea Shells Diy comes in handy. You can also buy bulk bags of shells on Amazon or at Hobby Lobby if you live far from the coast.
I suggest using a mix of flat shells like pectens for the base layer. Glue them around the edge of the mirror glass. Then layer smaller Conchas De Mar on top to hide the gaps. In my experience a hot glue gun is fine for small shells but use construction adhesive for the heavy ones.
I tried a shell mirror in my humid bathroom once. The hot glue melted and the shells popped off. In a living room hot glue is usually safe. Just keep it away from direct sunlight or heaters. If you want a more natural look weave in small pieces of sun bleached driftwood. It breaks up the texture of the shells perfectly.
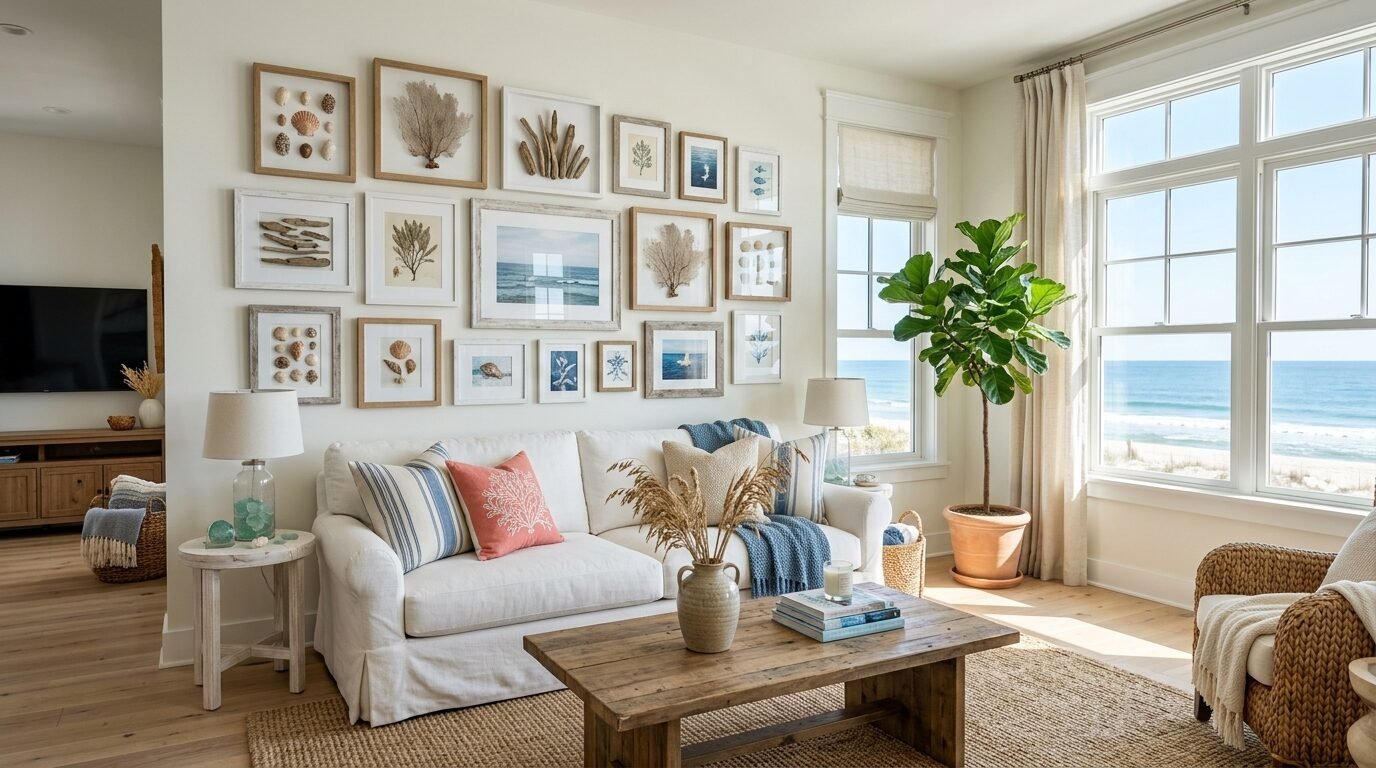
3. Coastal Gallery Walls Using Shell Crafts Diy
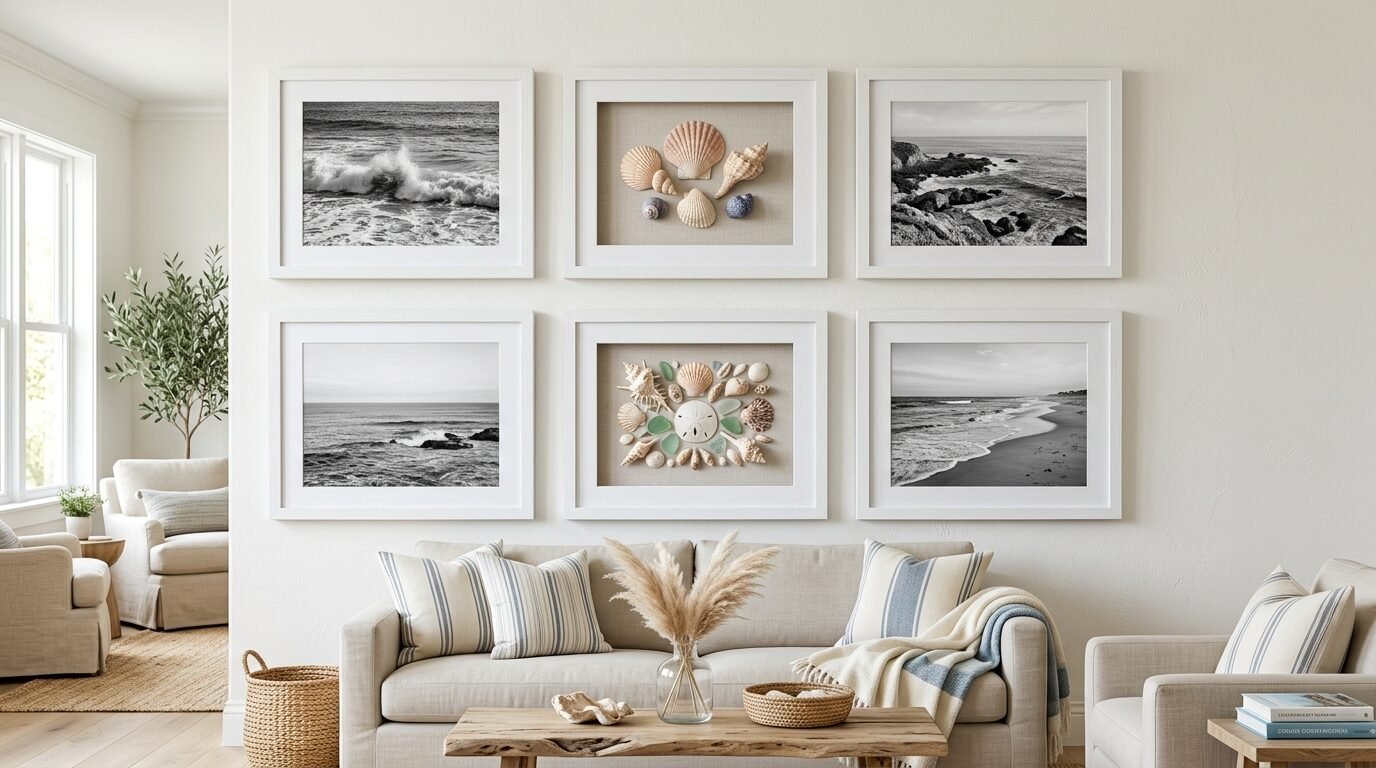
Gallery walls are popular for a reason. They tell a story. For a beach house your gallery wall should feel like a collection of memories. Mix your family photos with framed Beach Themed Crafts.
I once helped a friend design a wall in her Florida condo. We used six identical frames. Inside three frames we put black and white photos of the kids at the beach. Inside the other three we mounted large single shells. The symmetry made the room feel calm.
You can also use unexpected items. I have seen people frame old nautical maps or pieces of vintage fishing net. If you want to try Shells Diy art try making a specimen style frame. Label each shell with its name and the date you found it using a fine tip pen.
When hanging your gallery start from the middle and move out. Use 3M Command Strips if you are worried about damaging your walls. They are great for lightweight frames. For heavier pieces always find a wall stud. I have seen too many beautiful shell projects shatter on the floor because of weak nails.
4. Hanging Textured Wall Art with Sea Shells Diy
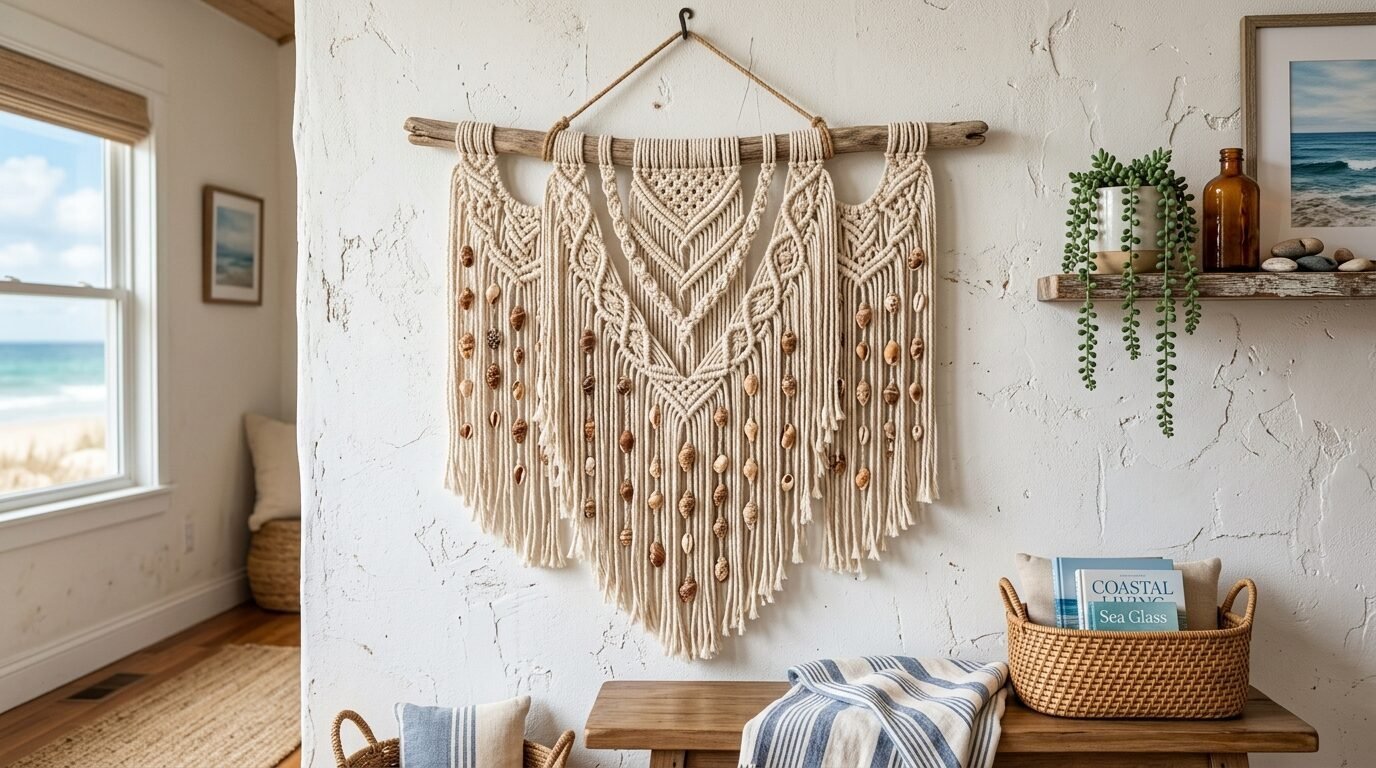
If you want a softer look go for hanging art. Macrame is a classic choice for coastal homes. You can easily add shells to a macrame piece. I started doing this three years ago. It adds a tactile element that flat art lacks.
You can buy a basic macrame hanger or make one. Use cotton cord in cream or sand colors. Tie small shells into the knots. I like to use shells with natural holes in them. These are often called holy stones or spirit shells by beachcombers.
If your shells do not have holes you can use a small jewelry drill. I use a Dremel tool with a diamond bit. Be careful not to press too hard or the shell will crack. I have broken dozens of beautiful pieces by being impatient.
Hang these near a window. The light catches the curves of the shells. It creates soft shadows on the wall. This type of Beach Crafts Diy is very relaxing to make. It feels more like a hobby than a chore.
5. Floating Shelves for Beach Themed Crafts
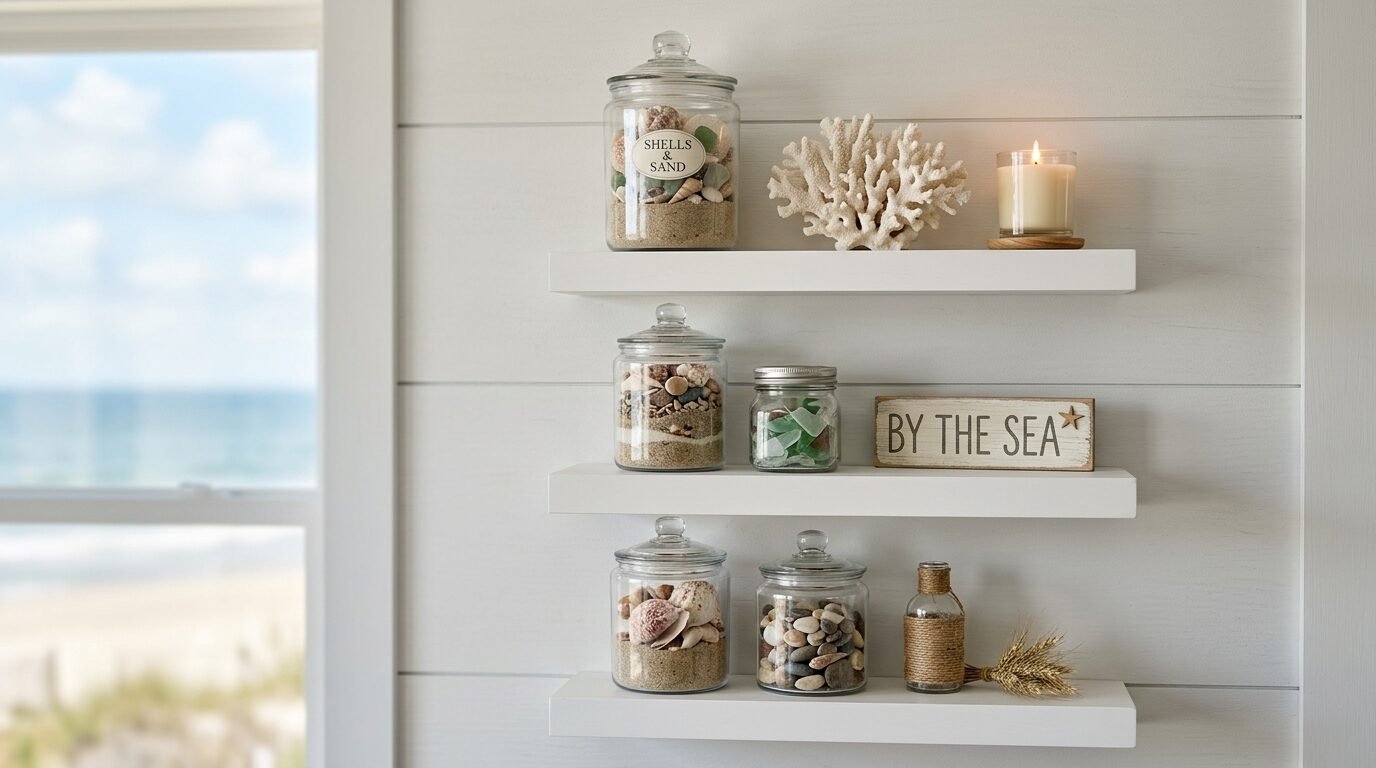
Floating shelves give you a place to rotate your decor. I change my living room shelves with the seasons. In the summer I display my best Conchas De Mar. In the winter I add more candles and driftwood.
I recommend white or light oak shelves. Brands like Shelfology offer great hidden bracket systems. If you want a cheaper option the Lack shelves from IKEA are easy to install.
On these shelves group items of different heights. Put a tall piece of coral in the back. Place a medium sized jar of small shells in the middle. Put a flat starfish in the front. This creates a staircase for the eyes to follow.
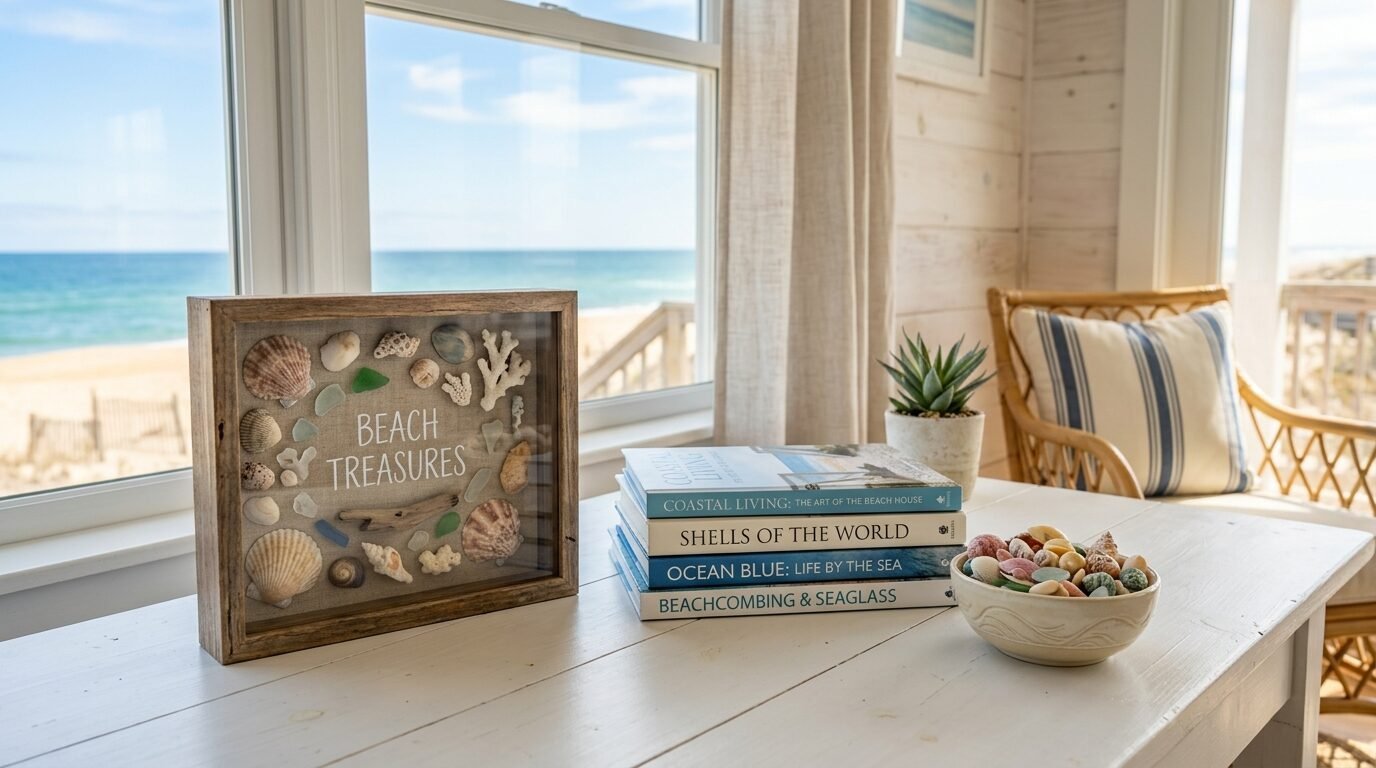
I have noticed that glass jars are essential for Shells Diy displays. I use old mason jars or apothecary jars from HomeGoods. Fill them with sand first then drop the shells on top. It looks like a miniature beach on your wall. Avoid overfilling the shelves. You want some white space so each item can breathe.
6. Creating a Focal Point with Oversized Shell Sculptures
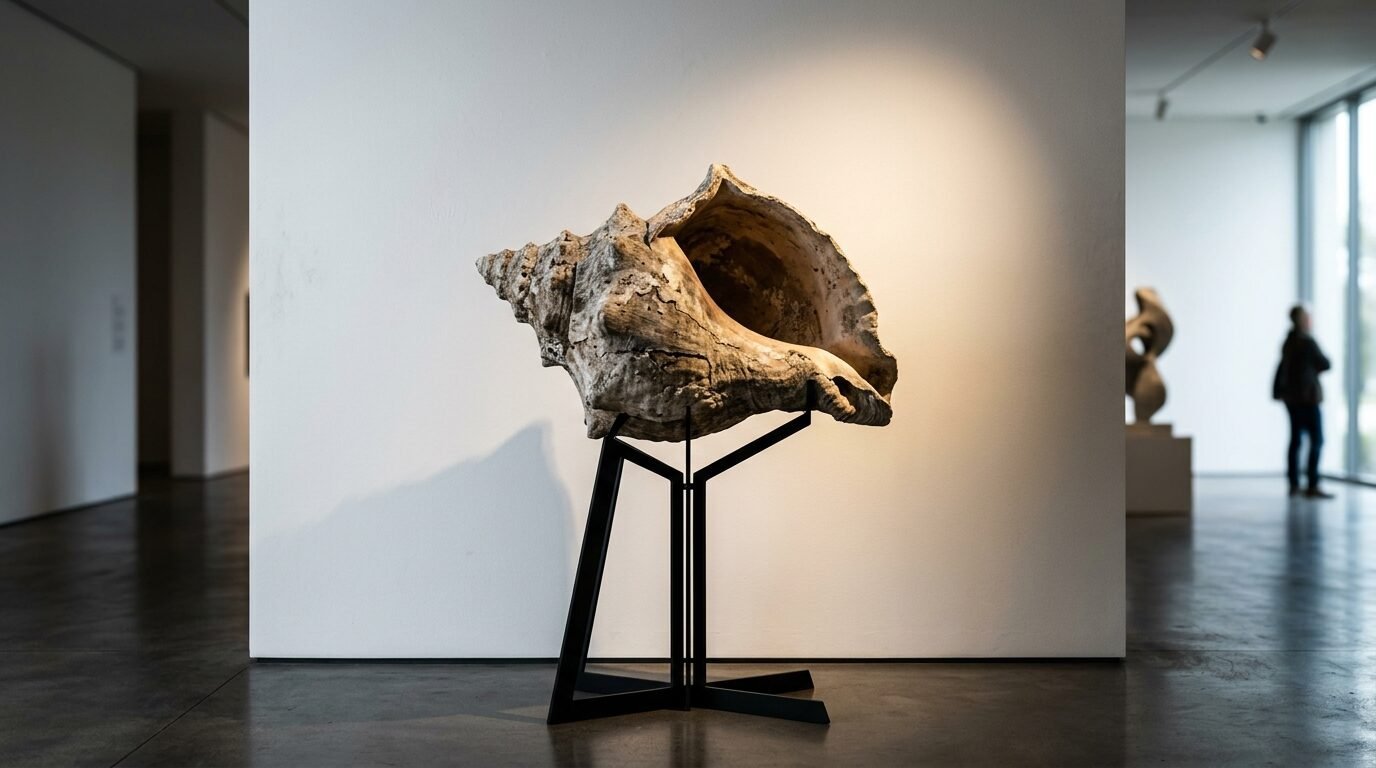
Sometimes one big piece is better than ten small ones. I have seen stunning living rooms where a single giant clam shell sits on a pedestal. You can find high quality replicas or real shells at specialized ocean decor shops.
If you want to hang a large shell on the wall you need a custom bracket. Most shells are irregular. I once tried to hang a heavy conch shell with a simple wire. It tilted and looked terrible. Now I use a small metal display stand that I screw directly into the wall.
This approach works best in a minimalist room. If your walls are busy a large shell gets lost. Place it on a wall that gets plenty of natural light. The shadows inside the shell change throughout the day. It creates a dynamic piece of art that never looks the same twice.
For a DIY version of this look for large pieces of flat driftwood. You can glue several large Sea Shells Diy finds onto the wood. This creates a natural sculpture that hangs horizontally. It is a great way to fill the space above a sofa without using a traditional painting.
7. Using Nautical Rope and Shells for Border Art
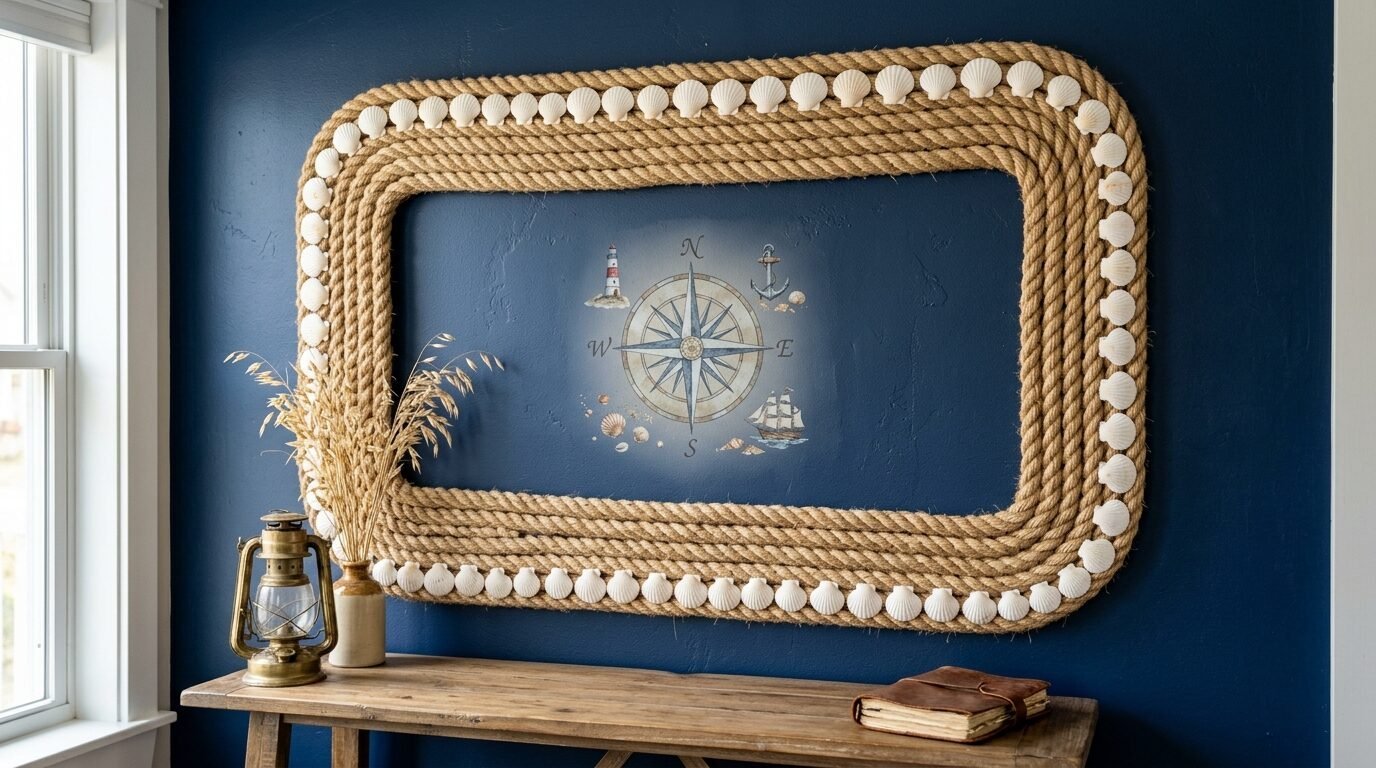
Nautical rope is a great way to frame a space without using a wooden frame. I used thick manila rope to create a border around a large map in my guest room. You can do the same with your Shell Crafts Diy projects.
Buy a roll of natural fiber rope from a hardware store. Coil it on the wall in a circular or rectangular shape. Use small finish nails to hold it in place. Then glue your Conchas De Mar along the rope.
This style feels more rugged and authentic. It works well in a house with a lot of wood or navy blue accents. I noticed that thinner rope looks better for small clusters of shells. Thicker rope needs larger shells to stay in proportion.
One tip I learned is to singe the ends of the rope with a lighter. This stops it from fraying and looking messy. It also adds a slight burnt wood smell that feels very coastal. Pair this with a few brass accents for a classic maritime look.
8. Essential Tools for Seashell Projects

To make high quality wall decor you need the right kit. I have wasted money on cheap glues that yellow over time. Here is what I keep in my craft drawer.
E6000 Craft Adhesive is the gold standard. It is clear and flexible. Gorilla Hot Glue Sticks have a stronger hold than the cheap dollar store versions. A Dremel 4000 is great for drilling holes in shells or sanding driftwood. Use a tack cloth to remove dust from shells before gluing.
I once tried to use school glue for a shell project. It did not work at all. The shells fell off within minutes. Investing in a twenty dollar bottle of professional adhesive saves you hours of frustration.
If you are working with driftwood you might want a clear matte sealant. I use Minwax Polycrylic. It protects the wood without making it look shiny or fake. It also helps stop the wood from flaking onto your rug.
9. Best Paint Colors for Coastal Decor
Your wall color is the backdrop for your decor. If the color is wrong your shell art will look muddy. I always suggest light and airy tones.
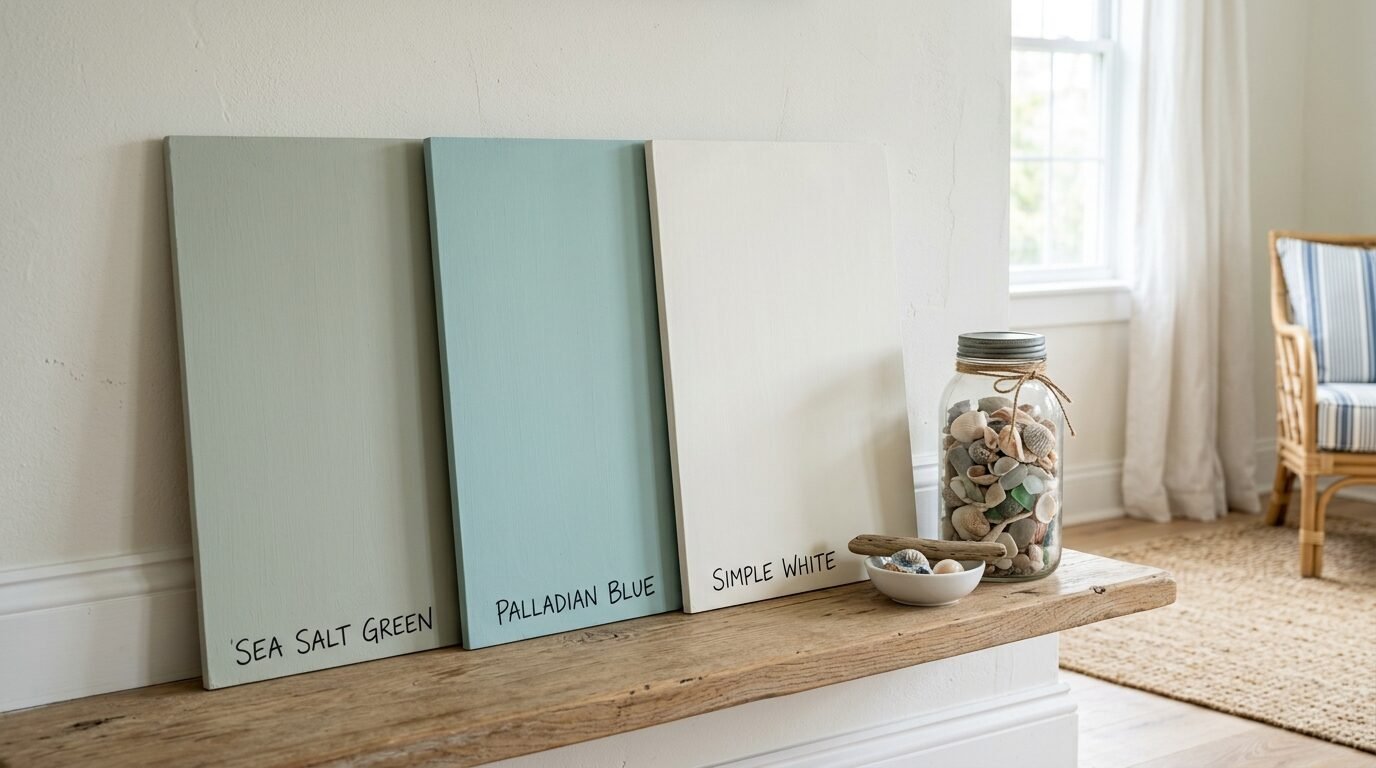
Sherwin Williams Sea Salt is a favorite for a reason. It is a mix of green and blue and gray. It changes with the light. In the morning it looks blue. In the evening it looks more gray. It makes white Conchas De Mar pop.
Benjamin Moore Palladian Blue is another great choice. It is a bit more saturated. It works well if you have a lot of dark wood furniture. For a clean look try Benjamin Moore Simply White. It is a warm white that does not feel clinical.
I have seen people try dark navy walls in small living rooms. It can look good but it makes shell art much harder to see. If you go dark make sure your Shell Crafts Diy uses only white or very light shells for contrast.
10. Cost Breakdown for Beach House DIYs
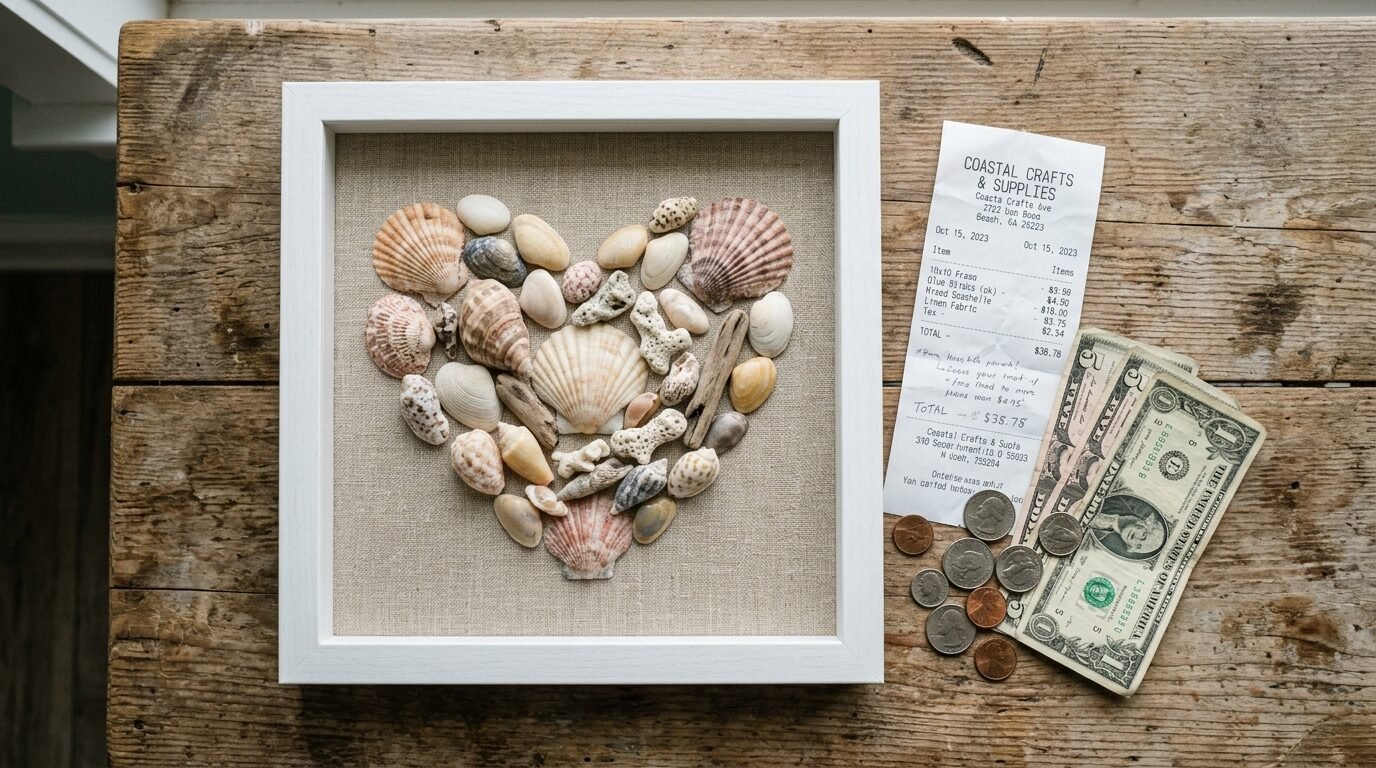
Creating a beach house feel does not have to be expensive. Most of these costs are just for frames and glue. If you collect your own Sea Shells Diy materials you save at least fifty percent.
A single shell shadow box costs between twenty five and forty dollars. A large shell mirror costs between seventy and one hundred fifty dollars. A gallery wall with five frames usually runs between one hundred and three hundred dollars.
I have found that spending more on a high quality frame makes a cheap shell look like an expensive antique. You can find great frames at thrift stores and paint them white. This is my favorite way to save money on Beach Crafts Diy.
Always check the clearance section at stores like Michaels or Joann Fabrics. They often have shadow boxes on sale for half price. I buy them in bulk whenever I see a good deal.
11. Cleaning Shells for Odor-Free Decor
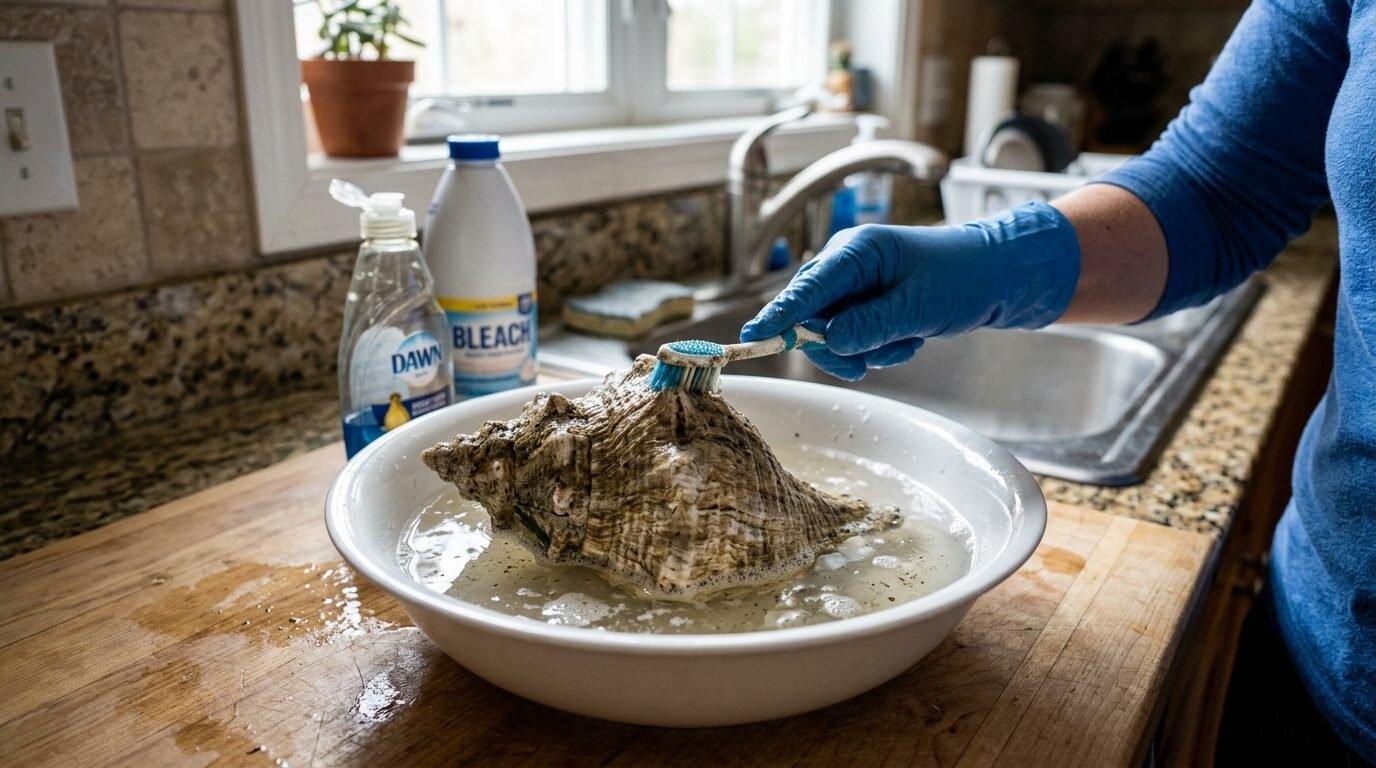
If you find your shells on the beach you must clean them. I learned this the hard way. I once put a bag of uncleaned shells in my living room. Two days later the house smelled like rotting fish.
First soak the shells in a mix of water and bleach. Use a half and half ratio. Let them sit for two hours. This kills any bacteria and removes the smell. It also helps whiten the shells.
After the soak scrub them with an old toothbrush. Be careful with delicate shells like sand dollars. For those I suggest a shorter soak. If the shells look dull after drying rub them with a tiny bit of mineral oil. This brings back the shine they have when they are wet in the ocean.
I have noticed that some people use clear nail polish for shine. Do not do this. It yellows over time and looks like plastic. Mineral oil is natural and lasts a long time.
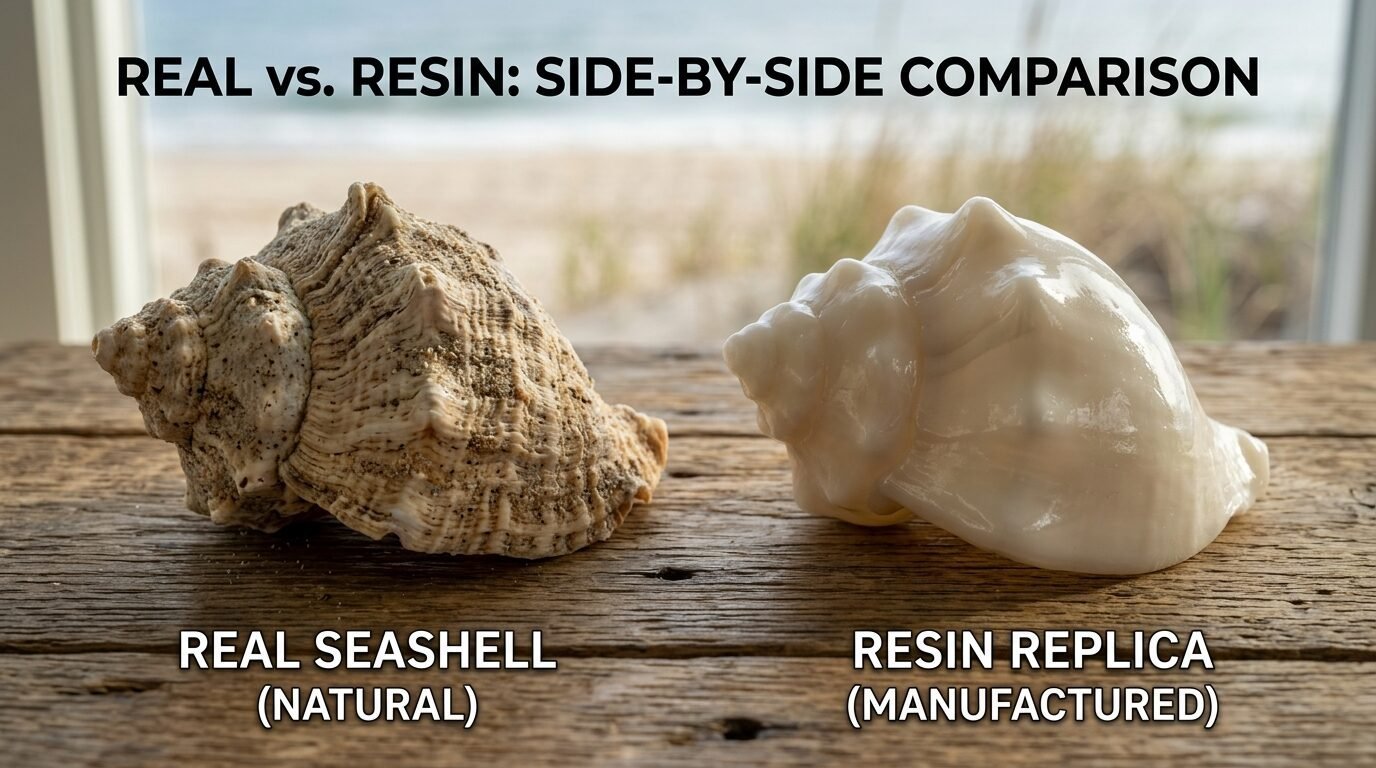
12. Pros and Cons: Real Shells vs Resin
| Feature | Real Sea Shells Diy | Faux Resin Decor |
| Texture | Natural and unique | Uniform and smooth |
| Durability | Fragile and breakable | Very durable |
| Cost | Low to free | Moderate to high |
| Aesthetic | Authentic | Can look mass produced |
| Scent | Needs cleaning | No scent |
| Weight | Varies by shell | Often lighter |
In my experience nothing beats the look of real shells. Resin decor can look cheap under bright lights. If you have kids or pets resin might be safer for lower shelves. For wall decor always choose real Conchas De Mar. The way they reflect light is impossible to mimic perfectly with plastic.
I have used resin shells in outdoor spaces where real shells might get bleached or damaged by storms. For your living room stay with the real thing. It feels much more premium.
13. Incorporating Sea Glass into Your Wall Art
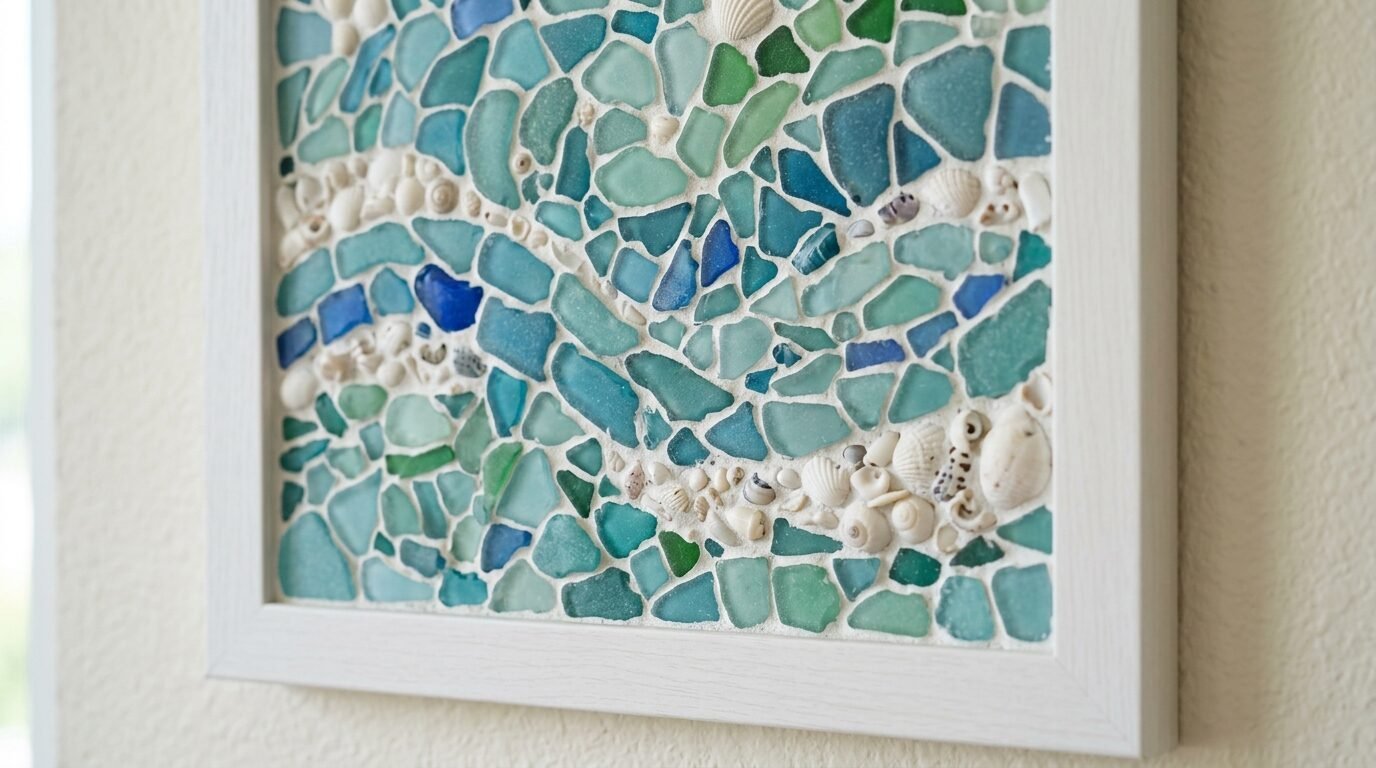
Sea glass adds a touch of color that shells lack. I love the frosted greens and blues of old bottle glass tumbled by the sea. You can use sea glass to fill the gaps in your Shell Crafts Diy projects.
I made a mosaic heart for my wall using only green sea glass and white shells. The contrast was striking. You can buy genuine sea glass on Etsy if you do not have a beach nearby. Just be careful with craft store glass. It often looks like broken jars and lacks the smooth edges of real sea glass.
Glue the glass pieces using a clear adhesive that does not shrink. E6000 is perfect for this. I have noticed that sea glass looks best when backlit or placed near a light source. The way the light passes through the glass adds a glow to your Coastal Living Room Wall Decor.
Mix different sizes of glass with your Conchas De Mar. This creates a more natural beach look. Think about how the tide washes things up. It is never perfectly sorted. It is a beautiful mix of textures and colors.
14. Creating Seasonal Coastal Wall Displays
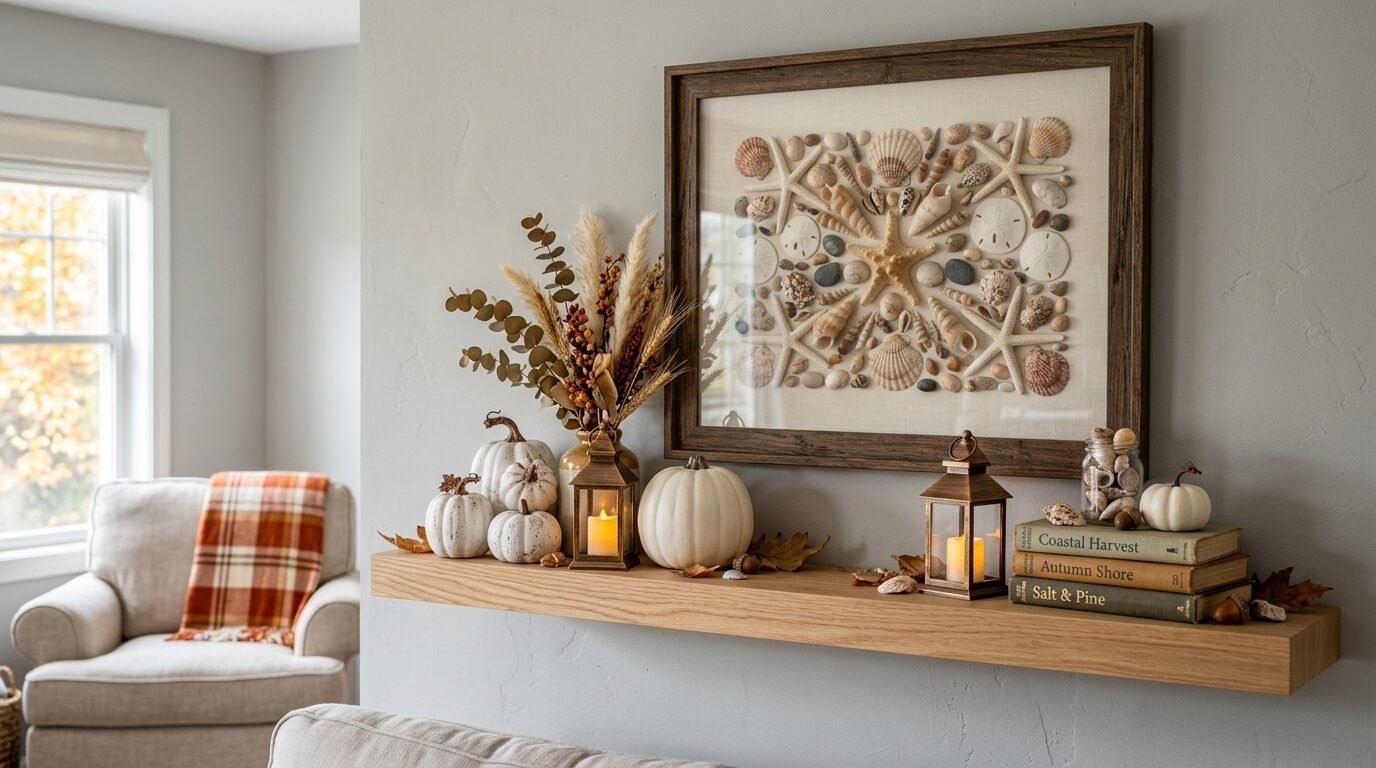
One mistake people make is keeping their beach decor exactly the same all year. In the summer I use bright whites and blues. In the fall I swap some shells for pieces of dried seagrass or darker wood accents.
You can use your floating shelves to facilitate this change. Keep your main Sea Shells Diy frames on the wall. Change the items around them. I add small lanterns and white pumpkins in the autumn. It makes the beach house feel cozy instead of cold.
In the spring I add fresh greenery near my shell art. A simple air plant looks amazing tucked into a large conch shell. It brings life to the display. I have noticed that air plants thrive in the same light that makes shells look good.
This keeps your home feeling fresh. You do not have to redo the whole room. Just change three or four small items. This is the secret to a professional looking home that feels lived in and loved.
15. Frequently Asked Questions
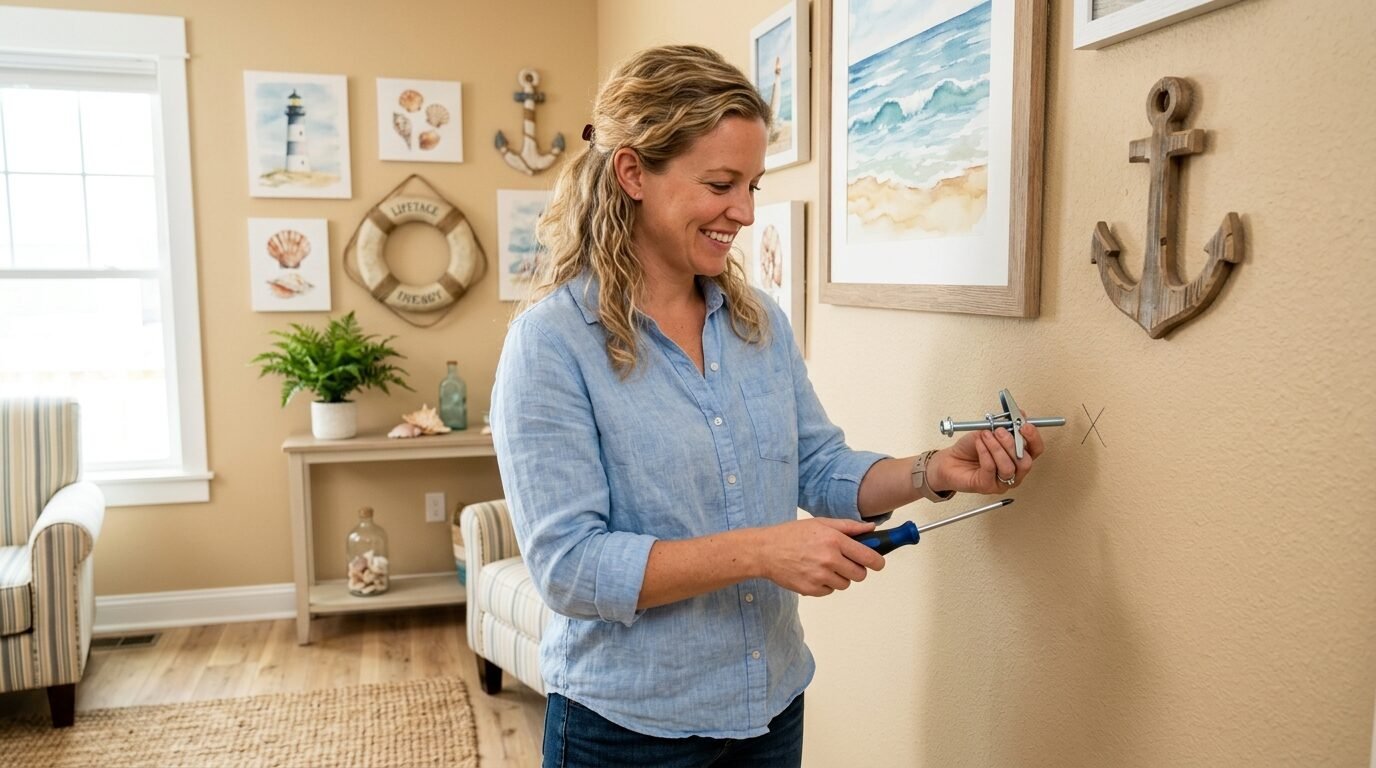
How do I hang heavy shell art without damaging the wall?
Use heavy duty wall anchors. I prefer the screw in plastic anchors from hardware stores. They can hold up to fifty pounds. For lighter shadow boxes 3M Command Strips are excellent. They remove cleanly without leaving holes.
What is the best glue for Shell Crafts Diy?
E6000 is the best overall choice. It bonds to almost any surface and stays clear. For very small shells a high quality hot glue like Gorilla Glue works well. Avoid standard white craft glue as it is not strong enough for the weight of most shells.
Can I use sand in my wall decor?
Yes but you must seal it. If you put loose sand in a frame it will eventually leak out. I use a spray adhesive on a backing board then pour the sand over it. Apply a clear matte sealer on top to keep the sand in place.
Where can I find the best Conchas De Mar?
If you cannot go to the beach Etsy is a great source for specific shells. You can find bulk beach finds for low prices. Many sellers offer cleaned and sorted shells that are ready for art projects.
How do I prevent my shell art from fading?
Keep it out of direct sunlight. Even though shells come from the beach constant UV light can make them brittle and pale. Use UV protective glass in your shadow boxes if the room is very sunny.
Can I paint my seashells?
Yes you can. I sometimes use a metallic gold spray paint on the edges of large shells. This gives them a high end boutique look. Use a light hand so you do not hide the natural texture of the shell.
How do I fix a broken shell?
If it is a clean break you can use a tiny drop of super glue. Hold the pieces together for sixty seconds. If the shell is shattered it is better to use the pieces in a mosaic style project.
Is it legal to collect shells from the beach?
In most places it is legal to collect empty shells. Always check local laws before you go. Some protected beaches or national parks have strict rules against taking anything from the environment.
Conclusion
Making your living room feel like a beach house is about bringing the outside in. It is about the small details. A single frame filled with Conchas De Mar can change the mood of a corner. I have found that the more personal the items the better the room feels. Do not worry about making things look perfect. The ocean is not perfect. It is messy and textured and beautiful.
Start small. Try one Shells Diy project this weekend. Maybe it is just a jar of shells on a shelf or a simple framed scallop. You will notice that these natural elements bring a sense of peace to your home. I have seen it happen in my own house and in many others. Once you start you might find yourself looking at every beach trip as a shopping spree for your next wall masterpiece.

Anya Castellan is the Founder and Editor-in-Chief of Home Wall Trends. An art history graduate of the Rhode Island School of Design with twelve years of experience writing for leading American design publications, she specializes in composition, gallery wall theory, and the quiet architecture of domestic space. A former contributing editor at Architectural Digest and guest lecturer at Parsons School of Design, Anya personally reads and signs off on every piece before it is published.