Your blank walls feel like a missed opportunity. You walk into a high-end furniture store and see a simple wood frame for two hundred dollars. You know you can make that. I have spent years staring at empty drywall in my first apartment. I tried every cheap trick in the book. Some failed miserably. I once ruined a wall with heavy glue. But some projects looked so good my friends asked where I bought them. You want a home that feels curated. You want guests to ask which boutique sold you that art piece. This guide gives you the exact steps to create high-end wall decor on a small budget. I will show you how to use wood and paint to change your space. These projects are for people who want style without the stress of complex power tools.
Executive Summary
This article provides twenty five specific projects to fix boring walls. You will find detailed plans for a Diy Clock and unique Wood Slice Art. I cover several Wooden Projects that require zero carpentry experience. We will look at a specific Wood Clock Design that mimics minimalist Scandinavian styles. You get Aesthetic Room Decor Ideas Diy Cheap that actually look expensive. I also include Hanging Ideas for rentals where you cannot drill holes. Each idea includes a list of tools like Gorilla Glue or Krylon spray paint. I share the exact costs for every piece. Most projects cost under thirty dollars. You will learn how to avoid common mistakes like crooked frames or poor spacing. I explain how to choose the right wood at Home Depot. This guide is your complete roadmap to a better home.
1. Minimalist Wood Slice Art
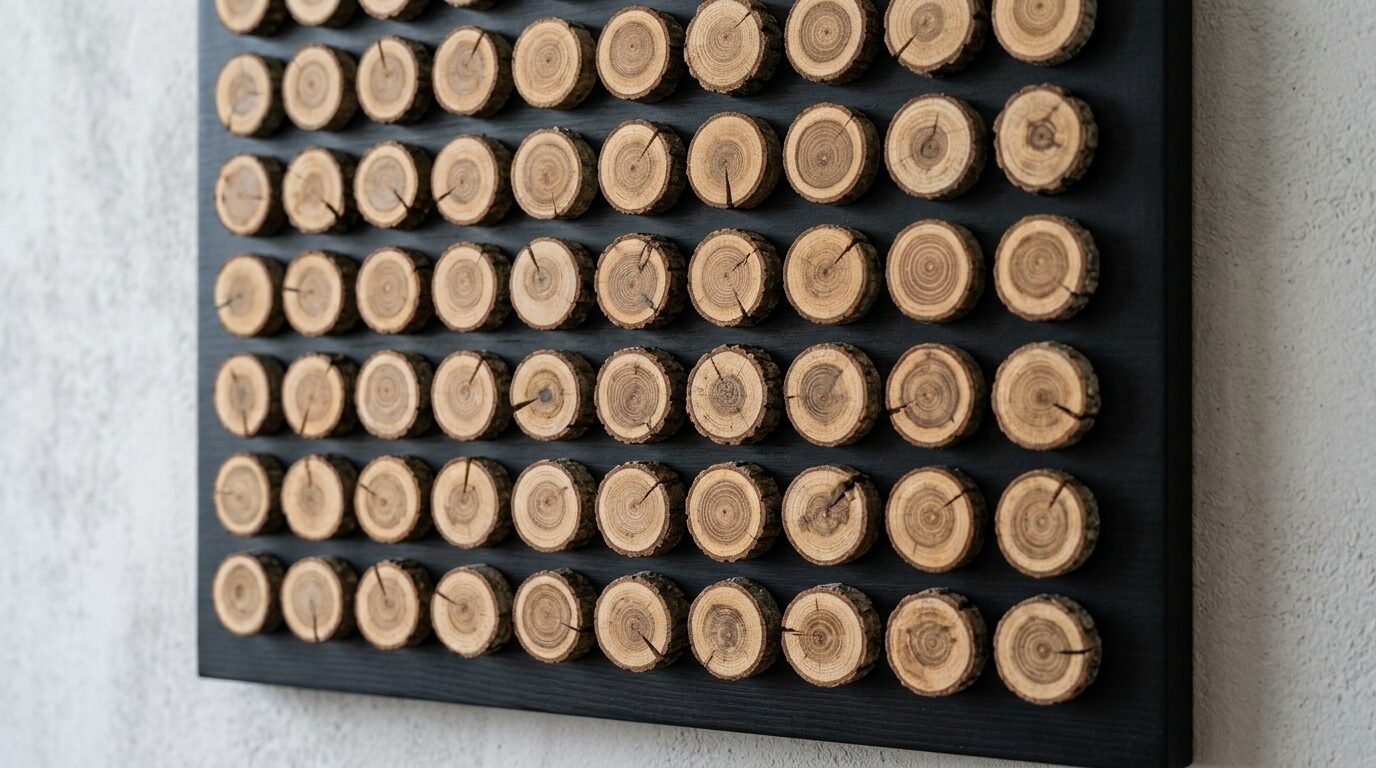
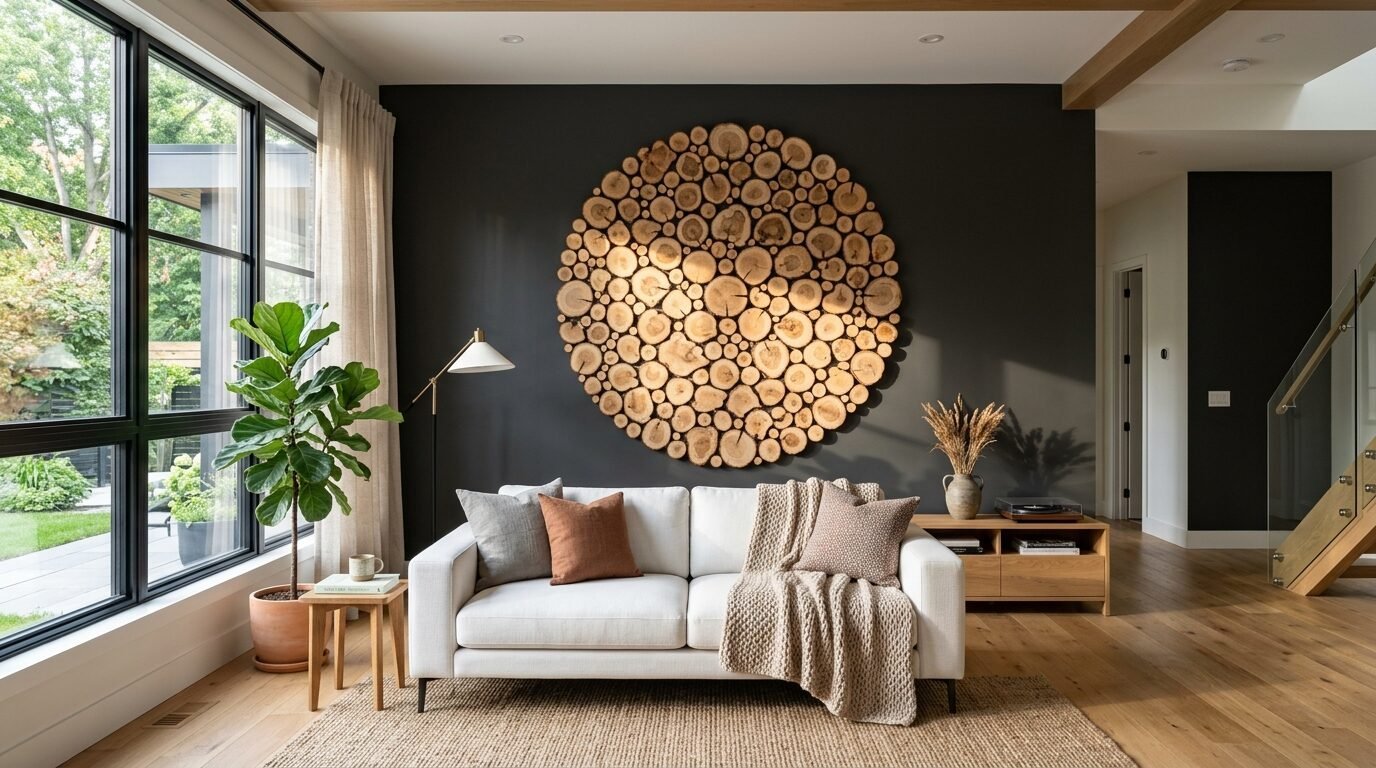
Natural textures make a room feel warm. I found that using cross-cut wood rounds creates an instant focal point. You can buy a bag of dried wood slices at Michaels for fifteen dollars. I suggest choosing slices with bark still attached for a rustic look. You will need a large wooden board for the base. Use wood glue to attach the slices in a tight grid. I tried a random pattern once but a grid looks more professional. Paint the base board a flat black first. This makes the wood grain pop. It looks like a piece from a mountain gallery. My neighbor thought I spent three hundred dollars on mine. It actually cost twenty two dollars.
2. Floating Acrylic Calendar
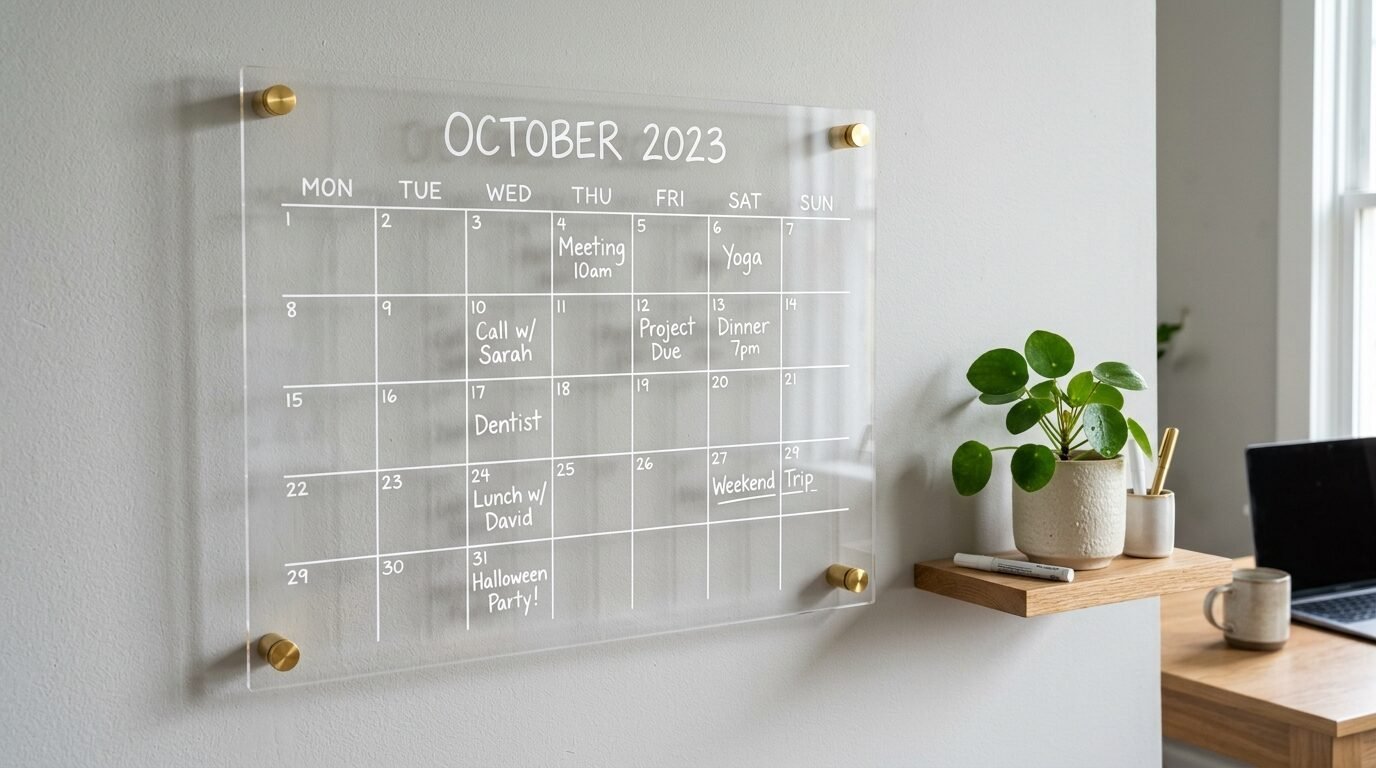
Clear acrylic sheets are great for modern offices. You can buy a sheet at a local hardware store. I use gold standoffs to mount it. This creates a gap between the wall and the plastic. It looks like it is floating. Use a white chalk marker to write your dates. I noticed that thick acrylic resists bending better than thin sheets. I once used thin plastic and it warped under the heat of the sun. Get the quarter-inch thick version. It stays flat. This is one of those Hanging Ideas that works for any room. It keeps you organized and looks like a custom installation.
3. Large Scale Fabric Frame
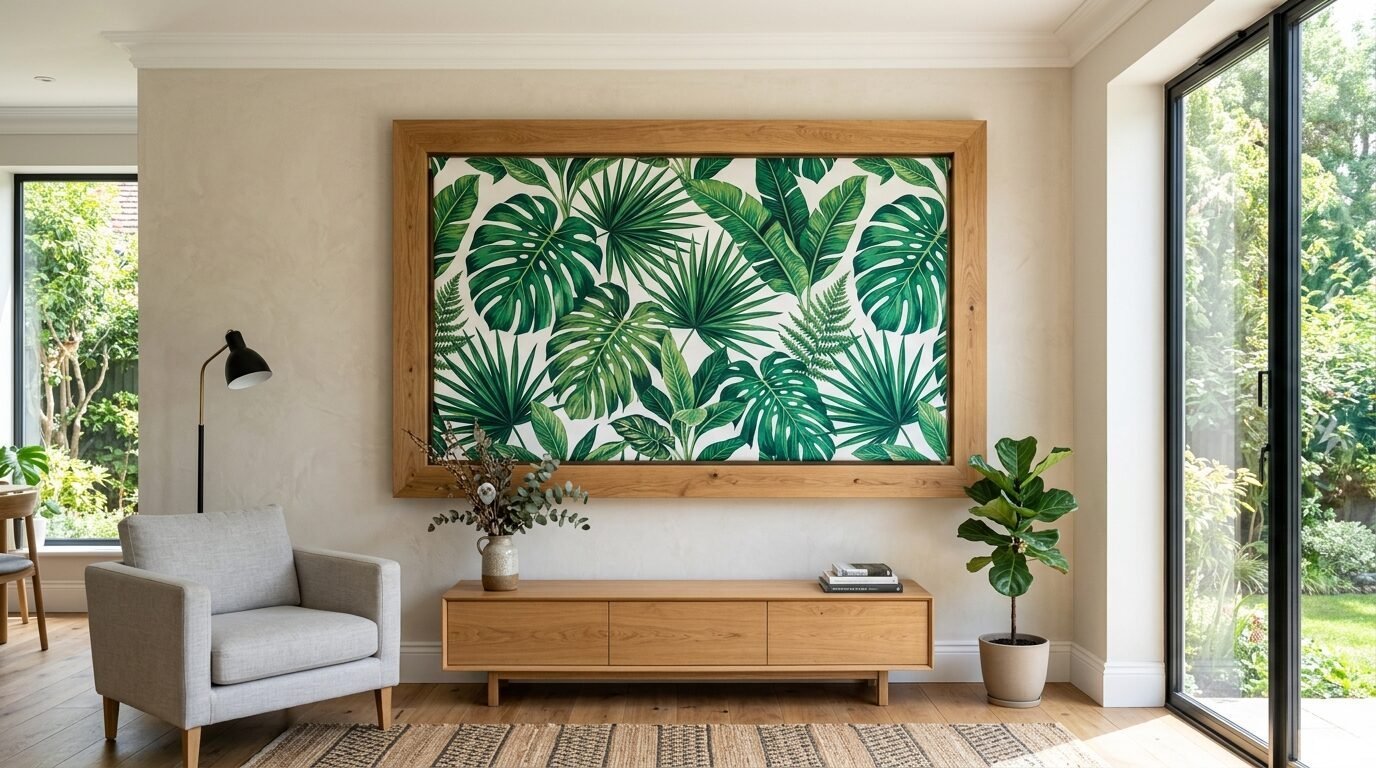
Art is often too small for big walls. I solved this by using a wood frame and a yard of patterned fabric. Find a bold print at a craft shop. Stretch the fabric over a wooden frame. Use a staple gun to keep it tight. I learned to start from the middle of each side. This prevents wrinkles. I used an old curtain for my first one. People thought it was a designer canvas. This project is perfect for people who cannot paint. It covers a huge area for under twenty dollars. It adds color without the mess of acrylics or oils.
4. Modern Diy Clock With Gold Hands
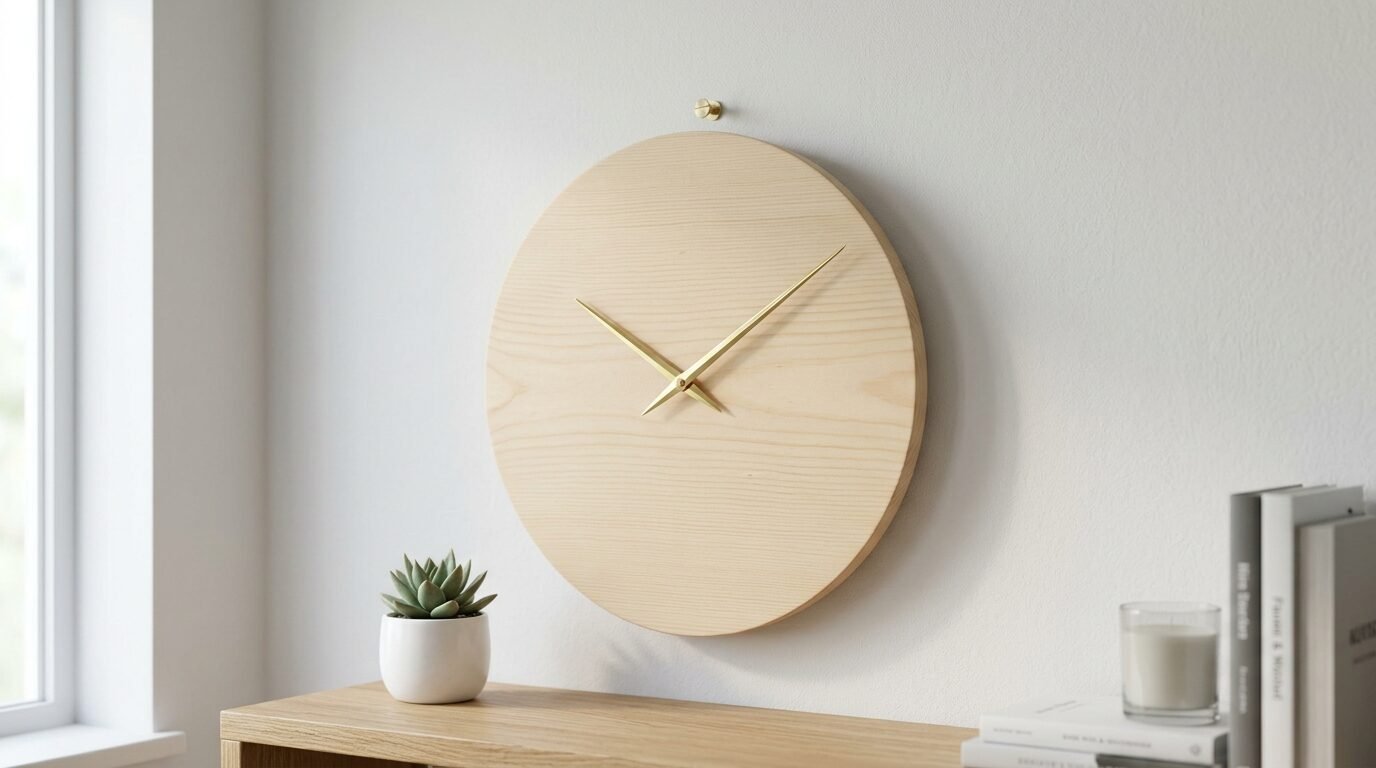
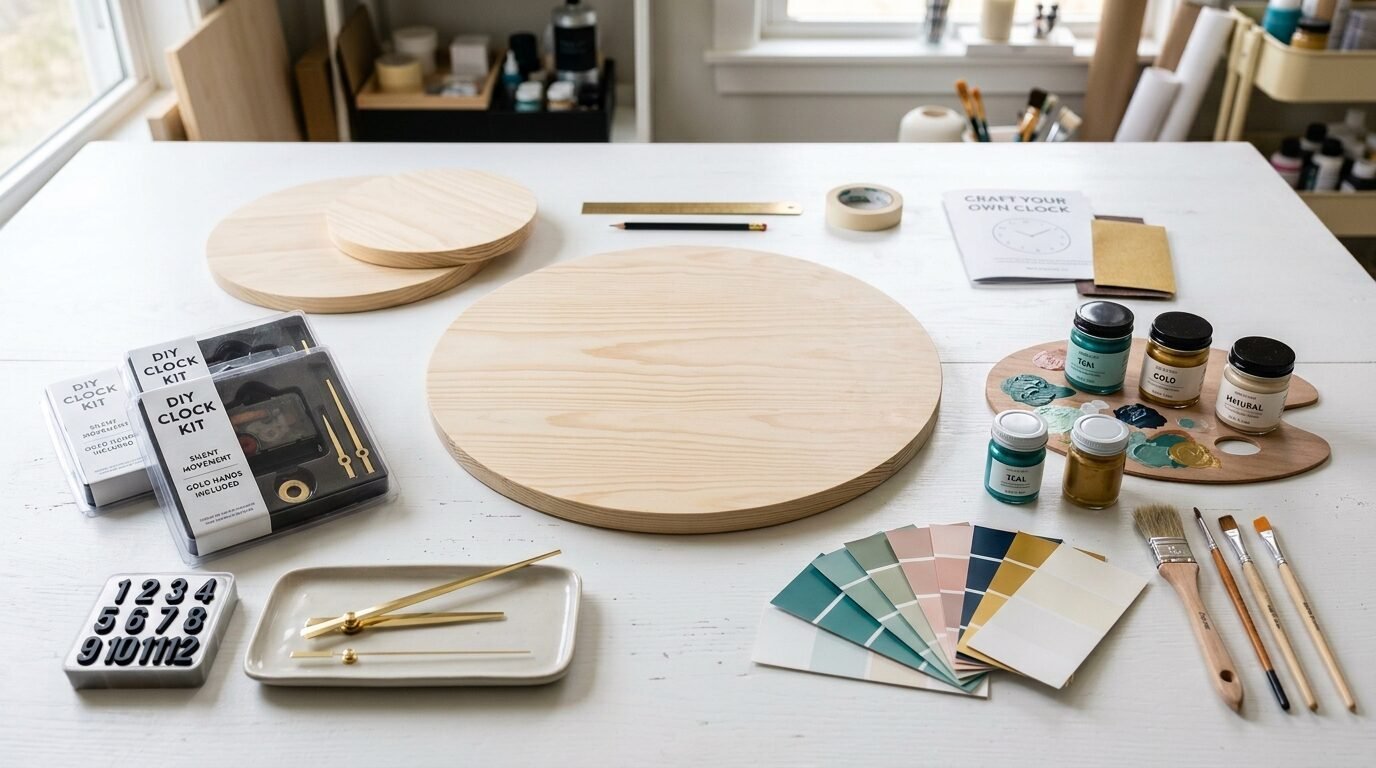
Clocks are functional art. I created a Wood Clock Design using a simple pine circle. You can find pre-cut wood circles in the craft aisle. Sand the edges until they feel smooth. Drill a hole in the center for the mechanism. I buy my clock kits on Amazon for ten dollars. Choose long gold hands for a luxury feel. I prefer to leave the wood natural. I applied a light coat of beeswax to protect it. Avoid using heavy stains on pine. It often looks blotchy. A natural finish keeps it looking like a high-end boutique item. This Diy Clock takes thirty minutes to finish.
5. Geometric Wood Lath Art
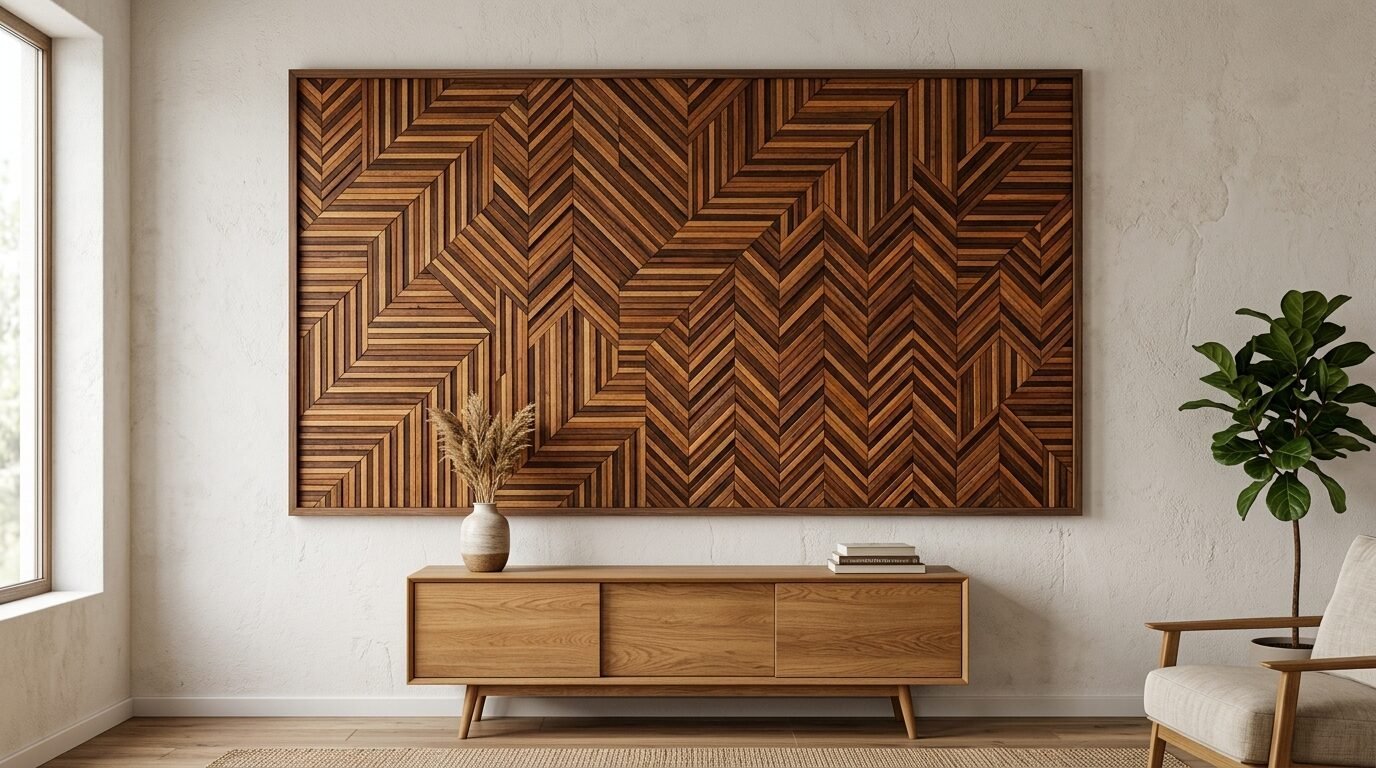
Thin wood strips are cheap and versatile. Lath bundles at the hardware store cost very little. Cut them into different lengths. Arrange them in a herringbone pattern on a backing board. Use a small hammer and finishing nails. I found that staining the strips different shades of brown adds depth. I once tried painting them bright colors. It looked too much like a classroom project. Stick to wood tones for a store-bought look. This is one of my favorite Wooden Projects because it uses scrap material. It looks heavy and expensive once it is on the wall.
6. Pressed Fern Gallery Wall
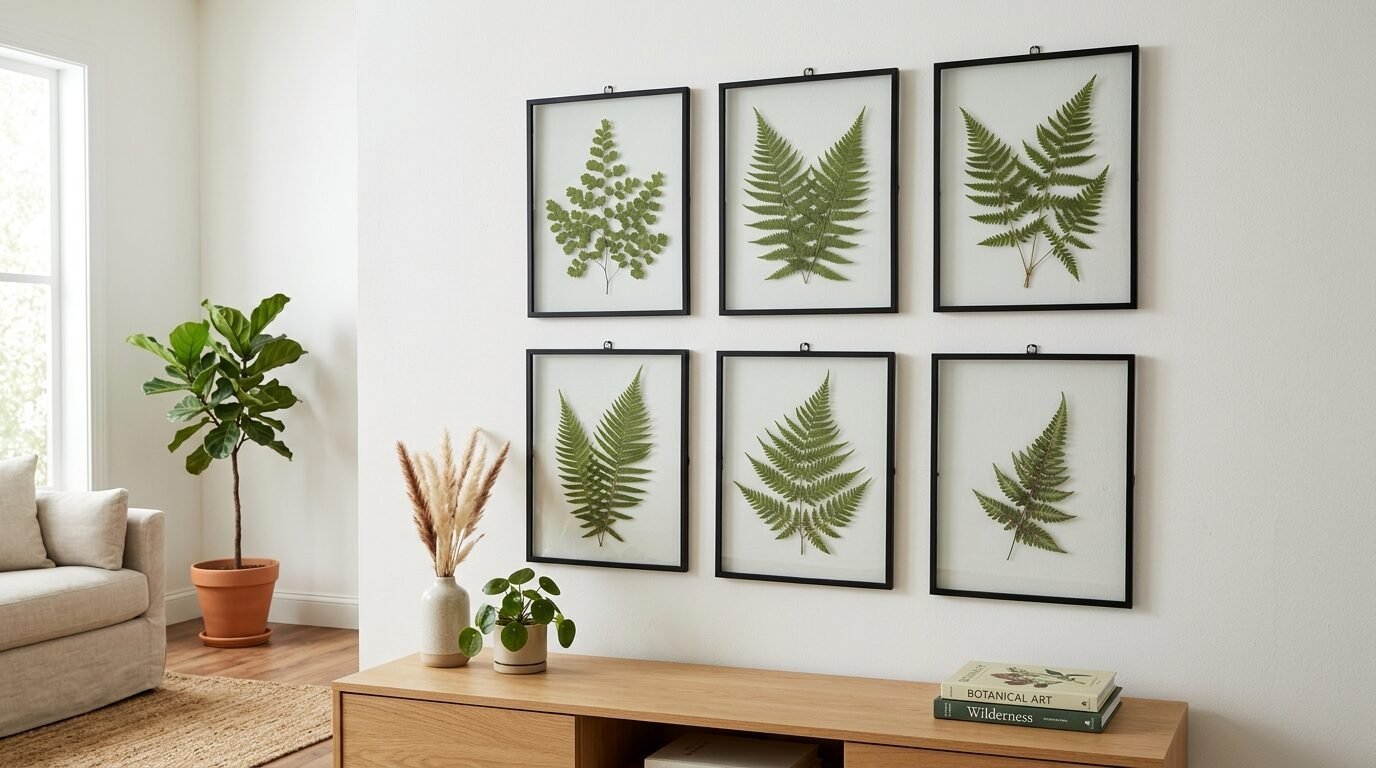
Nature belongs on your walls. I collected ferns from my yard and pressed them in heavy books for two weeks. Buy a set of matching black frames. Place the dried leaves between two pieces of glass. This creates a see-through effect. I noticed that using white backgrounds makes the green look dull. Clear glass is the secret. It allows your wall color to show through the art. This is a top choice for Aesthetic Room Decor Ideas Diy Cheap. You only pay for the frames. It looks like a vintage botanical collection. It brings a calm vibe to a bedroom or bathroom.
7. Basket Wall Arrangement
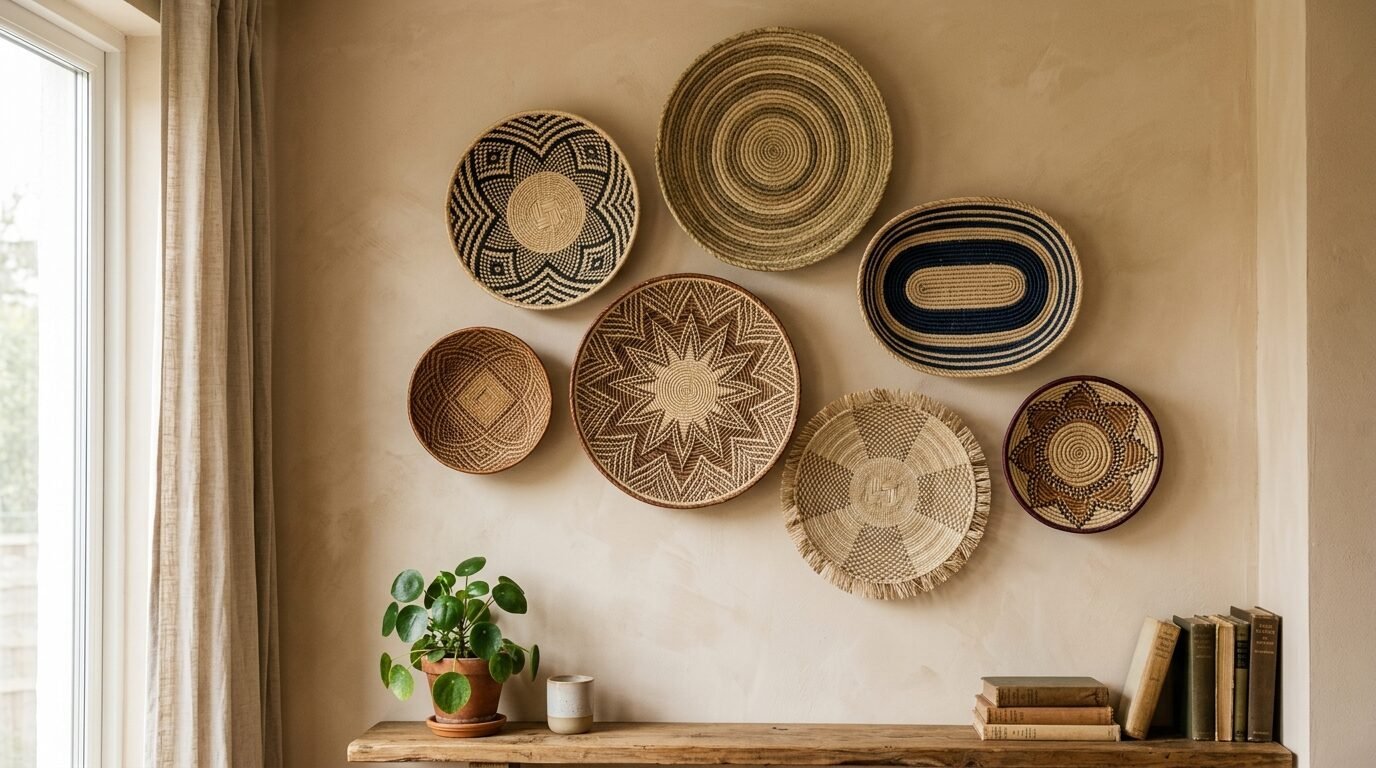
Woven baskets add texture and shape. Visit your local thrift store. Look for shallow baskets with different patterns. I found five unique ones for twelve dollars total. Arrange them on the floor first. Take a photo of the layout. Use small nails to hang them. I tried using tape but they fell off during the night. Nails are much safer. I like to overlap the edges slightly. This makes the collection feel like one large piece. It is a great way to fill a high wall. The varied heights create shadows that look very artistic.
8. Slat Wood Wall Accent
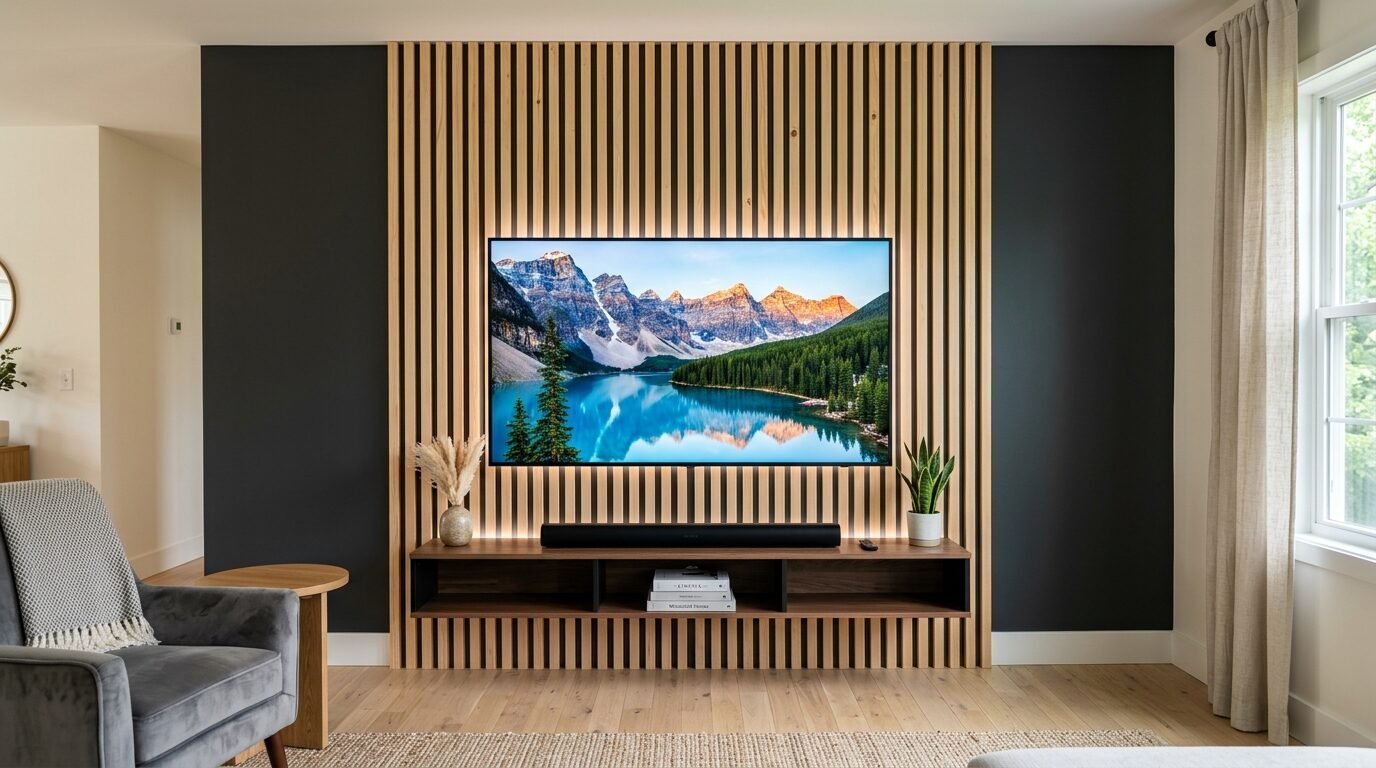
Small sections of slat wood look very modern. Buy one-by-two pine boards. Space them one inch apart vertically. I used a scrap piece of wood as a spacer. This ensures every gap is identical. Secure them with a brad nailer. I painted the wall behind the slats a dark charcoal. The light wood against the dark paint looks incredible. I saw this in a luxury hotel lobby. I recreated it for forty dollars. It works well behind a television or a headboard. It adds architectural interest to a plain boxy room.
9. Abstract Spackle Canvas
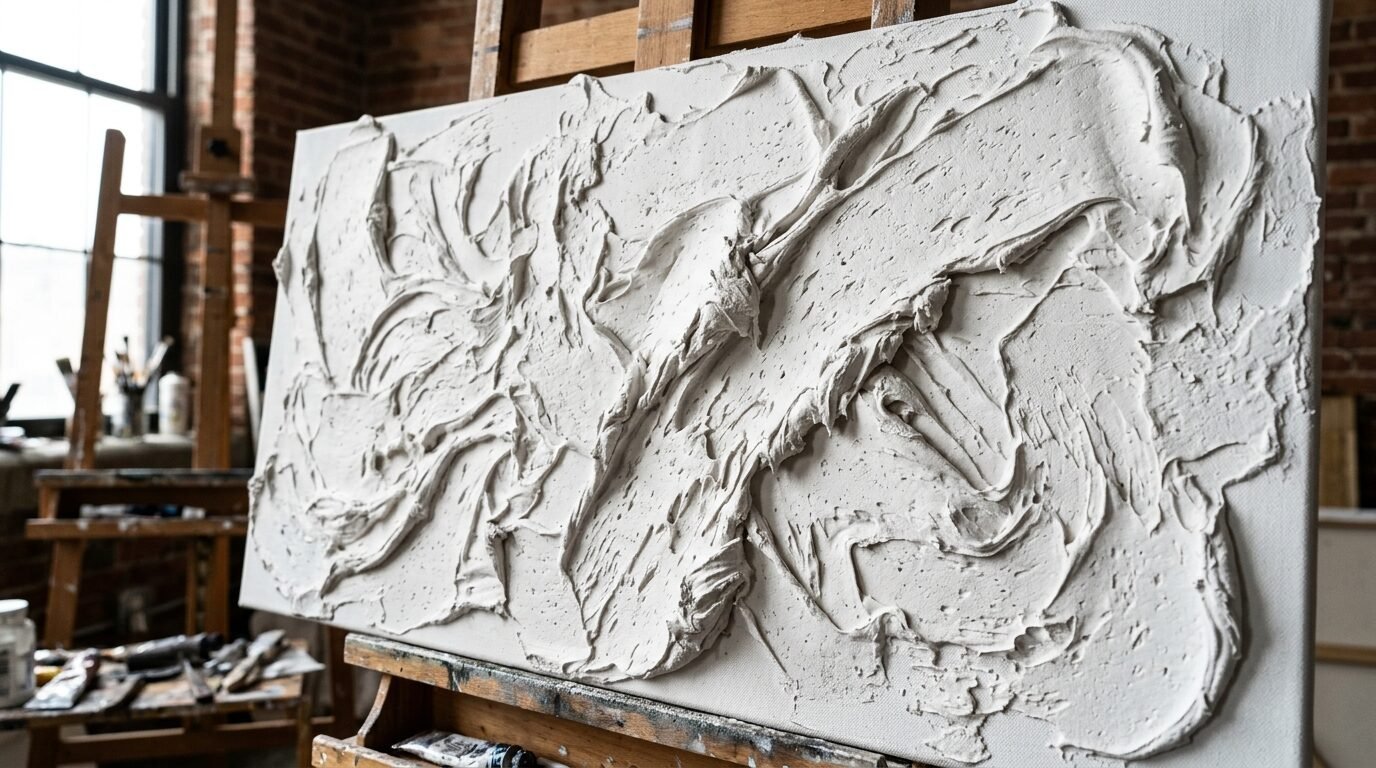
Texture is a big trend in home decor. Buy a large blank canvas and a tub of joint compound. Use a putty knife to smear the compound across the canvas. I like to create thick ridges and valleys. I tried using a comb to make patterns. It created a very cool rhythmic look. Let it dry for a full day. Paint the whole thing one solid color. I chose an off-white called Swiss Coffee. The shadows do all the work. It looks like a gallery piece that costs thousands. It costs about fifteen dollars to make.
10. Floating Branch Photo Display
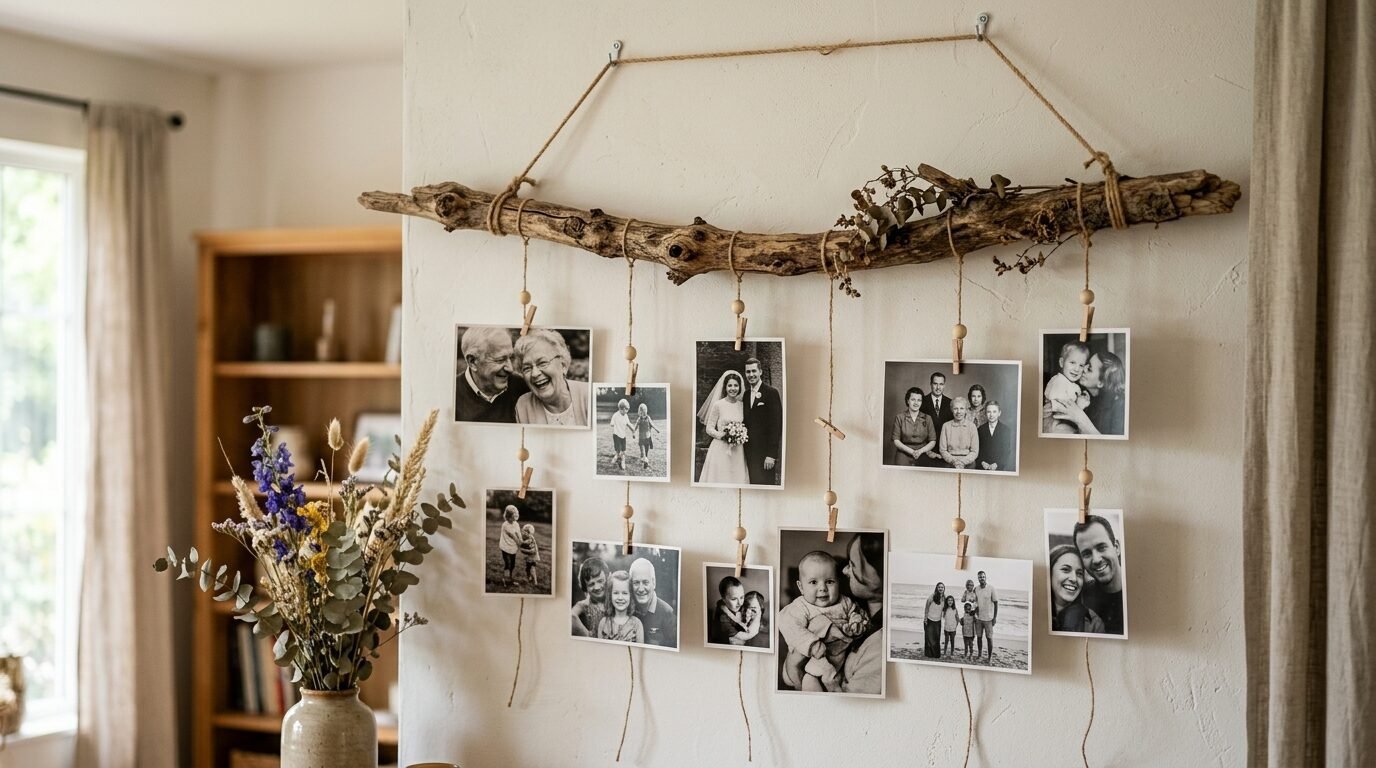
Branches bring an organic shape to your room. Find a sturdy fallen branch in a park. Clean it with a damp cloth. Tie several pieces of twine to the branch at different intervals. Use small wooden clips to attach your photos to the twine. I noticed that black and white photos look best here. They keep the look cohesive. I hung mine above my desk. It feels much more personal than a standard frame. This is one of those Hanging Ideas that feels light and airy. It is very easy to change the photos whenever you want.
11. Scalloped Mirror Border

Plain mirrors are boring. I used small wooden discs to create a scalloped edge on a round mirror. You can buy the discs at a craft store. Use a strong clear adhesive to glue them around the rim. I painted the discs a soft terracotta color. It gave the mirror a custom designer look. I learned to let the glue cure for twenty four hours before hanging. If you rush it the discs might slide. This project turned a five dollar mirror into a statement piece. It looks great in an entryway.
12. Grid Clipboard Gallery

Clipboards are an easy way to display art. Buy twelve identical wooden clipboards. Hang them in a perfect grid of three rows and four columns. I used a laser level to keep them straight. Put a different print or photo in each one. I like using sketches or architectural drawings. I found that using black clipboards makes the art stand out more. It is a very flexible system. You can swap the art in seconds. It looks organized and professional. It fills a large wall for a low price.
13. Plywood Cutout Map
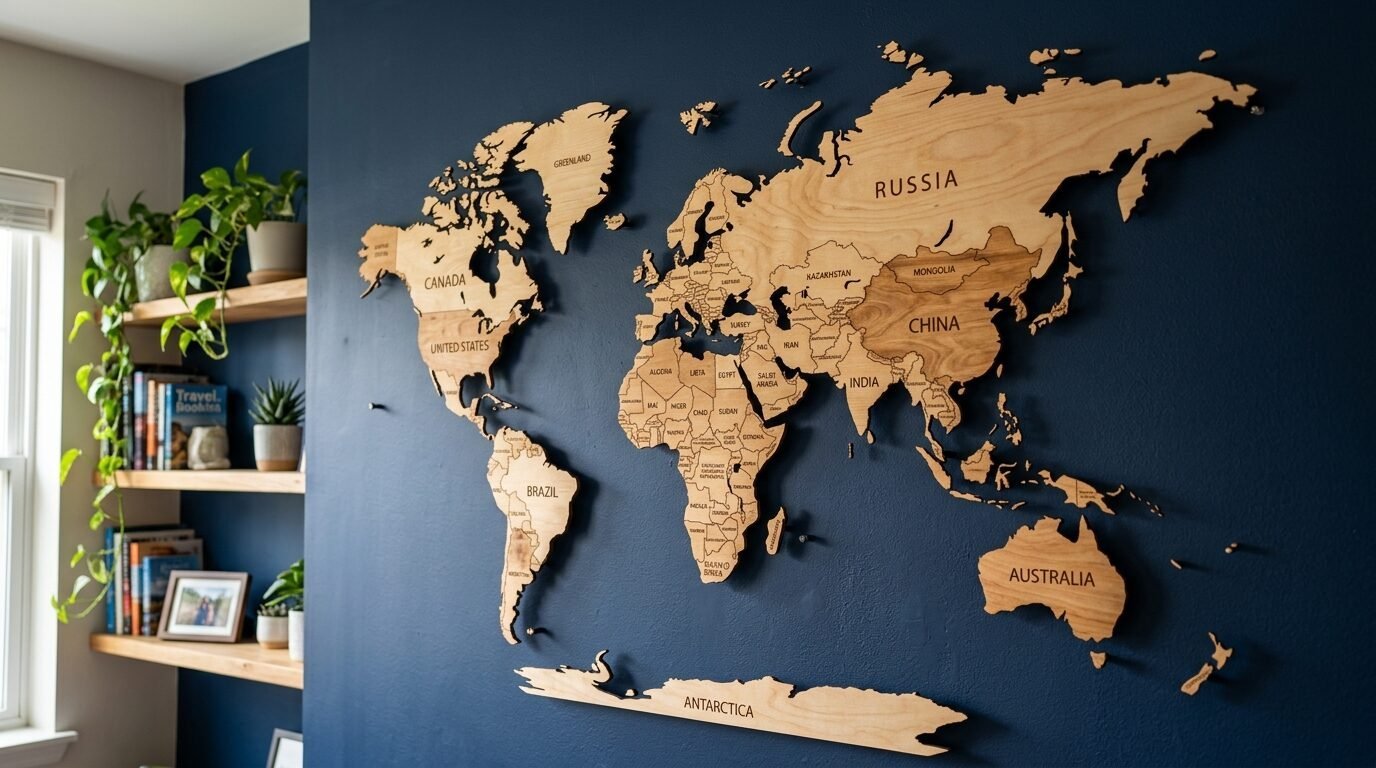
Maps are great for travel lovers. I bought a thin sheet of birch plywood. I projected a map of the world onto the wood using a small projector. Trace the outlines with a pencil. Use a jigsaw to cut out the continents. I sanded the edges and used a dark walnut stain. I mounted the pieces with small spacers to create a 3D effect. It looks like a custom piece from an office in a movie. It takes some time but the result is stunning. It is one of the most rewarding Wooden Projects I have done.
14. Painted Arch Backdrop
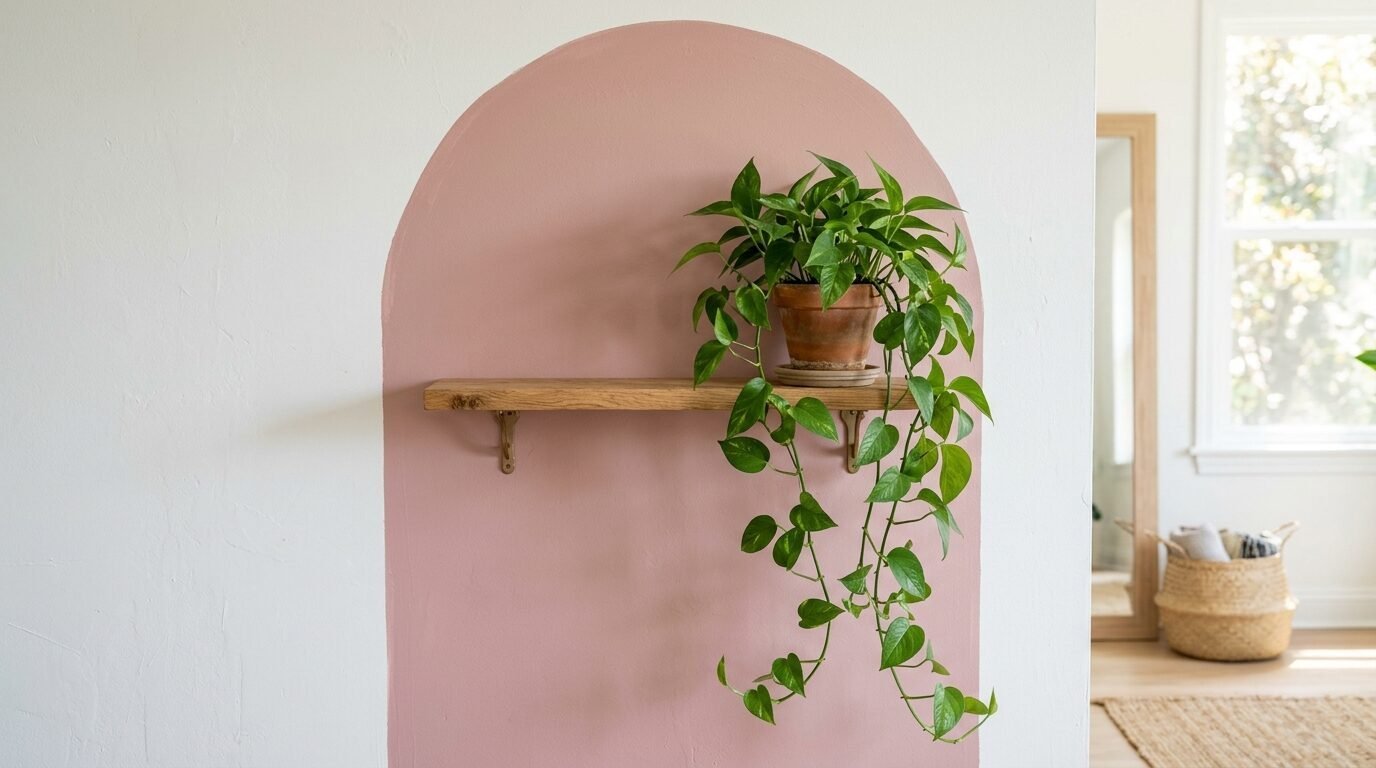
Sometimes you do not need physical items. A painted arch can frame a shelf or a plant. Use a string and a pencil to draw a perfect curve. I used a painter’s tape to mark the straight sides. Choose a color that is two shades darker than your wall. I went with a dusty rose. It created a focal point without taking up any floor space. I saw this in a trendy studio apartment. It makes the whole room feel designed. It costs about ten dollars for a small can of paint. It is a very high impact change.
15. Metal Grid Mood Board
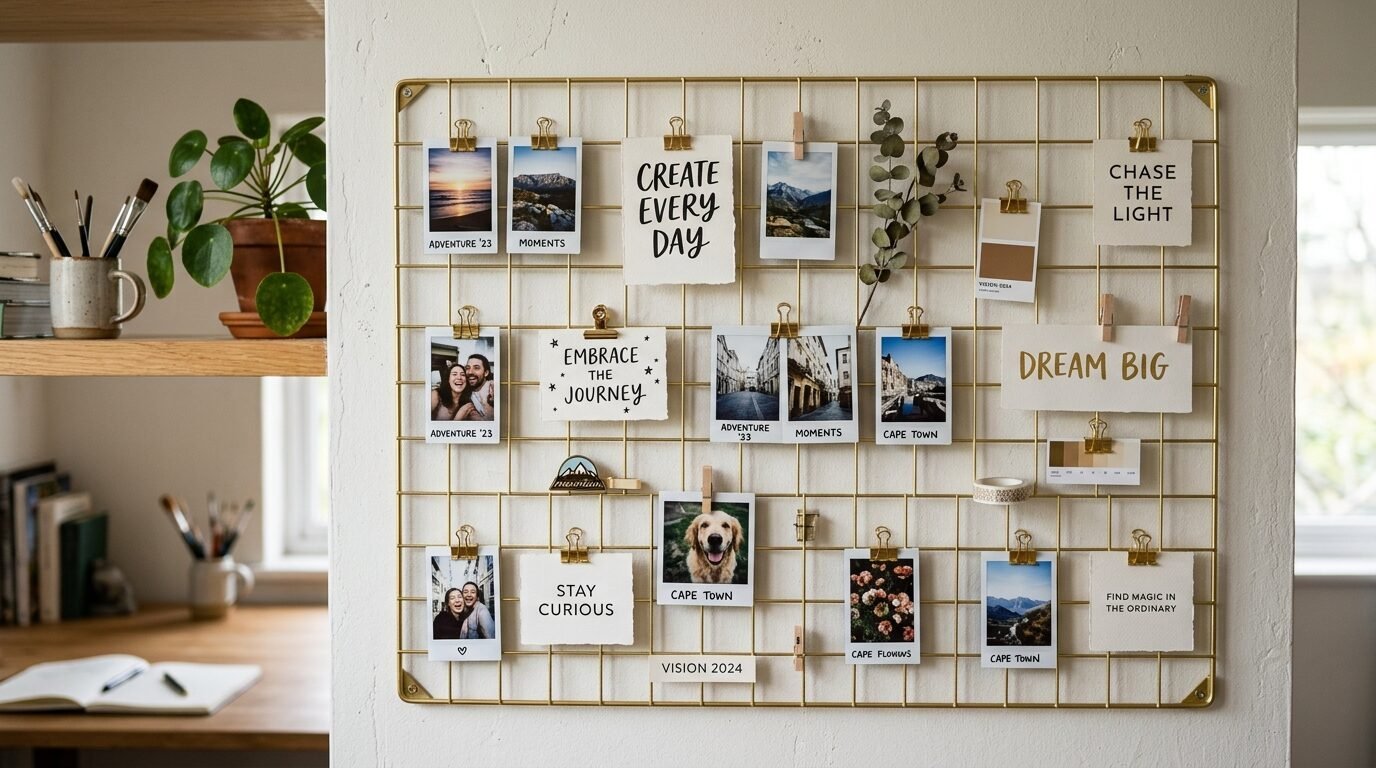
Metal grids are perfect for industrial styles. You can buy a wire mesh panel at the hardware store. Spray paint it matte black or gold. I prefer the gold for a more polished look. Use S-hooks to hang small plants or tools. I clipped some inspirational quotes to mine. I noticed that using too many items makes it look messy. Keep it simple with a few key pieces. It looks like a professional design studio setup. It is very sturdy and holds a lot of weight.
16. Driftwood Wall Hanging
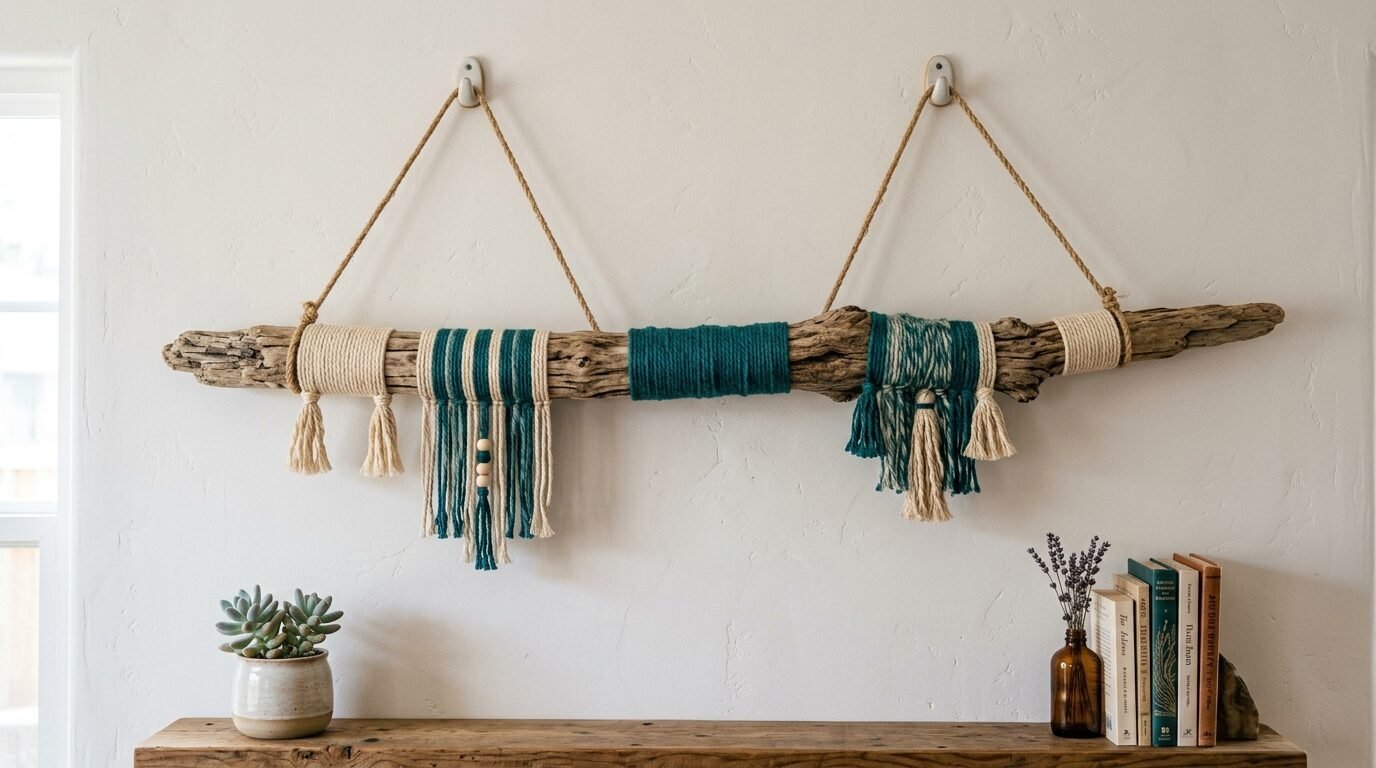
Driftwood has a beautiful weathered texture. I found a long piece on a beach trip. I wrapped colorful yarn around parts of the wood. This added a soft touch to the hard wood. I hung it horizontally using two small nails. It looks like a piece of fiber art. I tried using different textures of yarn like wool and cotton. This made the piece feel more expensive. It is a great conversation starter. People always ask where I found the wood. It brings a piece of the coast into your home.
17. Box Shelf Collection
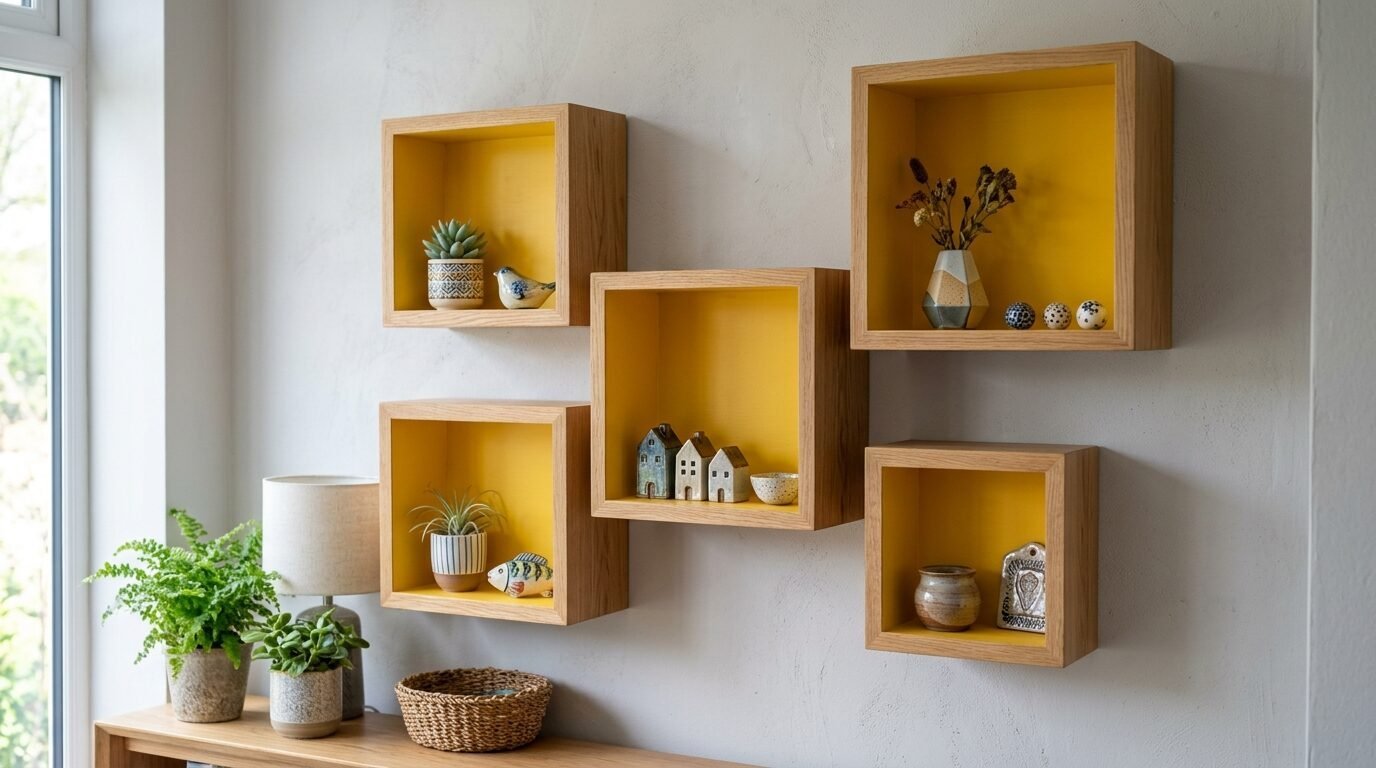
Small box shelves are great for showing off tiny treasures. I built five square boxes out of scrap pine. I made them different depths. I arranged them in a cluster on the wall. I painted the insides a bright yellow and kept the outsides natural. This added a hidden pop of color. I learned to use wall anchors for these. Even small shelves can get heavy with books. I once had a shelf fall because I only used a nail. Use a proper screw into a stud or an anchor. It looks very modern and clean.
18. Hanging Herb Garden
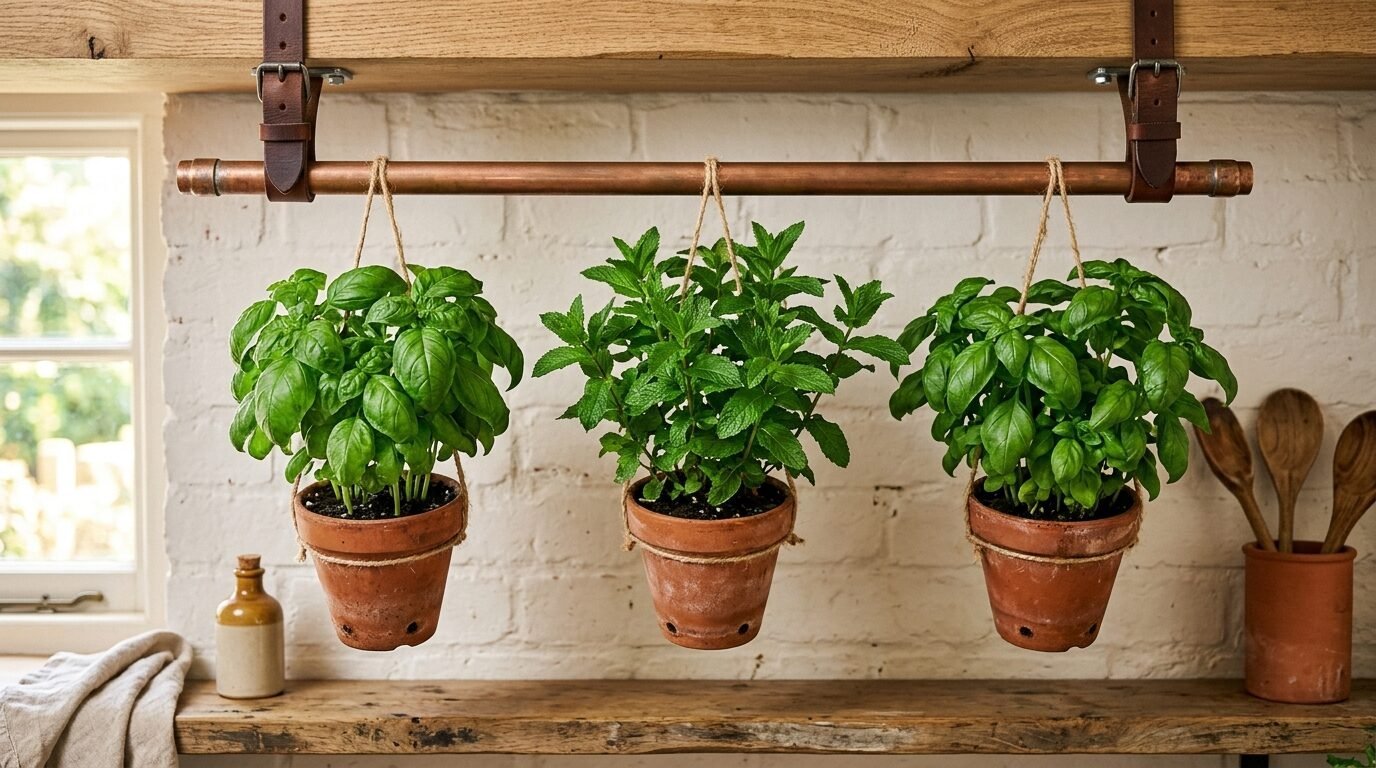
Food can be art too. I used a long copper pipe and three leather straps. I hung the pipe from the wall. I attached small terracotta pots to the pipe using wire. I planted basil and mint in the pots. It looks like a living wall. I noticed that copper tarnishes over time. I like the aged look but you can polish it if you want. It smells amazing and looks very fresh. It is perfect for a kitchen wall. It combines utility with a very high-end aesthetic.
19. Giant Pegboard Organizer
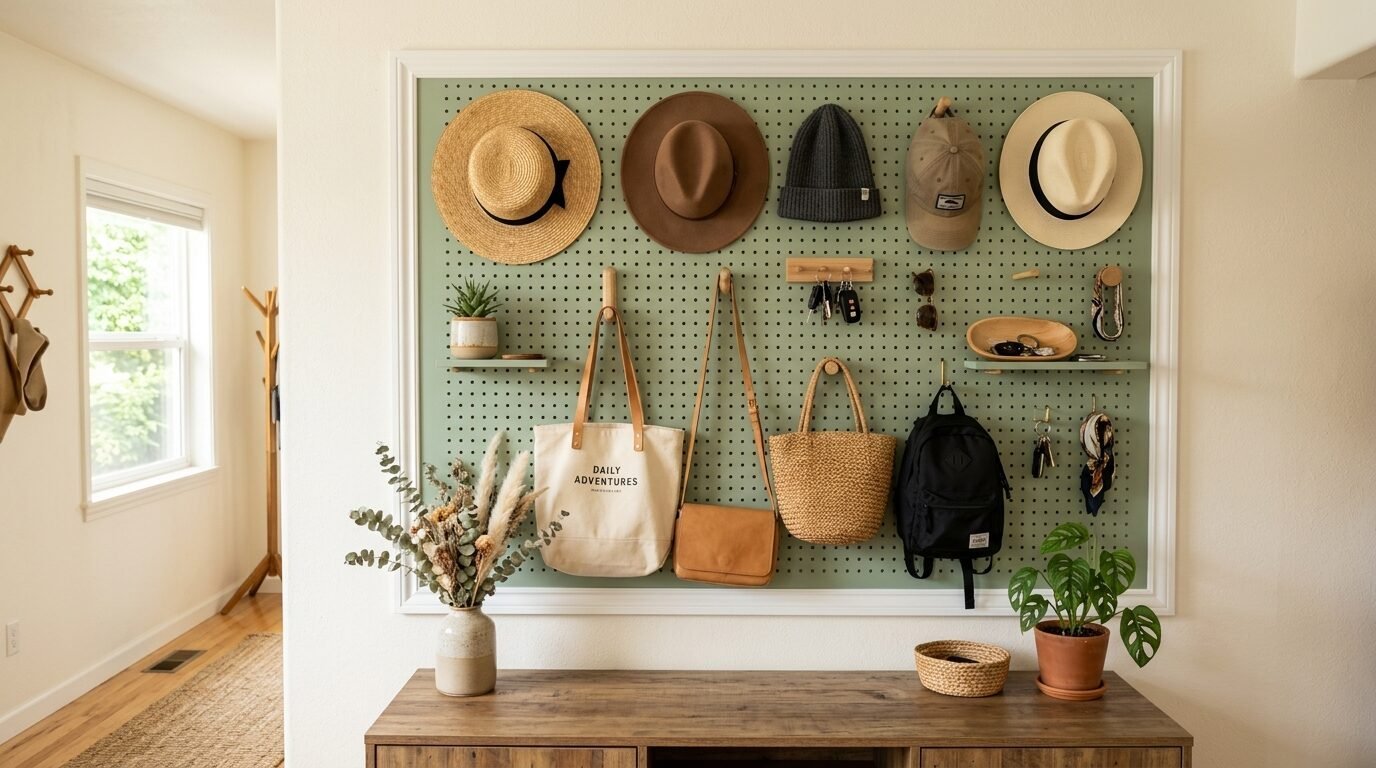
Pegboards are not just for garages. I painted a large pegboard the same color as my wall. I framed it with thick wood molding. This made it look like furniture rather than a utility item. I used wooden pegs to hold my hats and bags. I found that grouping items by color made it look very curated. I saw this in a boutique clothing store. It keeps my floor clear and my walls interesting. It is a very smart way to use a large empty space. It is functional and stylish.
20. Stenciled Cement Tiles
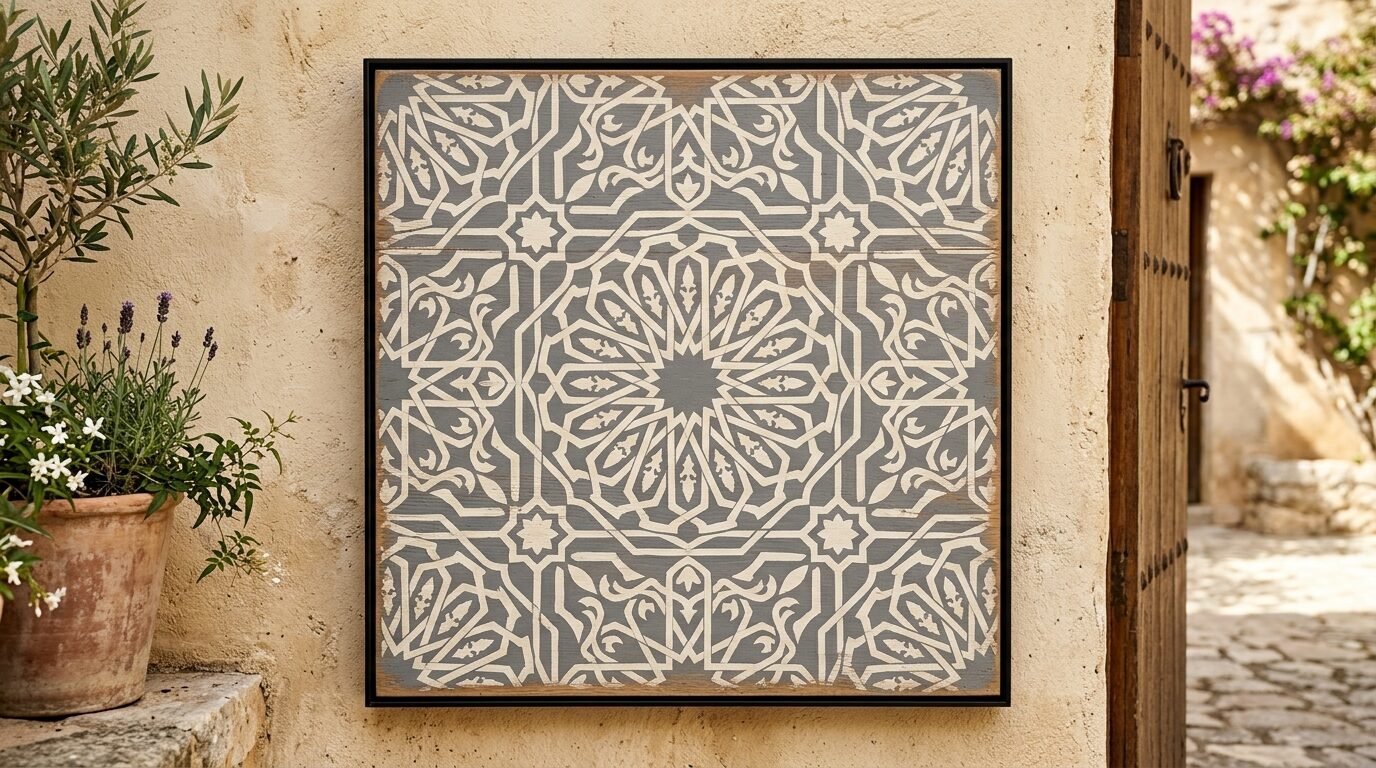
You can create a tile look without the grout. I used a large tile stencil on a piece of plywood. I used gray and white paint to mimic the look of Mediterranean tiles. I framed the plywood with a thin black frame. It looks like a heavy stone slab. I tried using a sponge for the paint. It gave the tile a more realistic aged texture. I hung it in my dining room. It adds a sophisticated pattern to the space. It is much easier than installing real tile. It is light enough to hang with standard hooks.
21. Rainbow Glass Vases

Glass catches the light beautifully. I found several clear glass bottles at a thrift store. I filled them with water and a drop of food coloring. I used a different color for each bottle. I mounted them on a small wooden ledge. When the sun hits the window the colors glow across the room. I noticed that using distilled water keeps the colors clear for longer. Tap water can get cloudy. It is a very simple way to add color. It looks like a custom glass installation. It costs almost nothing to set up.
22. Oversized Letter Art
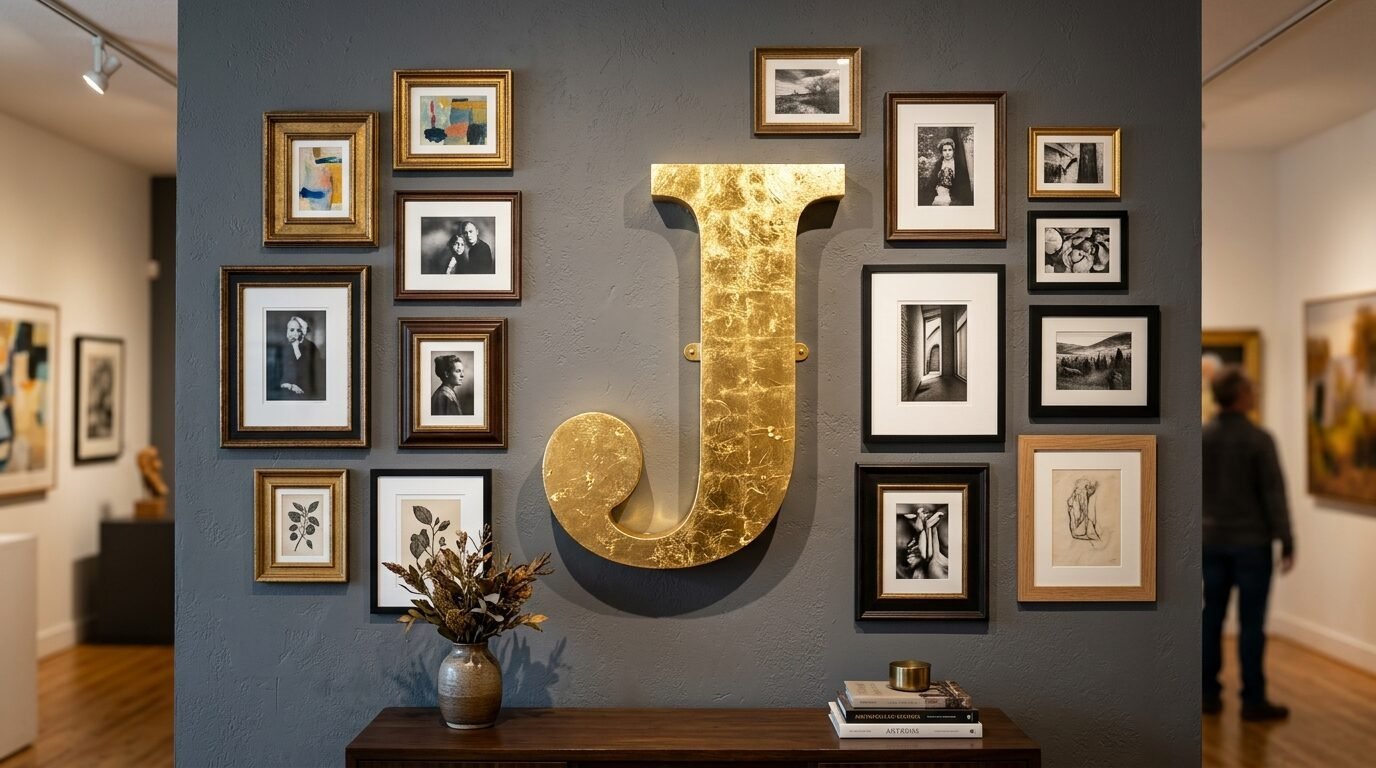
Typography is a classic design element. I bought a large wooden letter from a craft shop. I covered it in gold leaf. I found that using a spray adhesive made the gold leaf stick better. I used a soft brush to remove the extra flakes. It looks like a heavy brass sign from a library. I hung it in the center of a gallery wall. It breaks up the square frames with a different shape. I tried a black painted version too but the gold looks more expensive. It adds a personal touch to the room.
23. Macrame Wall Hanging
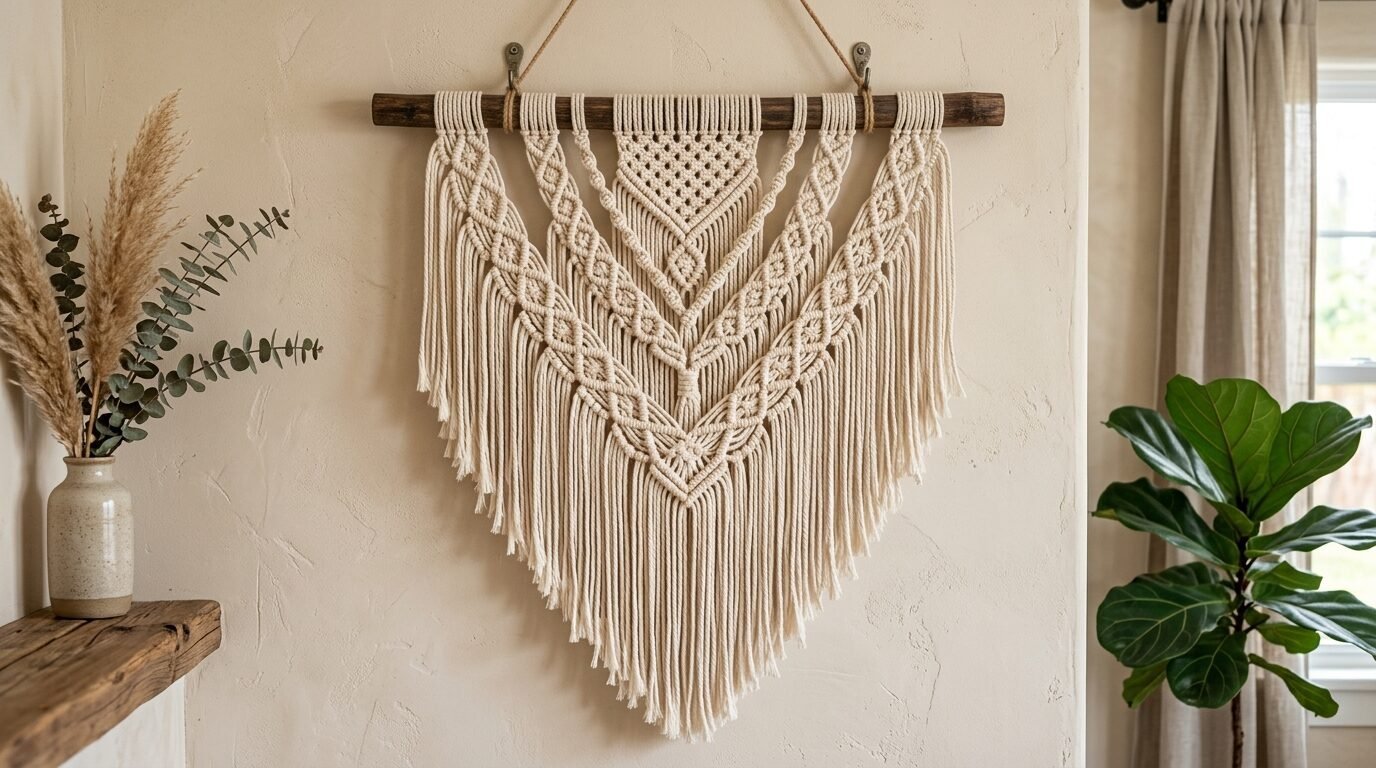
Fiber art adds a soft layer to a room. I learned a few basic knots on YouTube. I used thick cotton cord and a wooden dowel. I spent three hours making a large fringe hanging. I noticed that brushing out the ends of the cord makes it look more professional. It creates a soft cloud-like texture. I hung it over my bed. It makes the room feel cozy and finished. I saw similar pieces online for eighty dollars. I made mine for twelve. It is a great way to add a boho vibe.
24. Vintage Plate Wall
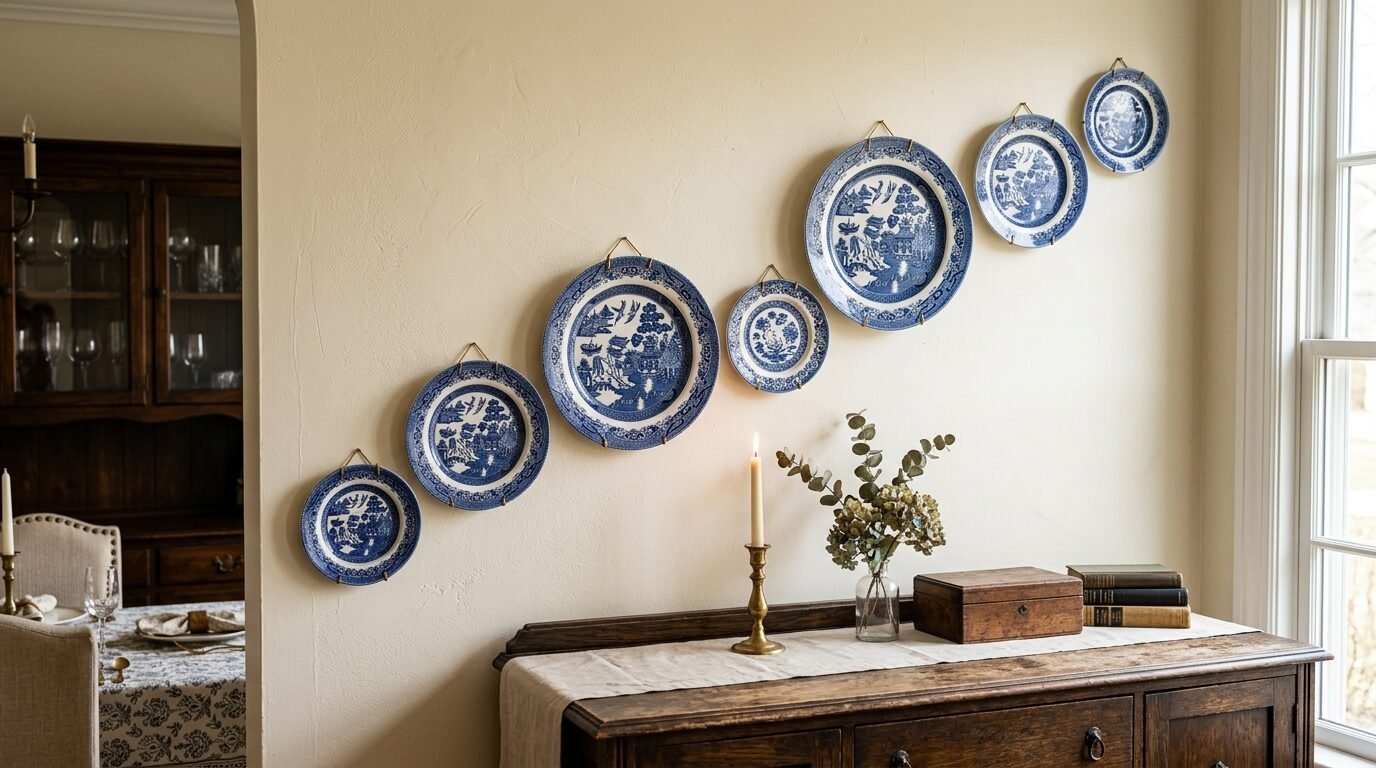
Old plates have incredible patterns. I searched for blue and white plates at antique malls. I found seven different sizes. I used adhesive plate hangers to mount them. These are invisible from the front. I arranged them in a flowing line across the wall. I tried a tight circle first but the line felt more modern. It looks like a curated collection from a world traveler. I learned to clean the back of the plates with alcohol before sticking the hangers. This ensures they stay on the wall forever.
25. Wood Block Cityscape
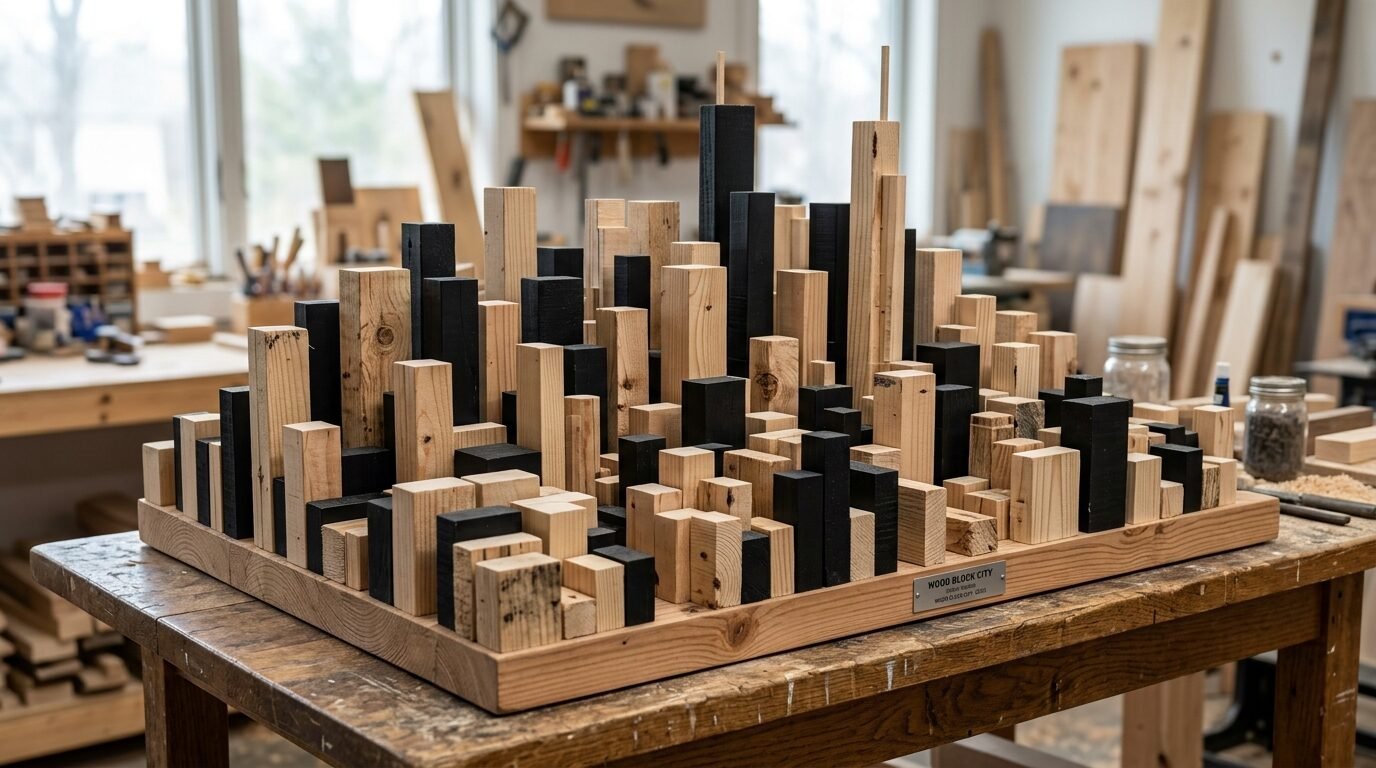
Small wood blocks can create a 3D skyline. I cut several pieces of two-by-four wood into different heights. I glued them together on a flat base. I painted the tops of some blocks black and left others natural. I noticed that the different heights create great shadows at night. It looks like an abstract model of a city. I hung it in my hallway. It is a very tactile piece of art. It uses very cheap materials but the result is a complex and interesting sculpture. It is one of the best Wooden Projects for a modern home.
Frequently Asked Questions
What is the best wood for a Diy Clock?
I recommend using birch or pine for your project. Birch plywood is very stable and does not warp easily. Pine is cheaper and easy to find at any hardware store. I have found that pre-cut circles save a lot of time. You can buy these in the craft section. Always sand the surface before you start. I once forgot to sand and the paint looked very rough. If you want a luxury look go for a thin piece of oak. It has a beautiful grain that looks professional even with a clear coat.
How do I hang heavy wood art without a stud?
I always use heavy-duty toggle bolts for anything over ten pounds. Standard plastic anchors often pull out of the drywall. I learned this the hard way when a mirror fell in my hallway. Toggle bolts expand behind the wall to provide a very strong hold. You will need a drill to make the hole. If you are a renter and cannot drill look into French cleats. They distribute the weight across a larger area. They are much safer for Large Scale Fabric Frame projects or heavy wood blocks.
Can I make Wood Slice Art with fresh wood?
I strongly suggest you avoid fresh wood. Green wood contains a lot of moisture. As it dries it will shrink and crack. I once tried slices from a tree in my yard. They all split within a month and fell off the board. Buy kiln-dried wood slices. They are already stable and will not change shape. If you must use your own wood you need to let it dry for several months. Use a wood sealer on both sides to slow down the drying process. This prevents the bark from falling off.
What are the cheapest Aesthetic Room Decor Ideas Diy Cheap?
The cheapest way to fix a wall is with paper or paint. A painted arch costs almost nothing if you have a sample jar of paint. Another great idea is a photo grid. You can print photos for ten cents each. Use a roll of washi tape to create frames on the wall. This is a top choice for Hanging Ideas because it leaves no marks. I also love using pressed flowers. You find the flowers for free and only pay for a cheap frame. These ideas make a room look styled without spending much.
How do I ensure my Wood Clock Design looks professional?
The secret is in the details. Use a high-quality clock movement kit. Avoid the very cheap plastic hands. Look for metal hands in gold or black. Ensure your center hole is perfectly straight. If the hole is crooked the hands will rub against the wood. I use a drill press for this. If you do not have one use a guide to keep your hand drill vertical. Apply a smooth finish like a spray lacquer. I find that three thin coats look much better than one thick coat. It avoids drips and bubbles.
Final Thoughts
Making your own wall decor is about more than saving money. It gives you a home that no one else has. I have seen how a simple piece of Wood Slice Art can change the entire feel of a living room. You do not need to be a master builder to start these Wooden Projects. Start with something simple like the Pressed Fern Gallery. Move on to a more complex Diy Clock as you get more confident. I noticed that the best homes are the ones where the owners put in the effort. Your walls are a canvas for your personality. Take the first step today. Buy one board or one can of paint. You will be surprised at how much you can do with a little time. A better home is within your reach.

Anya Castellan is the Founder and Editor-in-Chief of Home Wall Trends. An art history graduate of the Rhode Island School of Design with twelve years of experience writing for leading American design publications, she specializes in composition, gallery wall theory, and the quiet architecture of domestic space. A former contributing editor at Architectural Digest and guest lecturer at Parsons School of Design, Anya personally reads and signs off on every piece before it is published.