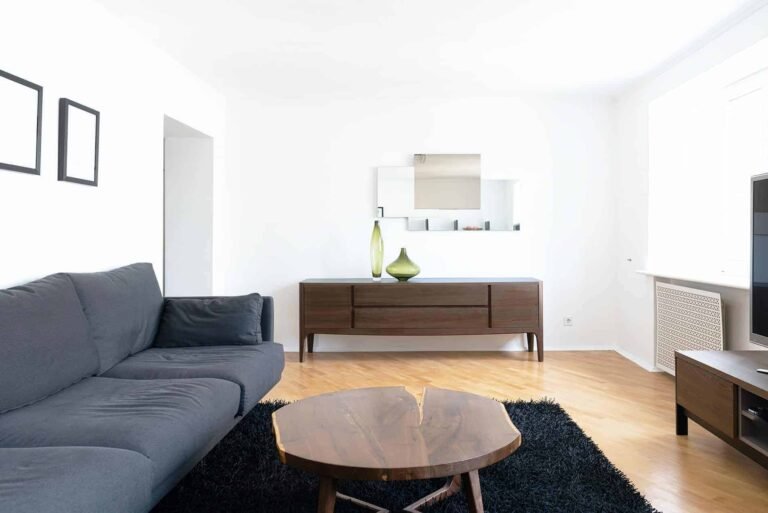
I spent three hundred dollars on a single framed print last year. It felt like a gut punch to my bank account. I wanted a gallery wall but the math did not work. Then I walked into a local print shop with a USB drive and an idea. I realized that the secret to high end decor lives inside the office supply aisle. Most people use Staples for resumes and business cards. I use it to create massive statement pieces for under twenty dollars. In my experience most homeowners overpay for art because they fear the technical side. I have printed over fifty oversized pieces for clients and my own home. I have seen the failures and the wins. This guide reveals how to get professional results without the gallery price tag.
The Executive Summary
You can create a professional gallery wall for less than the cost of a takeout dinner. This article covers the exact steps to turn digital files into massive wall decor. You will see how to choose between engineering prints and posters. I share the specific file settings that prevent blurry images. We look at the top twelve tools for finding free art. You get a clear breakdown of costs and paper weights. I also share my three biggest printing mistakes so you can avoid them. We cover everything from aspect ratios to framing secrets. This is not about cheap looking posters. This is about museum quality looks on a budget. You will know exactly what to say to the print clerk by the end of this deep dive.
1. Choose Engineering Prints for Instant Scale
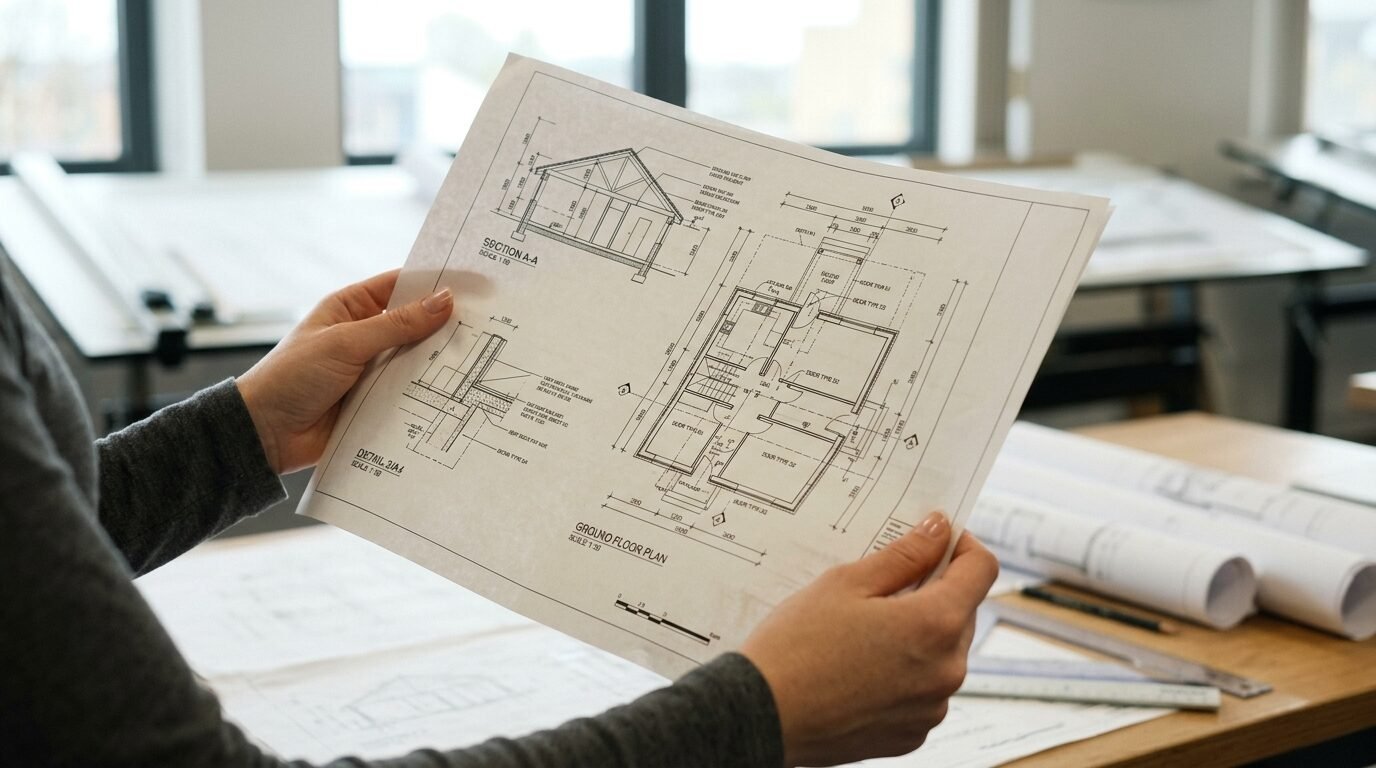
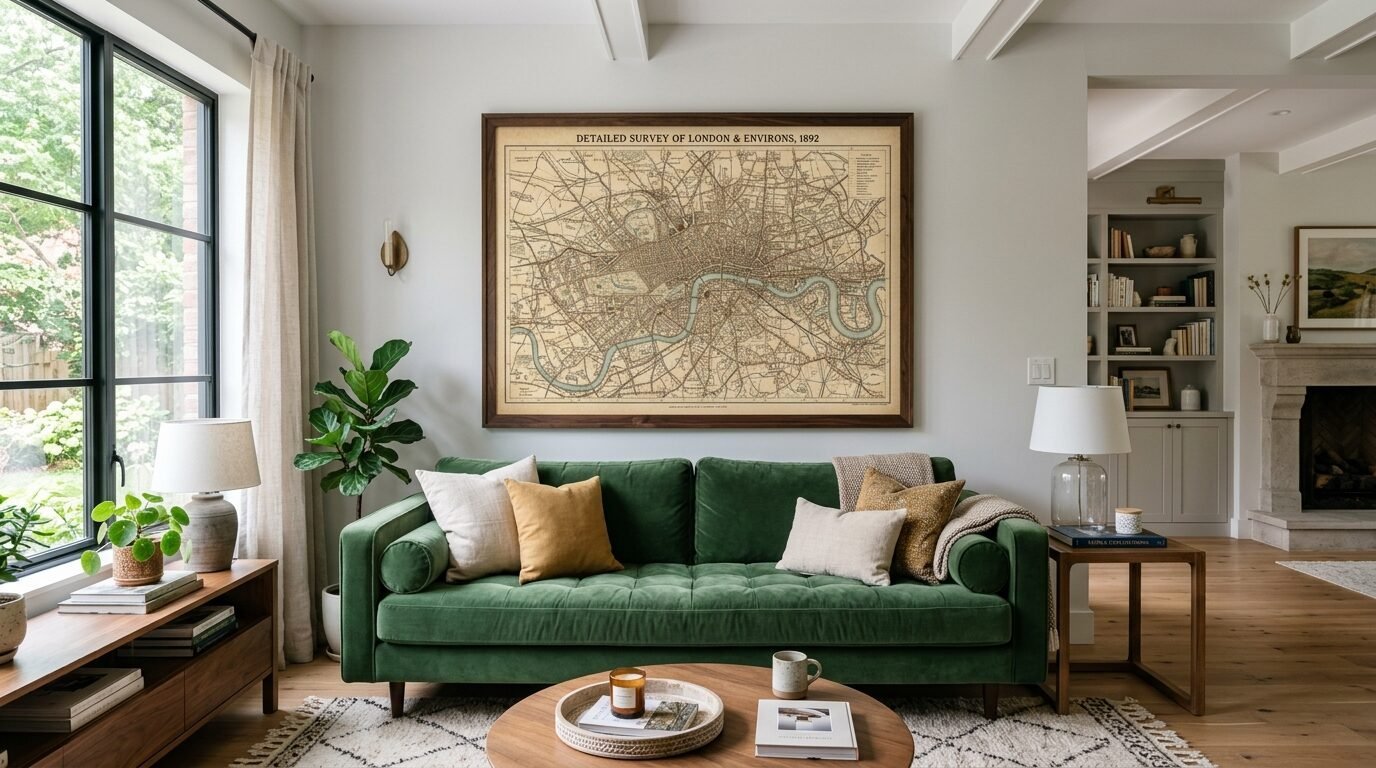
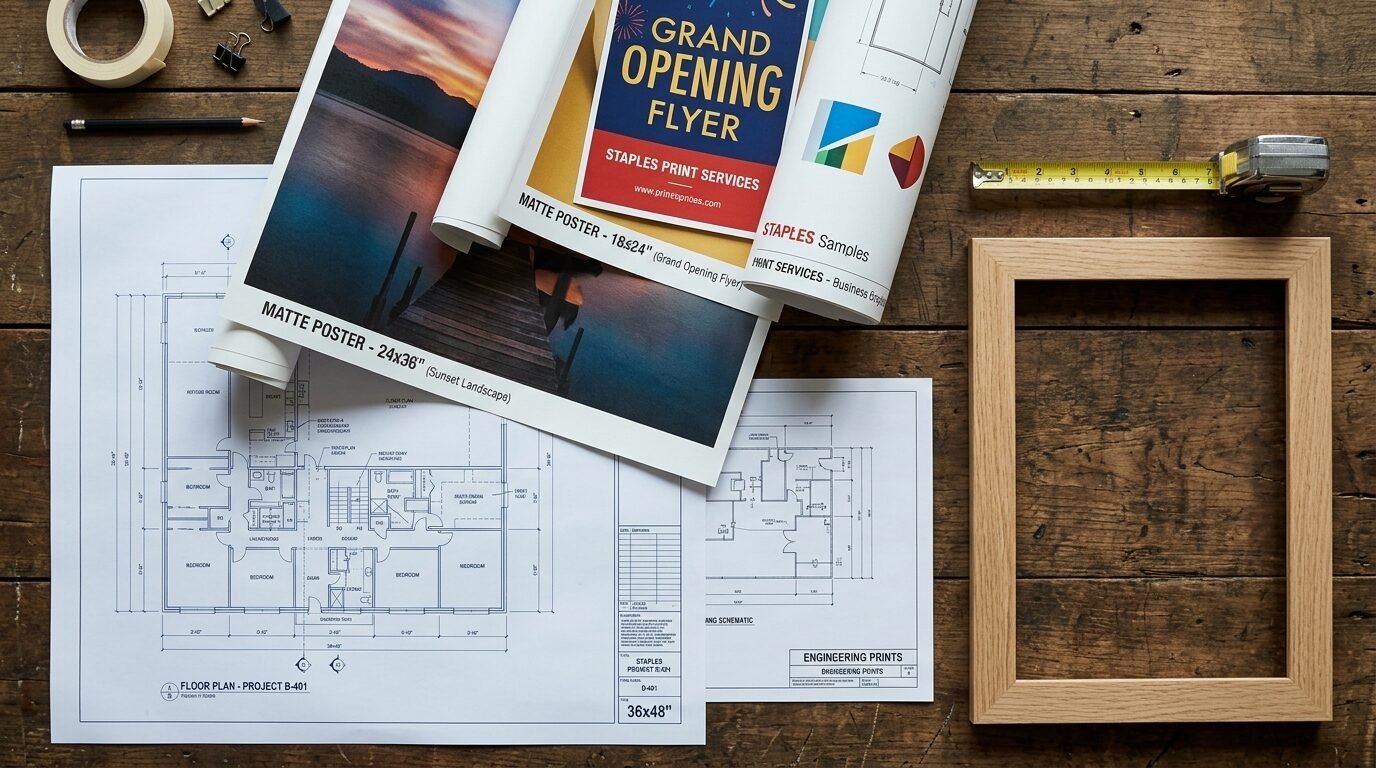
The engineering print is the best kept secret in the home decor world. These are technically for blueprints and site maps. They come in massive sizes like twenty four by thirty six inches. In my experience they offer the best value for black and white art. I once printed a giant photo of a vintage map for five dollars. The paper is thin but it looks incredible under glass. You get a raw architectural feel that works in modern or industrial rooms. Do not expect heavy cardstock here. Expect a crisp image on a lightweight bond paper. This works best for line art or high contrast photos. I have seen these last for years when framed properly.
2. Understand the Resolution Math
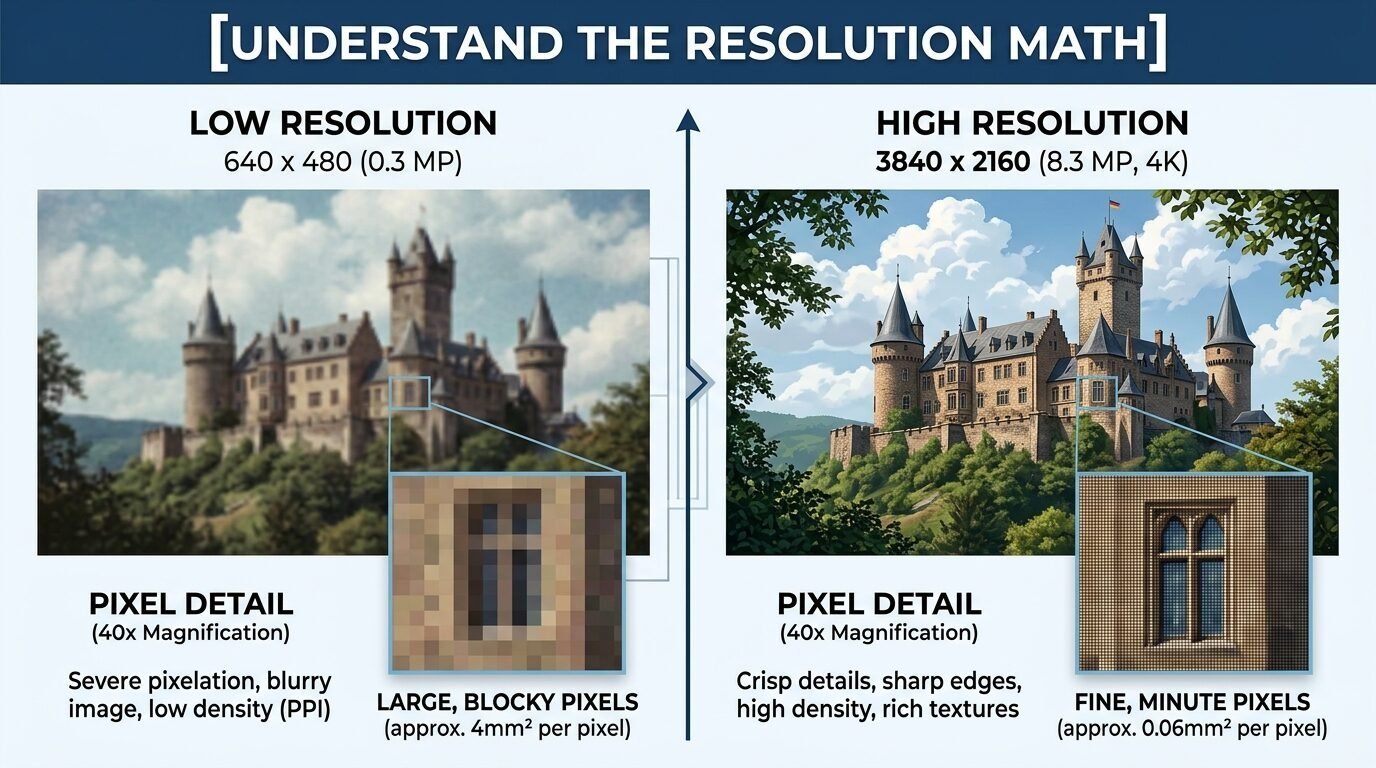
Blurry prints happen when you ignore pixels. I see people upload small phone photos and expect miracles. You need a high resolution file for large wall art. Aim for three hundred dots per inch for the best results. If you want a twenty four inch print your file needs to be seven thousand pixels wide. I use a tool called Image Upscaler to fix low quality files. It uses math to fill in the gaps. Last month I saved a vintage family photo using this method. The print came out sharp even at a large scale. Check your file properties before you upload to the website.
3. Pick the Right Paper Weight
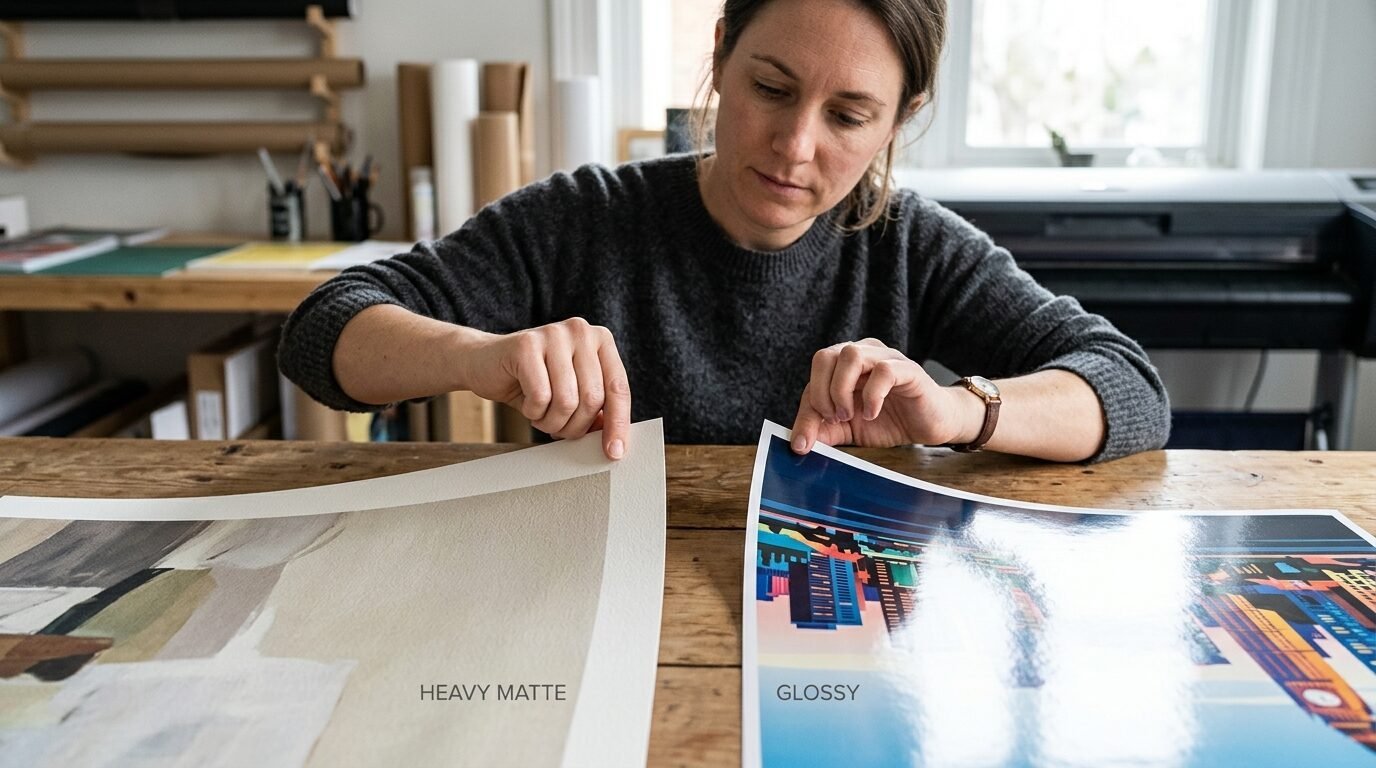
Staples offers different paper types for posters. You will see options like matte, gloss, and satin. In my experience matte is the winner for wall art. Glossy paper reflects every light in the room. It makes the art hard to see from different angles. Matte paper has a velvet look that hides imperfections. I tried a glossy print for a nursery once and regretted it. The glare from the window ruined the view. Satin is a good middle ground if you want a slight sheen. Heavyweight paper feels more like a premium product. It resists wrinkles when you put it in the frame.
4. Master the Online Upload Tool
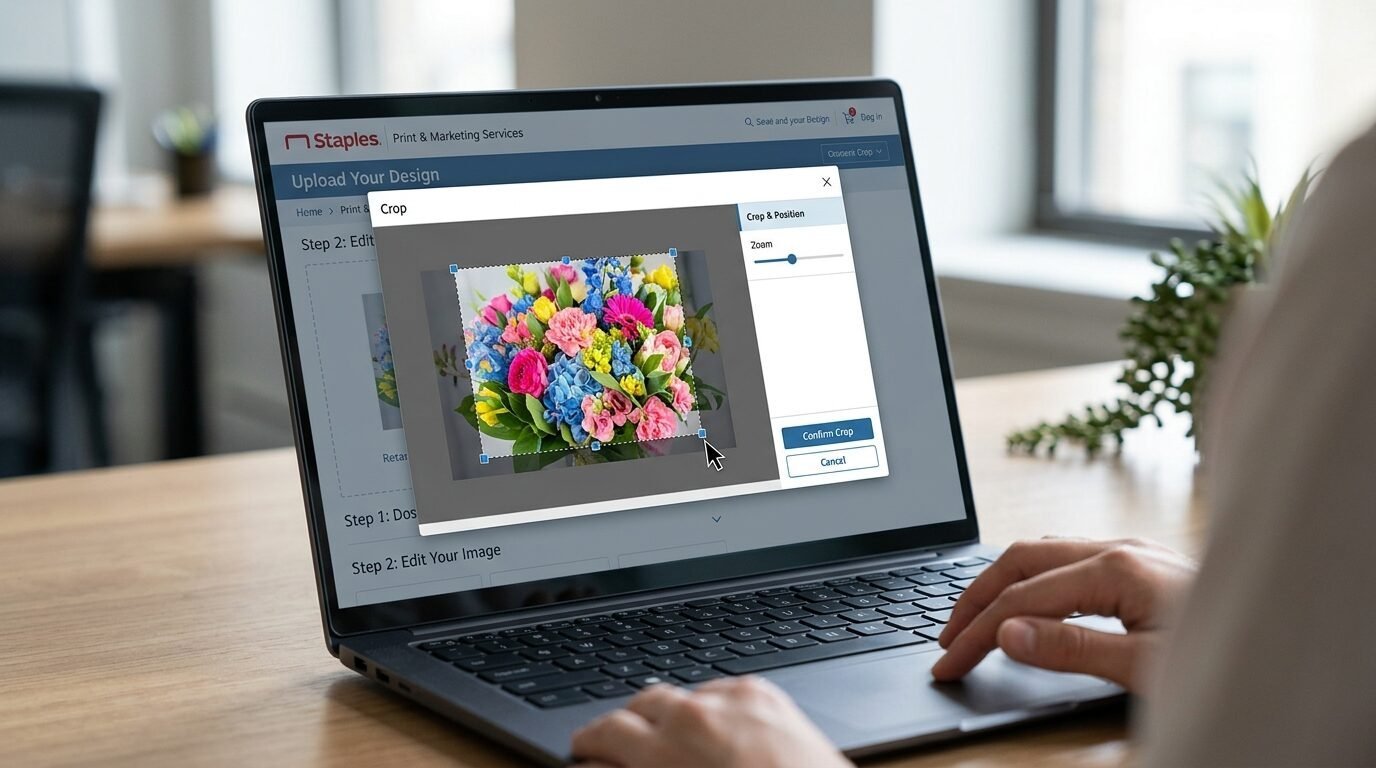
The Staples website is simple if you know the path. Go to the services section and look for posters or engineering prints. I prefer the online tool over going in person. It lets you see a digital proof before you pay. You can crop the image and check the borders. I noticed that the online prices are sometimes lower than the walk-in rates. You can also apply promo codes easily at checkout. I always save my files as a PDF to keep the fonts and colors locked. PNG files work well but PDF is the industry standard for a reason.
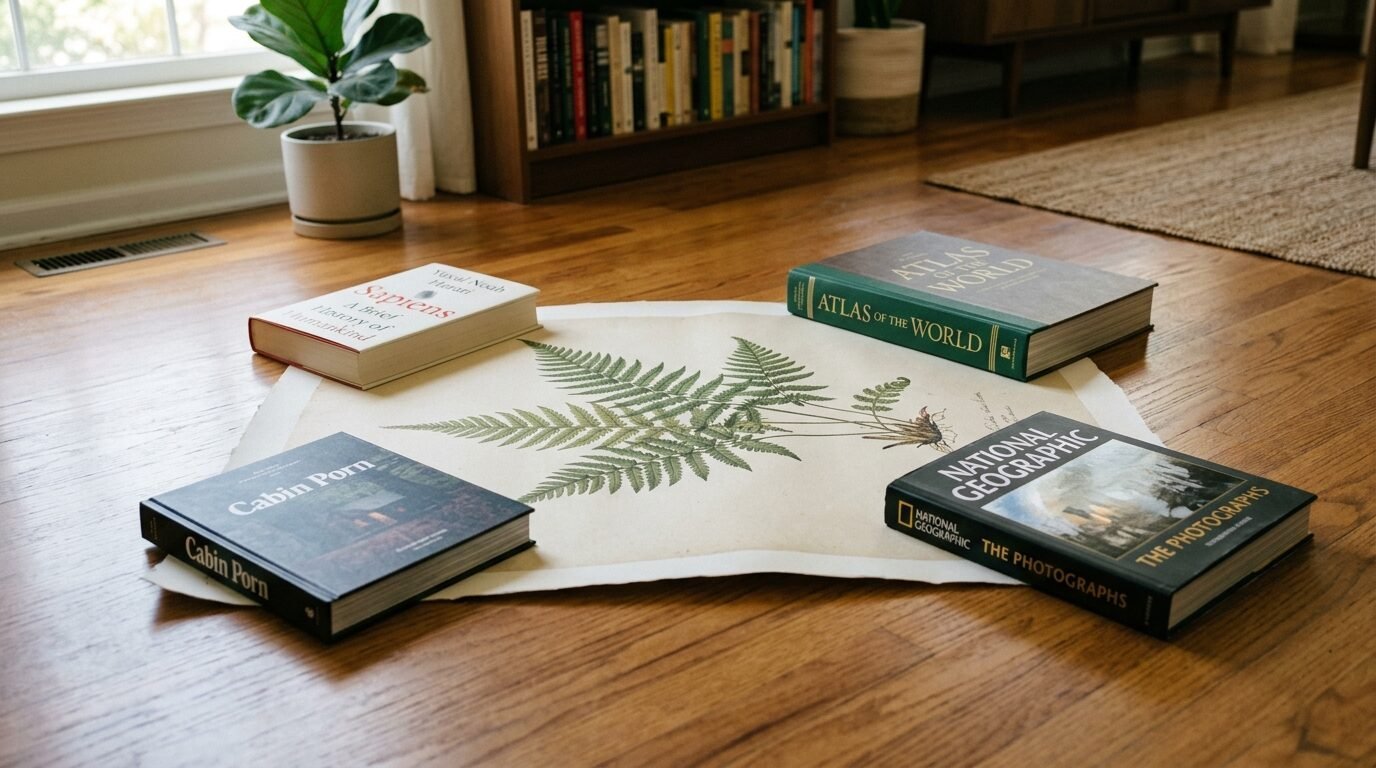
5. Use Public Domain Art Assets
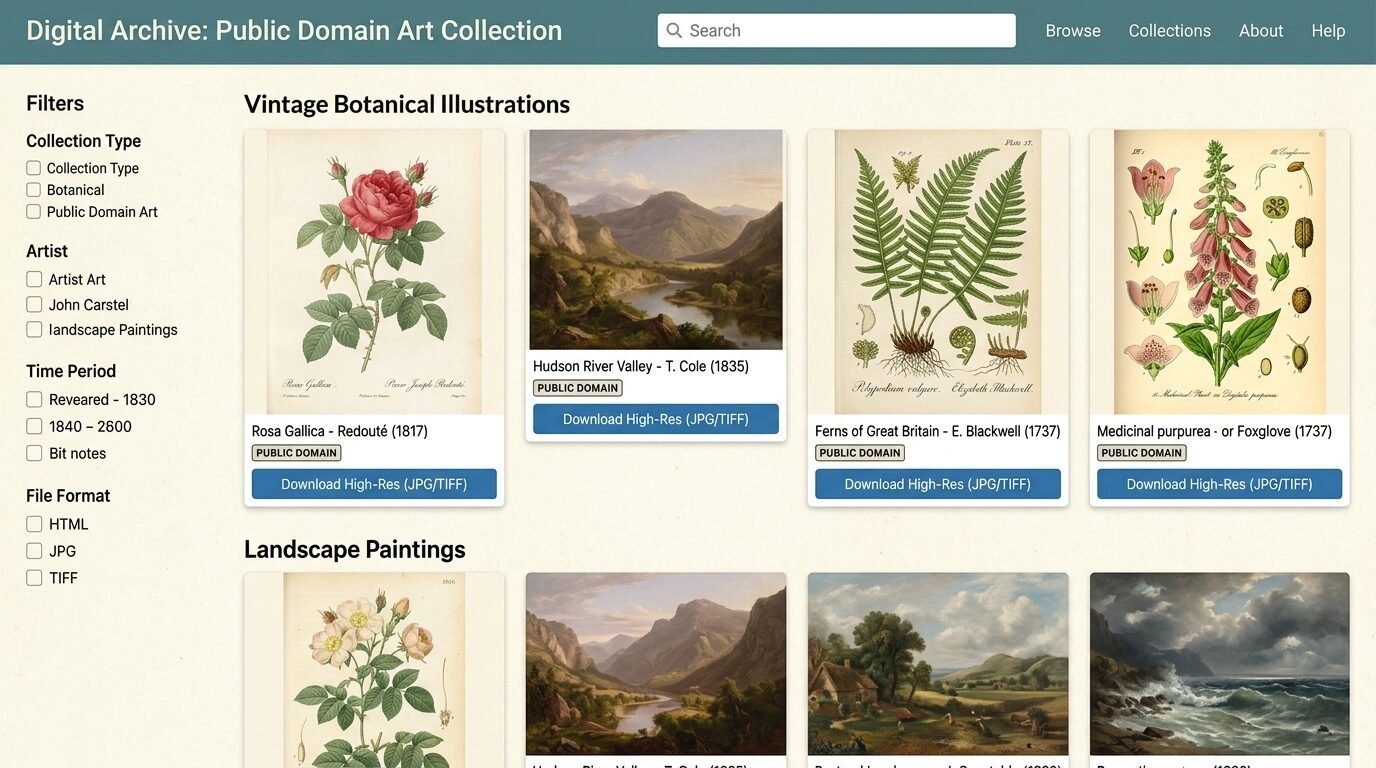
You do not need to be a painter to have great art. I source most of my prints from the public domain. Museums like the Met and the Smithsonian offer free high resolution downloads. These are legal to print and use. I found a collection of botanical sketches from the eighteen hundreds. They look like expensive antiques when printed on matte paper. Search for Creative Commons Zero licenses. This means the artist gave up their rights to the work. You can print them as many times as you want. I use these for gallery walls to keep a consistent theme.
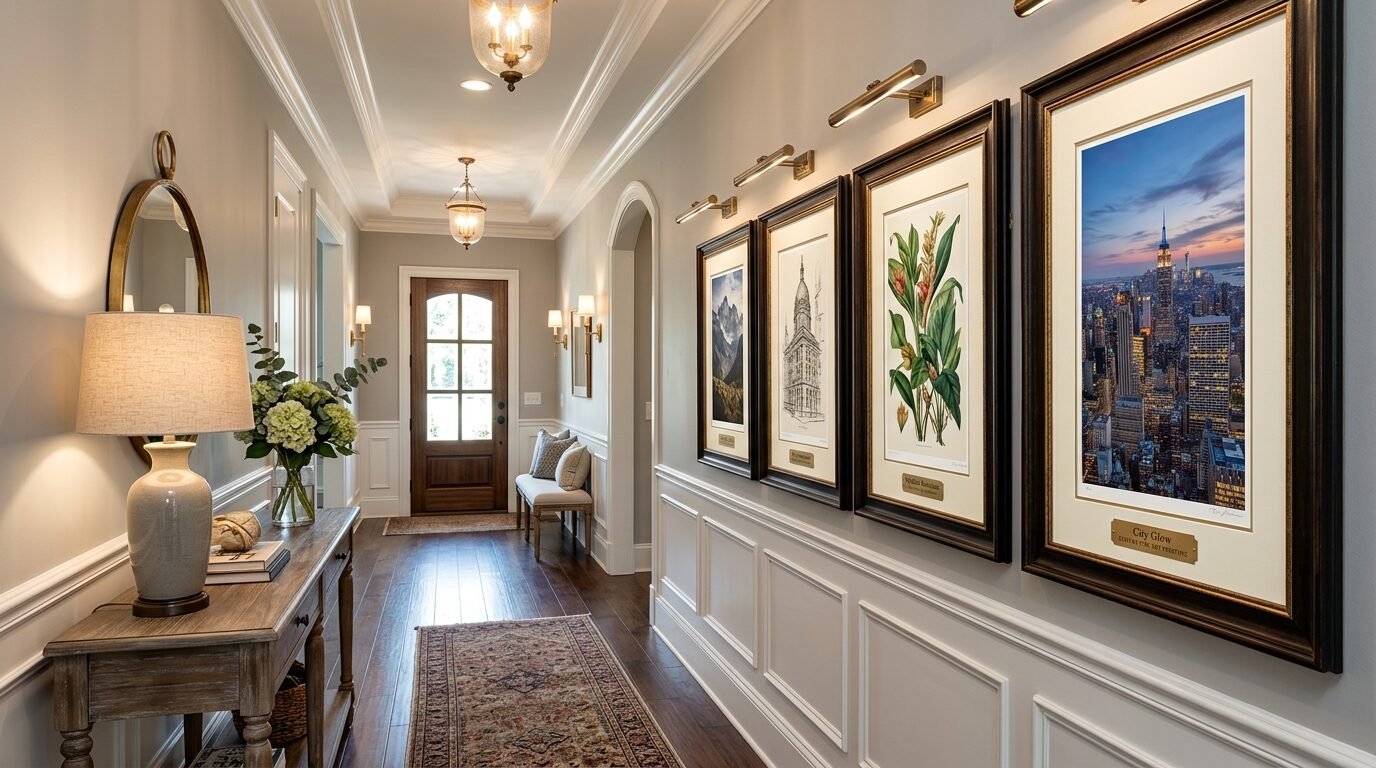
6. Sizing Art for Standard Frames
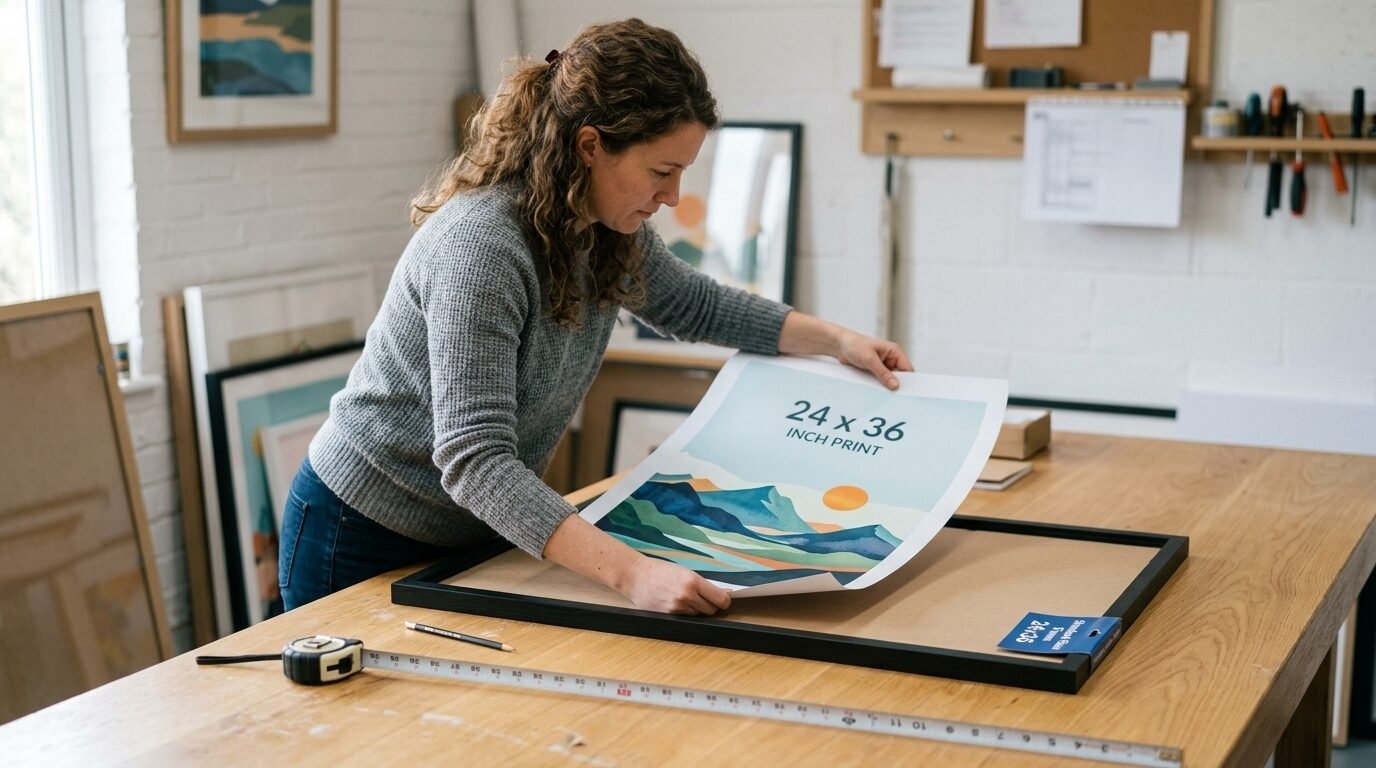
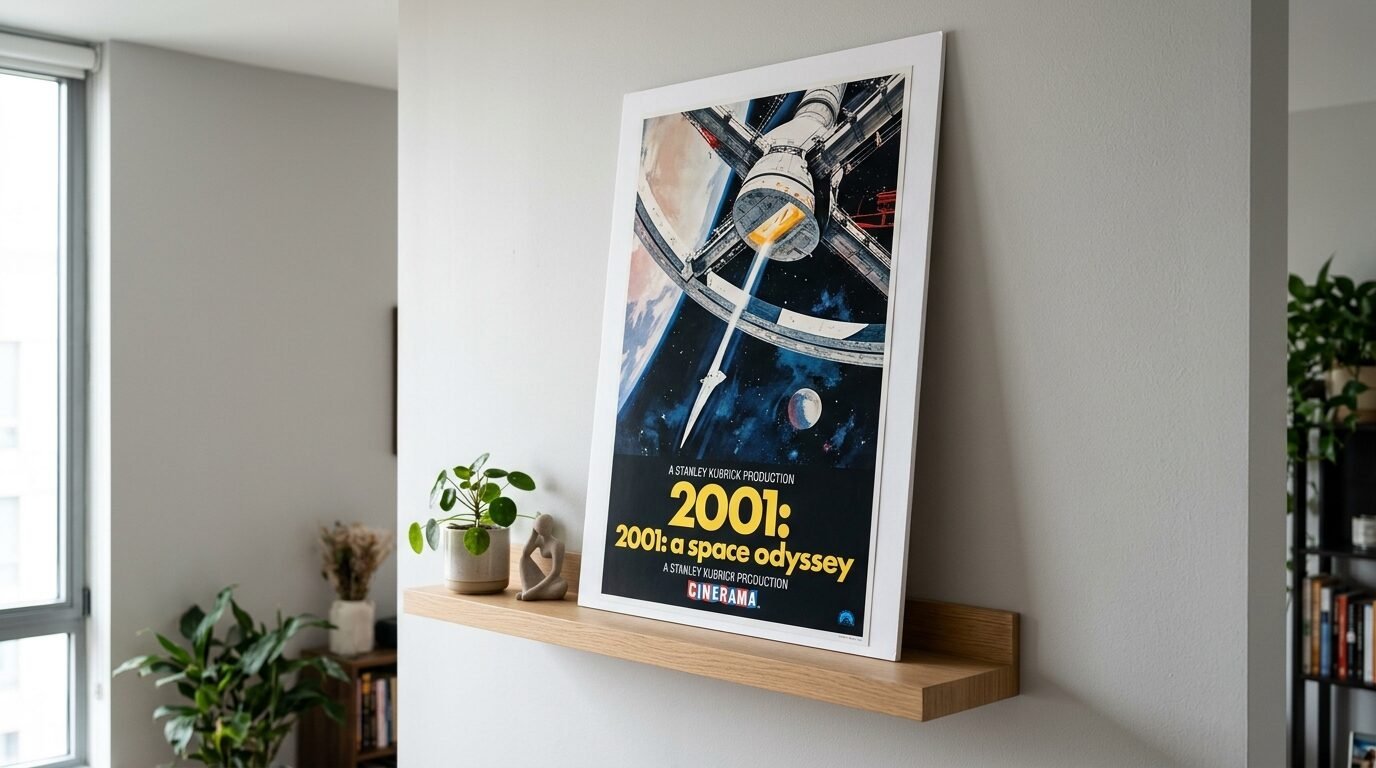
Custom framing is where budgets go to die. I always print my art to fit standard frame sizes. Staples can print at eighteen by twenty four or twenty four by thirty six. These sizes match cheap frames from big box stores. I buy my frames from Target or Ikea. This keeps the total project cost under fifty dollars. If you print a weird size you will pay hundreds for a custom frame. I learned this lesson the hard way with a panoramic print. It sat in a closet for two years because a frame cost too much. Stick to the standard grid for the easiest experience.
7. Compare Poster Prices vs Engineering Prints
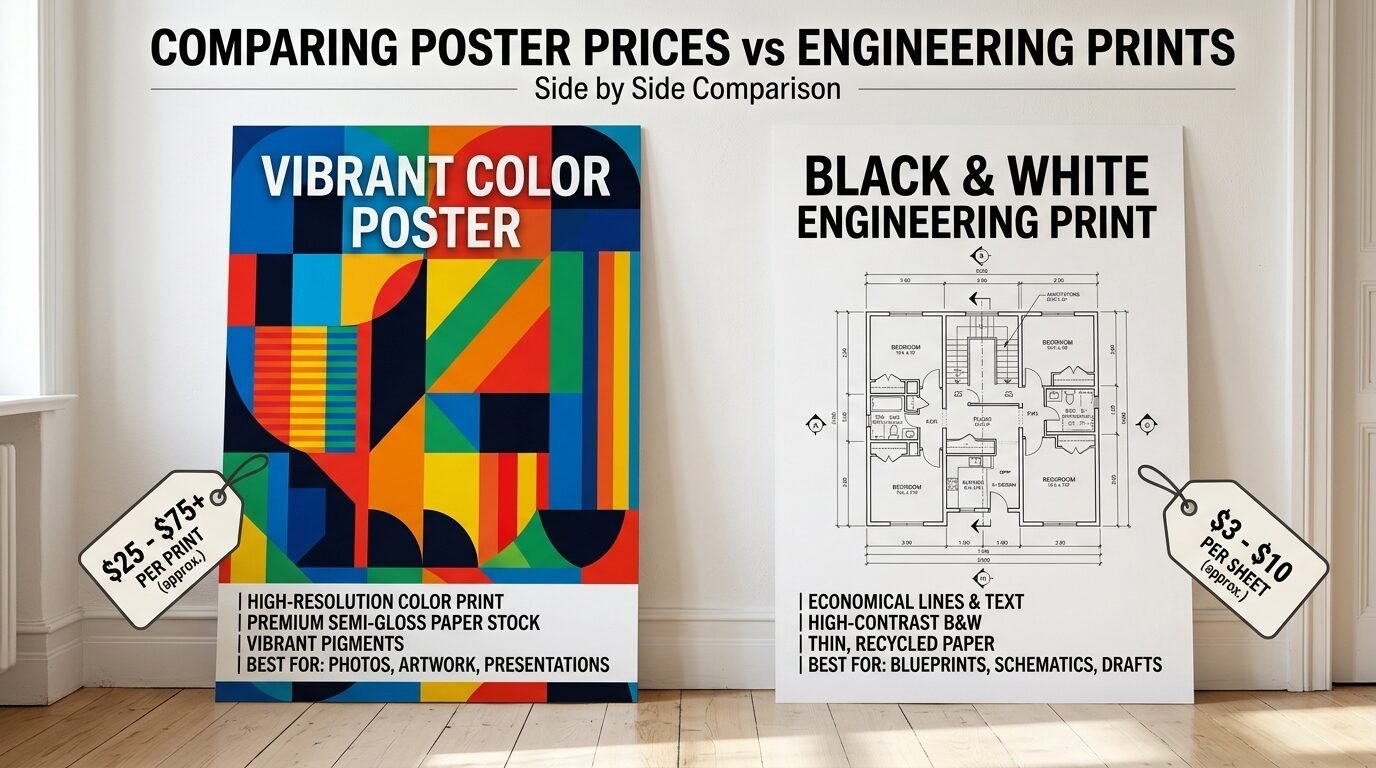
| Feature | Engineering Print | Standard Poster |
| Price | $5 to $10 | $20 to $40 |
| Color | Best for Black and White | Full Color |
| Paper | Thin Bond Paper | Heavyweight Matte/Gloss |
| Best For | Line Art/Vintage Maps | Photography/Fine Art |
| Durability | Delicate | Robust |
The price gap is huge. I use engineering prints for eighty percent of my projects. Only pay for the poster option if you need deep colors.
8. Check Your Color Profile
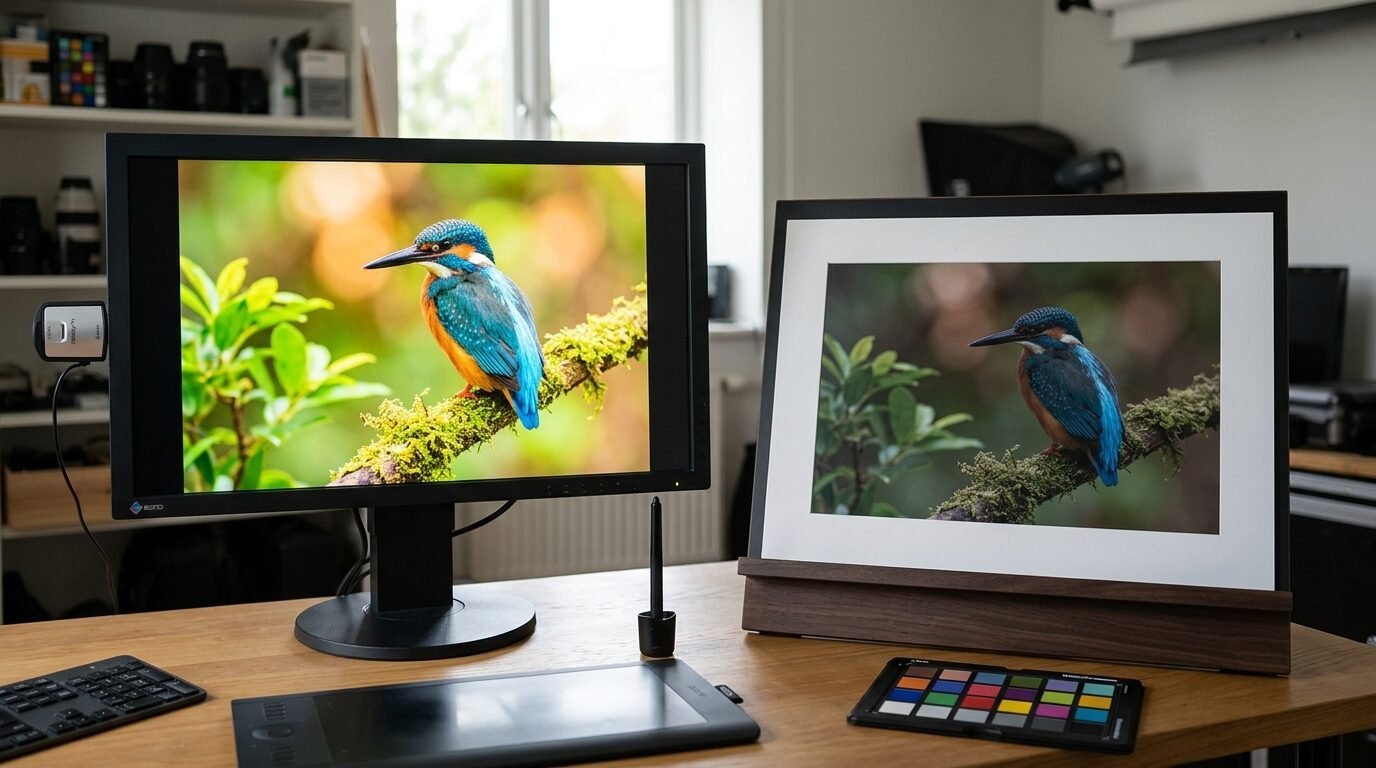
Screens and printers speak different languages. Your phone uses RGB light while printers use CMYK ink. This is why a bright blue on your screen might look dull on paper. I use Canva to check my color profiles before printing. In my experience neon colors are the hardest to replicate. If your art has bright pinks or greens expect them to be a bit darker. I often bump up the brightness of my digital file by ten percent. This compensates for the way paper absorbs ink. It ensures the final product does not look muddy or dark.
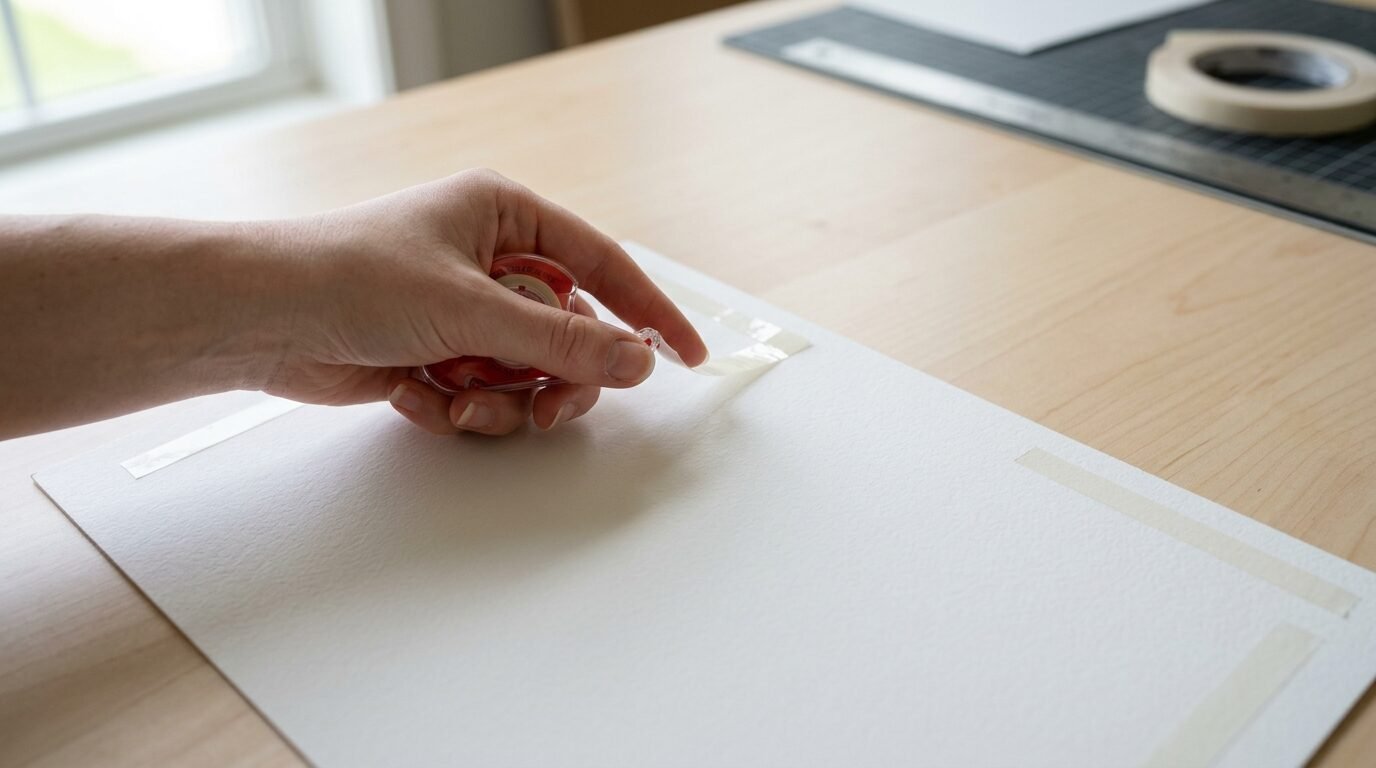
9. Avoid the Bleed Zone
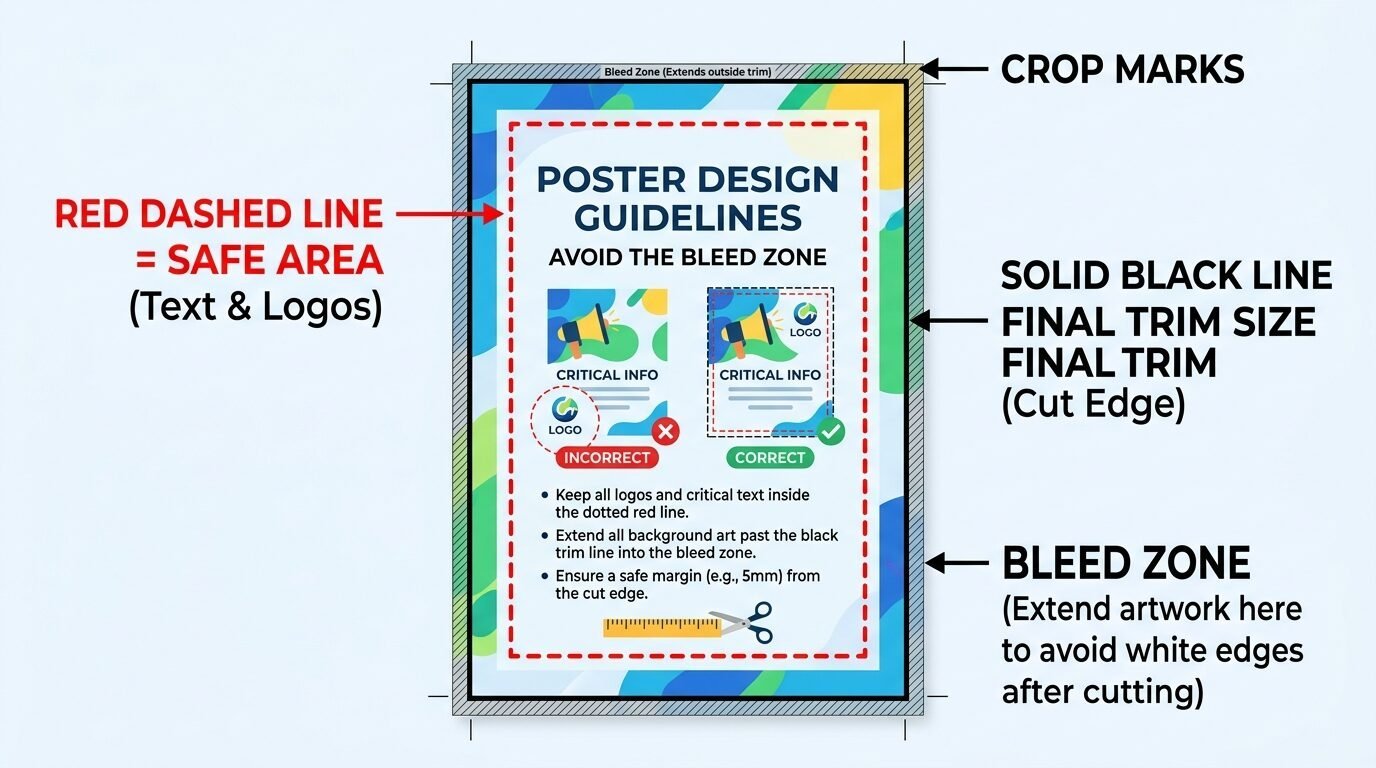
Printers have a small area near the edge where they cannot print. This is the bleed zone. If you put important text or faces at the very edge they might get cut off. I keep all vital parts of my art at least half an inch from the border. Staples usually shows a dotted line in their preview tool. Pay attention to that line. I once lost the top of a mountain range because I ignored the margins. Now I always leave a bit of extra space. This also makes it easier to mount the art in a frame.
10. The Foam Core Mounting Option
If you do not want a frame you can get your print mounted. Staples offers foam core mounting for posters. This makes the art rigid and ready to lean on a shelf. In my experience this is great for parties or temporary decor. It is lighter than a frame and does not need glass. I used this for a birthday backdrop last summer. It stood up on its own and looked professional. Be careful with the edges as foam core can dent easily. It is a smart way to get art on the wall fast without tools.
11. Scale Your Art with Canva
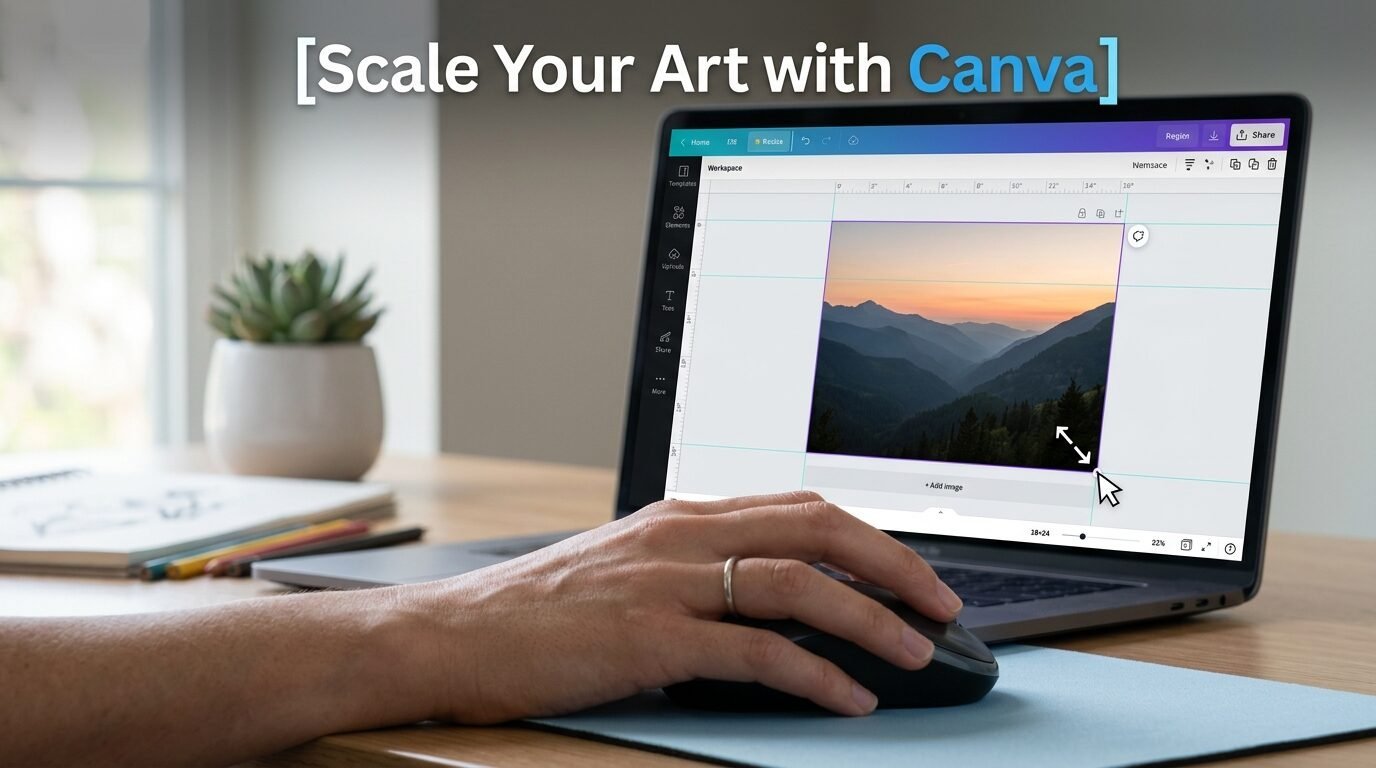
Canva is my favorite tool for prepping files. You can set the exact dimensions in inches. I create a canvas that matches my desired print size. Then I drop my image in and stretch it to fit. This prevents the printer from stretching the image in a weird way. I see many people upload square photos for rectangular prints. This leads to white bars on the sides. Canva lets you control the crop. I use the pro version for better export options but the free version works too. It is the most user friendly way to prep large wall art at Staples.
12. Ask for a Test Strip
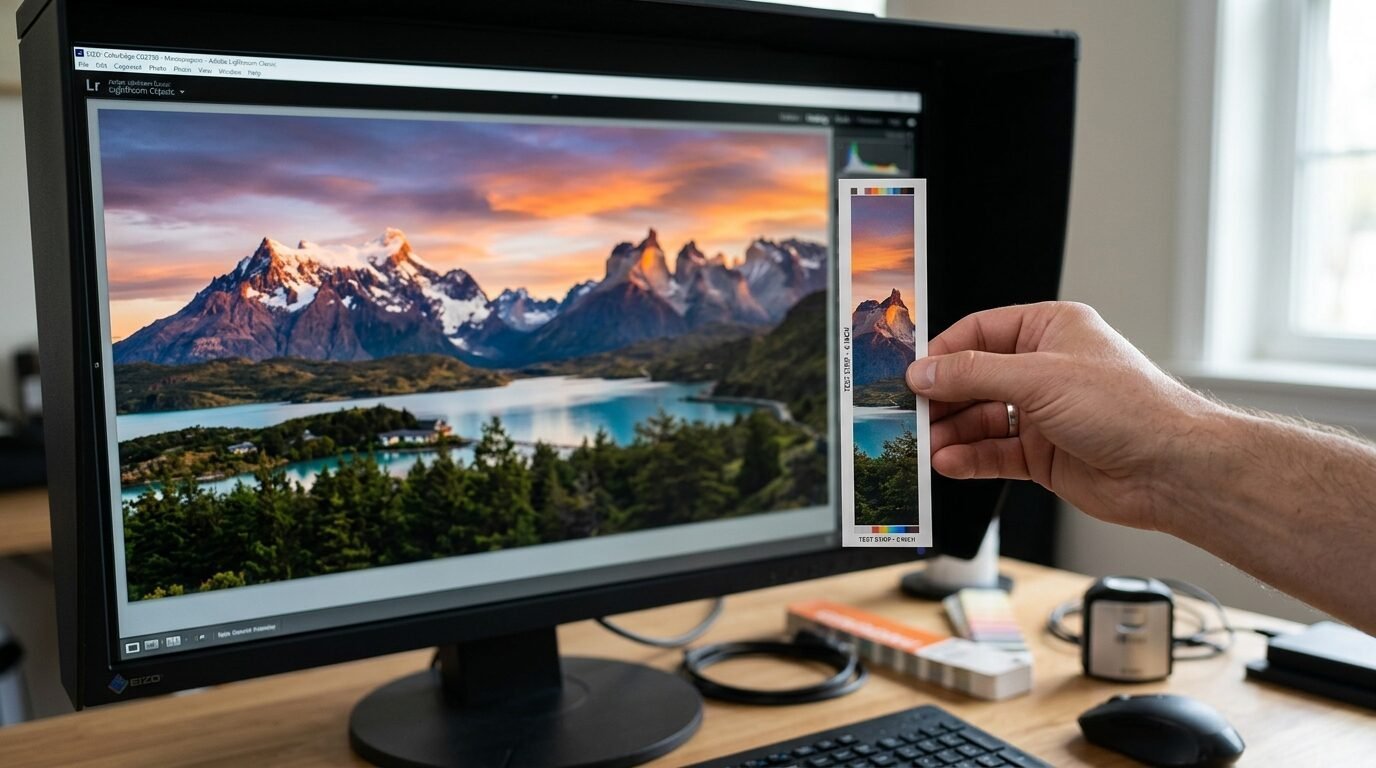
If you are printing a very expensive poster ask for a test strip. This is a small slice of your image printed on the actual paper. Most Staples staff will do this if the store is not busy. It lets you see the color and clarity before you commit to the full size. I did this for a wedding seating chart. The first test was too light so we adjusted the file. It saved me forty dollars and a lot of stress. It is a pro move that many people overlook.
13. Handle with Clean Hands
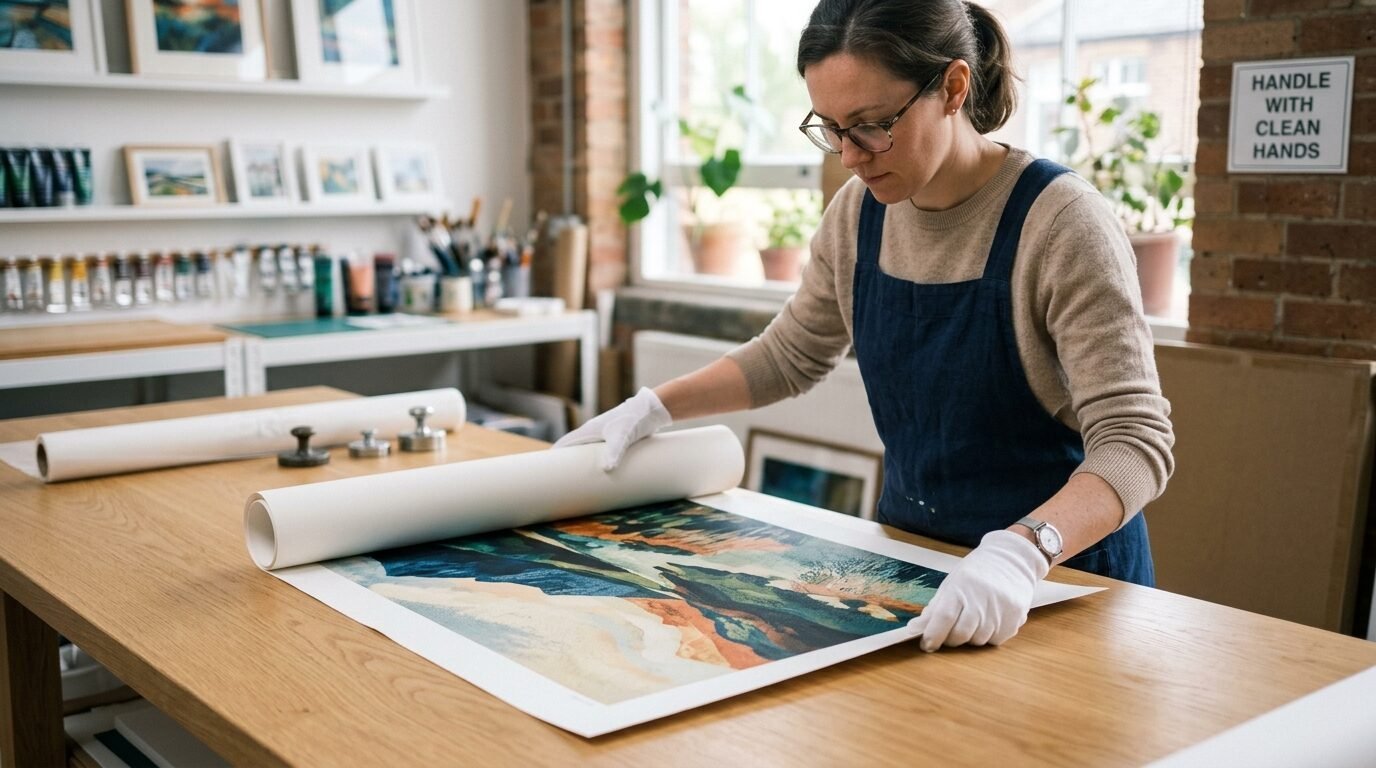
Large prints are magnets for finger oils. I have ruined matte prints just by picking them up. The oil from your skin leaves dark marks that do not come off. I always wash my hands before unrolling my art. In my experience it is better to hold the print by the very edges. If you can use white cotton gloves you will be even safer. I keep a pair in my craft drawer for this reason. Never slide your hand across the face of the print. This can scratch the ink or leave streaks.
14. Fix Curled Prints Safely
Your art will come in a tight tube. It will want to curl back up when you take it out. Do not roll it the opposite way. This can cause the paper to crease or the ink to crack. I lay my prints flat on a clean table. Then I put heavy books on the corners for twenty four hours. This gently flattens the paper without damage. I used this method for a set of architectural drawings last week. They went into the frames perfectly flat the next day. Patience is the key here.
15. Use High Quality Digital Sources
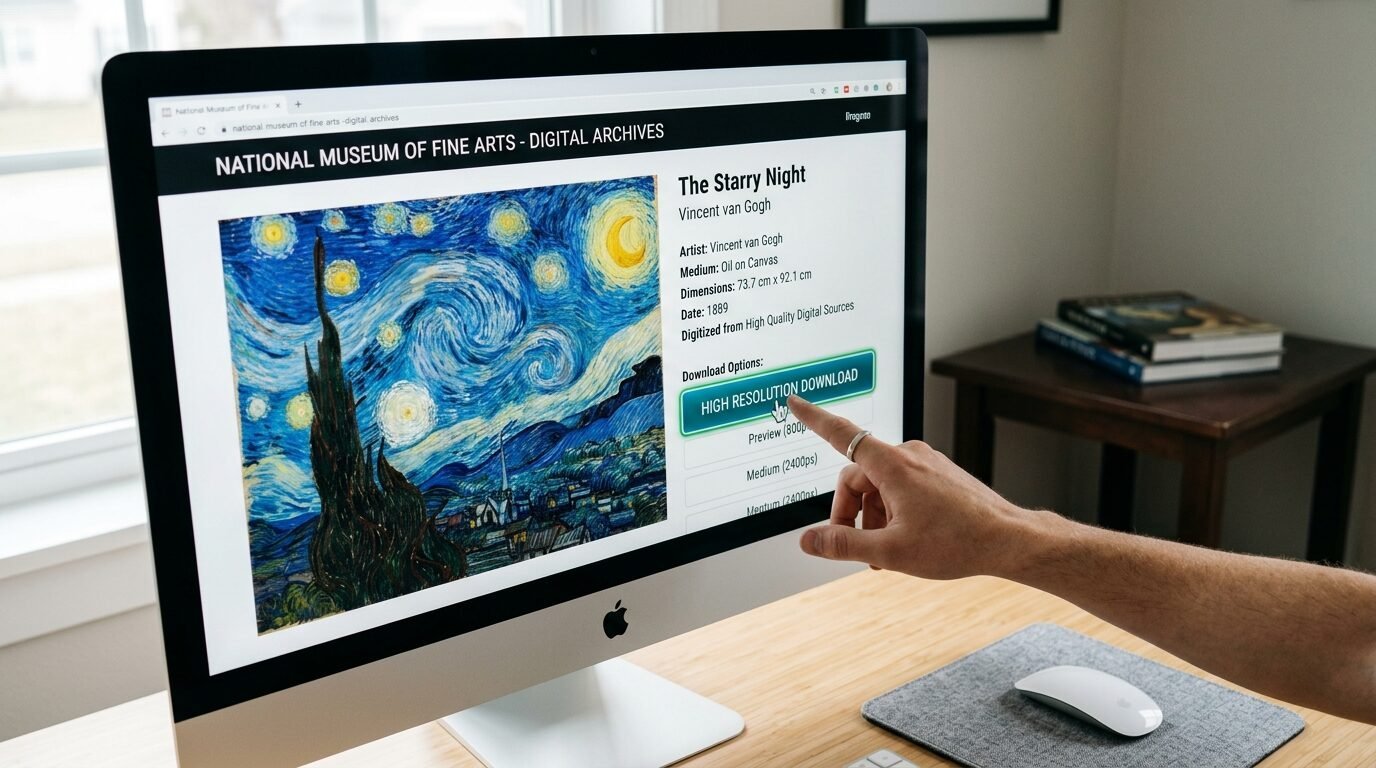
The quality of your print depends on the source. I avoid pulling images from social media or Google search results. These are usually compressed and low quality. I use sites like Unsplash or Pexels for modern photography. For art I visit the Creative Commons section of museum websites. I recently found a high resolution scan of a Van Gogh painting. Printing it at Staples cost me twelve dollars. It looks like a museum piece in my living room. Always look for the download button that says original size or high res.
16. Black and White vs Color Costs
Printing in black and white is much cheaper. This is especially true for engineering prints. I often convert my colorful photos to black and white for a classic look. It hides flaws in the image quality too. In my experience a black and white gallery wall looks more cohesive. It allows you to mix different styles of art without them clashing. Staples uses different machines for these prints. The black and white toner is often crisper on thin paper than the color ink.
17. The Secret of Oversized Mats
If your print is slightly too small for your frame use a mat. A large mat makes small art look expensive. I once printed an eight by ten photo and put it in a sixteen by twenty frame with a wide mat. It looked like it came from a gallery in Soho. Staples does not cut mats but they can print a border around your art. You can design a digital mat in Canva. Just put a colored box behind your image. This gives the illusion of a matted print for zero extra dollars.
18. Watch for Staples Coupons
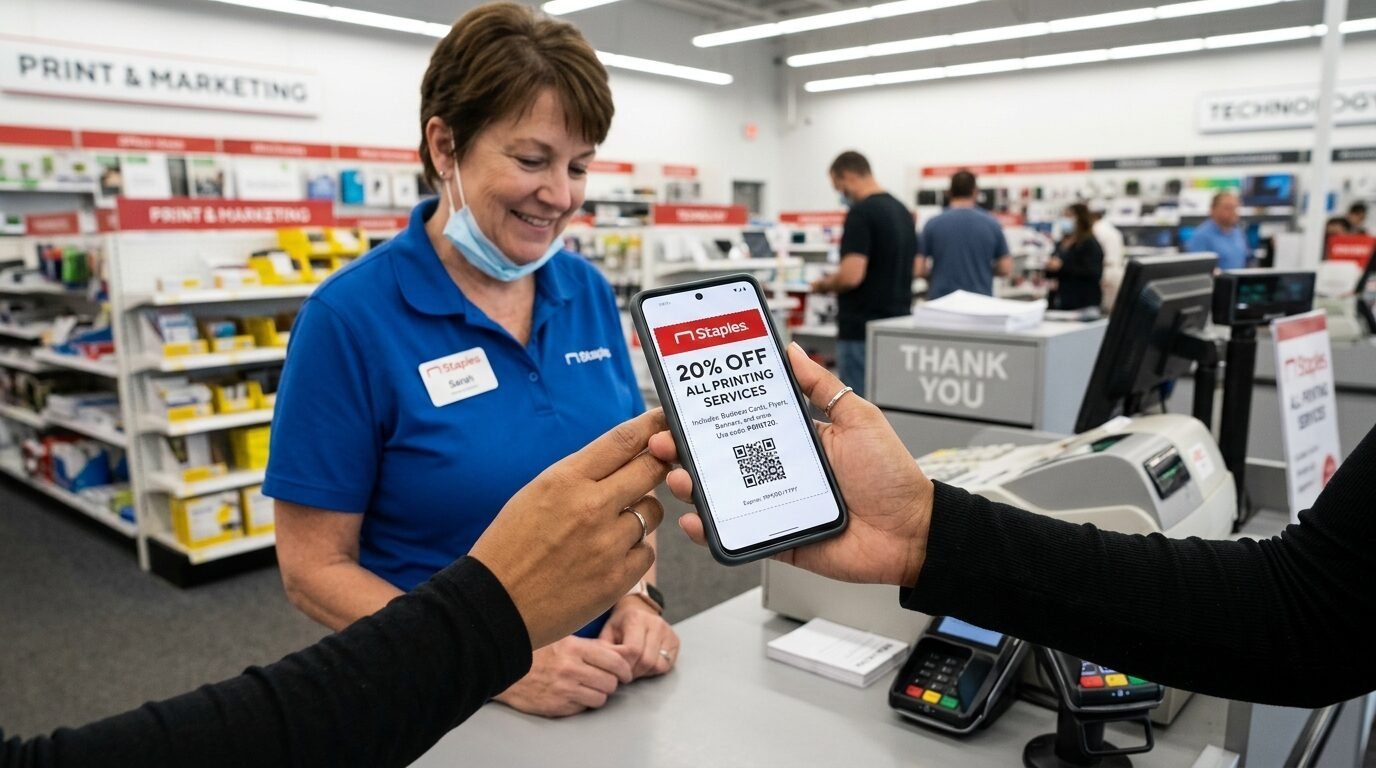
Never pay full price at Staples. They have a weekly ad with printing deals. I often see twenty percent off coupons for posters. You can sign up for their email list to get these. I also check sites like RetailMeNot before I hit buy. Last quarter I saved fifty dollars on a large order for a local office. The savings add up fast if you are doing a whole room. I usually wait for a holiday weekend to do my big printing projects.
19. Turnaround Times and Same Day Pickup
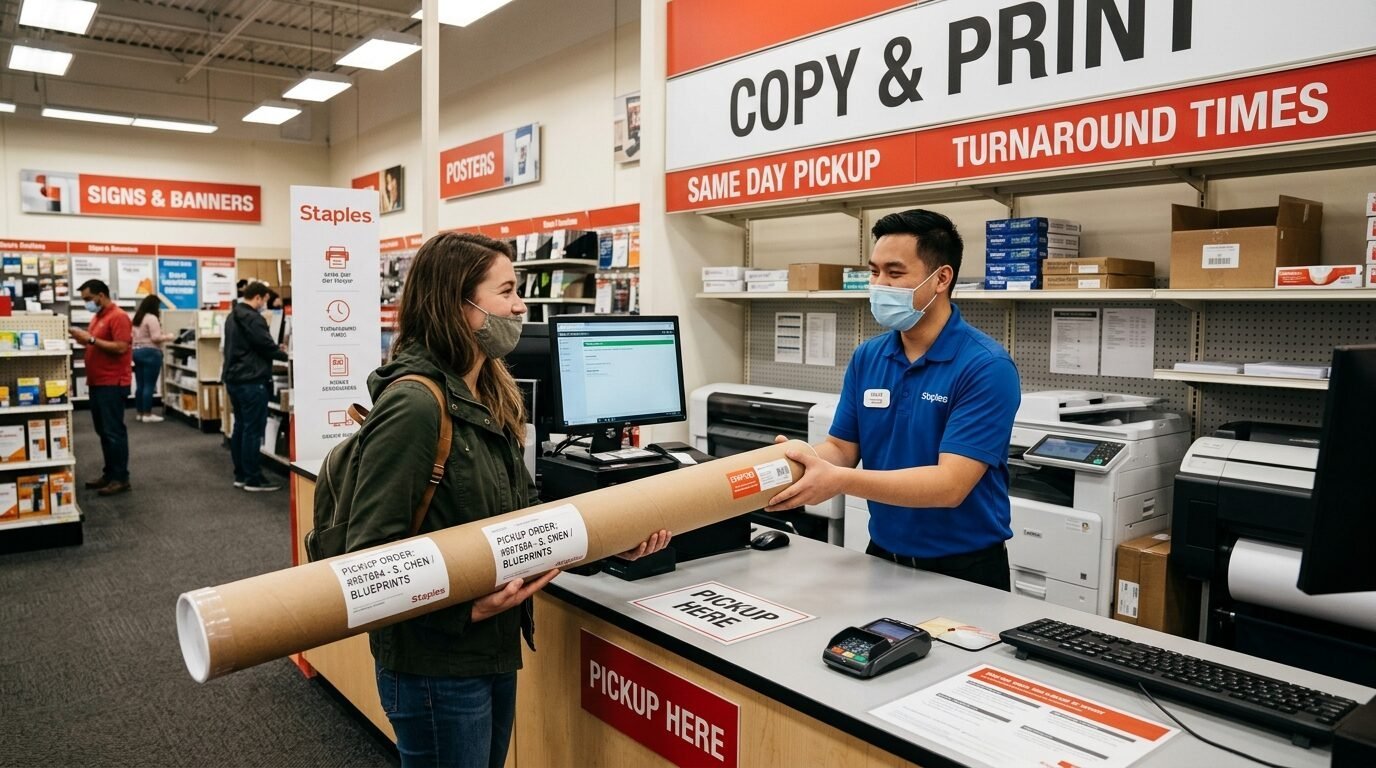
Most Staples locations offer same day pickup for posters. This is great for last minute projects. I have ordered a print at ten in the morning and picked it up by two. Engineering prints are even faster. They usually take less than an hour. I noticed that online orders are prioritized. Do not just walk in with a USB and expect it done instantly. Order online then wait for the email confirmation. It saves you a long wait in the store aisle.
20. Protect Your Art with Spray
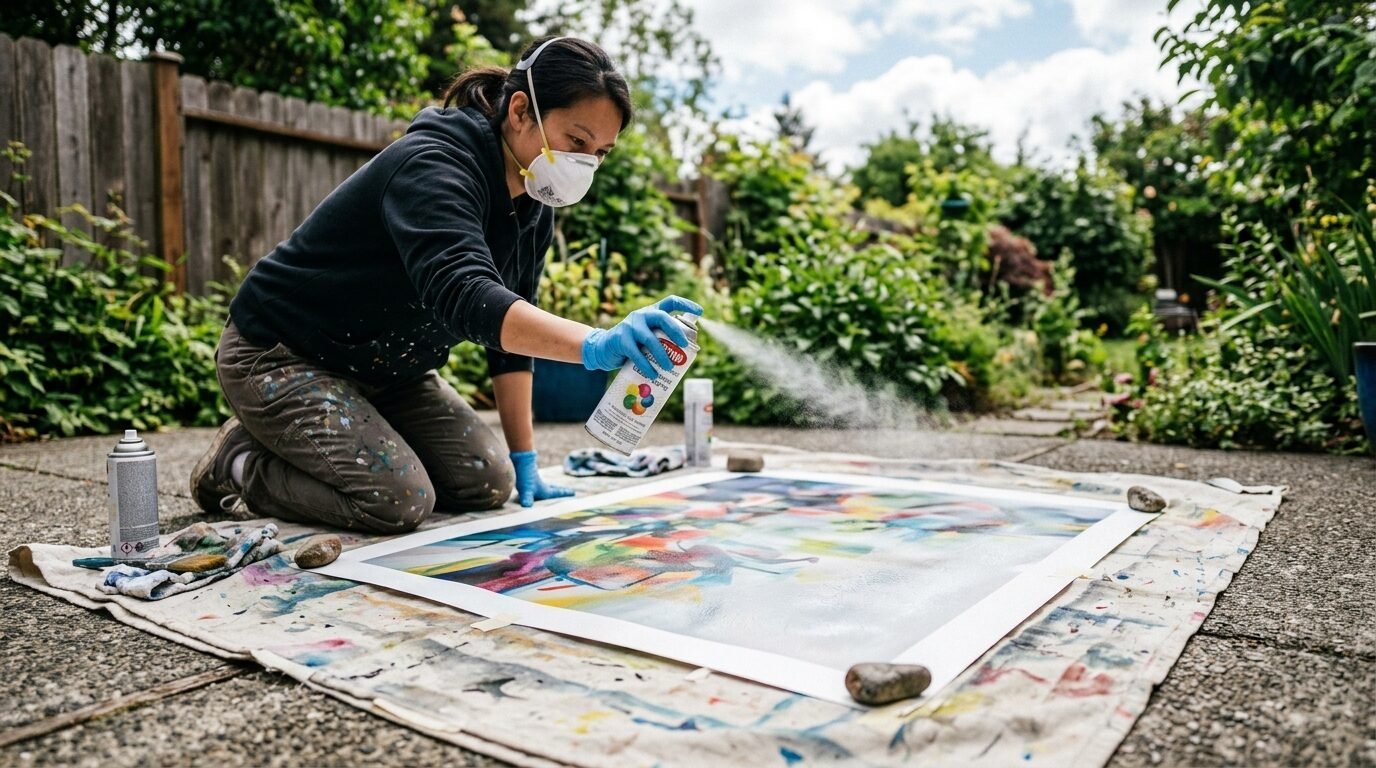
Matte prints can be sensitive to moisture and light. I use a clear acrylic spray to seal my large prints. You can find this at any craft store. It adds a protective layer that resists fading. I spray my engineering prints before framing them. This prevents the paper from yellowing over time. It also makes the black ink look deeper and richer. Do this in a well ventilated area. I use light coats to avoid soaking the paper. It is a five dollar step that doubles the life of your art.
21. Use Double Sided Tape for Mounting
If you are putting art on foam core use the right tape. I avoid liquid glue because it makes the paper ripple. I use thin double sided tape or a spray adhesive. Apply the tape to the board first. Then slowly roll the print onto the surface. I use a clean brayer or a soft cloth to smooth out bubbles. I saw a friend use a glue stick once and the result was lumpy. Tape gives you a flat professional finish.
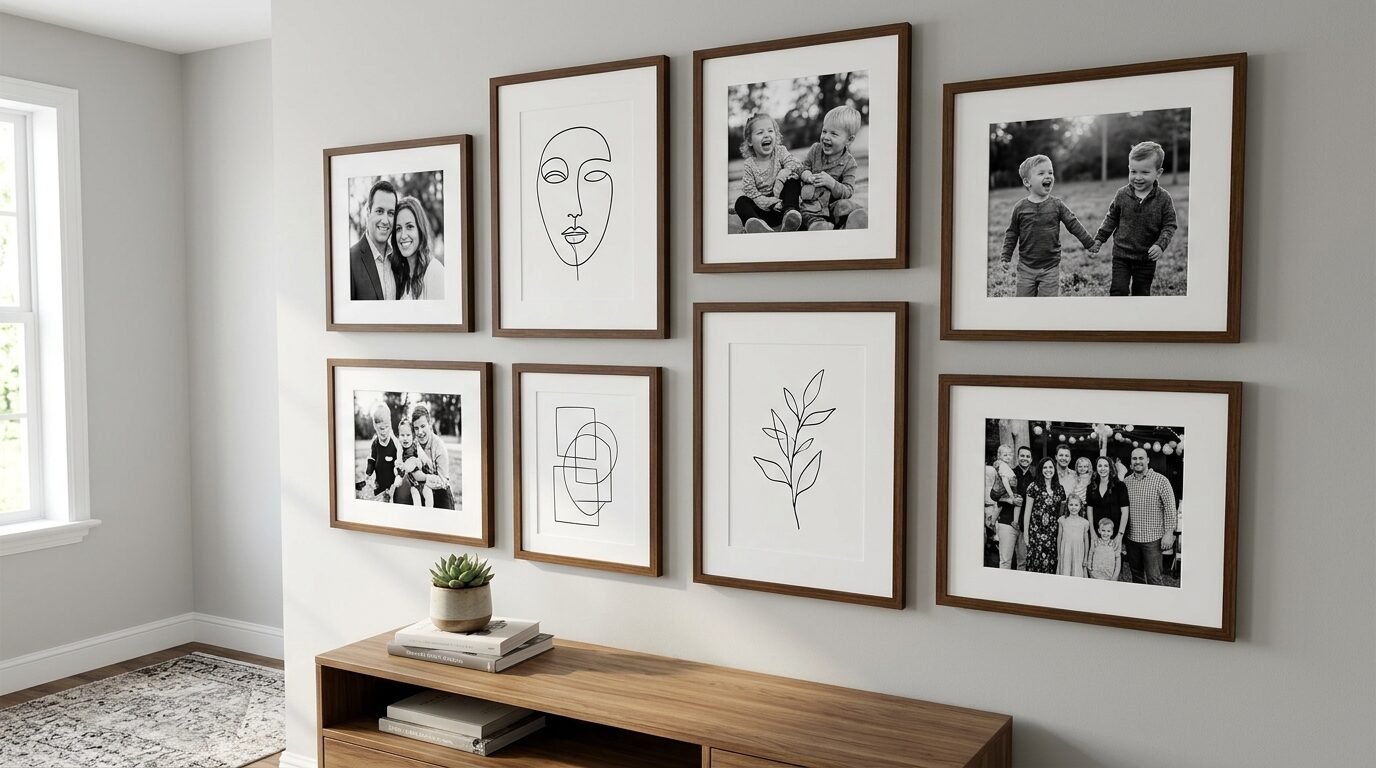
22. Designing for a Grid Wall
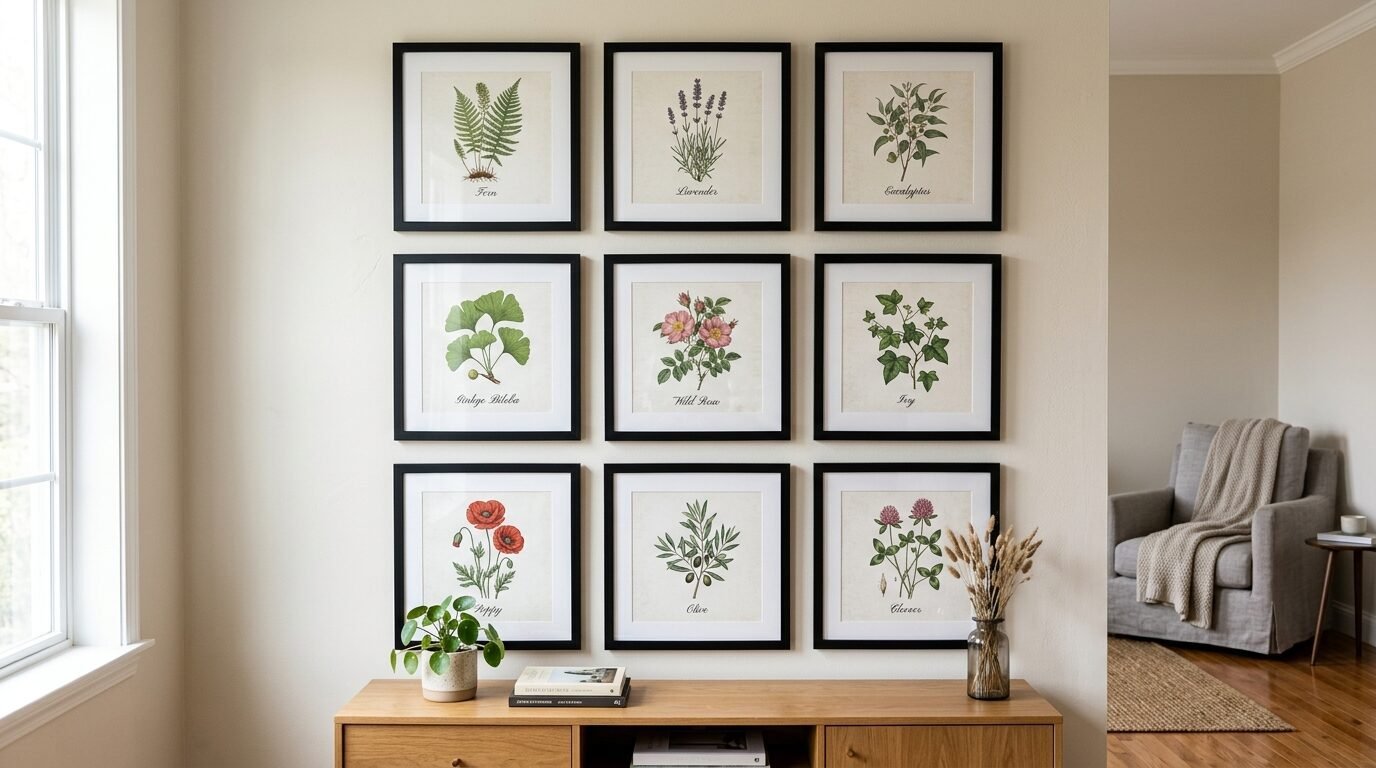
A grid wall is a series of identical frames. This is a huge trend on Pinterest. I use Staples to print sets of three or six images. To make this work all images must be the same size and style. I use the same filter on all my photos in Canva. Then I order them all as the same paper type at Staples. This creates a high end look that fills a large wall. I did this in my dining room with vintage bird illustrations. The total cost was under eighty dollars for six large pieces.
23. Check for Copyright Restrictions
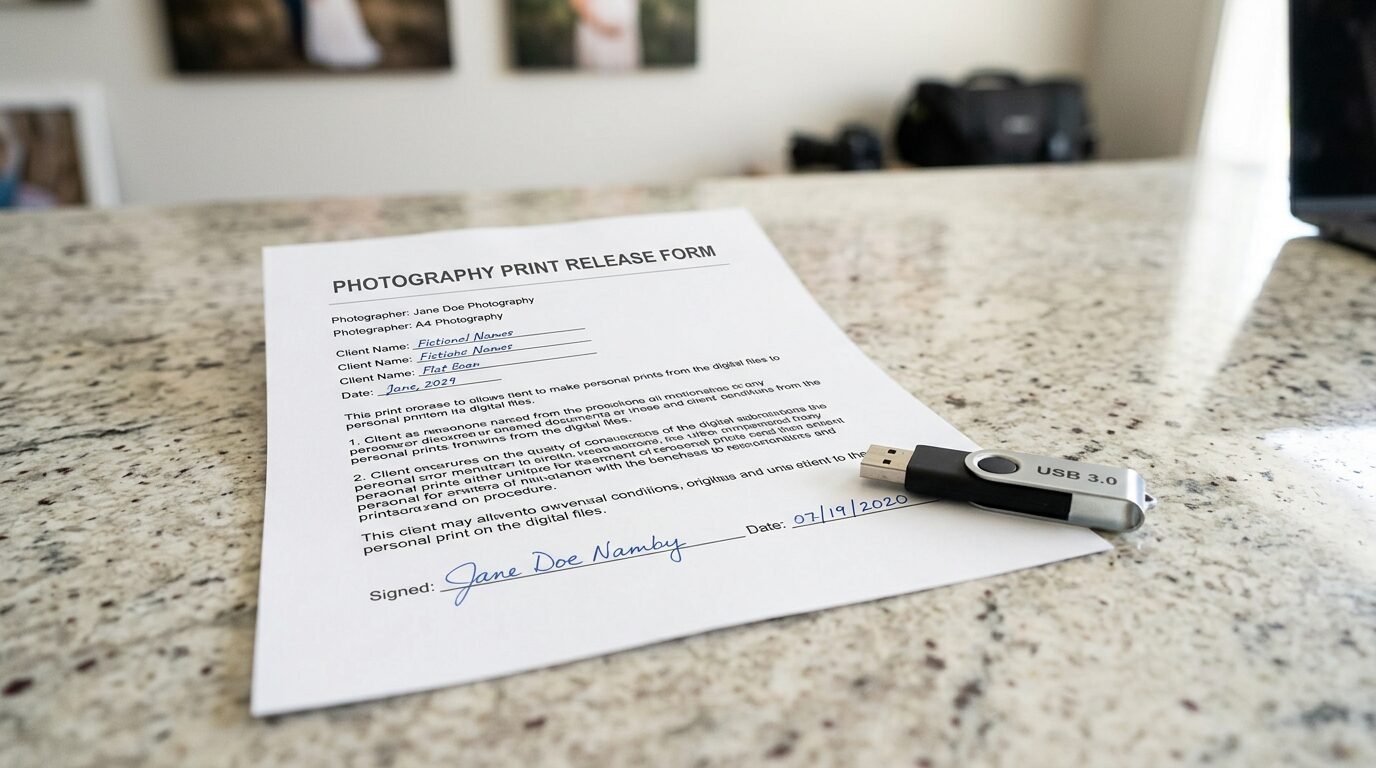
Staples will not print copyrighted images. This includes movie posters or professional photos you do not own. I have seen them refuse orders for Disney characters or famous logos. If you have a professional photo session get a print release from your photographer. I keep mine on my phone to show the clerk. For digital art from Etsy the receipt usually serves as your proof of purchase. Being prepared prevents a wasted trip to the store.
24. Verify the Store Equipment
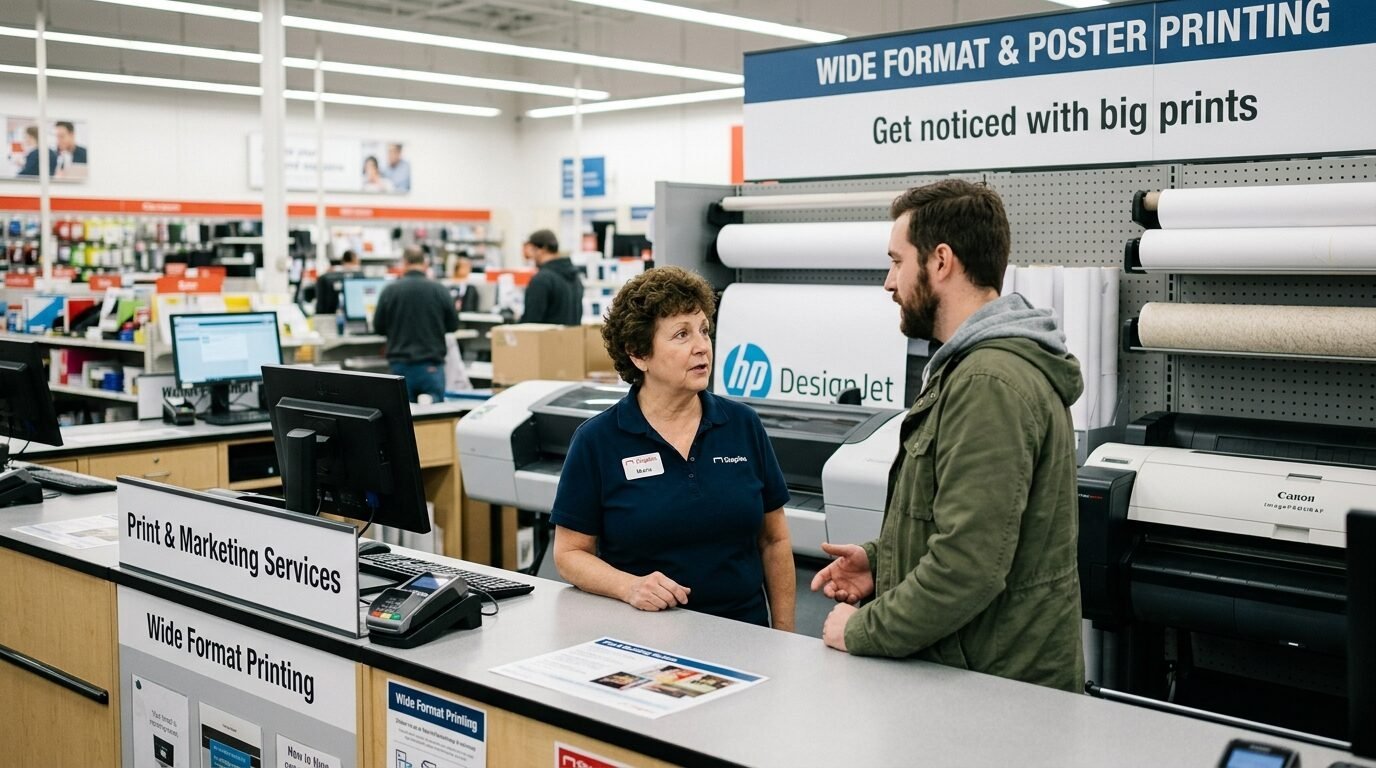
Not every Staples has the same printers. Some smaller locations cannot do the largest engineering prints. I always call ahead if I am trying a new size. I ask if their wide format printer is working. These machines are sensitive and often go down for repairs. I once drove thirty miles only to find the machine was broken. A quick phone call saves time. Most staff are happy to tell you what they can handle that day.
25. Finishing with Style
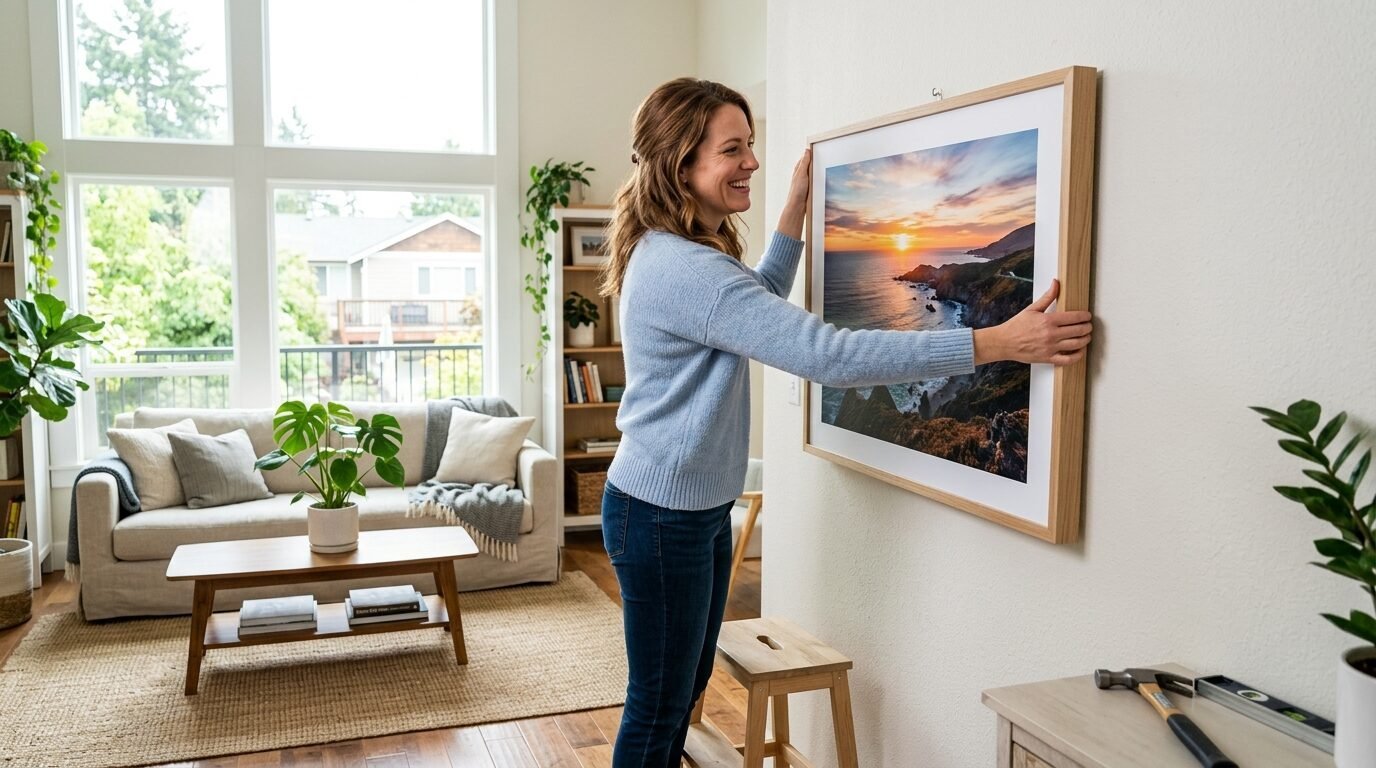
The frame is the final touch. I avoid plastic frames with thin clips. I look for wood or metal frames with real glass. If the art is very large I use acrylic instead of glass to keep the weight down. I also use Command strips for hanging. Large art at Staples is light enough that you do not need nails. This is perfect for renters. I have a gallery wall that has stayed up for three years using only strips. It makes the whole process easy and stress free.
Frequently Asked Questions
What is the cheapest way to print large wall art at Staples?
The engineering print is the cheapest option. You can get a twenty four by thirty six inch print for around five dollars. This price is for black and white ink on thin paper. It is much cheaper than a standard color poster. I use this for vintage maps and line drawings.
Can I print photos as engineering prints?
Yes but they will look different. Engineering prints have lower resolution and use less ink. A photo will look grainy and artistic rather than sharp. In my experience this looks great for moody black and white photography. Do not expect gallery quality for high detail color photos.
What file format is best for Staples printing?
A high resolution PDF is the best format. It preserves the quality and ensures the layout does not change. PNG and JPEG files also work well if the resolution is high. Aim for at least three hundred DPI for a clear result. I always check my file size before uploading.
How long does it take to get a print from Staples?
Many locations offer same day service. If you order online in the morning you can often pick it up by the afternoon. Engineering prints are usually ready in an hour. Large canvas prints or mounted posters might take two or three business days. Always check the estimated time at checkout.
Does Staples offer custom sizes for posters?
Staples has several standard sizes like eighteen by twenty four and twenty four by thirty six. They can do custom sizes if you go in store and talk to the staff. It is usually easier to print a standard size and trim it yourself. Trimming paper is simple with a straight edge and a utility knife.
Will Staples print images I found on the internet?
Only if they are in the public domain or you have permission. They have strict rules against printing copyrighted material. I use sites like Unsplash for free images that are legal to print. If you bought a digital file on Etsy keep the receipt handy.
Conclusion
Transforming your home does not require a massive budget. Staples is a powerful tool for any DIY decorator. You can create oversized art that looks expensive for a fraction of the cost. Start with a high resolution file and choose the right paper. Remember to use matte finishes to avoid glare. Frame your work in standard sizes to save even more. I have found that the most beautiful homes are often the most creative. Use these hacks to fill your walls with art that tells your story. Your home should reflect your style without draining your savings.

Anya Castellan is the Founder and Editor-in-Chief of Home Wall Trends. An art history graduate of the Rhode Island School of Design with twelve years of experience writing for leading American design publications, she specializes in composition, gallery wall theory, and the quiet architecture of domestic space. A former contributing editor at Architectural Digest and guest lecturer at Parsons School of Design, Anya personally reads and signs off on every piece before it is published.