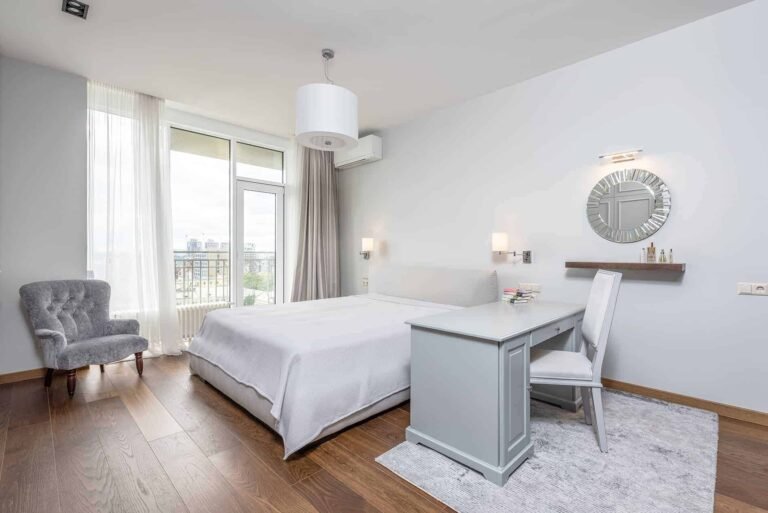
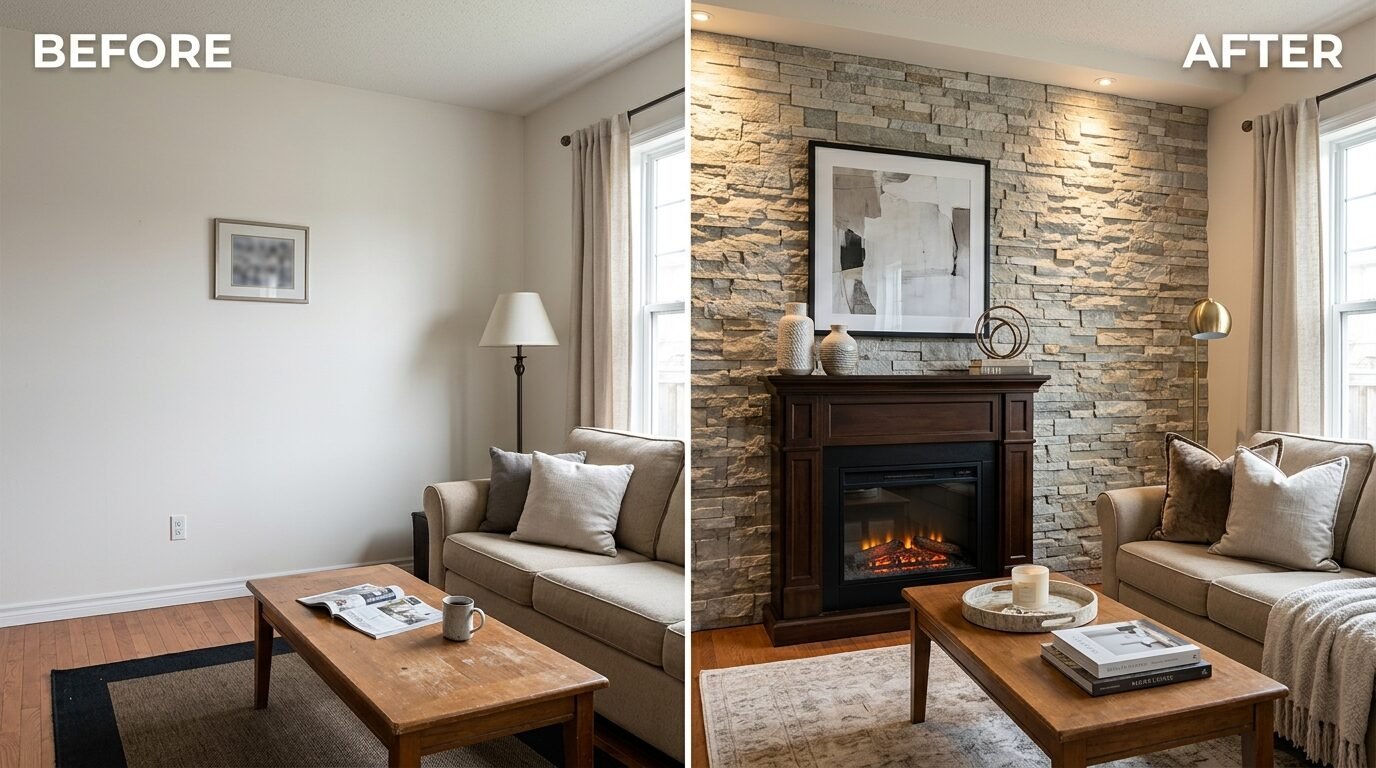
You stare at that plain white wall. It feels cold. It feels empty. You want warmth. You want texture. You want that cozy rustic cabin feel. A stone veneer accent wall changes everything. It turns a boring room into a masterpiece. I remember my first project in 2021. I was nervous. I thought it would be a mess. Instead, it was the best DIY choice I ever made. The room felt solid. It felt like home. In this guide, I will show you how to get that look. We will use real world tips. We will avoid the mistakes I made. Your living room is about to become your favorite space.
Why Stone Veneer is the Best Choice for Your Home
Many people think real stone is too heavy. They think it costs too much. Stone veneer is different. It is thin. It is light. It looks just like the real thing. I have seen it used in storybook homes to create magic. It gives you the look of a mountain lodge without the structural stress. In my experience, faux stone accent wall projects provide the highest visual impact for the lowest cost. You get the weight of history in your living room. You get a limestone wall look that feels ancient yet fresh. It is a win for any homeowner.
I once worked on a small cottage. The owner wanted a brick and stone mix. We used thin veneer. The result was stunning. It did not take up extra floor space. It just sat flush against the wall. That is the beauty of this material. It is practical. It is beautiful. It is the perfect weekend project for a motivated DIYer. You can achieve professional results with simple tools and a bit of patience.
Types of Stone Veneer for Your Living Room Project
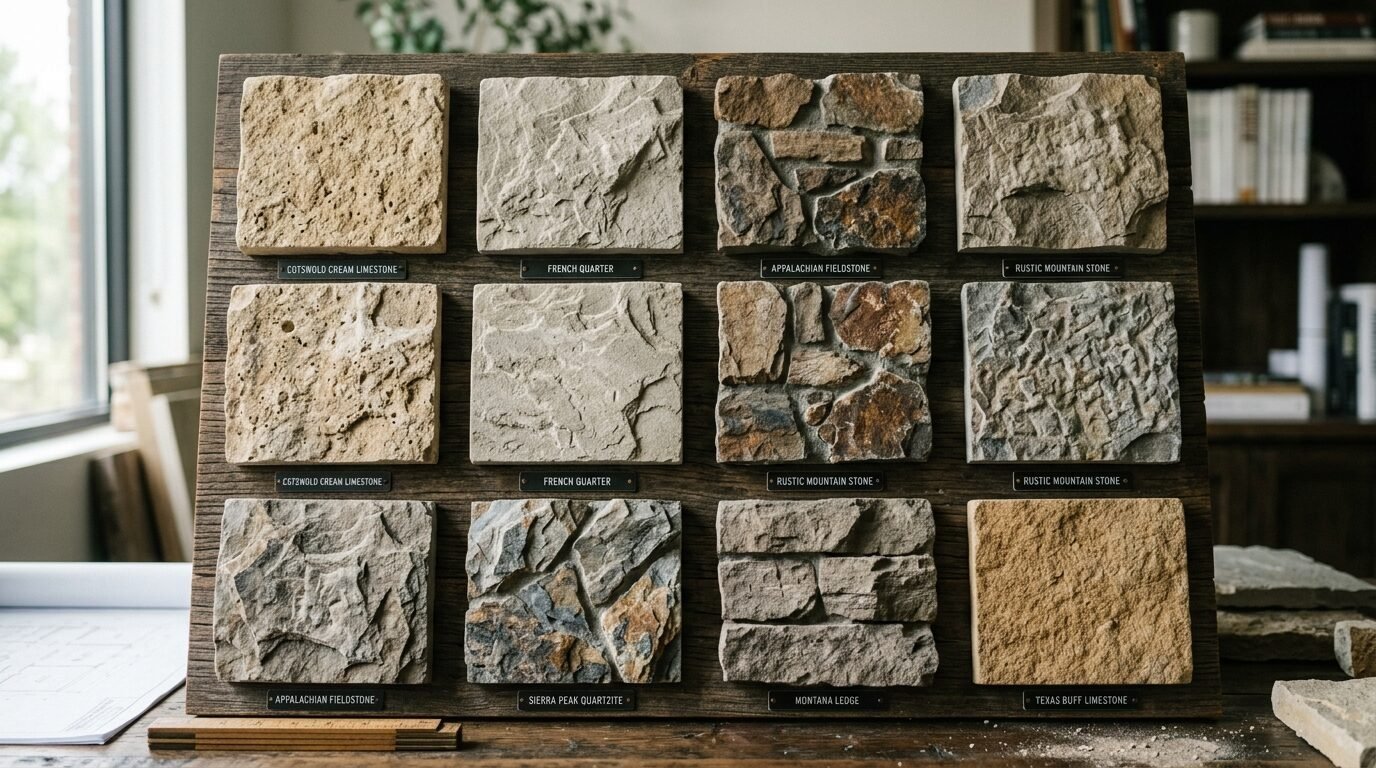
You have choices. This is the fun part. You can go for a rustic stone look. You can choose a clean limestone wall style. There are two main types. Natural stone veneer is real rock cut thin. It has unique colors. No two pieces are the same. Then there is manufactured stone. This is made from concrete and pigments. It is very light. It is easy to cut. I prefer natural limestone for high end looks. It has a grit and feel that concrete cannot match.
If you are on a budget, look at brands like AirStone or GenStone. They offer peel and stick options. These are great for beginners. For a more authentic feel, I recommend Cultured Stone. They have been the industry standard for years. I used their country ledgestone in my own home. It has deep shadows. It catches the light perfectly at night. Consider the vibe of your room. Are you going for a rustic cabin? Go with dark, irregular stones. Want a modern look? Choose flat, stacked limestone in white or grey.
Planning Your Budget and Timeline
Do not start without a plan. I learned this the hard way. A stone accent project can grow fast. You need to know your square footage. Measure the height. Measure the width. Multiply them. Subtract windows or doors. Always buy 10 percent extra. Stones break. Cuts go wrong. Expect to spend between five and thirty dollars per square foot. Real stone sits at the higher end. Faux stone is more affordable.
In my experience, a standard wall takes three days. Day one is prep. Day two is the heavy lifting. Day three is for grouting and cleaning. If you rush, the stones will sag. I once tried to finish a wall in ten hours. The mortar was too wet. Half the stones slid down three inches. It was a nightmare. Take your time. Let the mortar set. Your patience will pay off with a wall that lasts decades.
Essential Tools for a Professional Finish

You need the right gear. Do not try to wing it with a hammer and a screwdriver. I rely on a Ryobi wet saw for my cuts. It keeps the dust down. It makes clean lines. You also need a notched trowel. A half inch notch works best for stone. A level is non negotiable. You want your rows straight. Use a chalk line to mark your starting point. This keeps the whole wall balanced.
I also keep a grout bag handy. It looks like a pastry bag. It makes filling gaps easy. A wire brush is great for cleaning excess mortar. Do not forget a shop vac. Stone work is messy. You will have dust everywhere. I also recommend a heavy duty mortar mixer. It attaches to your drill. It saves your arms from a lot of pain. Buy a pair of good work gloves. Stone is sharp. Your hands will thank you by the end of the day.
Preparing Your Living Room Wall for Stone
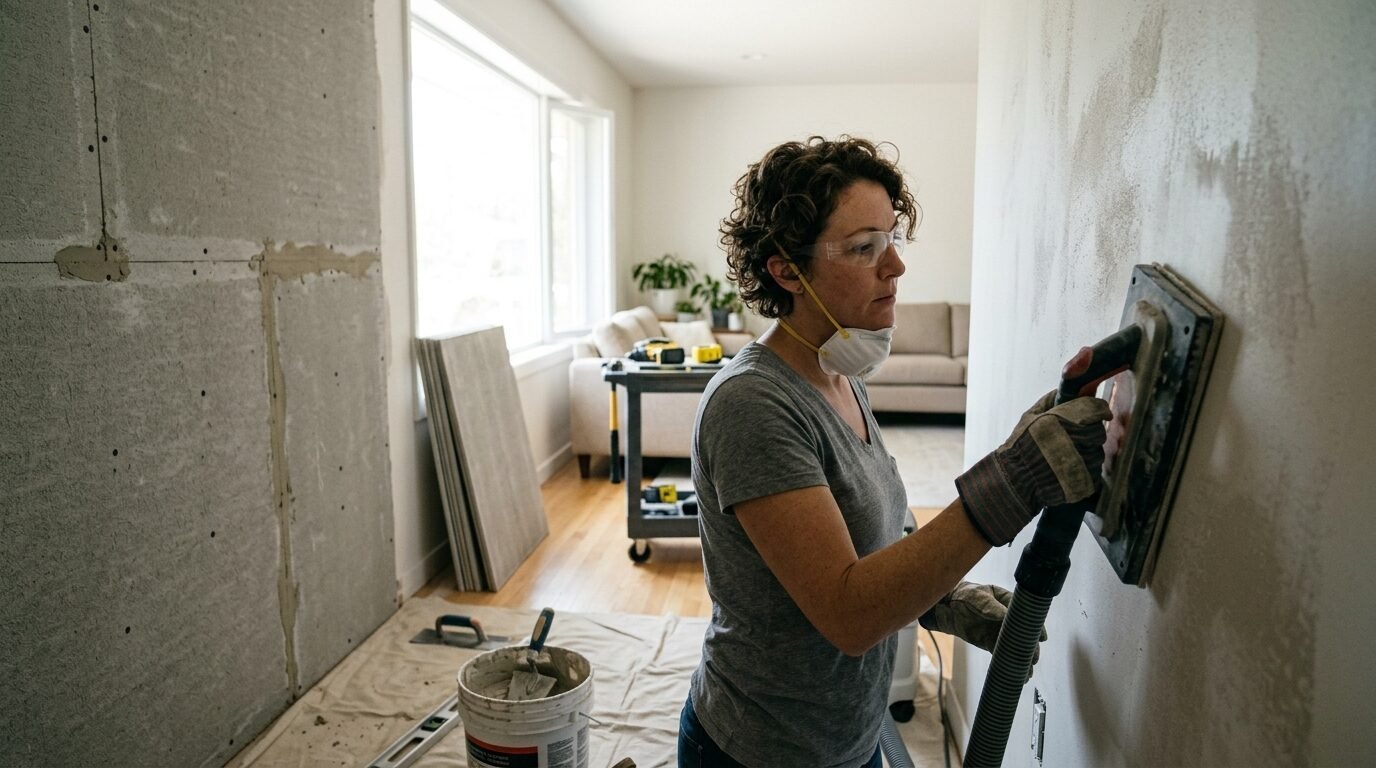
This is the most important step. Many people ignore it. You cannot stick stone to a painted wall. The paint will peel. The stone will fall. I saw this happen in a client home last year. They used a cheap adhesive over gloss paint. The whole wall failed in six months. You must create a bond. I like to sand the wall first. Use forty grit sandpaper. It roughens the surface.
If your wall is drywall, consider adding a cement backer board. It provides a rock solid foundation. For real limestone, you need a metal lath. Staple it to the studs. Then apply a scratch coat of mortar. Let it dry for twenty four hours. This creates a textured surface for the stone to grab. It is more work. But it ensures your stone accent stays put forever. I always tell people to prep like a pro to finish like a pro.
Choosing the Right Mortar and Adhesive
Not all mud is the same. For interior walls, I like modified thin set. It has polymers that help it stick. It is very strong. If you are using heavy rustic stone, use a high bond mortar. It prevents sliding. I have used Mapei products for years. They are reliable and easy to mix. Follow the bag instructions exactly. If it is too watery, it will not hold. If it is too thick, it will dry before you can set the stone.
I once tried a pre mixed adhesive. It was a mistake. It did not have the strength for larger stones. Stick to the powder you mix yourself. It gives you more control. Mix small batches. You only have about forty minutes before it starts to harden. I keep a bucket of water and a sponge nearby. Clean your tools as you go. Once mortar dries on a trowel, it is there forever.
How to Install Stone Veneer Step by Step
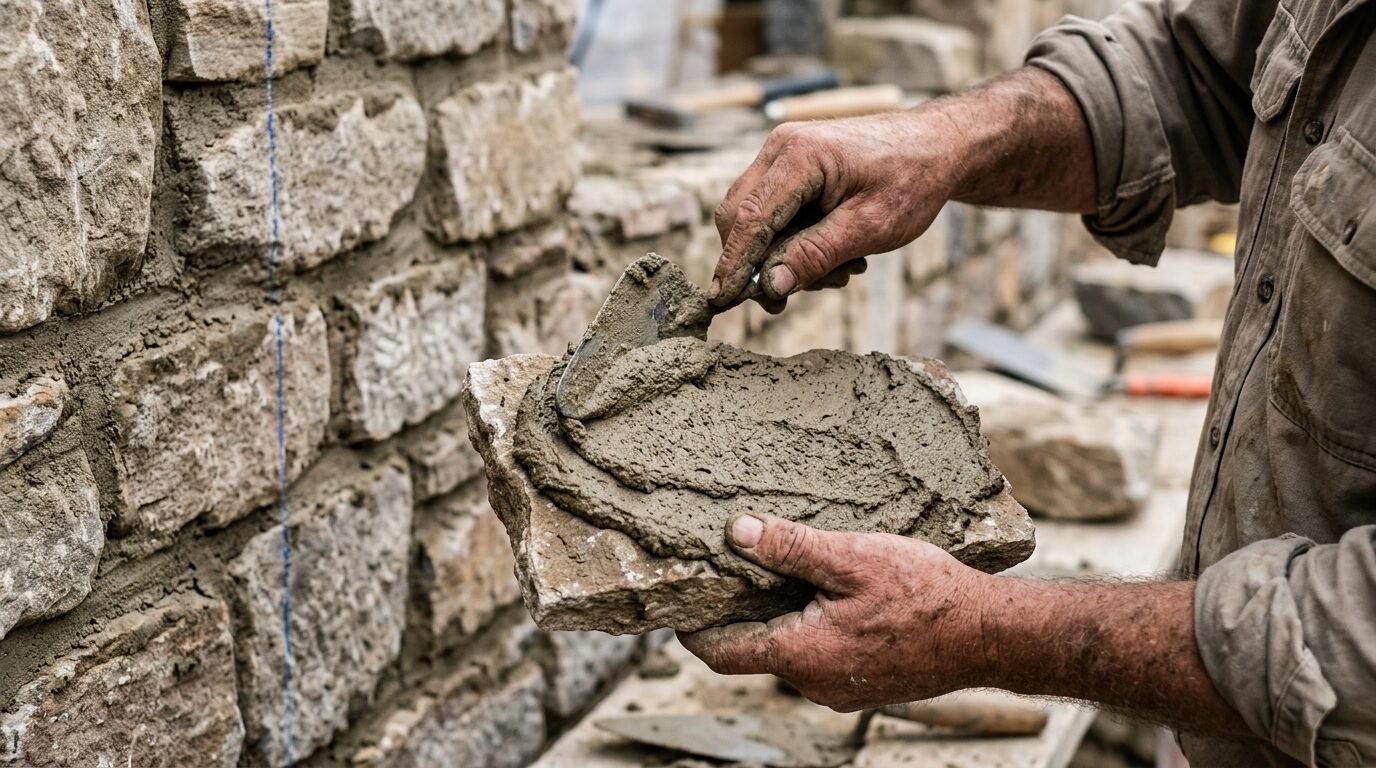
Start at the bottom. This is the golden rule. The bottom row supports the weight of everything above it. Use your level. Make sure that first row is perfect. Apply mortar to the back of the stone. This is called back buttering. Press it firmly against the wall. Wiggle it slightly to set the bond. You should see a little mortar squeeze out the sides.
Work in small sections. I like to do three feet at a time. Check your level every two rows. If you are using irregular stones, mix shapes and sizes. Do not put two large stones next to each other. It looks unnatural. I step back every ten minutes. I look for patterns that look too repetitive. You want it to look like a rustic cabin wall. Nature is not perfect. Your wall should not be perfect either.
Cutting Stone for Corners and Edges
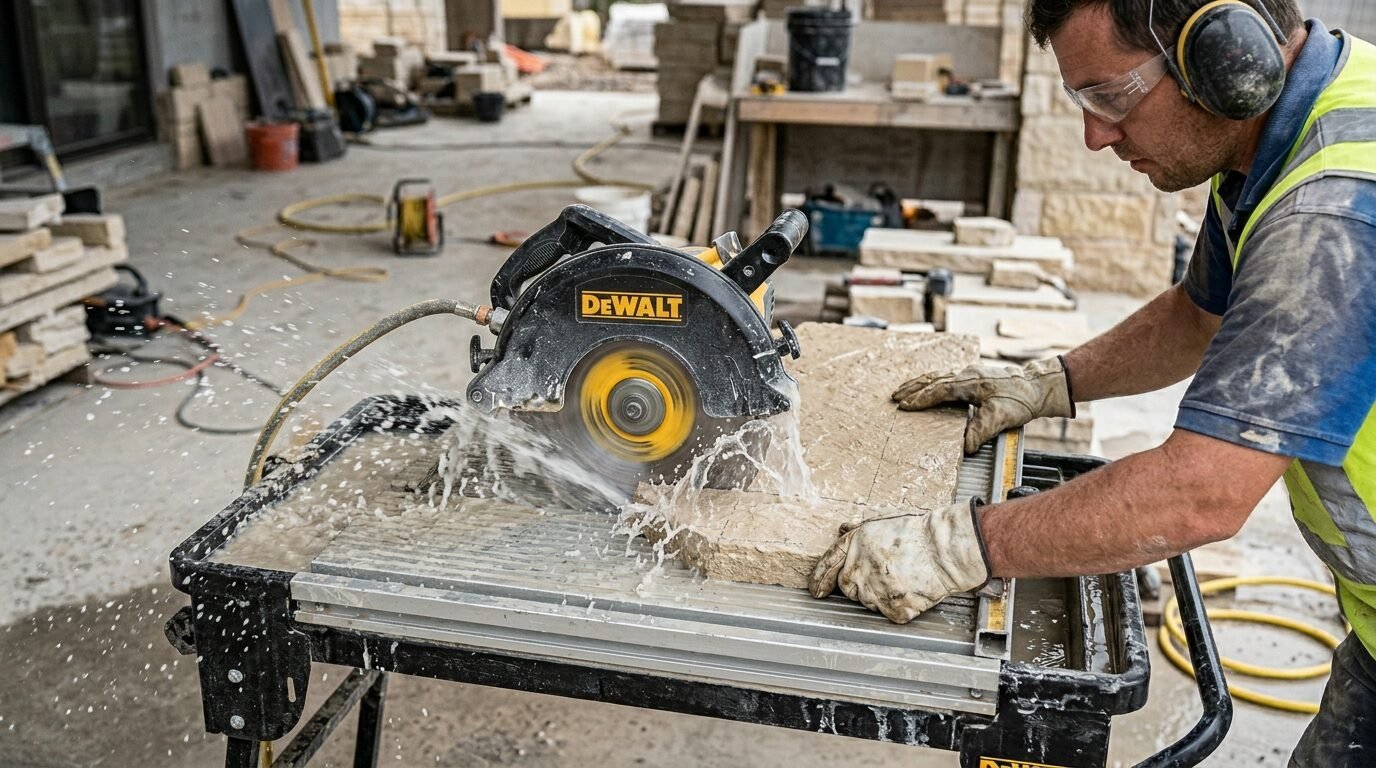
Edges are where DIY projects look messy. You want a clean finish. Use your wet saw for straight edges against the ceiling or floor. For corners, I prefer corner pieces. Most stone veneer brands sell them. They are L shaped. They wrap around the wall. They make it look like the stone is thick and solid. It hides the seams perfectly.
If you do not have corner pieces, you must miter the edges. This is hard. It takes a steady hand. I use an angle grinder for small tweaks. Wear safety glasses. Stone shards fly fast. I remember my neighbor tried to cut stone with a wood saw. He ruined the saw and the stone. Use a diamond blade. It slices through limestone and concrete like butter. Take your time with the cuts. They are the difference between a pro job and a hack job.
Grouting and Finishing Your Accent Wall
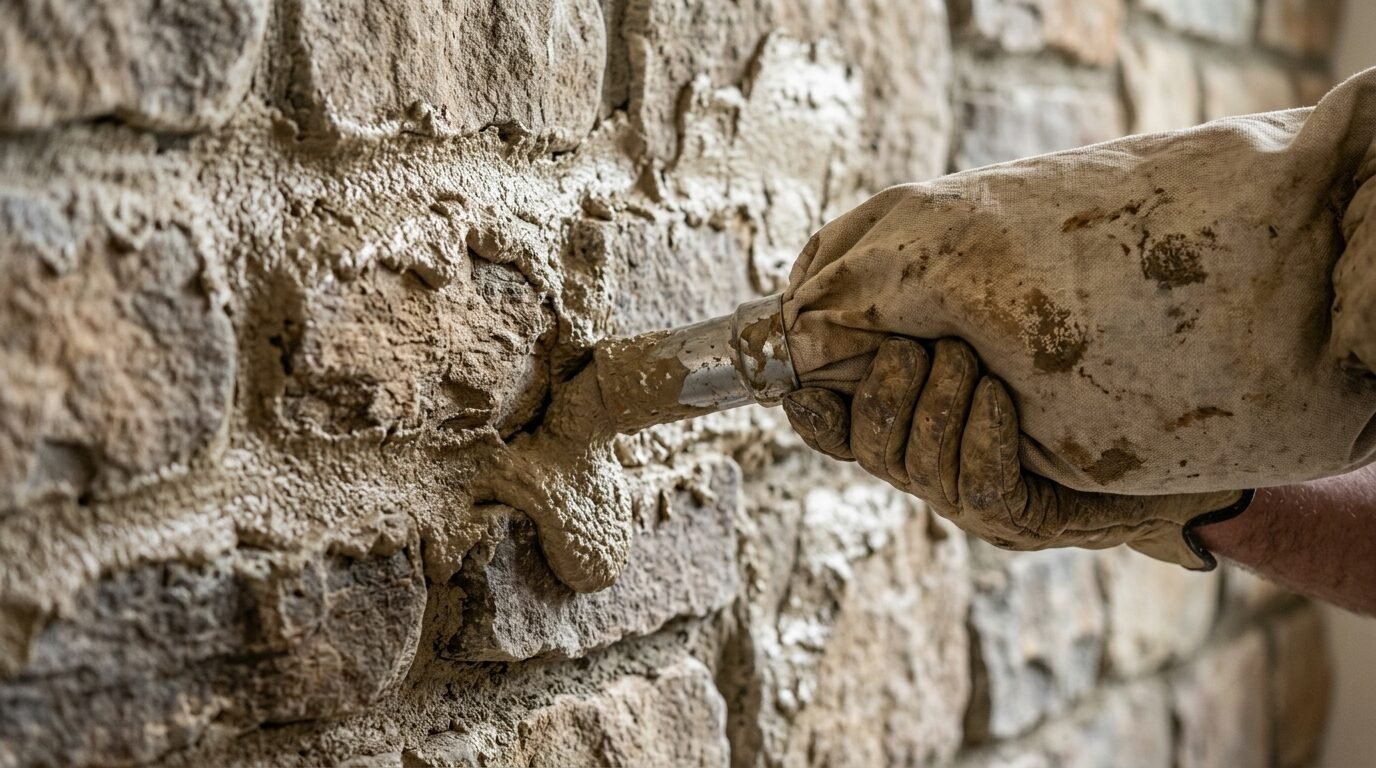
The grout changes the whole look. You can choose a matching color or a contrasting one. I love the overgrout look for a storybook homes vibe. It makes the wall look hundreds of years old. Use your grout bag to fill the joints. Let it sit for twenty minutes. It should feel like firm clay. Then use a wooden stick or a striking tool to smooth it out.
Do not let the grout dry too much. If it gets hard, you cannot shape it. I once waited too long on a brick and stone project. I had to chip the grout out with a chisel. It was a waste of four hours. Use a damp sponge to wipe the faces of the stones. You want the texture to show. Once it is dry, apply a sealer. This protects the stone from dust and stains. A matte sealer is best. It keeps the natural look without adding a fake shine.
Styling Your Stone Wall with Driftwood Decor
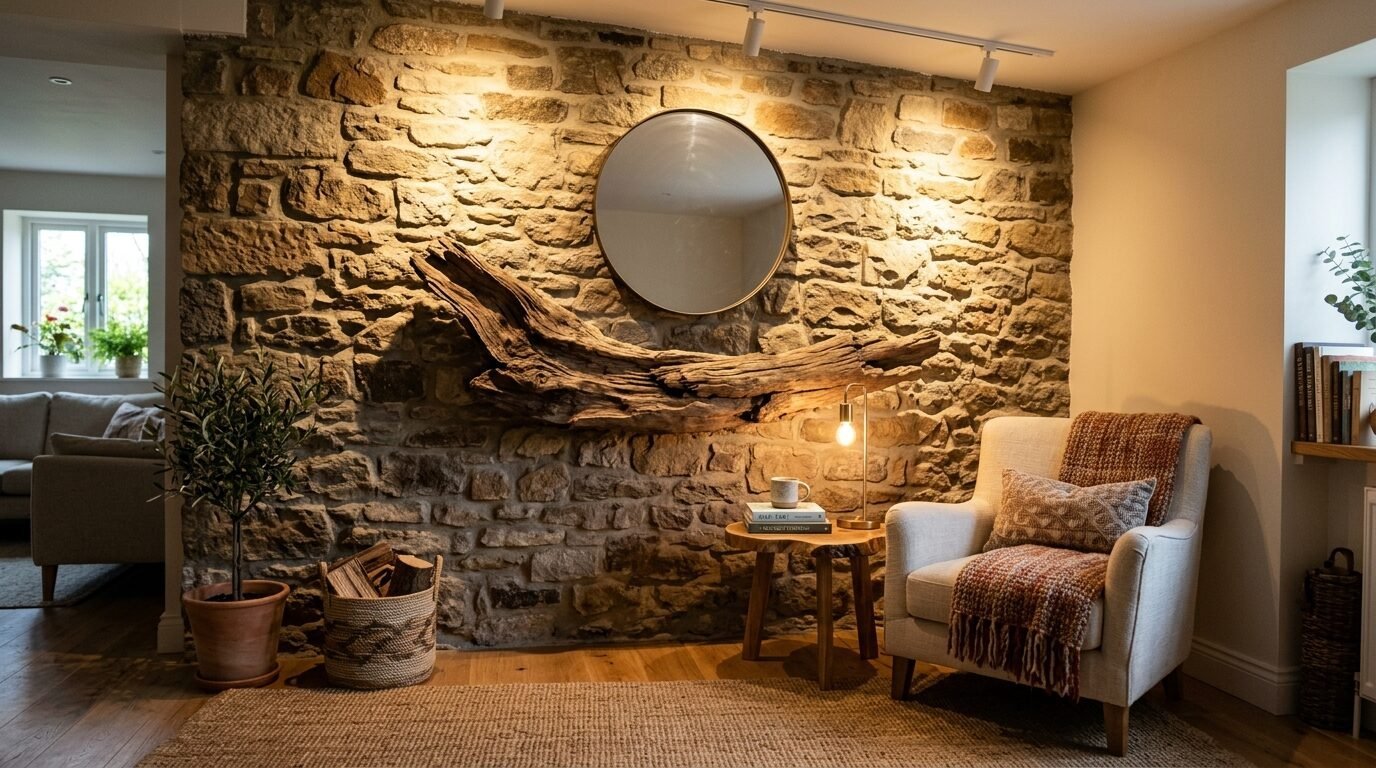
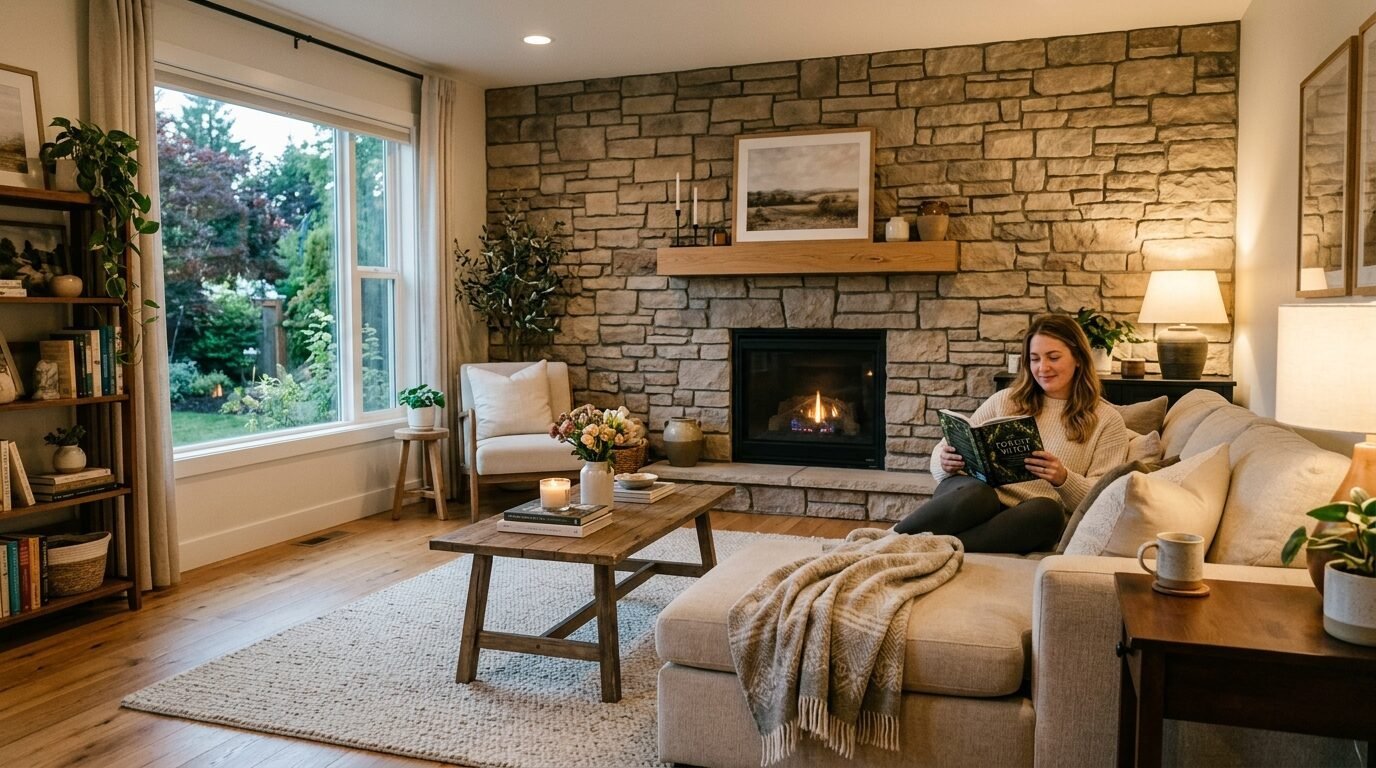
Once the wall is up, you need to style it. A stone wall is a big statement. It needs the right partners. I love using driftwood decor. The light wood against the heavy rustic stone is beautiful. It creates a coastal meets mountain vibe. Place a large piece of driftwood on a mantel. Or hang a mirror with a driftwood frame. It softens the room.
Think about lighting. Stone has texture. Use recessed lights in the ceiling to shine down the wall. This is called grazing. It creates deep shadows. It makes the limestone wall look three dimensional. I have seen quirky decor work well here too. Old lanterns or vintage clocks look great against the stone. Do not overfill the space. Let the stone be the star. It provides the character. Your decor should just highlight it.
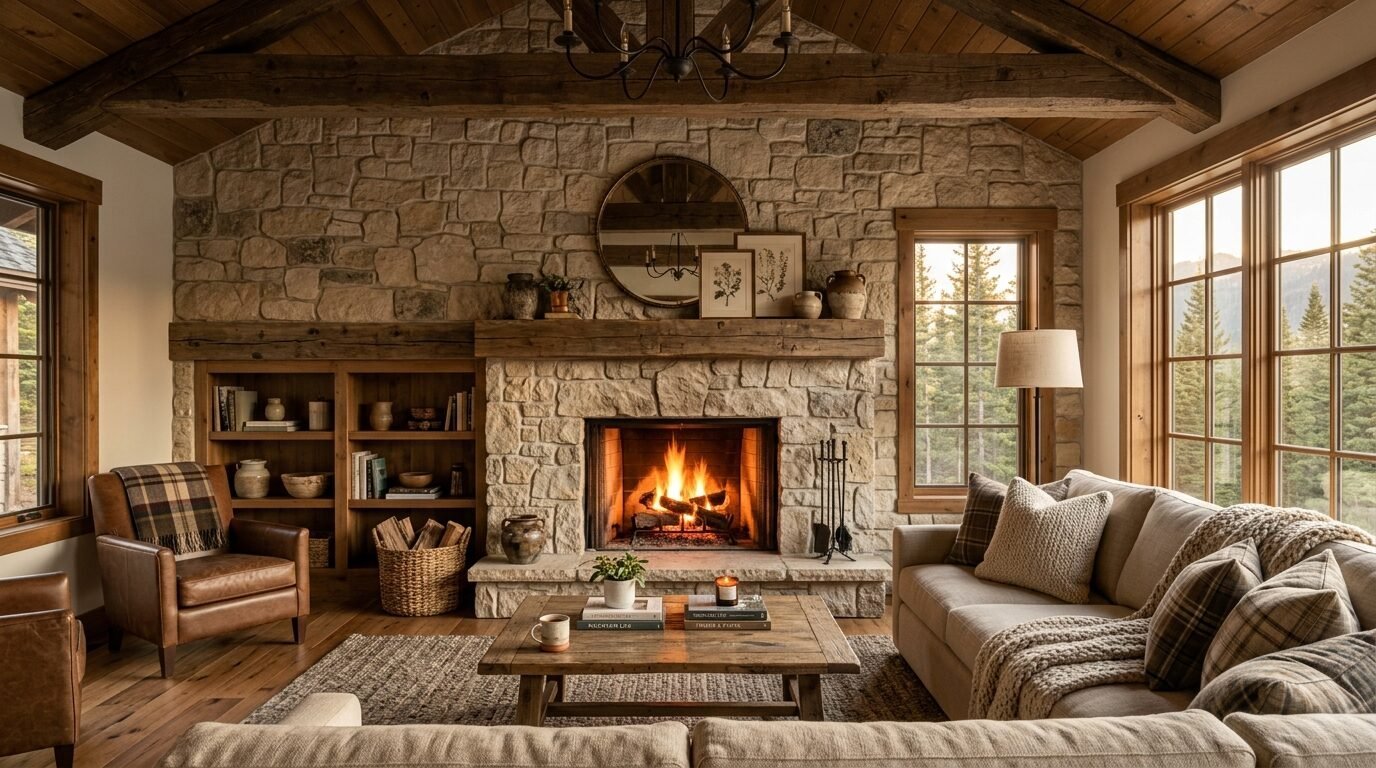
Creating a Rustic Cabin Vibe in a Modern Home
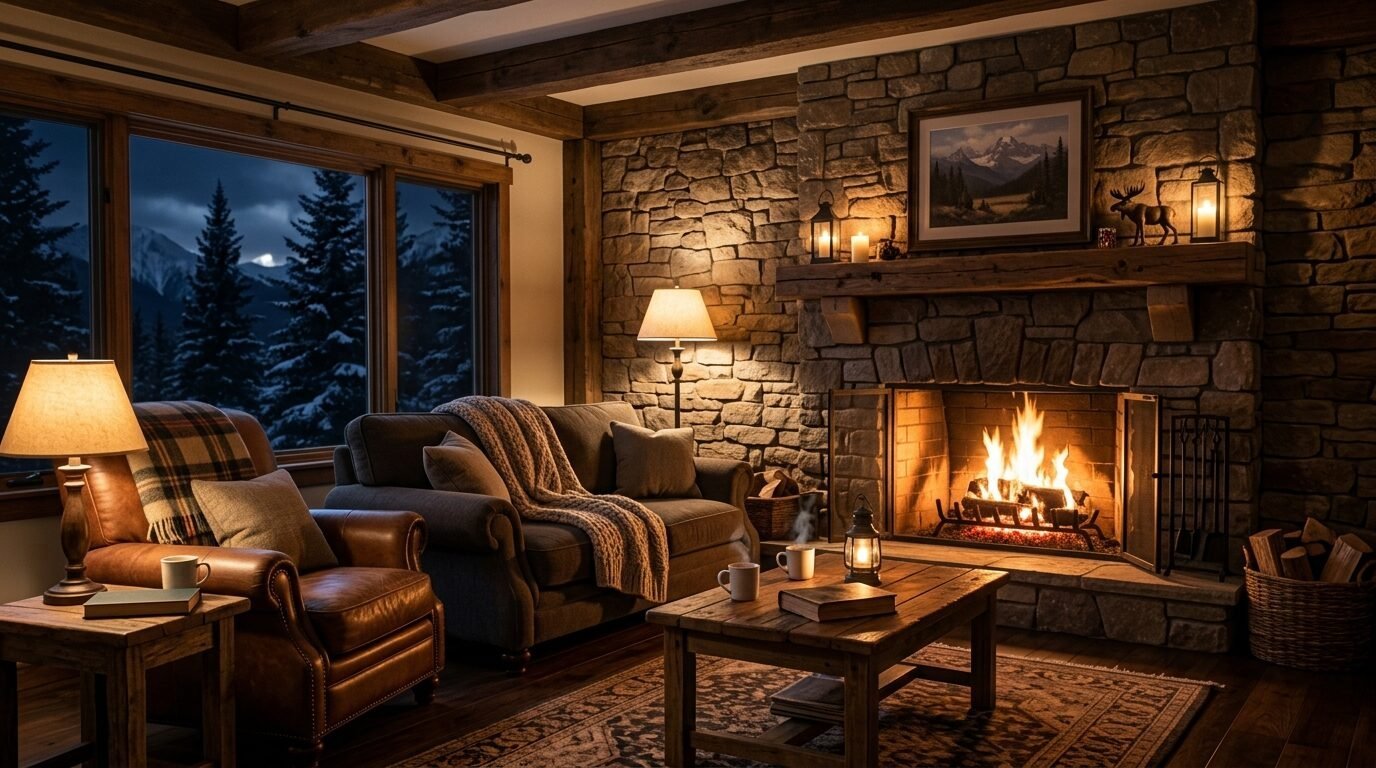
You do not need to live in the woods to have a cabin feel. A stone veneer accent wall is the shortcut. Pair it with warm colors. Think deep greens, rich browns, and soft creams. I suggest adding a reclaimed wood mantel. The mix of wood and rustic stone is classic. It feels grounded. It feels safe.
In my experience, the flooring matters too. If you have a stone wall, use a soft rug. A faux hide or a thick wool rug works best. It balances the hardness of the rock. I’ve noticed that people who add stone often forget about the other walls. Keep the rest of the room simple. One stone wall is a feature. Four stone walls is a cave. Balance is the key to a comfortable living room.
Common Mistakes When Adding Stone Veneer
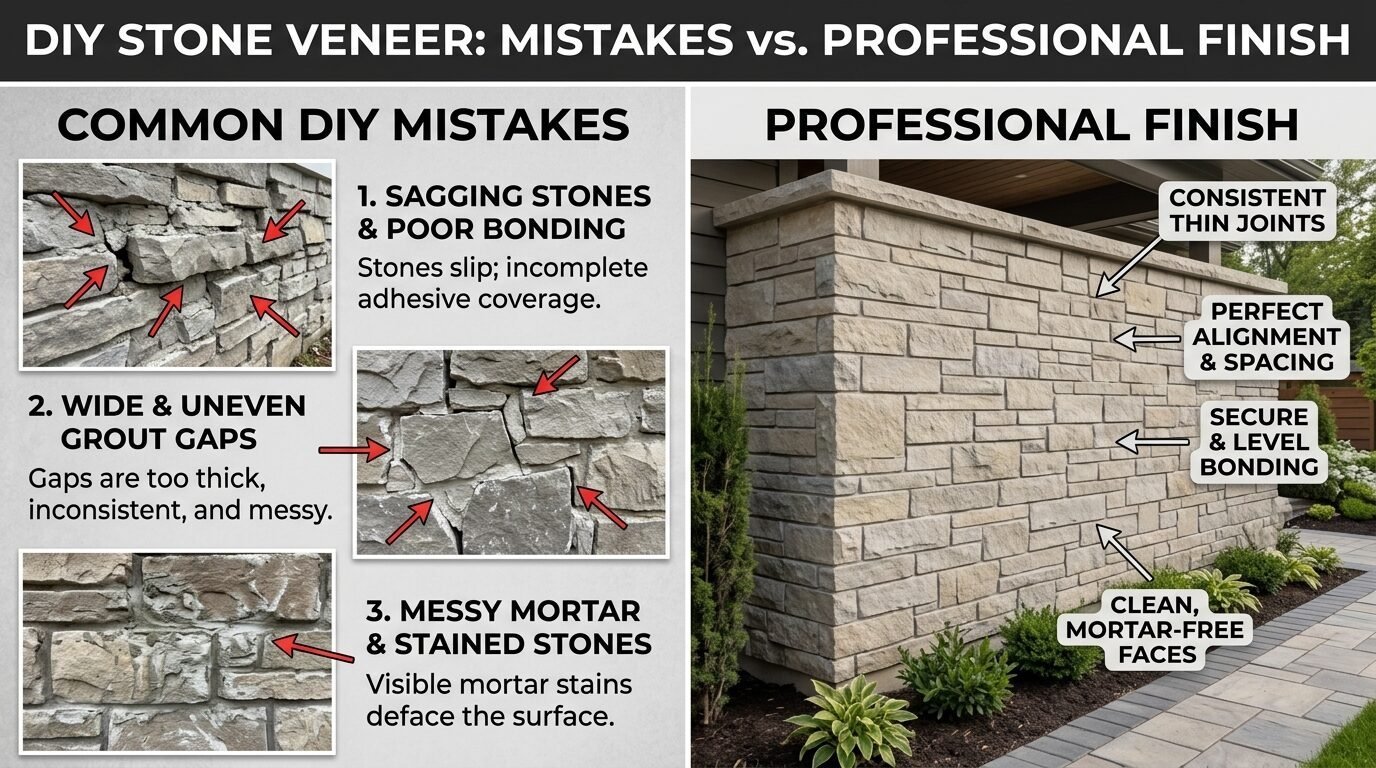
I have seen it all. The biggest mistake is poor spacing. People leave huge gaps between stones. It looks like a puzzle. Keep your joints tight. Another issue is the “staircase” effect. This happens when you stack stones in a predictable way. Always offset your seams. It should look random.
Do not forget to clean the stone. Mortar film is hard to remove later. Wipe it as you go. I also see people forget about outlets. You must extend your electrical boxes. The stone adds about an inch of thickness. If you don’t extend them, your plugs will be buried. Buy box extenders at any hardware store. They cost two dollars. They save you a lot of frustration.
Maintenance and Care for Your Stone Wall
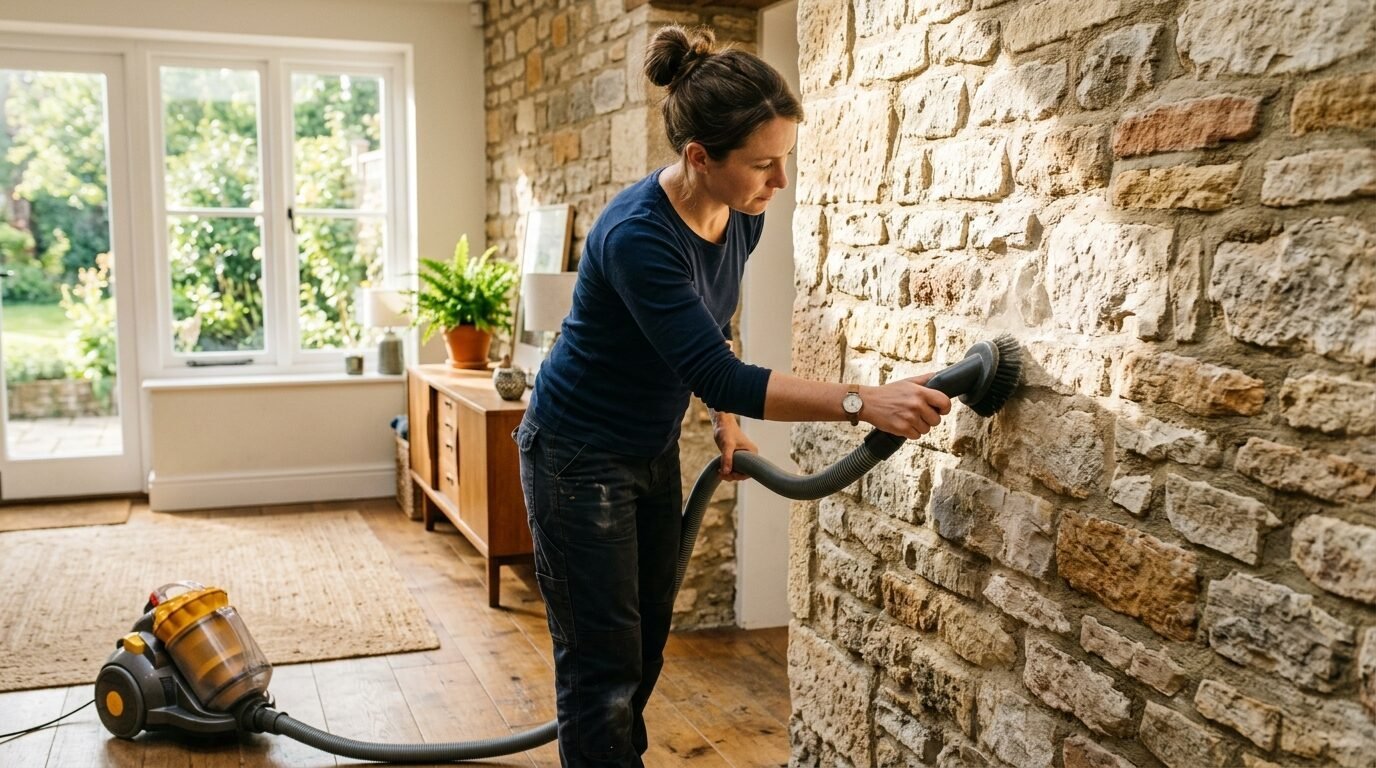
Stone is tough. But it still needs love. Vacuum the wall once a month. Use the brush attachment. Dust loves to hide in the cracks of rustic stone. If you spill something, clean it fast. Use a mild soap and water. Never use harsh chemicals or bleach. They can strip the color from manufactured stone.
I check my walls once a year for loose pieces. If a stone feels wobbly, pry it off. Clean the back. Apply fresh mortar and stick it back on. This rarely happens if you prep the wall correctly. A good stone accent wall should last as long as the house. It is a permanent upgrade that adds real value. Most buyers love the look of a limestone wall. It suggests quality and strength.
Real Life Case Study: The $600 Transformation
I helped a friend, Sarah, with her living room last fall. She had a tiny budget. She wanted that storybook homes look. We chose a faux stone accent wall kit. We spent $400 on stone and $200 on tools and mortar. We worked on a Saturday and Sunday. We covered a ten foot wall behind her TV.
The change was instant. The room felt bigger. It felt expensive. Sarah added some driftwood decor and a few plants. She sold the house three months later. The appraiser noted the stone wall as a high value feature. It proved to me that you do not need thousands of dollars. You just need a good plan and a couple of days. Stone is a high return investment for any homeowner.
Frequently Asked Questions
Can I install stone veneer over a fireplace?
Yes you can. Stone veneer is heat resistant. It is perfect for fireplace surrounds. Just make sure you follow local fire codes. You usually need a non combustible base. Cement board is a great choice here. It looks much better than old brick. It creates a focal point that anchors the whole room.
Does stone veneer require a professional?
Not always. If you are handy, you can do this. It is like a heavy version of tiling. The hardest part is the prep and the cuts. If the wall is very high, you might want help. But for a standard living room wall, it is a great DIY project. Just take your time and follow the steps.
How do I clean mortar off the stone?
Use a wet sponge while the mortar is fresh. If it has dried, use a stiff nylon brush. Do not use a wire brush on manufactured stone. It will scratch the surface. For real limestone wall pieces, a wire brush is fine. Just be gentle. You want to remove the mud, not the stone.
Is faux stone better than real stone?
It depends on your goal. Faux stone is lighter and easier to cut. It is better for DIYers. Real stone has better color and texture. It lasts longer without fading. If weight is a concern, go with faux. If you want the most authentic look, go with real limestone or rustic stone.
How thick is stone veneer?
Most pieces are between one and two inches thick. This is thin enough to fit behind furniture. It does not eat up your living space. This is why it is so popular for accent walls. You get the look of a thick rock wall without the bulk. It is the perfect compromise for modern homes.
The Long Term Value of a Stone Accent
A stone wall is more than just decor. It is a lifestyle choice. It brings a bit of the outdoors inside. It creates a sense of peace. Whether you want a rustic cabin vibe or a sleek modern look, stone works. It is timeless. Trends come and go. Paint colors change. But stone is always in style. I have never regretted a stone project. Every time I sit in a room with a stone wall, I feel more relaxed. It is a solid, grounding presence.
You have the tools. You have the steps. Now you just need to start. Pick a weekend. Order your stone. Turn that boring wall into something beautiful. Your living room deserves it. You will love the way the light hits the texture in the evening. You will love the compliments from your friends. But mostly, you will love the way your home finally feels finished.

Anya Castellan is the Founder and Editor-in-Chief of Home Wall Trends. An art history graduate of the Rhode Island School of Design with twelve years of experience writing for leading American design publications, she specializes in composition, gallery wall theory, and the quiet architecture of domestic space. A former contributing editor at Architectural Digest and guest lecturer at Parsons School of Design, Anya personally reads and signs off on every piece before it is published.