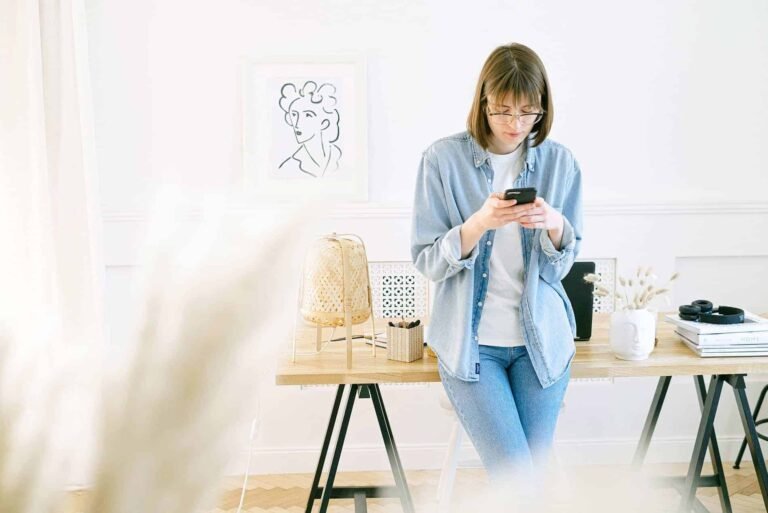
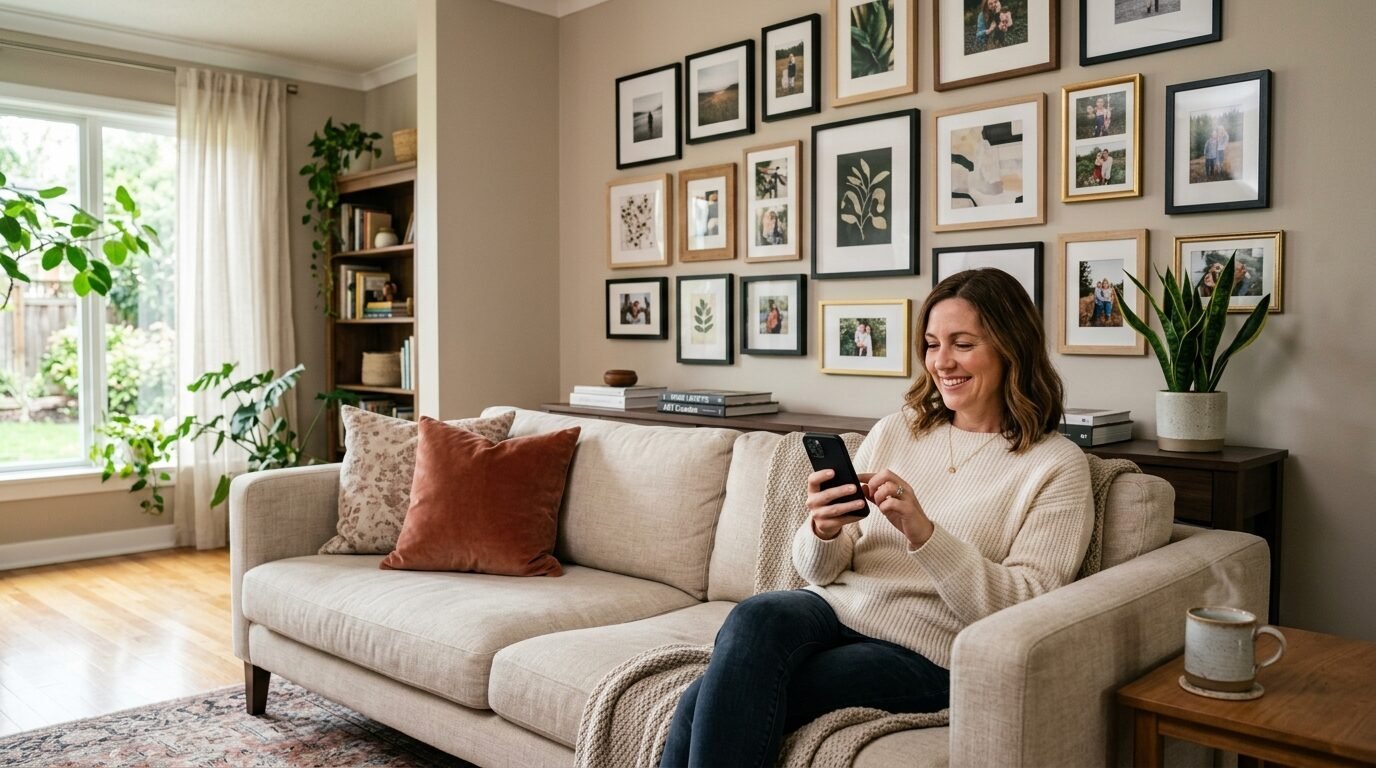
Professional framing shops charge a fortune. A single custom frame can cost three hundred dollars. Your walls stay empty because the price feels too high. You have digital files sitting on your phone or computer. They deserve to be on your wall. In my experience, you can create a gallery quality look for less than the price of a pizza. I have filled my entire hallway with art for under fifteen dollars per piece. This guide shows you the exact path to beautiful walls without the high price tag. We will look at sourcing files and finding frames at thrift stores. You will see how a simple coat of paint and the right paper change everything. You do not need an expensive setup. You only need a plan and a few cheap tools.
1. Find high resolution files for your diy digital art prints
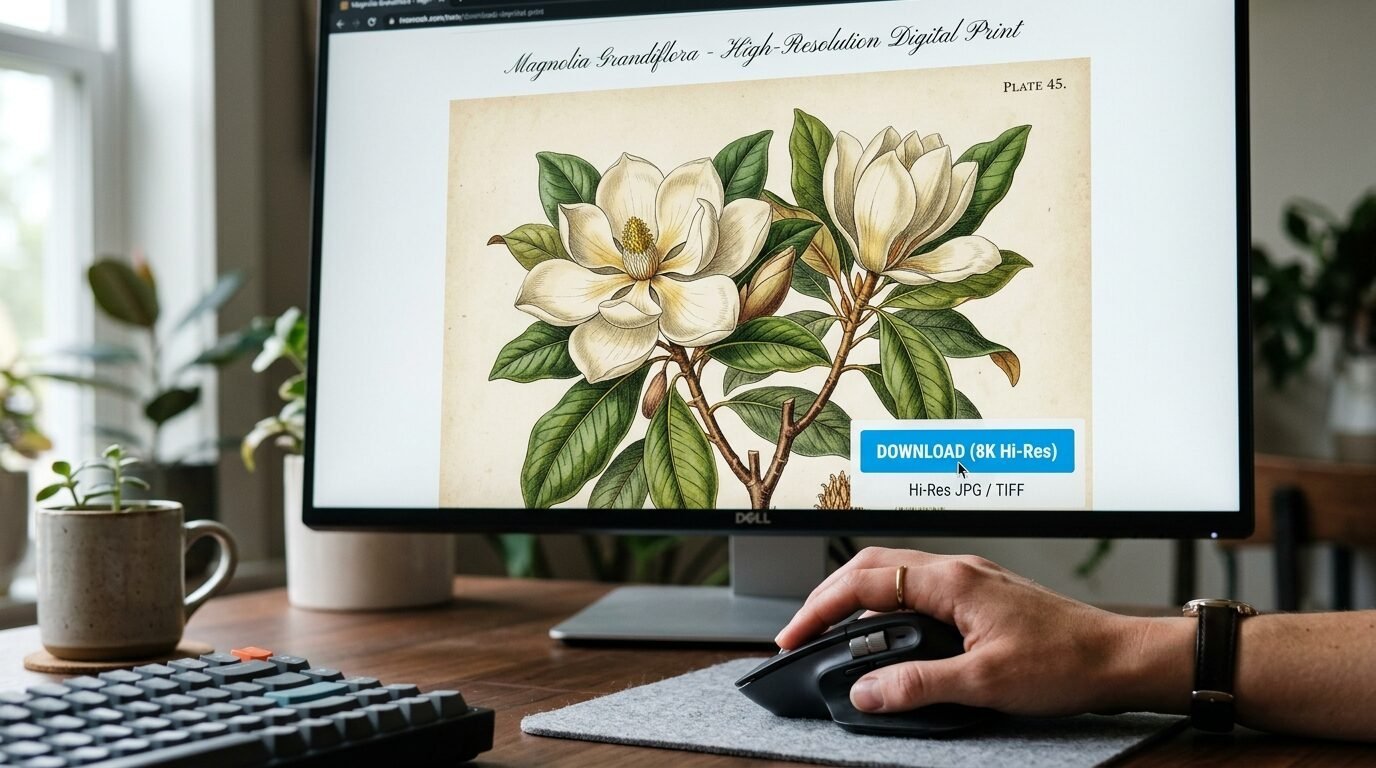
Finding the right image is the first step. You cannot use low resolution photos from social media. They look blurry when you print them. Look for public domain archives like the Metropolitan Museum of Art or the Smithsonian. They offer thousands of images for free. I once found a vintage botanical sketch from an old library archive. It looks like a hundred dollar antique on my wall. You can also search for digital art on Etsy. Many artists sell files for five dollars. This is a great way to support creators while keeping your costs low. Focus on files that are 300 DPI or higher. This ensures your diy digital art prints stay sharp and clear. Avoid images smaller than two thousand pixels. I have seen many people print small files and regret it. The image looks pixelated and cheap. Spend time picking an image you love. It is the foundation of your whole project.
2. Use free software for diy digital wall print design
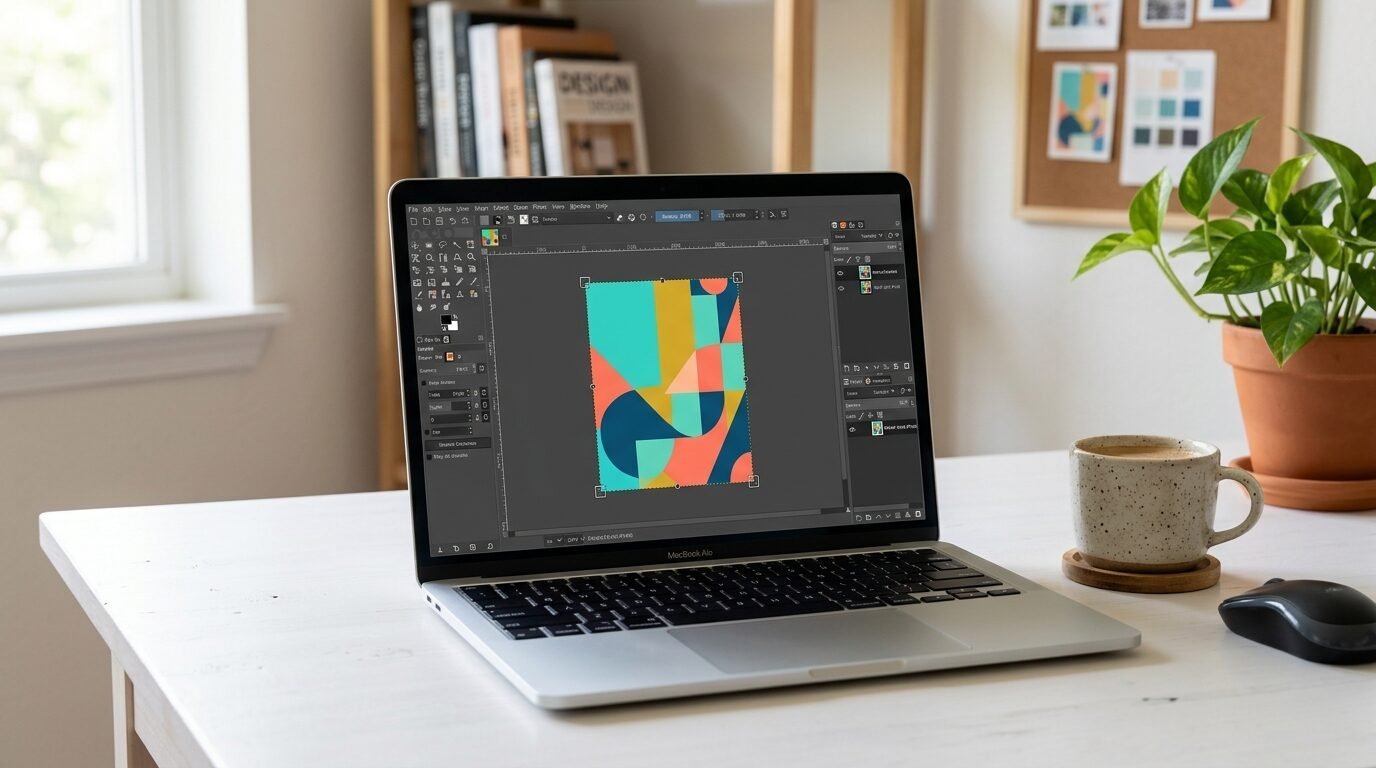
You do not need to buy Adobe Photoshop. Free tools work perfectly for a diy digital wall print. Canva is my favorite choice for this. You can set a custom size to match your frame. If you have an eight by ten frame, set your canvas to those exact inches. I often use Photopea for more advanced edits. It works in your web browser and looks just like professional software. You can fix the colors or increase the contrast. Sometimes a digital file looks a bit dull. I like to increase the saturation by ten percent. This makes the ink pop once it hits the paper. I have noticed that digital art often looks darker when printed. I usually increase the brightness by five percent before I hit print. This simple trick prevents your art from looking muddy. Practice with these tools for a few minutes. They are very user friendly.
3. How to customize digital prints for your space

Customization makes your art feel personal. You can change a colorful painting into a black and white masterpiece. This helps the art fit into a neutral room. I often crop images to focus on a specific detail. A wide landscape might look better as a tight shot of a single tree. I have tried adding text to digital files too. You can put a meaningful date or a short quote at the bottom. This turns a generic print into a memory. Use the crop tool to fit odd sized frames. If you find a square frame at a yard sale, you can center your image to fit. I once used a vintage map and cropped it to show only my home state. It became a conversation piece in my living room. Small changes lead to big results. Do not be afraid to play with the layout.
4. Pick the right paper for diy digital art printing
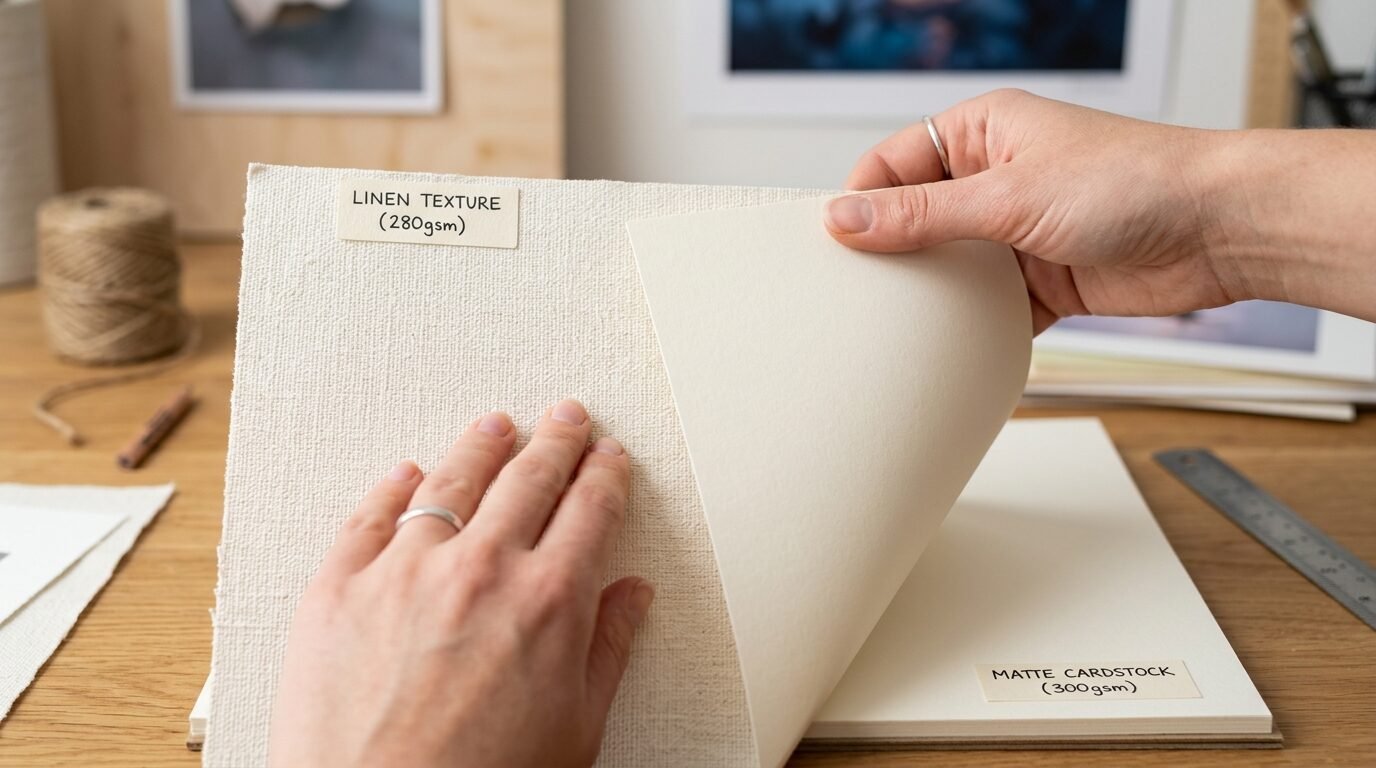
The paper you choose changes the whole look. Regular printer paper is too thin. It wrinkles when the ink hits it. I recommend using heavy cardstock or matte photo paper. Cardstock is very cheap at office supply stores. It gives the art a sturdy feel. In my experience, matte paper looks more expensive than glossy paper. Glossy paper shows too much glare under glass. I prefer a soft finish that looks like real paint or charcoal. Look for paper that is at least sixty five pound weight. I have seen great results with linen textured paper too. It adds a subtle grid pattern that mimics canvas. I once printed a portrait on cream colored paper. It gave the art an aged feel immediately. Avoid cheap multi purpose paper for this project. The extra three dollars for good paper is worth every cent.
5. Adjust your printer for professional diy art printing tips
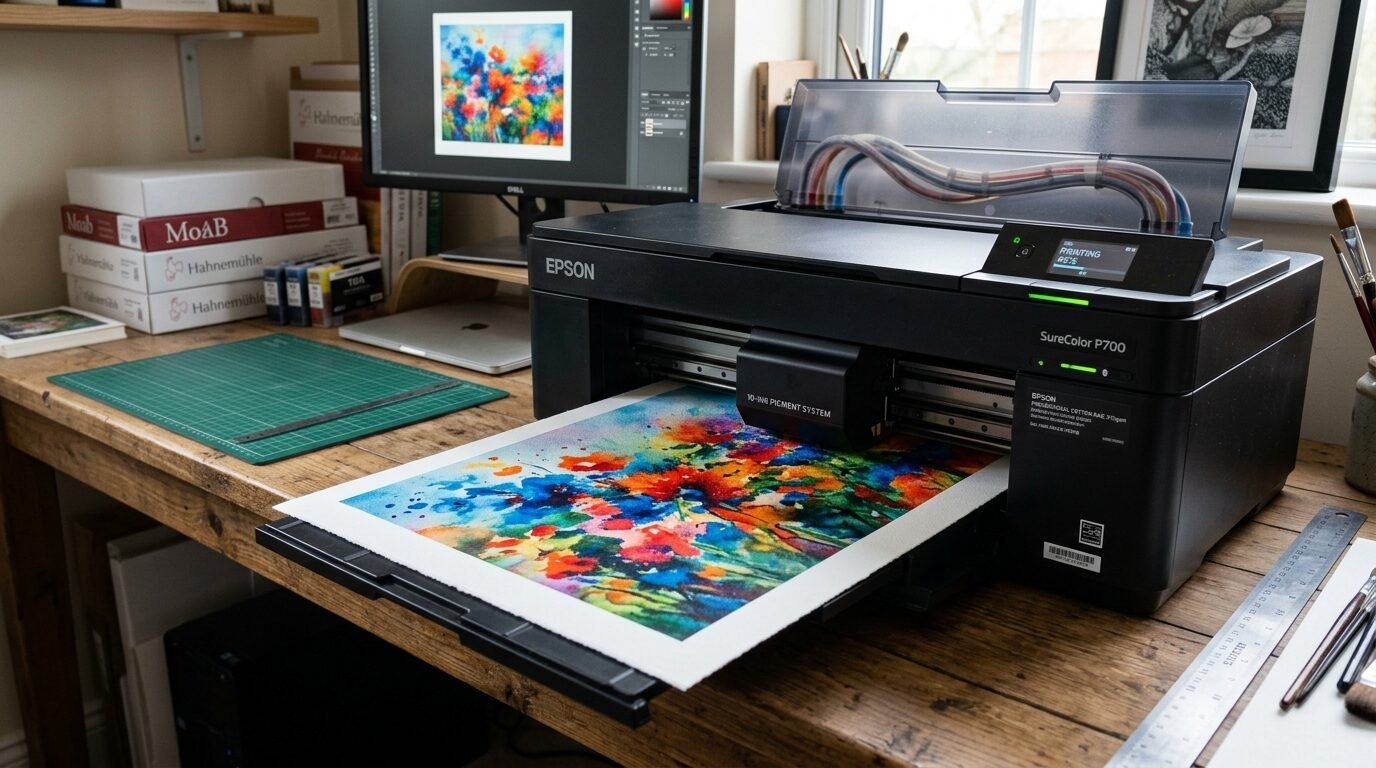
Your printer settings are a secret weapon. Most people just click print and hope for the best. You must go into the advanced settings. Choose the highest quality or best print mode. Tell the printer what kind of paper you are using. If you put in matte photo paper, select that option in the menu. This tells the machine to use the right amount of ink. I have noticed that the photo bypass tray often gives better results. It keeps the paper flat and prevents jams. Check your ink levels before you start. A low yellow cartridge can ruin the colors of a sunset print. I once wasted three sheets of good paper because my blue ink was streaky. Run a nozzle check if you have not used your printer in a while. These diy art printing tips save you time and money. A well calibrated printer produces gallery results.
6. How to make digital art prints on a budget
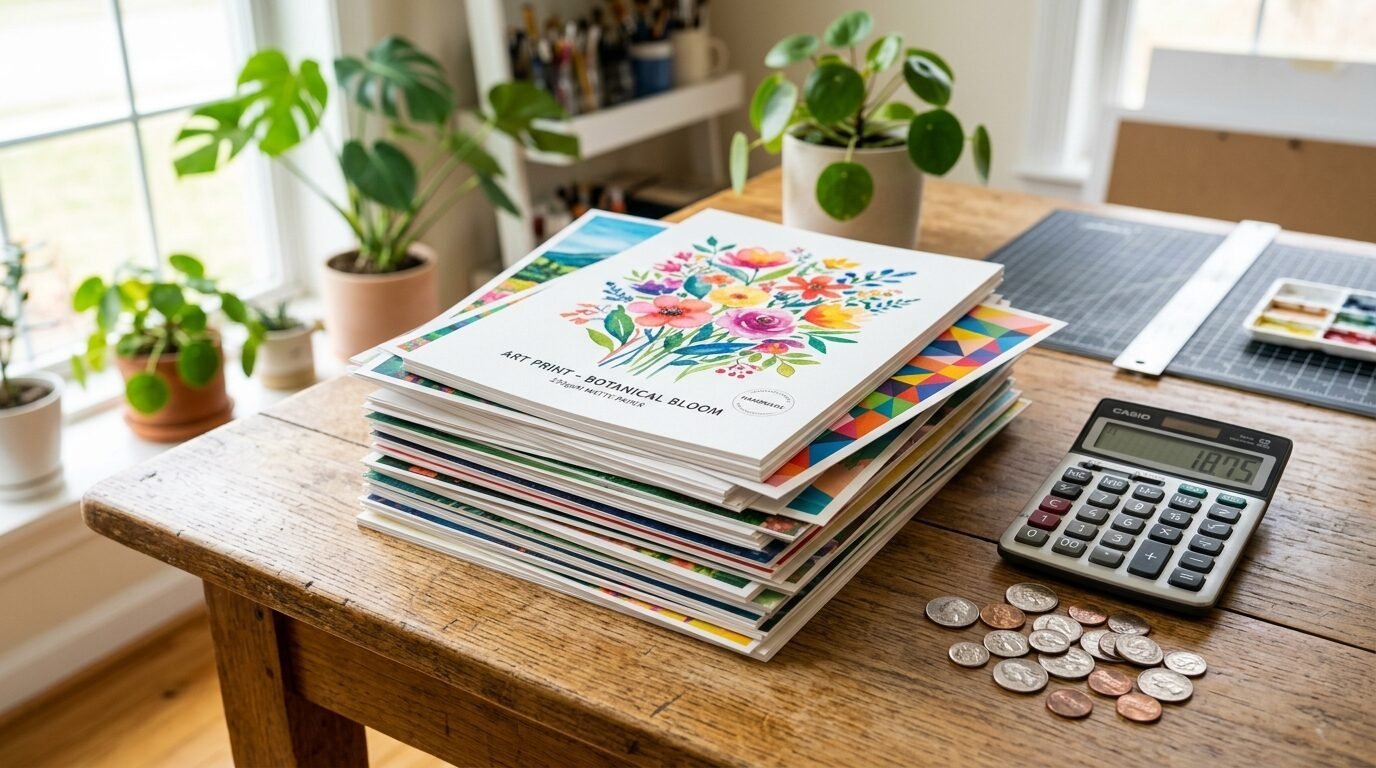
Keeping costs low is the main goal. To stay under twenty dollars, you must be smart with ink. Do not print solid black backgrounds if you can avoid it. This uses a lot of expensive ink. I like to use white or light colored backgrounds. If you want a dark look, use a dark frame instead of a dark print. Buy generic ink cartridges instead of brand name ones. I have used third party ink for years and the quality is excellent. I save about forty dollars per set. You can also print at a local library. Many libraries offer color printing for fifty cents a page. This is cheaper than buying a whole ink set. I have seen friends create entire gallery walls using library printers. It is a great way to stay on budget. Think about every cent you spend. It adds up quickly.
7. Hunt for cheap frames at local thrift stores
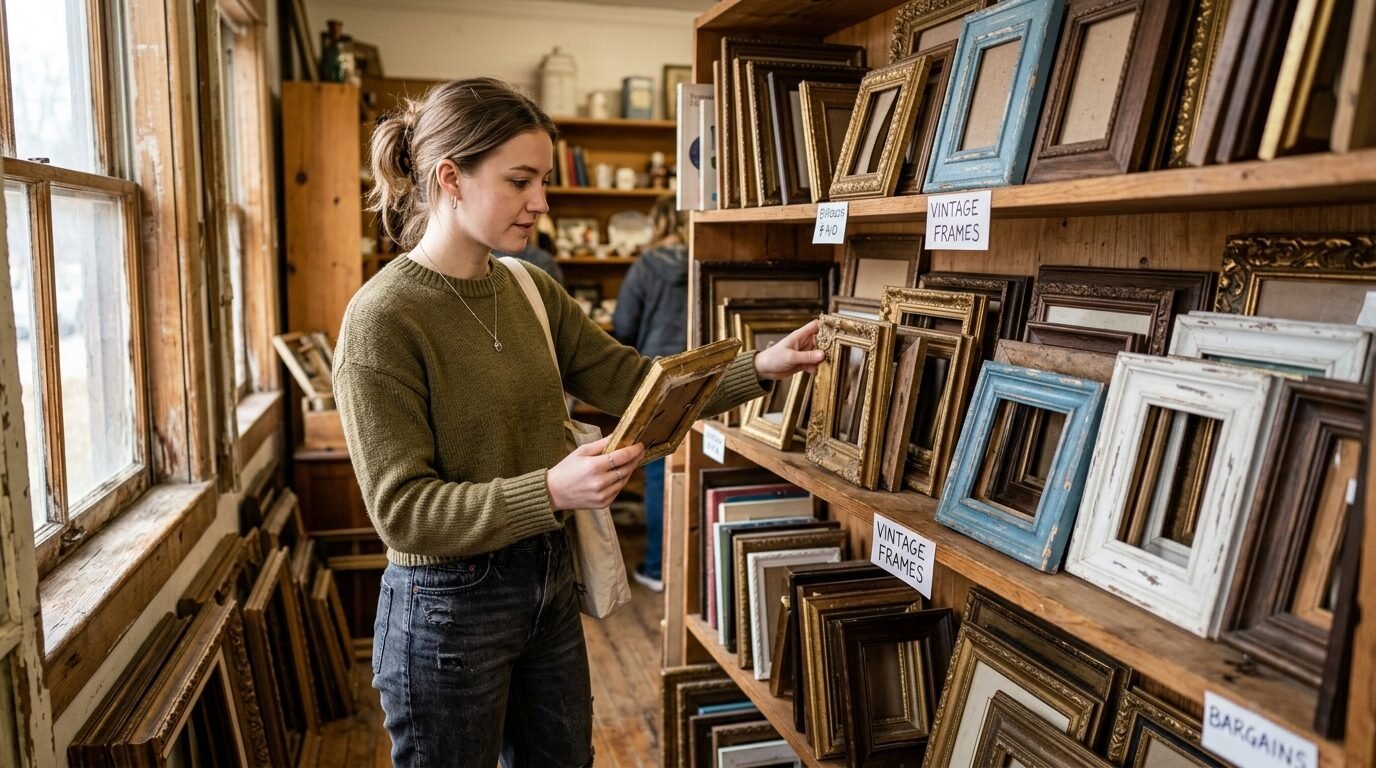
The frame is usually the most expensive part. Avoid buying new frames at big box stores. They are often made of cheap plastic and cost twenty dollars or more. Go to Goodwill or local charity shops instead. I find solid wood frames for three or five dollars all the time. Look past the ugly art inside the frame. You only want the wood and the glass. I once found a heavy oak frame for two dollars because the glass was dirty. I cleaned it and it looked brand new. Check for sturdy corners and real glass. Some modern frames use thin plastic instead of glass. Plastic scratches easily and looks cheap. I prefer the weight and clarity of real glass. Thrift stores are a gold mine for this project. You can find unique shapes that you cannot get at the mall.
8. Refresh old frames with affordable paint
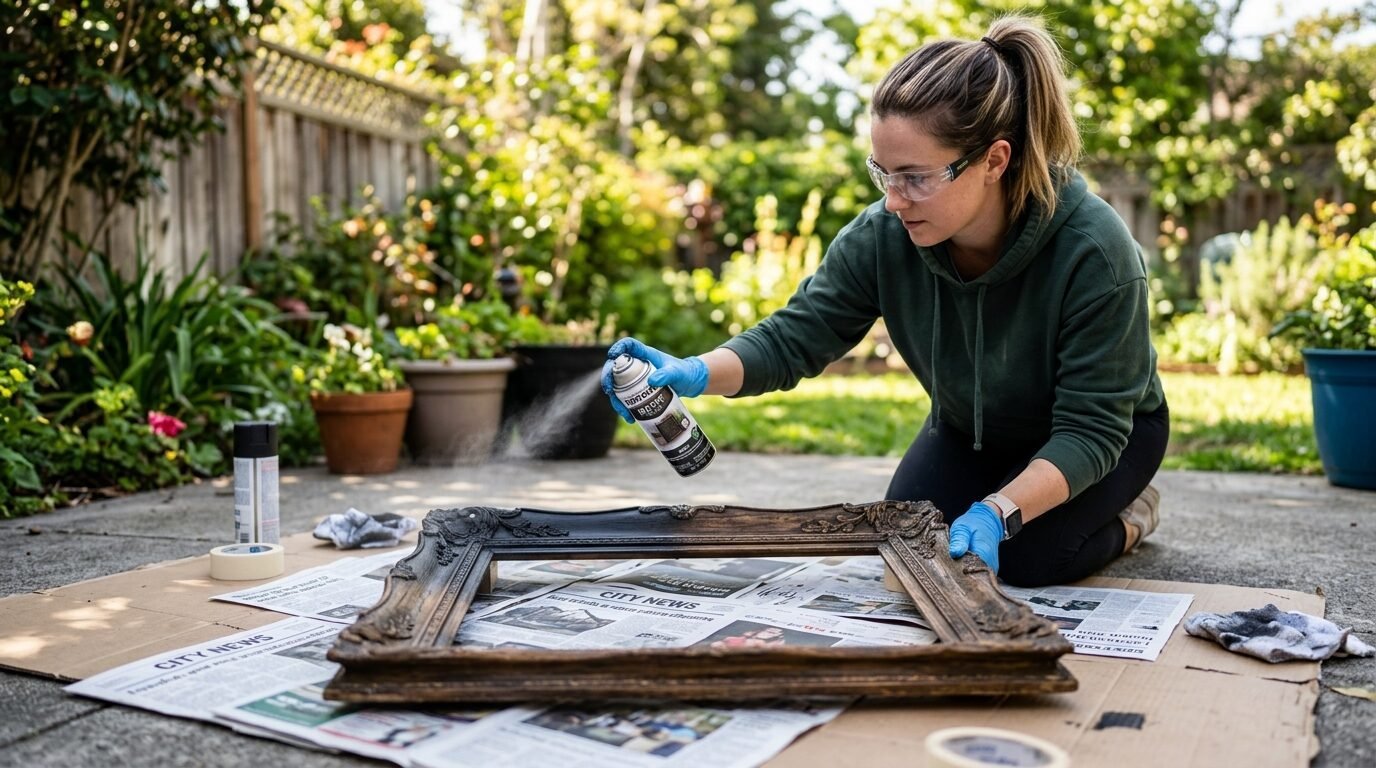
Most thrift store frames are the wrong color. They might be a weird orange wood or a faded silver. You can fix this with a can of spray paint. A five dollar can of matte black or antique gold paint works wonders. I have tried many brands and Rust Oleum is my favorite for metal and wood. Take the glass and the old art out first. Sand the frame lightly to help the paint stick. I usually do two thin coats instead of one thick coat. This prevents drips and runs. I once turned a bright red plastic frame into a high end gold focal piece. It took ten minutes of work. You can also use rub on wax finishes for a vintage look. This adds a metallic sheen that looks like real brass. Painting is the easiest way to make a cheap frame look custom.
9. How to frame digital prints using professional methods
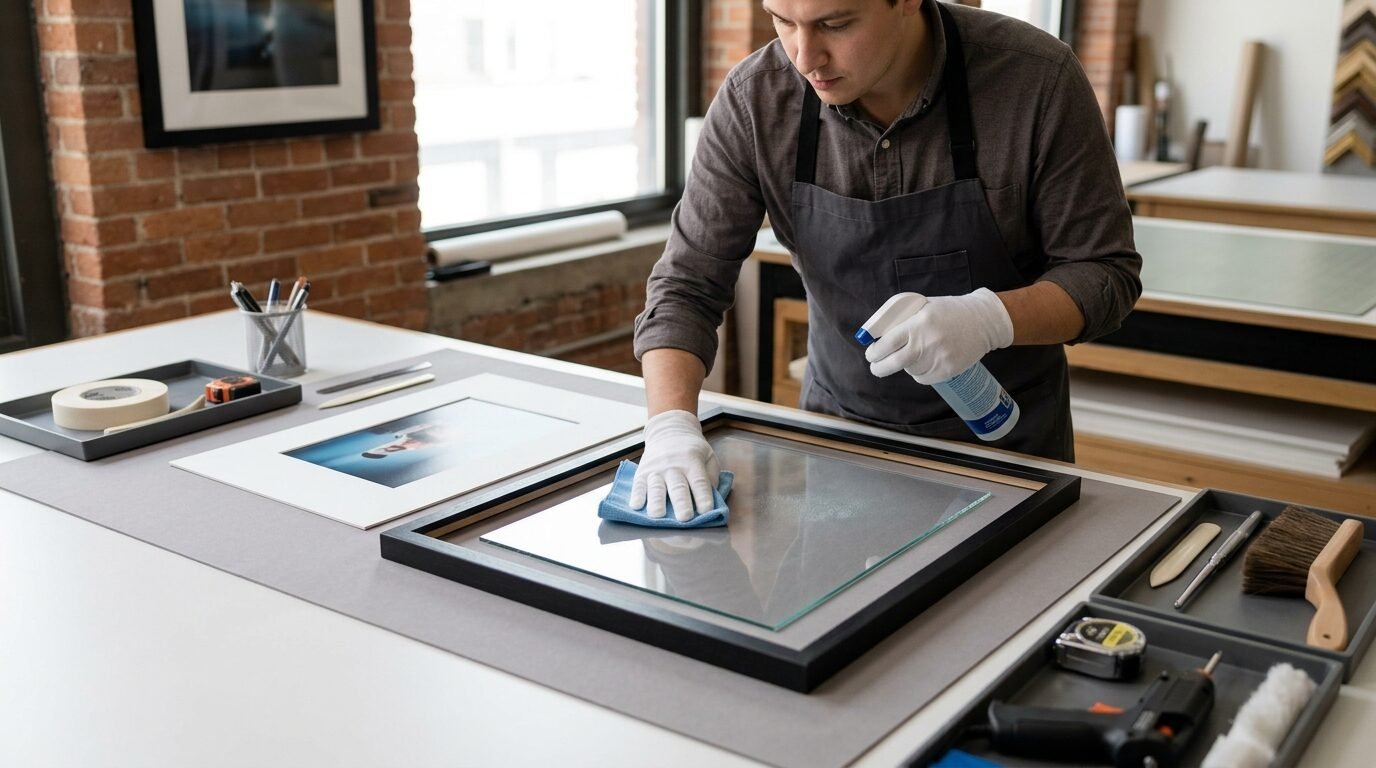
Good framing is about the details. Make sure your print is perfectly centered. If your frame is larger than your print, you need a mat board. You can buy pre cut mats for a few dollars. A white mat makes the art look professional and gives it room to breathe. I have noticed that a wider mat often looks more high end. I once used a large sixteen by twenty frame for an eight by ten print. The large white space around the art made it look like a museum piece. Clean the glass on both sides before you put the art in. Use a lint free cloth to avoid streaks. Even a tiny piece of dust will show up once the frame is closed. I have seen many people skip this and have to take the frame apart later. Take your time with the assembly. It shows in the final product.
10. Cut a custom mat board to save money
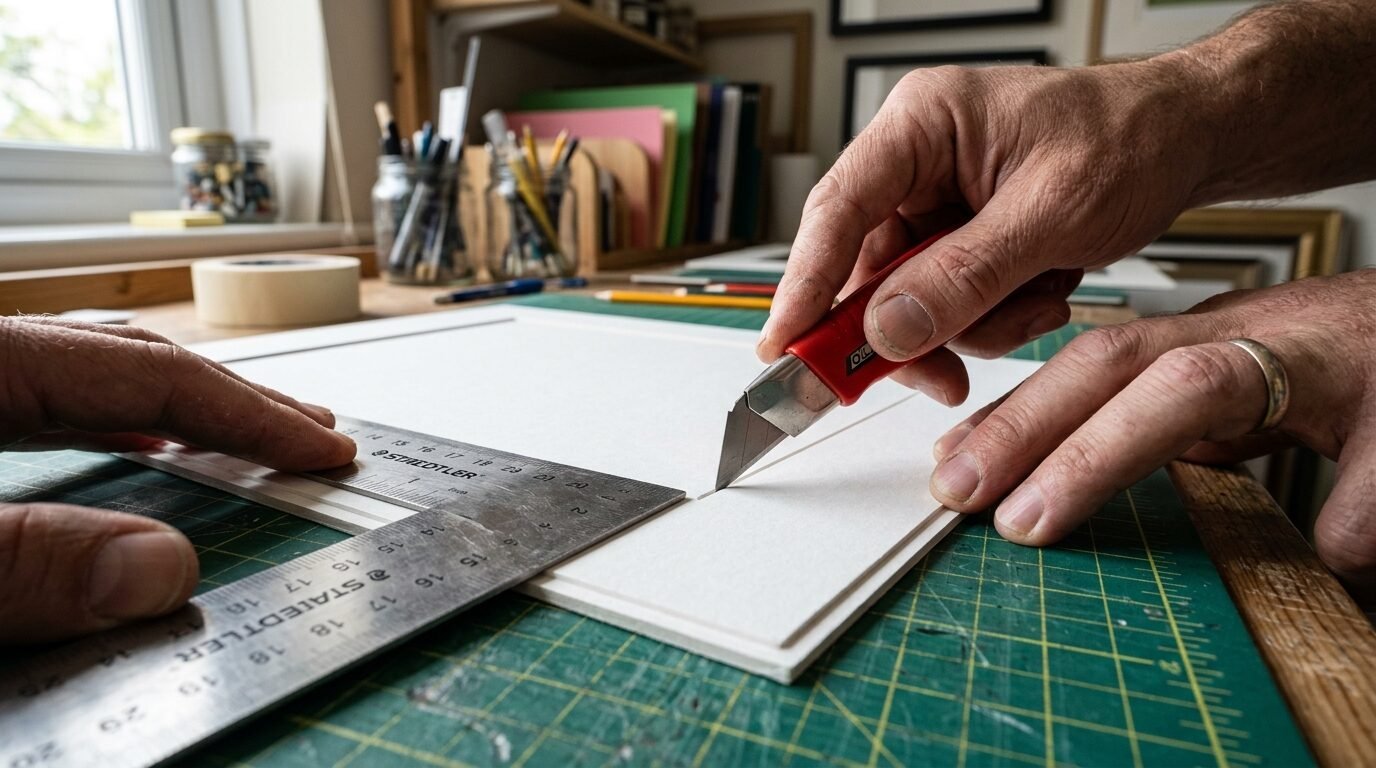
Buying custom mats is expensive. You can cut your own with a sharp utility knife and a metal ruler. Buy a large sheet of mat board at a craft store for about five dollars. You can get four or five mats out of one sheet. Measure the opening of your frame and the size of your art. Mark the back of the board with a pencil. Use a fresh blade for every cut. A dull blade will tear the paper and look messy. I have tried cutting on a kitchen table but a cutting mat is better. It protects your surfaces and helps the blade glide. I once messed up three boards before I got the hang of it. Now I can cut a mat in two minutes. This skill saves you ten dollars per frame. It is a great way to handle odd sized art.
11. How to sign an art print like a professional artist
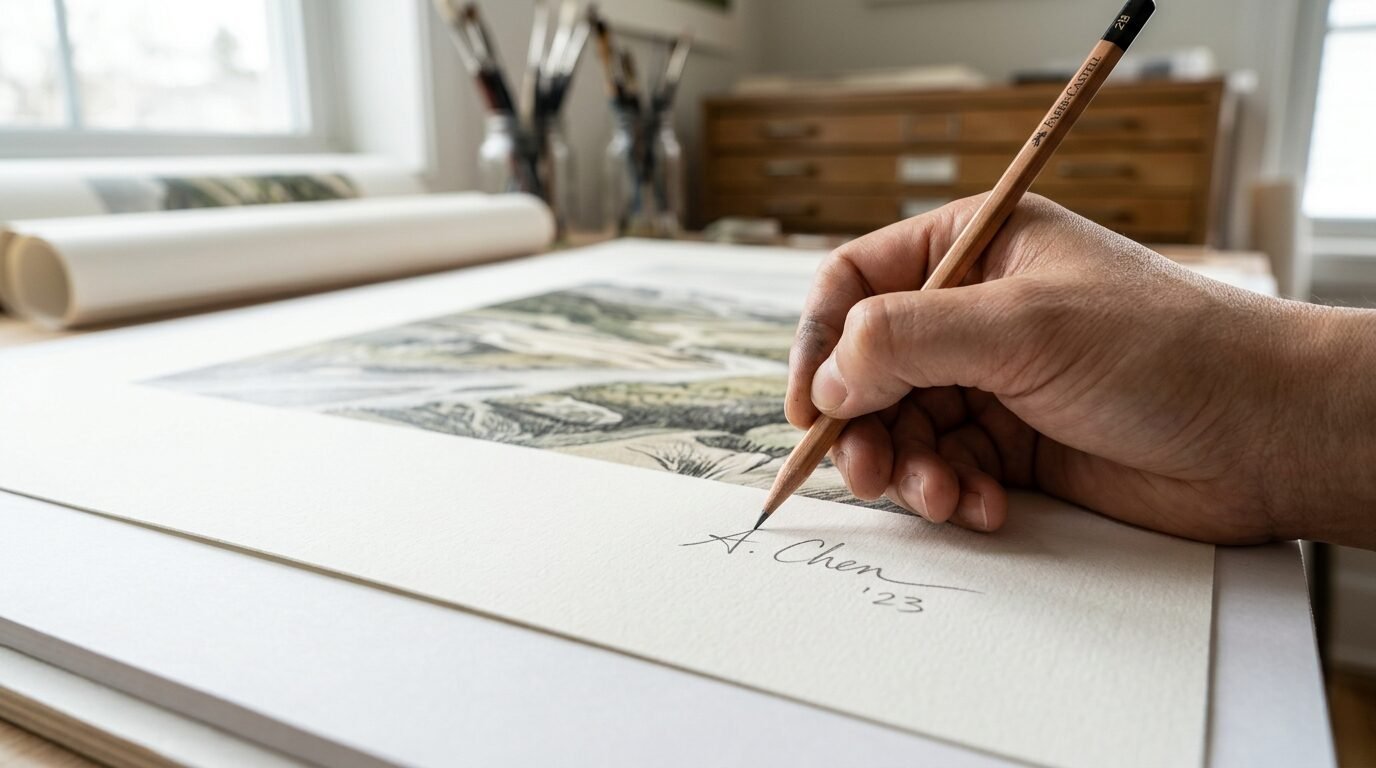
Signing your work adds a touch of class. It makes your diy digital art prints feel like limited editions. Use a soft lead pencil rather than a pen. Pencil looks more professional on paper. Sign your name in the bottom right corner just below the image. I often put the year on the left side. If you created the digital design, this is your right as the artist. Even if you just printed a public domain image, a small mark can feel special. I have seen artists use a small embossed stamp too. You can buy a custom embosser online for fifteen dollars. It adds a raised texture to the paper. I once signed a set of three botanical prints for a friend. She thought I bought them at a high end gallery. It is a tiny detail that makes a massive impact.
12. Mount your art using acid free materials
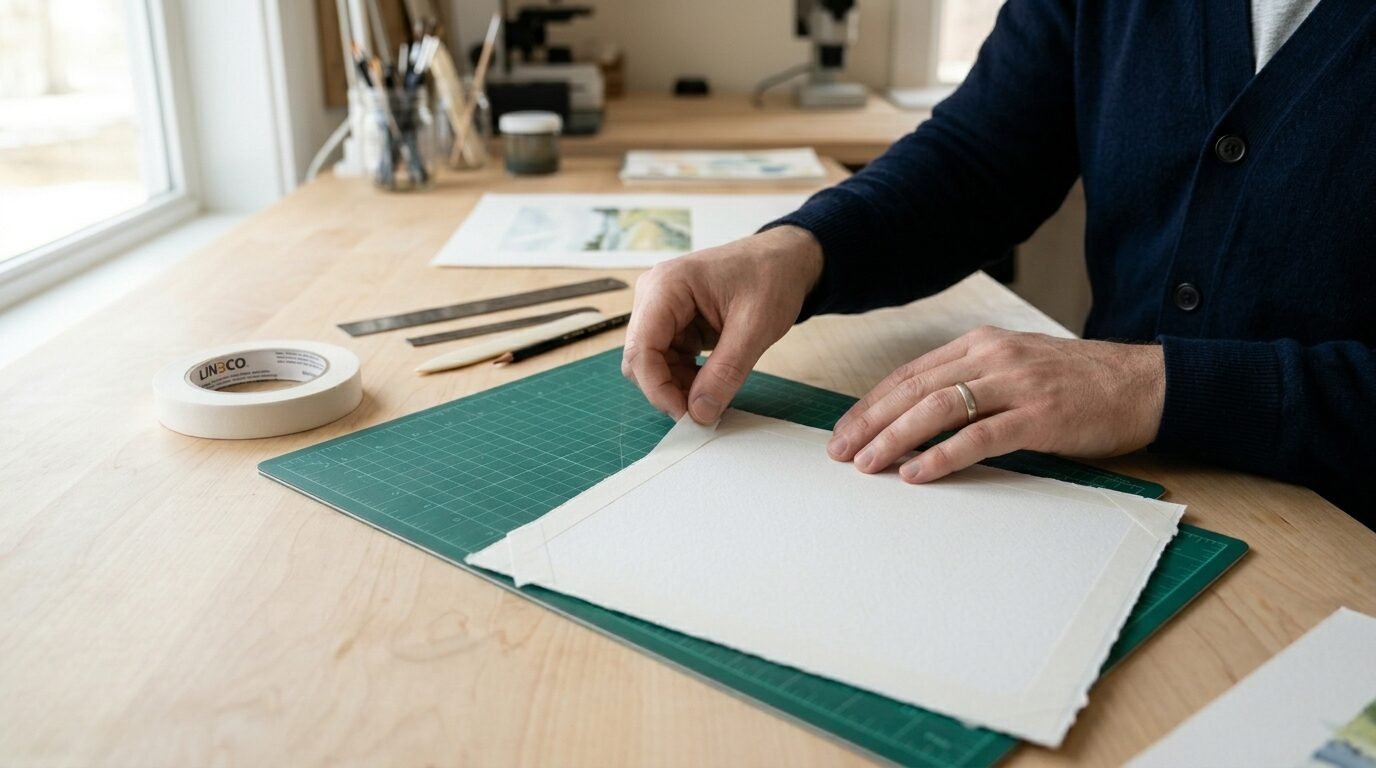
Do not use regular clear tape to hold your art. Over time, the chemicals in the tape will turn your paper yellow. Use acid free artist tape or linen hinges. This protects your art for years. I have noticed that cheap tape also fails in heat. Your art might slide down inside the frame on a hot day. Use the T-hinge method. Attach two small pieces of tape to the top back of the print. Then stick those to the mat board. This allows the paper to expand and contract with the weather. I once ruined a beautiful print by gluing it to the backing board. The paper buckled and looked terrible. Always let the art hang freely from the top. This keeps it flat and professional. Acid free materials are cheap and easy to find. They are a must for any framing project.
13. Assemble the frame for a high end look
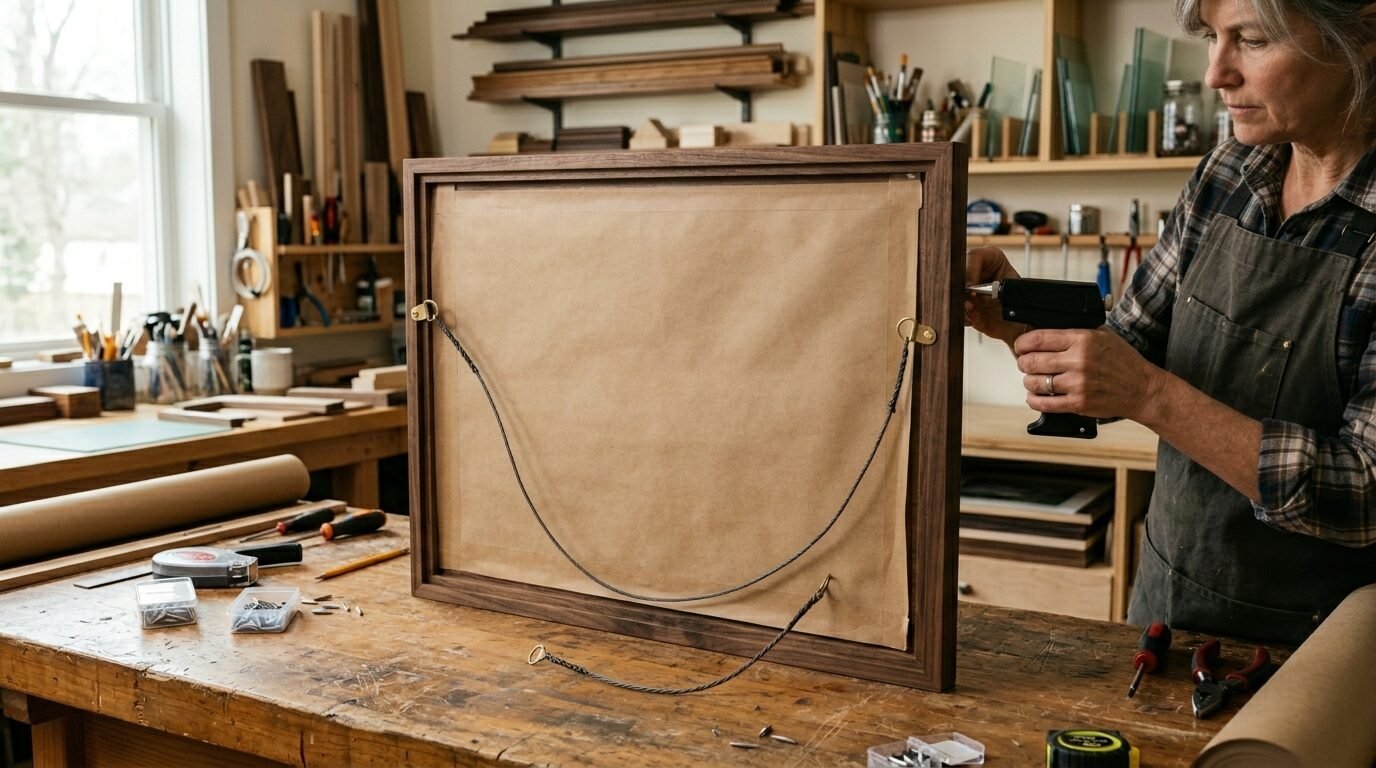
Now it is time to put everything together. Lay the clean glass in the frame first. Place your matted art on top of the glass. Add a piece of acid free foam board or cardboard for backing. Make sure the backing fits tightly. If the frame feels loose, use small glazier points or bendable tabs to hold it in place. I have used small finishing nails in a pinch. Hammer them in sideways to avoid hitting the glass. I like to finish the back with a piece of brown kraft paper. Tape it to the edges of the frame to seal out dust and bugs. I have seen old frames filled with tiny spiders because they were not sealed. This final step makes your project look like it came from a professional shop. It feels solid and well made in your hands.
14. How to order digital prints if you lack a printer
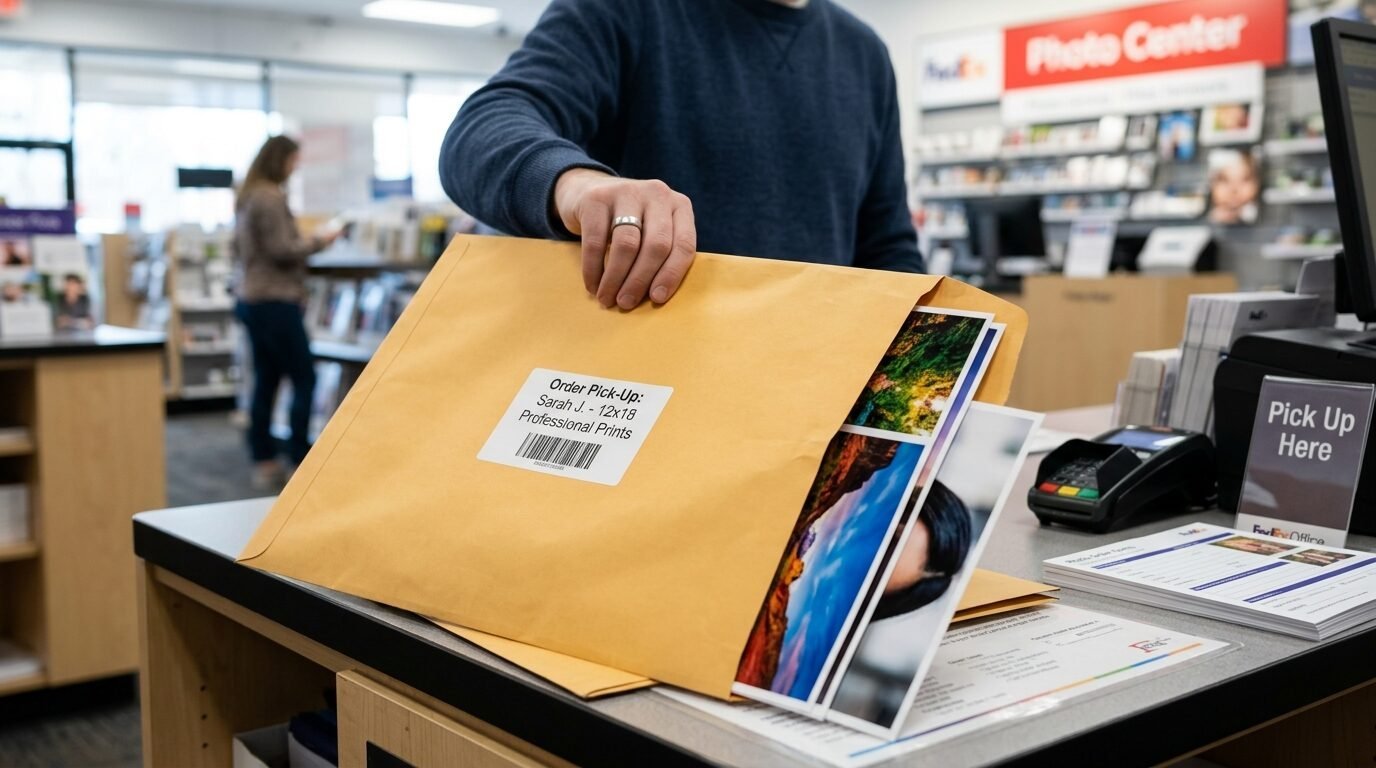
You can still do this project without a home printer. Use a local photo center or an online service. Many places offer high quality prints for under two dollars. I often use Walgreens or Shutterfly for larger sizes. They frequently have fifty percent off coupons. I have seen people order prints as posters to save even more money. A large poster can be cut down to fit several small frames. I once ordered a large map print and cut it into four pieces. I framed them in a grid and it filled a whole wall. This is a smart way to get professional ink quality without buying a machine. Just make sure to choose the matte finish during checkout. Online ordering is fast and convenient. It keeps your diy digital wall print project moving forward.
Cost Comparison Table for Home Framing
| Item | Thrift Store / DIY Cost | Big Box Store Cost | Professional Shop Cost |
| Digital File | $0 – $5 | $15 | $50+ |
| Printing | $0.50 – $2 | $5 | $20 |
| Frame | $2 – $7 | $25 | $150 |
| Mat Board | $1 | $10 | $40 |
| Total | $3.50 – $15 | $55 | $260+ |
Real Tools I Use for Every Project
- Canon PIXMA Pro: This is a great printer for high quality images. The ink lasts a long time and the colors are very accurate.
- Rust-Oleum 2X Painter’s Touch: I use this spray paint for every frame. It covers well and does not chip easily.
- Canva Free Version: I use this for almost every diy digital wall print design. It is simple and has every tool I need.
- Logan Graphics Mat Cutter: This is a bit more expensive but worth it if you frame a lot of art. It makes perfect 45 degree cuts.
- Fiskars Titanium Scissors: You need sharp blades for clean edges. These stay sharp for years.
- Scotch Acid-Free ATG Tape: This is the gold standard for mounting art. It never yellows the paper.
- Command Picture Hanging Strips: I use these to hang my frames without damaging the walls. They are very strong.
Frequently Asked Questions
Can I use a regular office printer for art?
Yes you can use a basic inkjet printer. The key is using the right paper. Heavy cardstock or matte photo paper makes a huge difference. Set your printer to the high quality mode. I have noticed that even cheap printers can produce great results with these settings. Do not use plain copy paper as the ink will bleed and look dull.
Where is the best place to find free art?
Public domain sites are the best source. The National Gallery of Art has a massive collection. You can search for specific styles like Impressionism or Modernism. Unsplash is also good for modern photography. I have seen many people find beautiful landscapes there for free. Always check the license to make sure you can print it for personal use.
How do I make my frames match?
You do not have to buy matching frames. You can make them match with paint. I often buy different styles and sizes from thrift stores. Then I spray paint them all the same shade of black or white. This creates a cohesive look for a gallery wall. I have noticed that matching the color matters more than matching the shape.
Is glass better than acrylic?
Glass is usually better for home projects. It is cheaper and does not scratch as easily. Acrylic is lighter and safer for kids rooms. But acrylic can look static and attract dust. I prefer real glass for a high end look. If you buy frames at thrift stores they almost always come with glass. Just give it a good cleaning.
How do I hang my art straight?
Use a level and a pencil. Mark the spot where the nail should go. I often use a piece of painters tape on the back of the frame to mark the hook location. Then I move that tape to the wall. This shows exactly where to hammer. I have seen many people struggle with this but the tape trick works every time.
Final Thoughts on Budget Wall Decor
Creating a beautiful home does not require a large bank account. You can turn empty walls into a personal gallery for under twenty dollars. It takes a bit of time and some searching at thrift stores. But the result is worth the effort. In my experience, diy digital art prints look just as good as expensive store bought versions. You get the added joy of knowing you made it yourself. Start with one small frame and see how it looks. You will soon want to fill every room in your house. Use these tips to save money and show off your style. Your walls are a blank canvas. Go fill them with something you love.

Anya Castellan is the Founder and Editor-in-Chief of Home Wall Trends. An art history graduate of the Rhode Island School of Design with twelve years of experience writing for leading American design publications, she specializes in composition, gallery wall theory, and the quiet architecture of domestic space. A former contributing editor at Architectural Digest and guest lecturer at Parsons School of Design, Anya personally reads and signs off on every piece before it is published.