
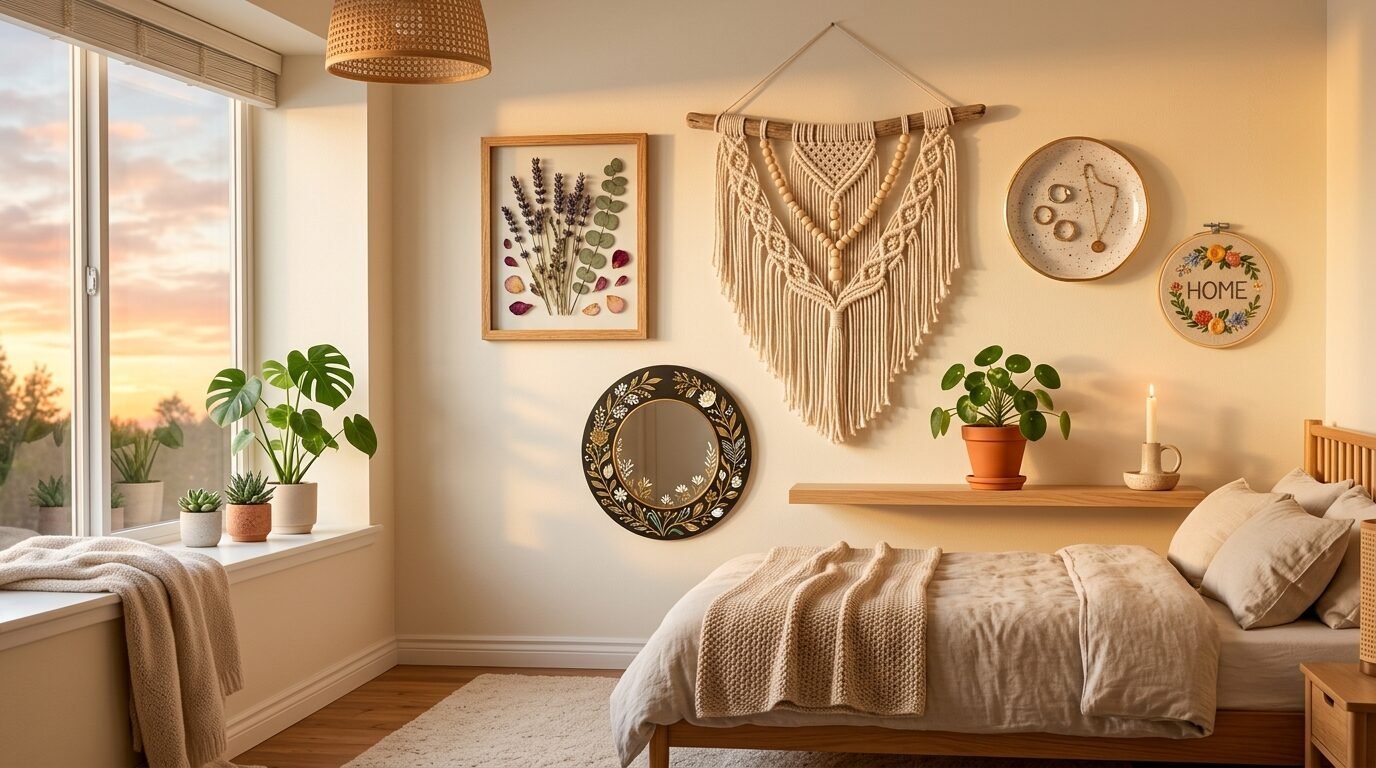
Blank walls feel cold and empty. I spent three hundred dollars on retail wall art last year in Austin. It looked generic and boring. My friend Sarah faced the same issue in her small apartment. We decided to make our own decorations instead. In my experience, handmade pieces tell a better story. You do not need expensive crafting skills. You do not need power tools. This guide helps you change your room in one afternoon. Let us look at simple projects that cost under twenty dollars. Your home will feel cozy and personal.
Quick Project Guide
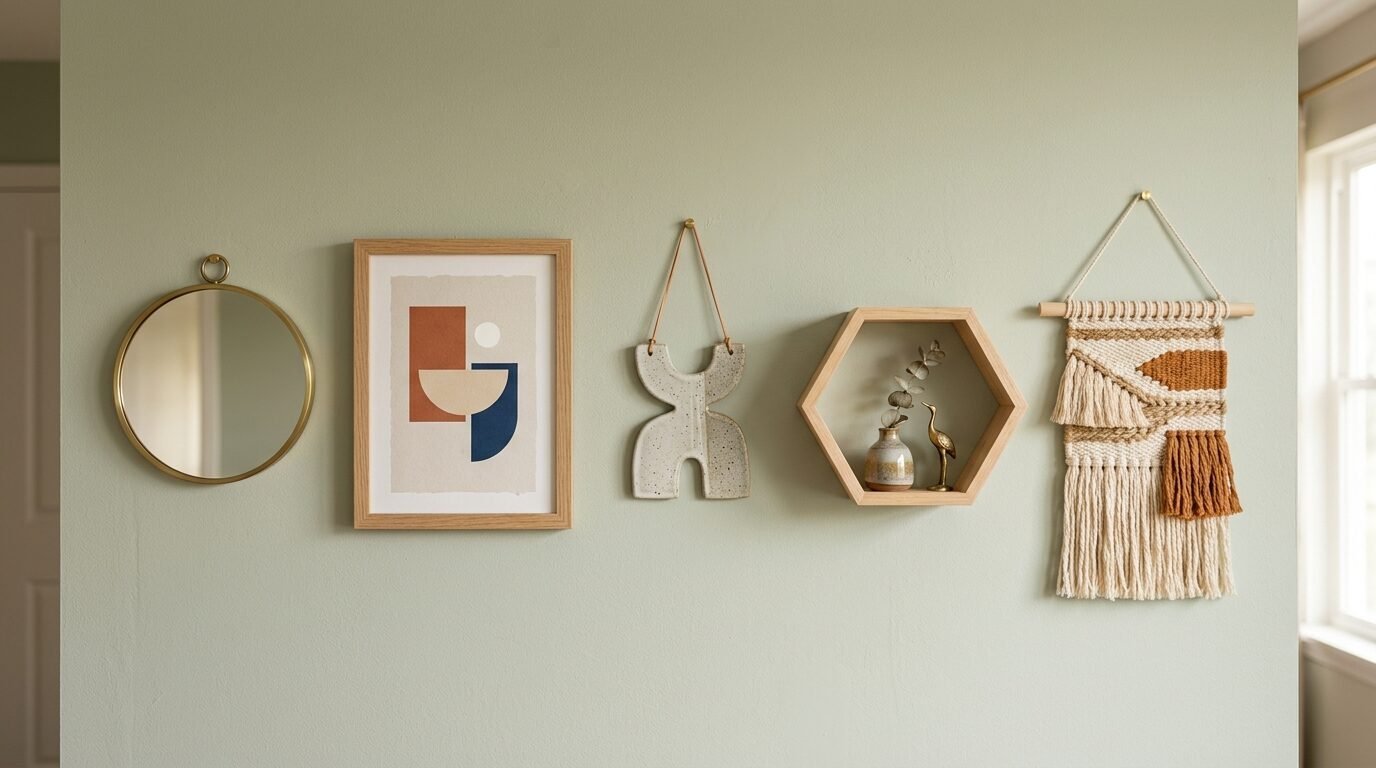
You will see five clear projects that take under two hours each. These ideas fix the fear of ruining your drywall. We use temporary hooks and light materials. I share my personal failures so you save money. For example, cheap glue fails after two weeks. I recommend using gorilla wood glue or command strips instead. Expect to spend twelve dollars to twenty five dollars per piece. Many people think DIY looks messy or cheap. I disagree completely. Clean lines and natural textures look high end. This deep dive covers everything from yarn hangings to paper crafts. You will get a gorgeous wall by tonight.
1. Yarn and Driftwood Tassel Hanging
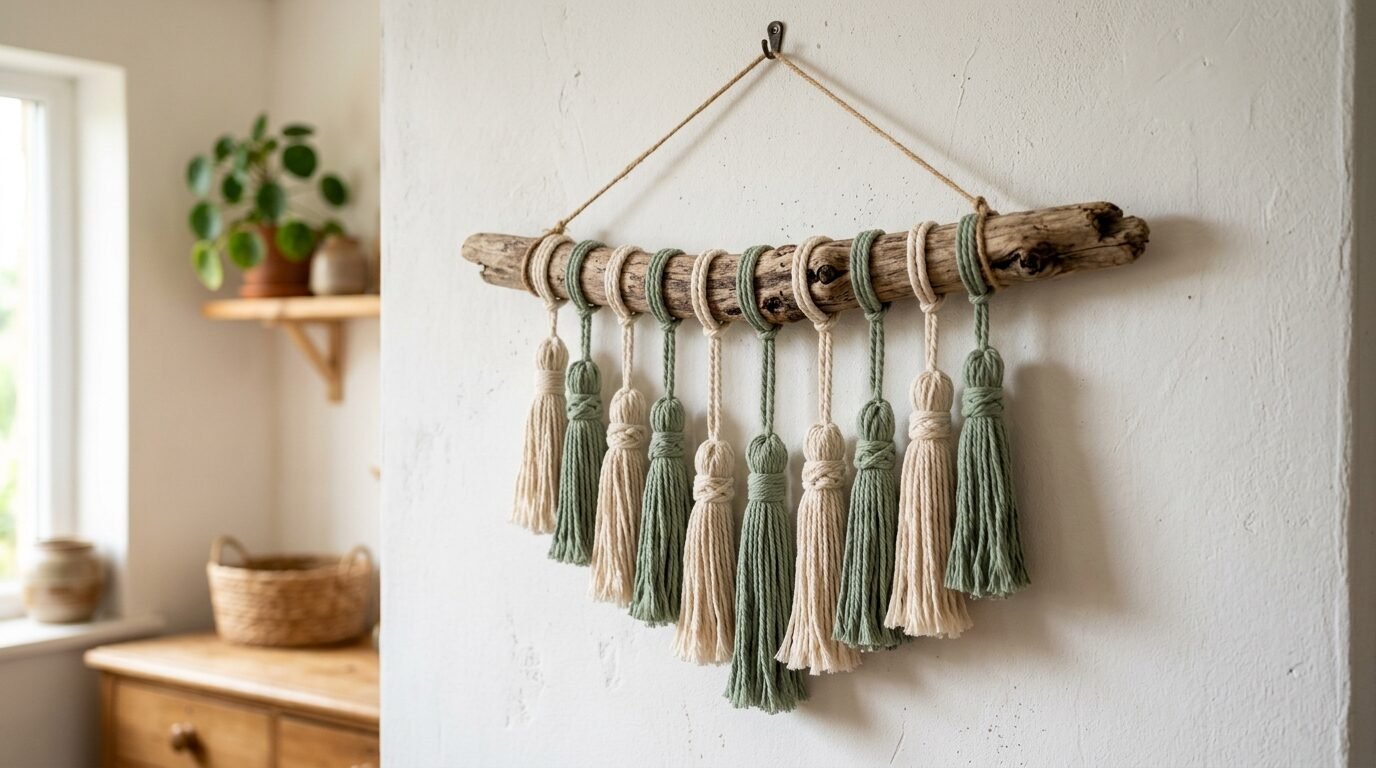
A yarn and driftwood tassel hanging is a budget friendly project that uses soft yarn tied to a natural branch. This project offers Cute Wall Hanging Ideas for people who want texture without heavy frames. You only need yarn, scissors, and a stick from your yard. It takes forty five minutes and costs under ten dollars total.
In my experience, natural cotton yarn works best. I tried using cheap acrylic yarn in early winter. The tassels looked flat and fuzzy. When I switched to four millimeter cotton cord, the piece looked beautiful. My neighbor Emma made one for her living room. Her guests thought she bought it at a boutique store.
Let us look at Mark in Denver. He used a piece of oak wood and gray yarn. He spent seven dollars and finished in thirty minutes. Another example is Julie in Seattle. She used three shades of green yarn to match her pillows. It made her bedroom feel peaceful.
Most design blogs say you must buy expensive driftwood online. That is a mistake. Free branches from your local park work perfectly. Just bake the wood at two hundred degrees for twenty minutes. This kills any hidden bugs safely.
First, clean your branch with a damp cloth. This takes five minutes. Cut twenty pieces of yarn to equal lengths. Loop each piece over the stick using a lark head knot. Trim the bottom into a clean V shape. This takes thirty minutes.
A common mistake is pulling the knots too loose. The yarn slips off when you hang it. Prevent this by pulling each loop tight against the wood.
Use Fiskars fabric scissors for clean cuts. Regular kitchen shears fray the yarn ends. Fiskars cost fifteen dollars but last for years.
A store bought version costs sixty dollars at Target. Your cost is eight dollars for the yarn. You save fifty two dollars instantly.
People in coastal regions prefer white cotton rope. Crafters in the Midwest often choose warm wool yarn.
2. Pressed Botanical Frames for Study Room Decoration
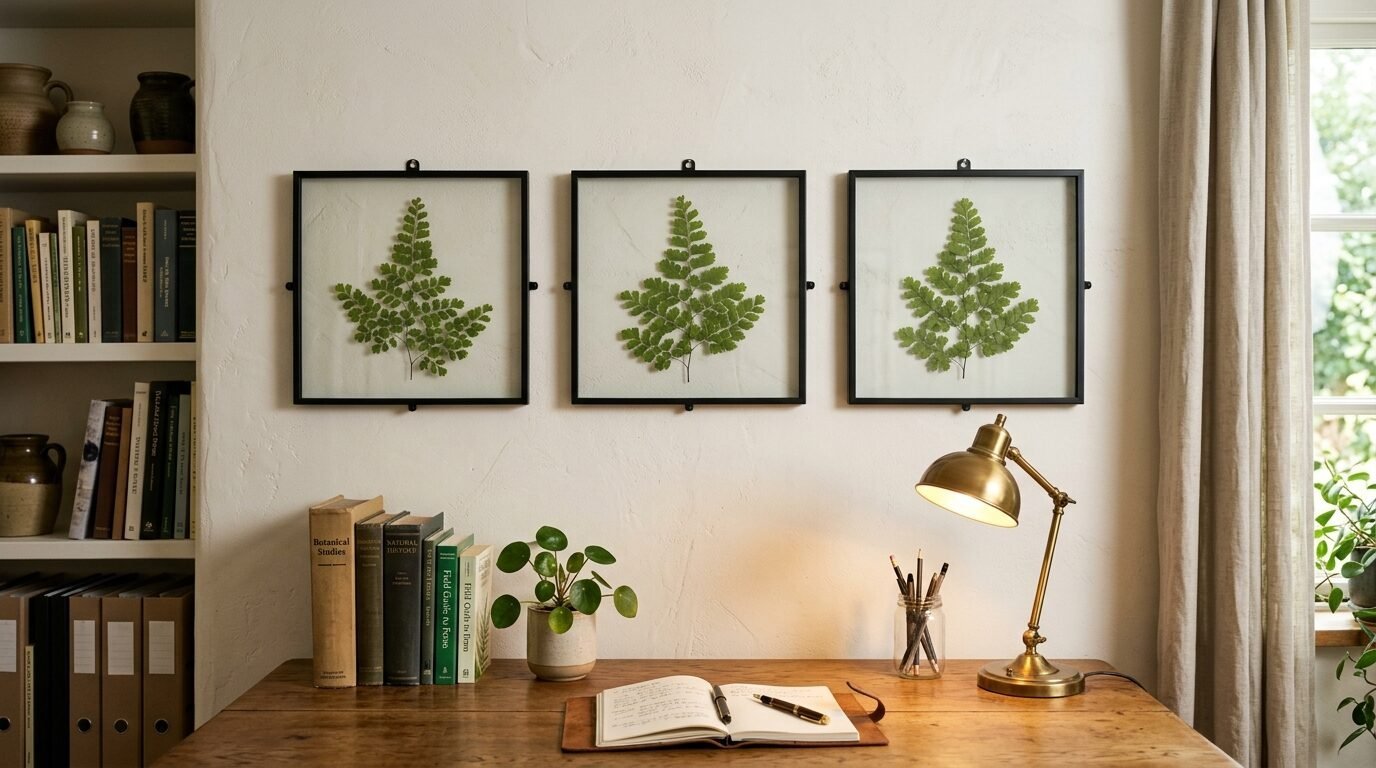
Pressed botanical frames provide a classic look for your Study Room Decoration. You place dried leaves or flowers between two glass panes in a floating frame. This project costs fifteen dollars and takes thirty minutes of assembly after your plants dry completely. It creates a calm environment for focus and reading.
I have noticed that fern leaves hold their green color longest. I pressed some ferns two years ago. They still look vibrant today. I tried pressing thick roses once. They turned brown and grew mold because of moisture.
Amy in Boston used maple leaves from her backyard. She placed them in a black metal frame. It took her ten minutes to arrange. Tom in Austin used dried lavender stems. The purple color looks beautiful against his white walls.
Many experts tell you to buy a heavy wooden flower press. Do not waste twenty dollars on that. Heavy textbooks work just as well. Put the plants between parchment paper inside the books.
Pick flat leaves from your garden. Place them inside a heavy book for two weeks. Open the floating frame and place the dry leaf on the glass. Close the frame tightly. This takes mini clips and fifteen minutes.
Using fresh plants directly in the frame causes mold. The moisture trapped inside ruins the glass. Always wait until the leaf feels paper dry.
I use Ikea Lerboda frames. They cost six dollars each. The plastic screen is safe but scratches easily. Glass frames look cleaner but cost more.
Boutique botanical art costs ninety dollars. Your total cost is six dollars for the frame and zero dollars for nature.
Students in tiny dorms use small four by six frames. Homeowners prefer large grid layouts with nine frames.
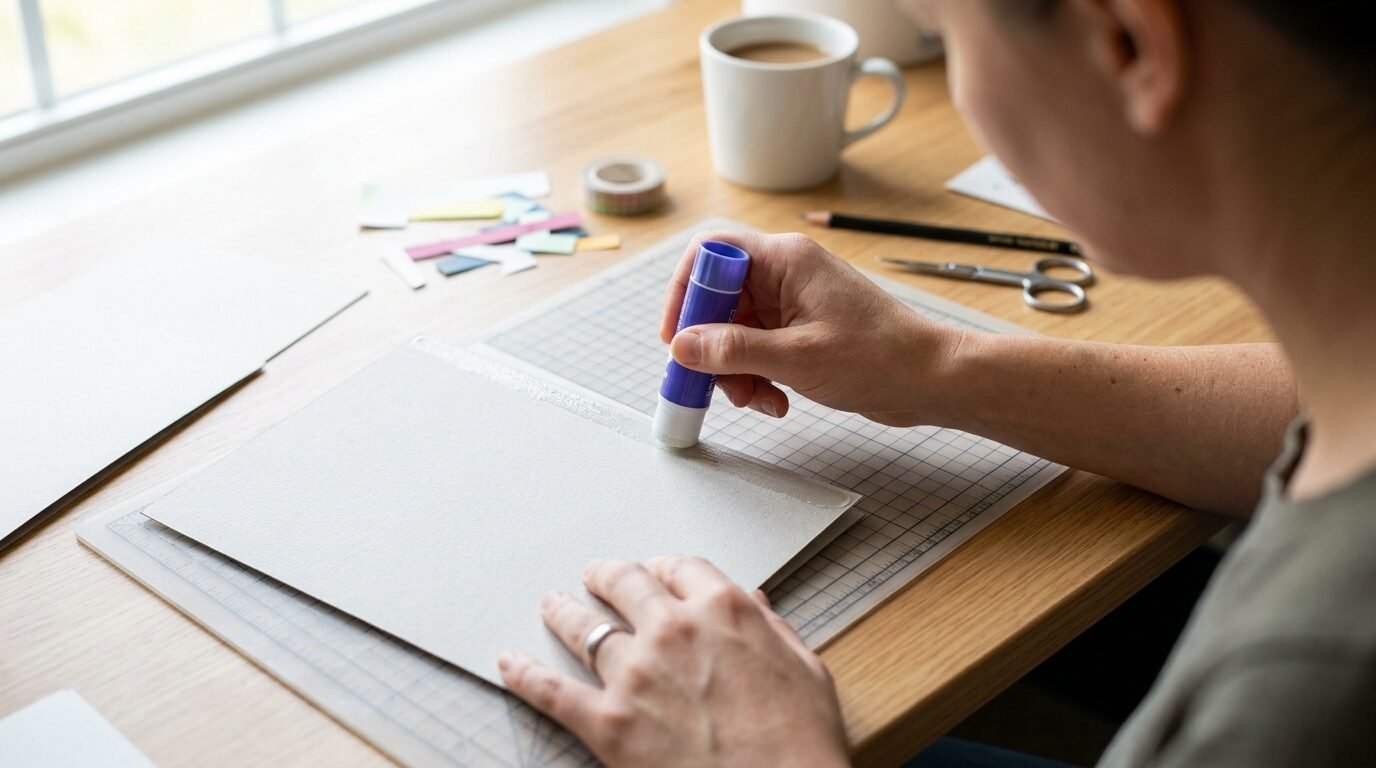
3. Geometric Paper Wall Art
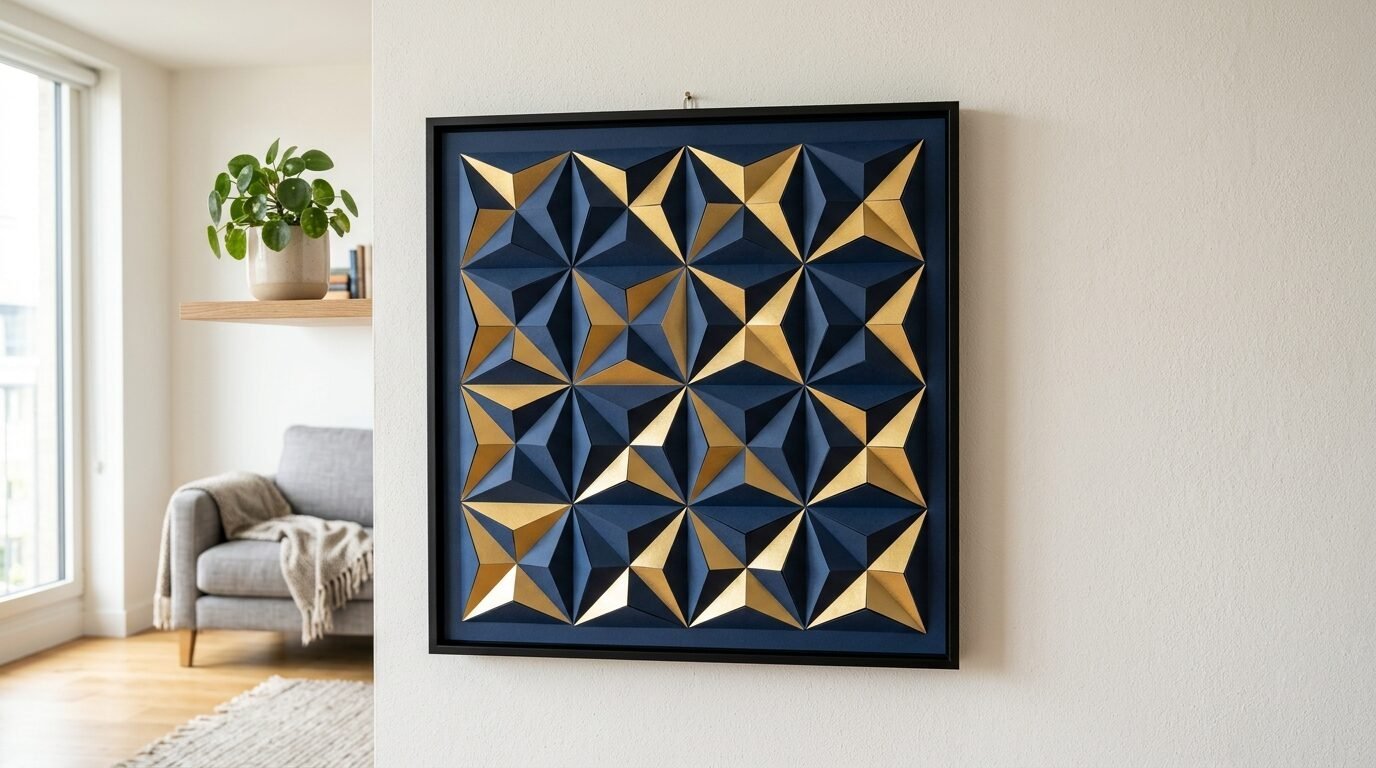
Geometric paper wall art uses thick cardstock paper cut into precise triangles or squares. This project provides excellent Craft Work Ideas for modern spaces. You glue the shapes onto a canvas in a repeating pattern. It takes one hour and costs twelve dollars total.
I have tried using thin printer paper for this craft. It wrinkles when the glue dries. Cardstock paper with a weight of sixty five pounds stays perfectly flat. I made a gold and black piece last summer. It looks like expensive metal art from a distance.
Kevin in Chicago used three shades of blue cardstock. He created a mountain pattern for his nursery. Rachel in Miami used metallic gold paper. Her friends thought it was a luxury metal sculpture.
People think you need a digital cutting machine like a Cricut. You do not. A metal ruler and a utility knife give you perfectly sharp edges for a fraction of the price.
Cut thirty triangles of equal size using your ruler. Arrange them on a twelve by twelve canvas. Glue each piece down carefully. Let it dry for one hour.
Using liquid school glue makes the paper warp. Use a dry glue stick or double sided tape instead.
The Scotch brand glue stick works best. It stays clear and holds tight. Avoid generic store brands that peel off.
A canvas costs five dollars. Cardstock costs seven dollars. You spend twelve dollars instead of forty dollars at a home store.
Teens prefer bright neon colors for energy. Adults usually choose monochrome tones for a sleek look.
4. Minimalist Macrame Hoop
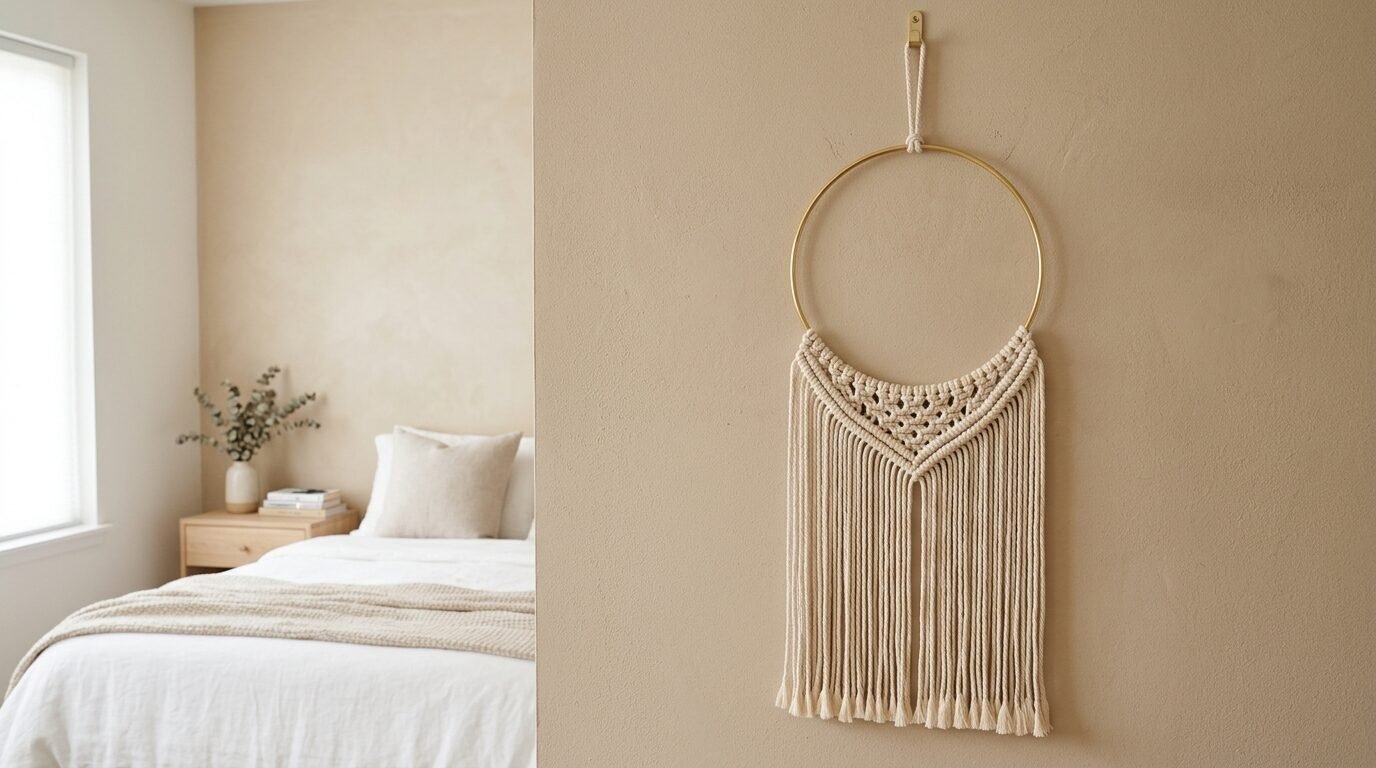
A minimalist macrame hoop uses a metal ring and basic knots to create elegant Hanging Decor Ideas. It gives a bohemian style to any bedroom or hallway wall. This project requires twenty yards of cotton cord and a ten inch hoop. It takes one hour and costs fourteen dollars.
In my experience, metal hoops stay rounder than wooden embroidery hoops over time. I hung a wooden hoop in a humid bathroom. It warped within three months. The metal hoop stays perfect.
Lisa in Phoenix used a brass hoop with cream cord. She placed two wooden beads for a modern touch. David in Seattle used a black hoop with charcoal gray cord. It matches his industrial loft theme.
Macrame looks complicated to beginners. Most people think you need to know twenty different knots. You only need to know one knot for this project. The square knot is simple and looks amazing.
Tie your cord to the top of the metal hoop. Create ten square knots down the center. Let the remaining strings hang loose at the bottom. Brush the ends for a fringe look. This takes forty minutes.
Uneven tension makes the hoop tilt on the wall. Keep your hands steady and pull each knot with equal force.
Use a metal comb to brush the fringe. A regular hair comb works but takes twice as long.
Macrame art online sells for fifty dollars. Making it yourself costs fourteen dollars. That leaves thirty six dollars in your pocket.
Small apartments benefit from six inch hoops. Large living rooms look better with a trio of twelve inch hoops.
5. Fairy Light Photo Grid

A fairy light photo grid combines warm LED string lights with your favorite printed memories. This project offers stunning Aesthetic Wall Decoration Ideas for cozy bedrooms. You clip photos onto a wire grid surrounded by glowing lights. It takes thirty minutes and costs twenty dollars.
I have seen this work wonders in dark basement rooms. The warm lights make the space feel twice as large. I recommend using battery powered lights with a timer. This saves you from unplugging them every night.
Anna in New York printed twenty square photos from her trips. She used mini wooden clothespins to attach them. Chris in San Diego used black and white photos for a classic look.
Do not buy expensive wall grids from teen clothing stores. Go to the hardware store instead. Look for wire storage panels or mesh fencing. It is the exact same material for a third of the price.
Hang the wire panel using two small wall hooks. Wrap the LED fairy lights around the outer frame. Clip your photos inside the grid squares. This takes twenty minutes total.
Heavy photos pull the wire grid off the wall. Use lightweight photo paper or square prints.
Anker fairy lights are excellent. They include a remote control and last for thousands of hours. Cheap lights burn out quickly.
The grid costs ten dollars. Lights cost eight dollars. Clothespins cost two dollars. Total cost is twenty dollars instead of forty five dollars.
College students use this for polaroid prints. Families use it for holiday cards in the winter.
Project Comparison Breakdown
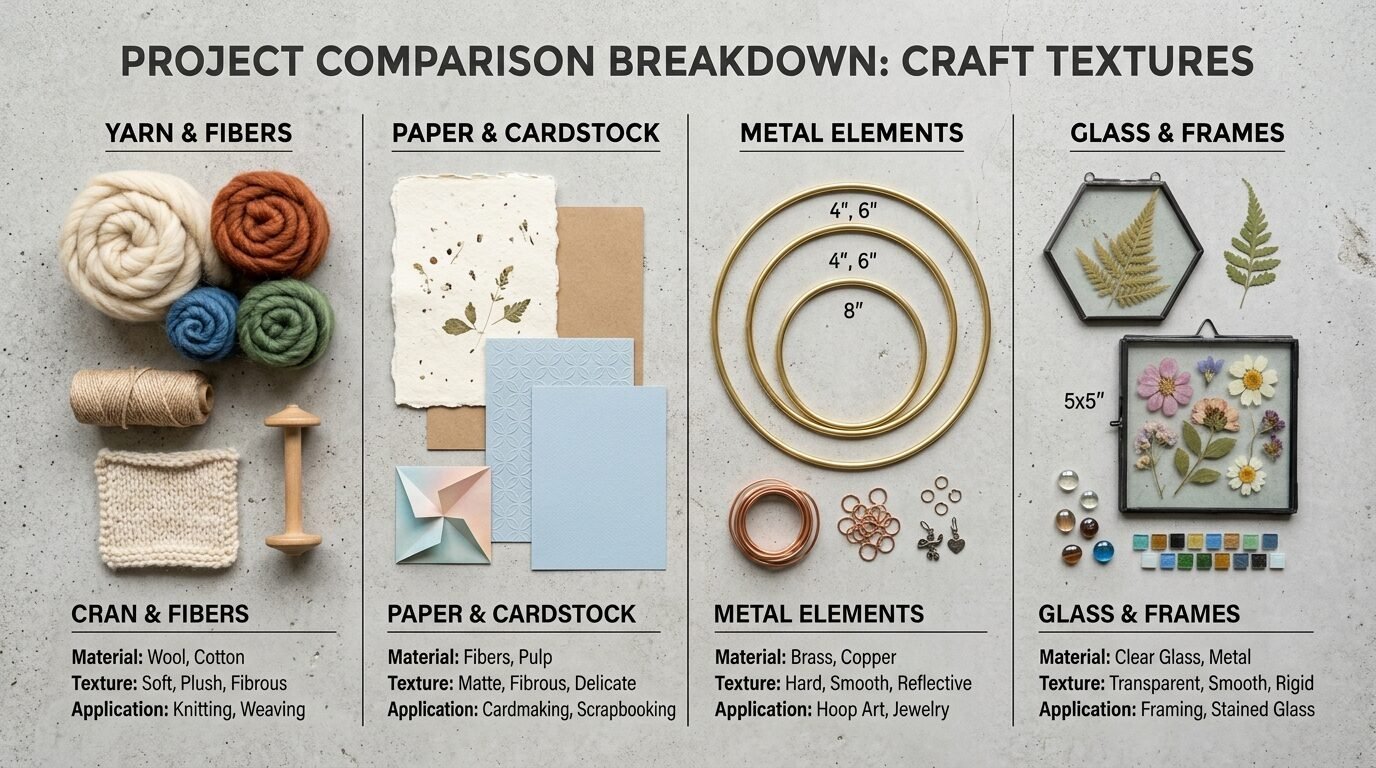
This comparison breakdown tracks each project by cost, time, and difficulty. Our system evaluates these options based on beginner friendliness and material availability. This helps you select the best project for your specific room needs.
- Yarn Tassel Hanging costs eight dollars, takes forty five minutes, and difficulty is low.
- Pressed Botanicals costs fifteen dollars, takes thirty minutes, and difficulty is very low.
- Geometric Paper Art costs twelve dollars, takes sixty minutes, and difficulty is medium.
- Macrame Hoop costs fourteen dollars, takes sixty minutes, and difficulty is low.
- Fairy Light Grid costs twenty dollars, takes thirty minutes, and difficulty is very low.
Troubleshooting Common Pitfalls
Avoid common crafting mistakes by planning ahead. This section addresses errors like failing adhesives, uneven hanging, and material damage. These tips ensure your wall art stays beautiful for years.
- Weak glue causes paper art to peel. Use permanent glue sticks instead of school glue.
- Heavy frames fall from the wall. Use heavy duty anchors if you cannot find a wall stud.
- Yarn tangles during assembly. Keep the strands flat on a table while tying knots.
- Moisture ruins pressed flowers. Ensure the leaves dry for a full two weeks before framing.
- Lights stop working. Buy LED lights with copper wire for better durability.
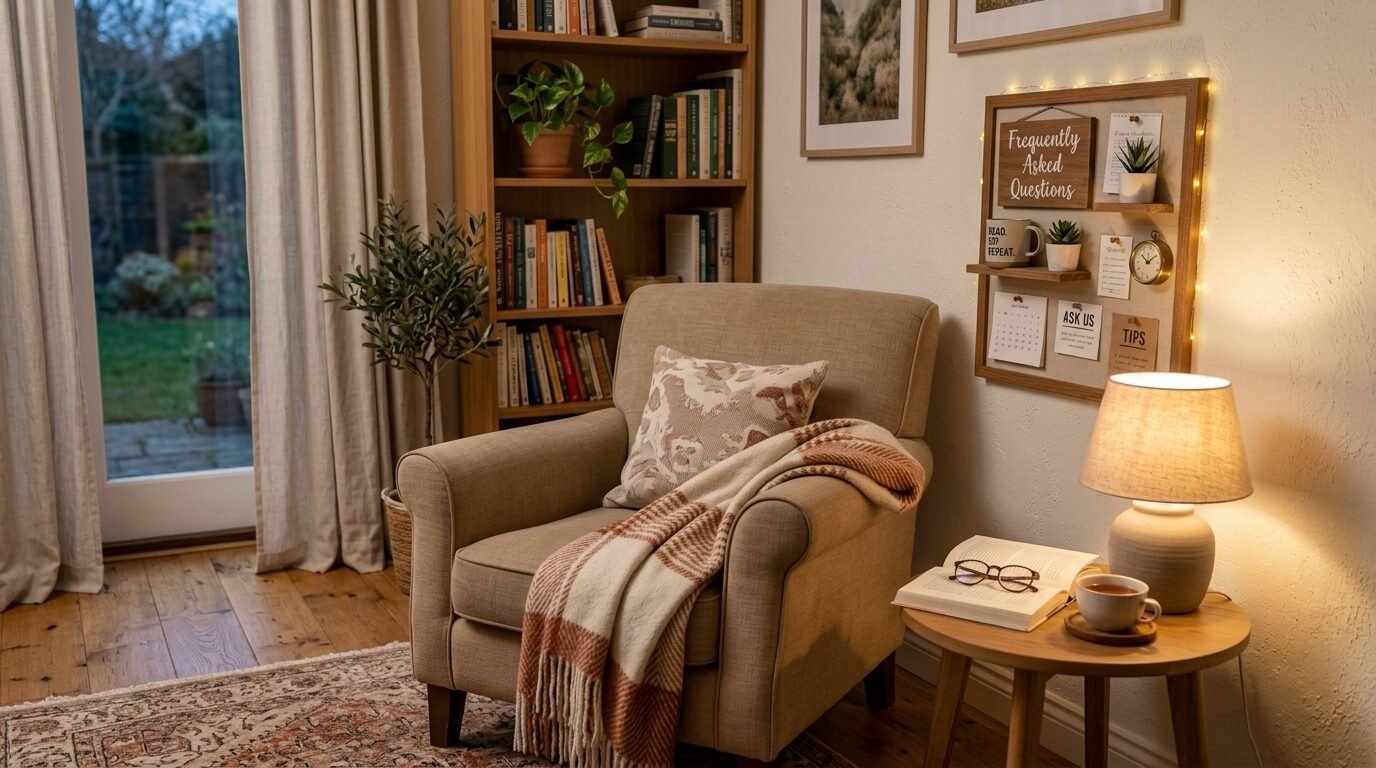
Frequently Asked Questions
What is the cheapest project for a bedroom?
The yarn tassel hanging is the most affordable choice. You can find a branch outside for free. A single roll of cotton yarn costs under five dollars.
How do I hang decor without damaging apartment walls?
Command strips and hook tapes are perfect options. They hold weight well and peel off cleanly without removing paint.
Can I use regular paper for geometric art?
Regular printer paper is too thin. It absorbs moisture from glue and wrinkles. Cardstock paper keeps a flat professional look.
How long do pressed leaves keep their color?
Green ferns and oak leaves stay vibrant for two years. Keep them out of direct sunlight to prevent fading.
What tools are necessary for beginners?
You only need a pair of sharp scissors a pencil and a standard ruler. No power tools are required for these ideas.
Where can I find free wood for crafts?
Local parks and backyard trees offer great branches. Clean the wood and dry it before use.
Next Steps for Your Home Walls

Decorating your home does not require a large budget or professional skills. These five simple projects offer a starting point for any beginner. Gather your materials this weekend and transform your space.
Conclusion
In my experience, starting with one small piece builds your confidence. You will enjoy your space much more when you make the decor yourself. Share your creations with friends and start crafting today.

Anya Castellan is the Founder and Editor-in-Chief of Home Wall Trends. An art history graduate of the Rhode Island School of Design with twelve years of experience writing for leading American design publications, she specializes in composition, gallery wall theory, and the quiet architecture of domestic space. A former contributing editor at Architectural Digest and guest lecturer at Parsons School of Design, Anya personally reads and signs off on every piece before it is published.