Wood slats change how a room feels. I remember walking into a small mountain cabin last year. The walls were plain drywall. It felt cold. The owner added vertical oak slats behind the bed. The room transformed. It felt taller. It felt warm. It felt like a retreat. Wood slats bring that organic texture into any home. You do not need a forest outside to get that cabin vibe. You just need the right wood and a solid plan. I have seen many people try this. Some use cheap pine. Others invest in walnut. Each choice creates a different mood. This guide covers the best ways to use wood slats for that modern cabin look. We will look at costs. We will talk about tools. You will see how to avoid common mistakes.
1. Vertical White Oak Slats for Visual Height
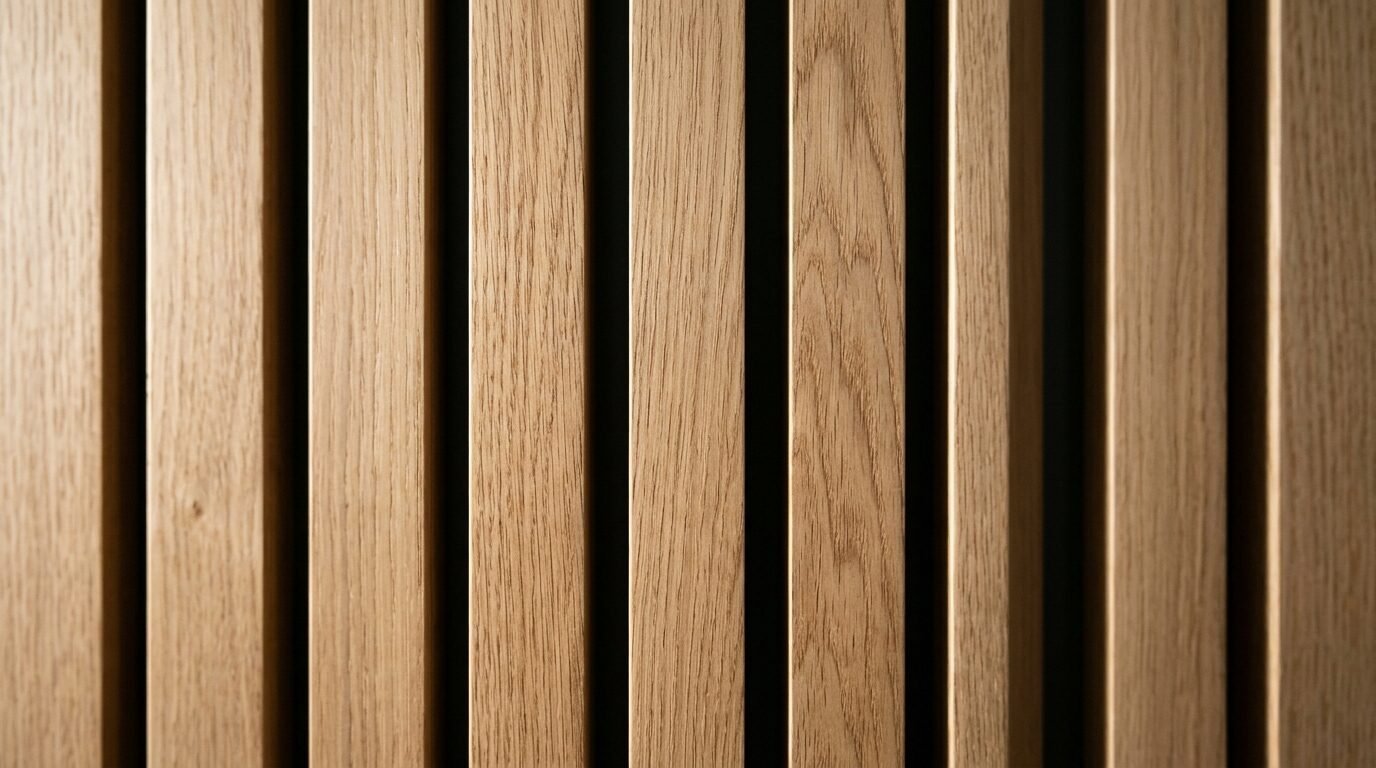
Vertical lines pull the eye upward. This is perfect for rooms with low ceilings. I noticed this works best in bedrooms. White oak has a tight grain. It looks clean. It does not feel heavy like old cabin logs. Most modern cabins in places like Aspen use this style. You want to space them about half an inch apart. This creates a shadow line. That shadow adds depth. It makes the wall look expensive.
Choosing Your Wood Grade
I always recommend Select grade white oak. It has fewer knots. Knots can look too rustic. If you want a modern feel, you want consistency. I once saw a DIY project using construction lumber. The boards warped within a month. Do not skip on quality here. Spend the money on kiln dried wood. It stays straight. It looks professional.
Installation Pro Tip
Use a spacer block. Do not guess the gap. Cut a small piece of wood to your desired width. Place it between every slat. This keeps your lines perfect. If your lines are off by even a tiny bit, your eye will catch it. A laser level is your best friend here. I never start a slat wall without one.
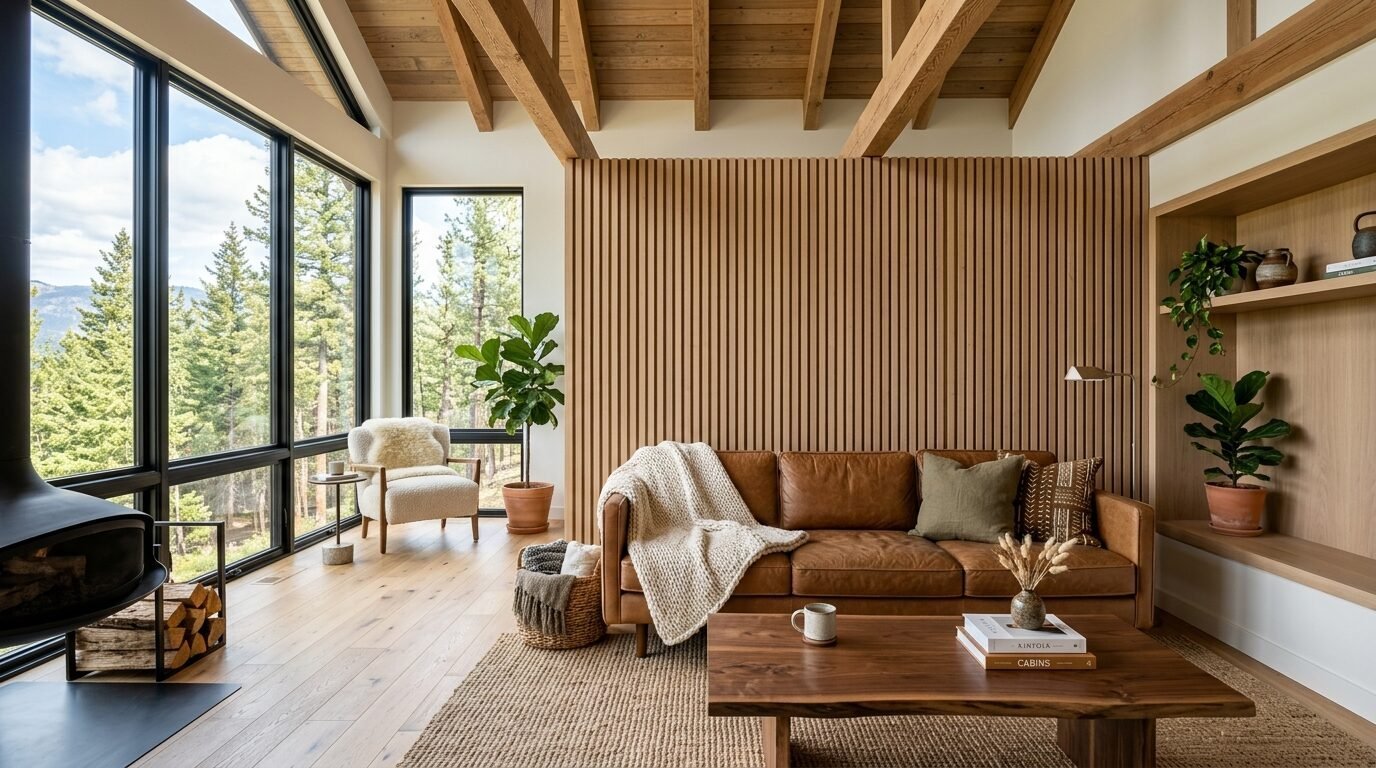
2. Horizontal Walnut Slats for Mid Century Cabin Vibes
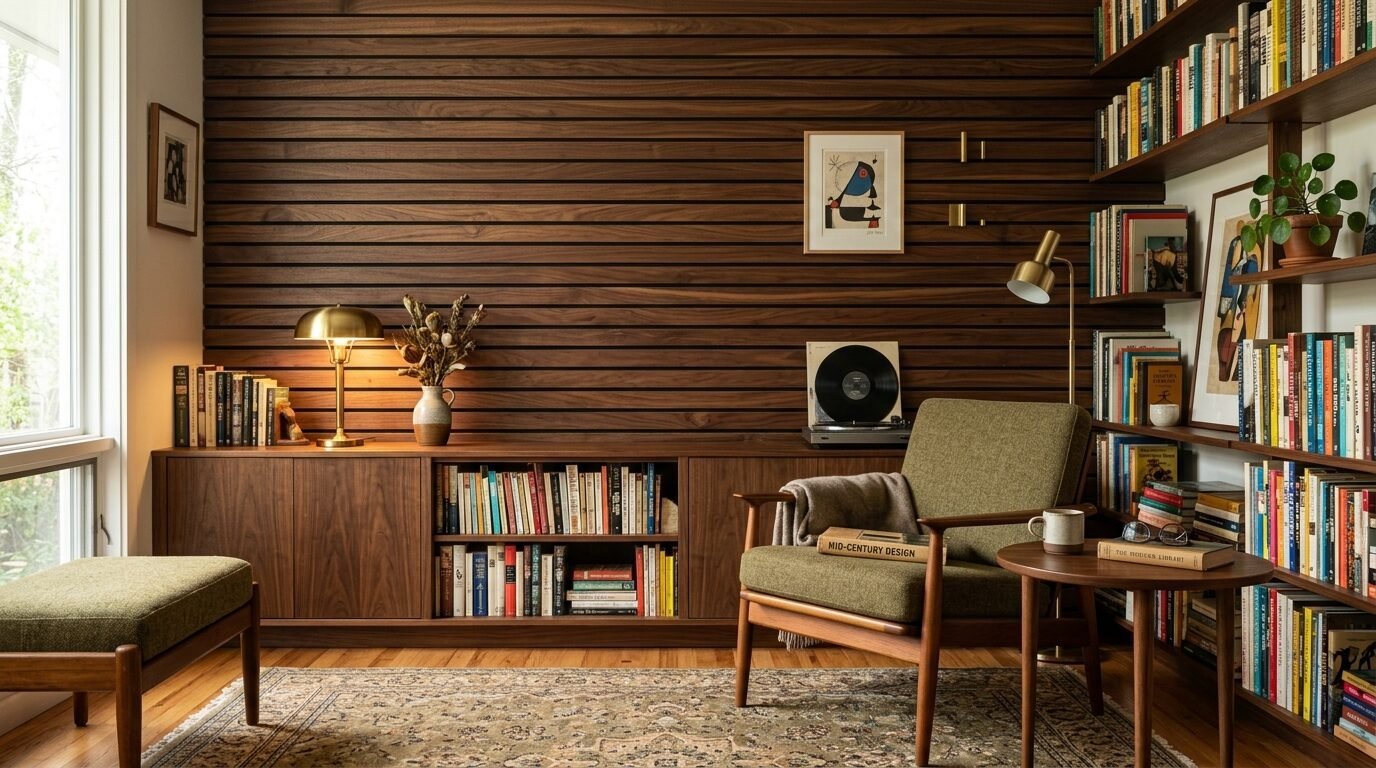
Horizontal slats feel grounded. They make a wide wall feel cozy. Walnut is dark and rich. It has a chocolate tone that feels very high end. I saw this used in a lake house living room. It wrapped around a stone fireplace. The contrast was stunning. Horizontal slats can be harder to install. You must ensure every board is perfectly level. Gravity works against you here.
Managing the Weight
Walnut is heavy. You cannot just use glue. I recommend using a high quality construction adhesive and a finish nailer. Drive nails at an angle. This creates a mechanical bond. I have seen horizontal slats sag over time when only glued. Use 16 gauge nails for walnut. They hold better than thin brads.
Finishing for Depth
Use a clear matte oil. I love Rubio Monocoat. It protects the wood but keeps it looking raw. You do not want a shiny plastic look. Real cabins have matte surfaces. A shiny finish makes the wood look like fake laminate. One coat of oil is usually enough for walnut.
3. Floor to Ceiling Slat Transitions
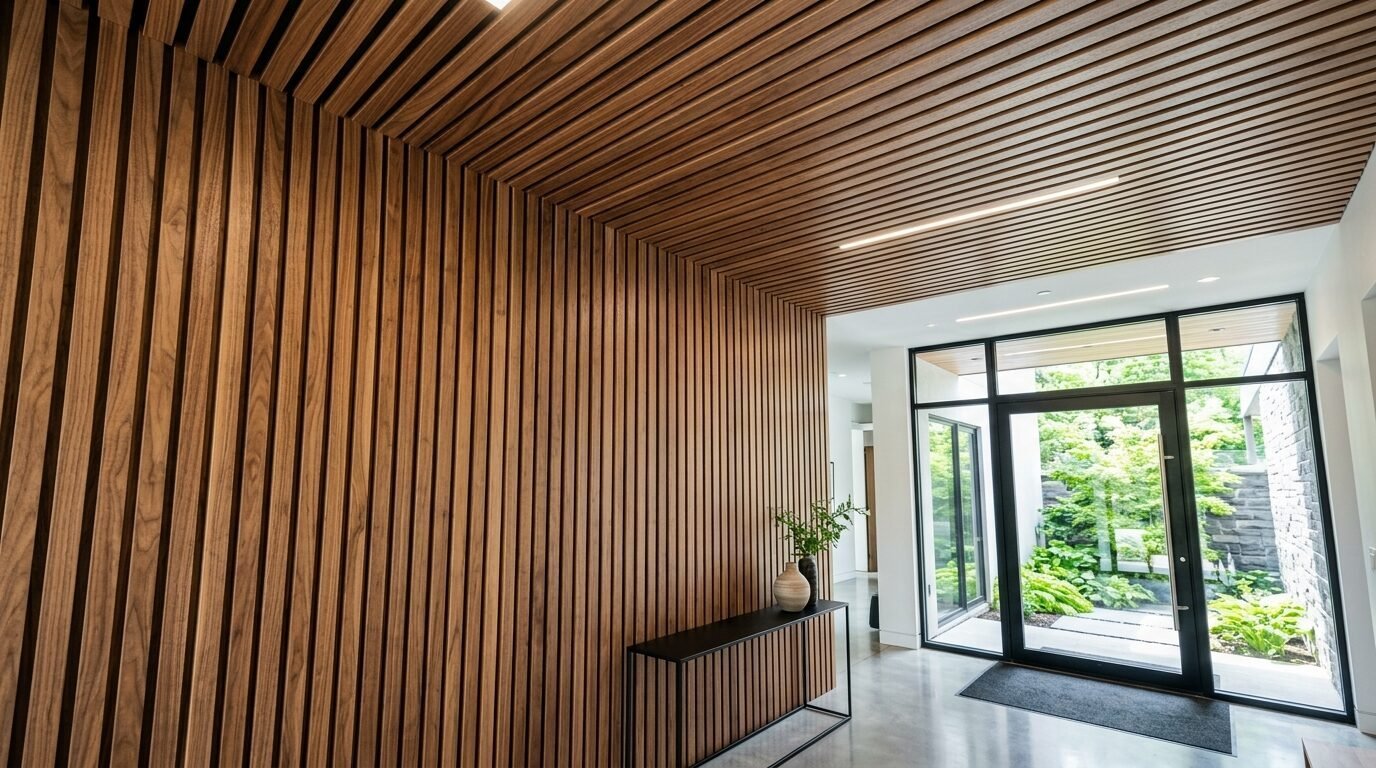
This is a bold move. You start the slats on the wall. Then you continue them onto the ceiling. It creates a canopy effect. It feels like being inside a wooden jewelry box. I saw this in a modern A-frame cabin recently. It was used in the entryway. It defined the space without using walls. It felt intentional. It felt like architecture.
Planning the Corner Joint
The corner is the hardest part. You can do a miter cut at 45 degrees. This looks seamless. Or you can do a butt joint. I prefer the miter cut. It shows you care about the details. It takes more time. You need a sharp miter saw blade. A dull blade will tear the wood fibers. That looks messy.
Lighting the Canopy
Hide LED strips between the slats on the ceiling. This provides soft ambient light. It highlights the wood grain. I noticed that warm white lights work best. Avoid cool blue lights. They make the wood look grey and dead. Aim for 2700K or 3000K color temperature.
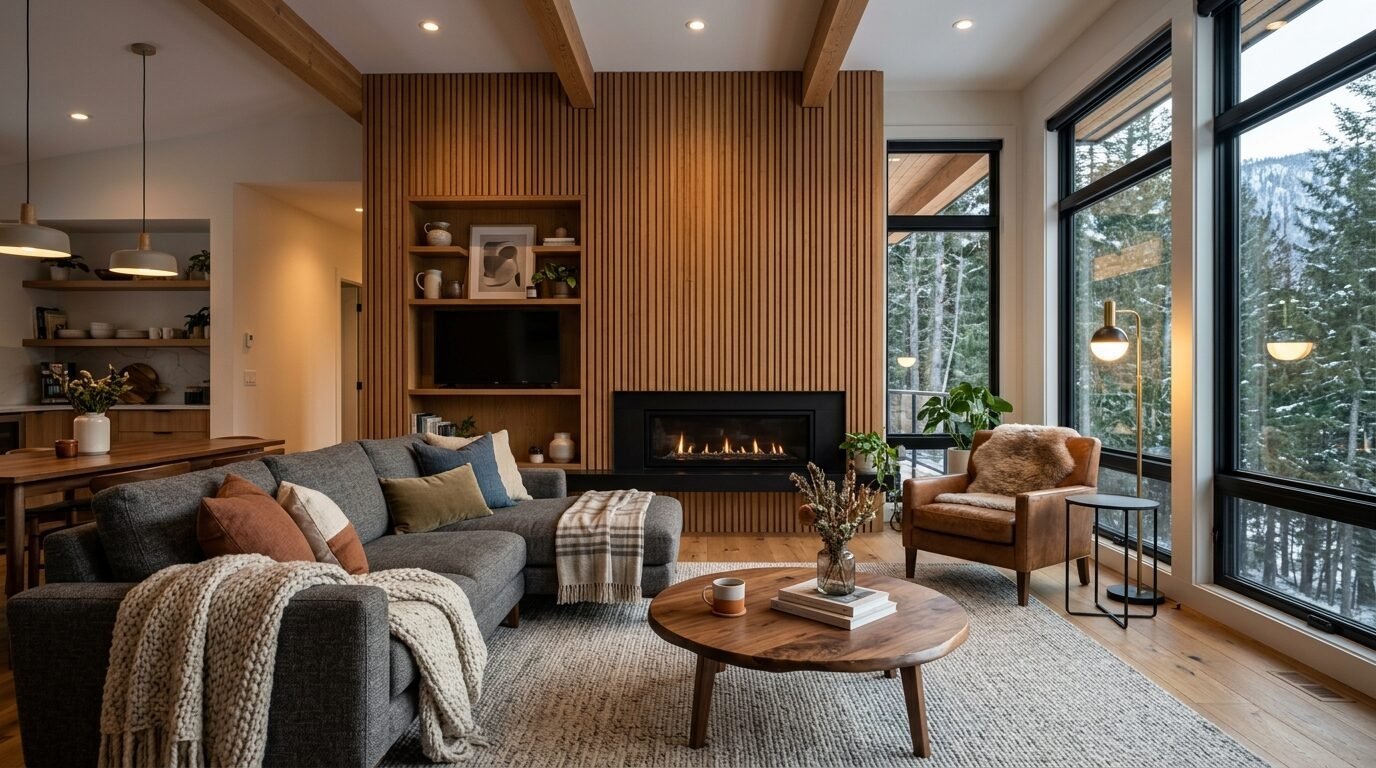
4. Backlit LED Slat Walls for Mood
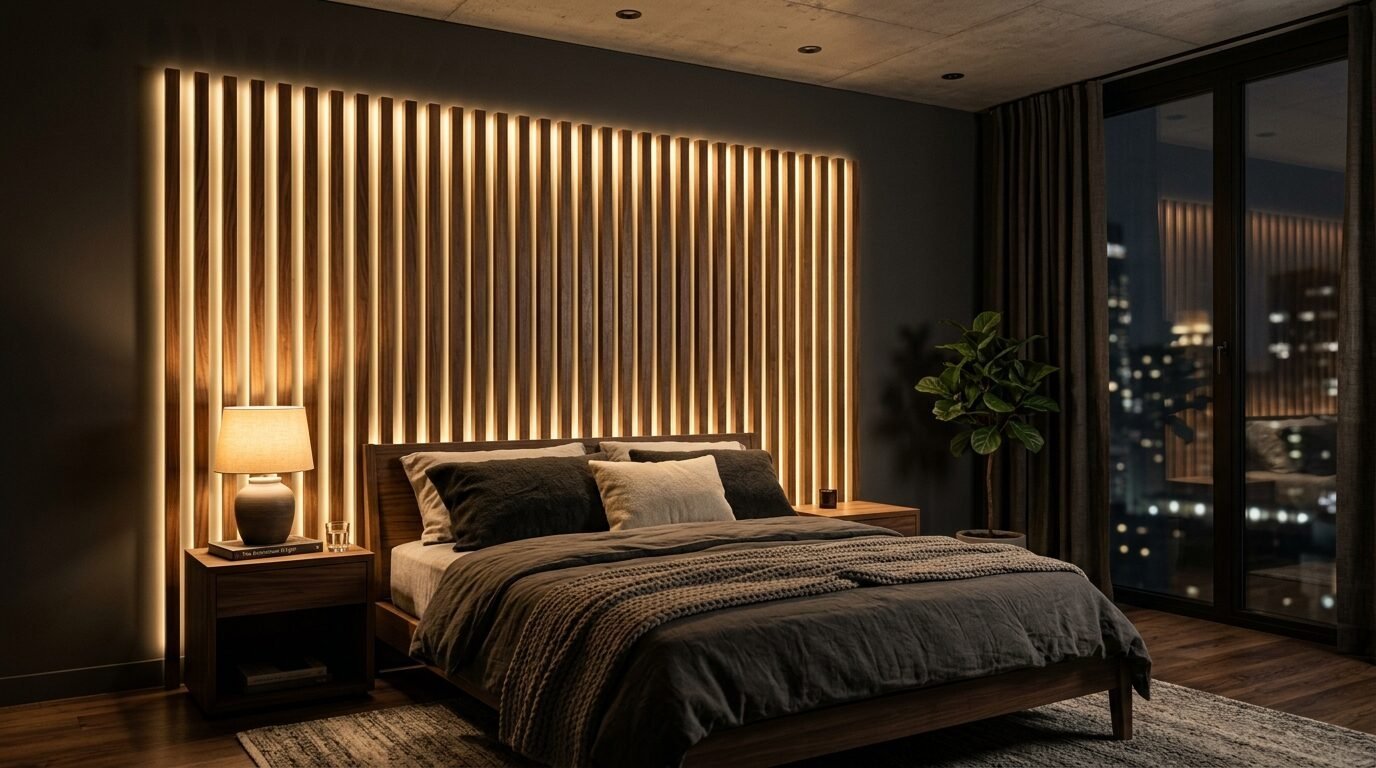
Lighting changes everything. You can mount your slats on a backer board. Leave a small gap behind the slats for LED ribbons. This creates a glow. It looks like the wall is floating. I installed this in a basement media room. It gave the space a warm cabin glow without being too dark. It is perfect for evening relaxation.
Selecting the Right LEDs
Use COB LED strips. They do not show individual light dots. You want a continuous line of light. Cheap strips show “hot spots” on the wood. It looks tacky. Spend the extra twenty dollars on high density strips. You will thank me later.
Wiring Secrets
Hide the transformer in a nearby closet or cabinet. You need access to it. Do not bury it behind the wall. I learned this the hard way. Transformers can fail. If it is behind the wood, you have to rip the wall down to fix it. Always plan for maintenance.
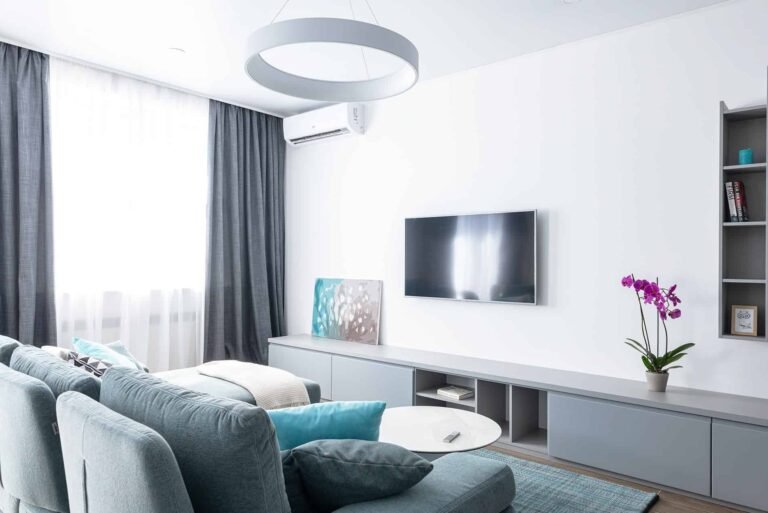
5. Dark Charcoal Stained Wood Slats
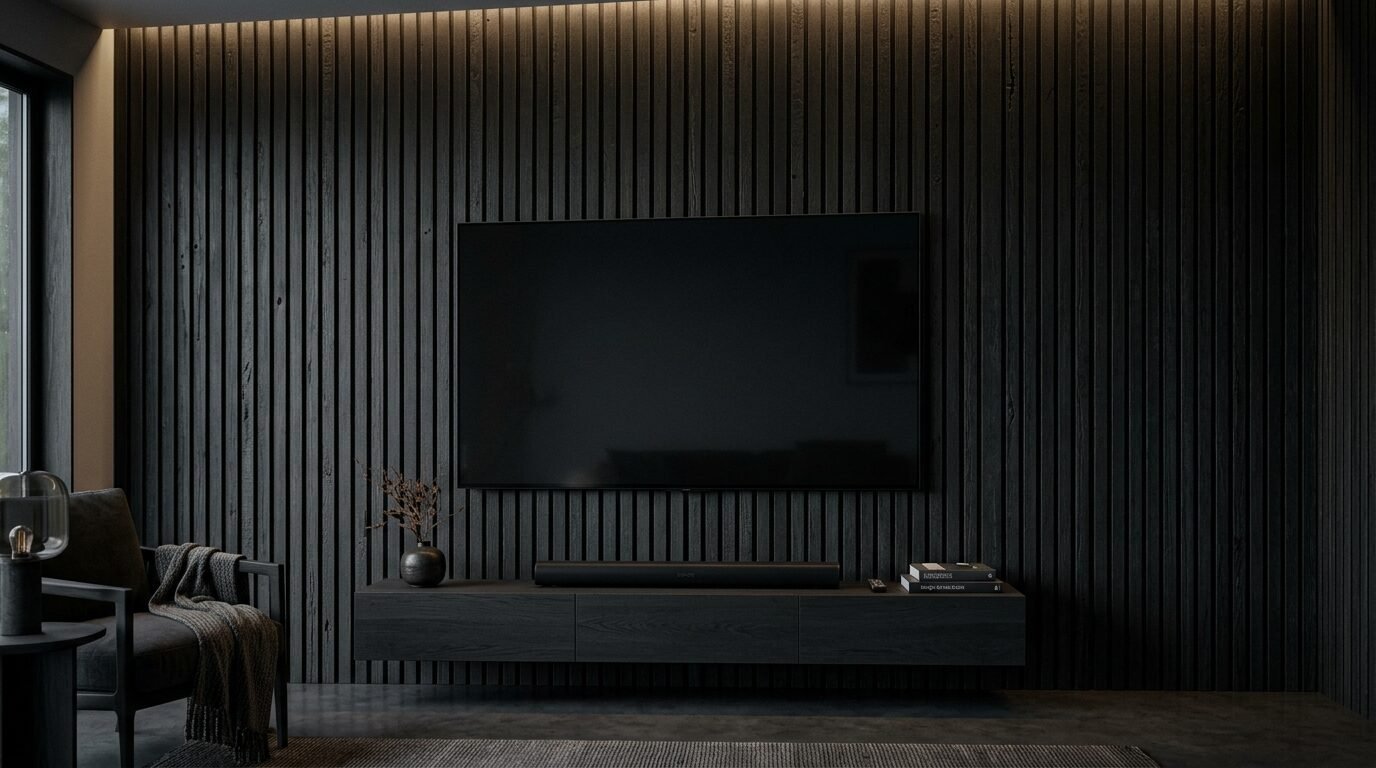
Not all cabins are light wood. Some of the most modern cabins use black or charcoal tones. This is inspired by Shou Sugi Ban. That is a Japanese technique of charring wood. You can get the look with a deep stain. Use pine or cedar for this. They take stain very well. Dark slats look amazing behind a television. They help the screen disappear.
Achieving the Perfect Black
Use a water based wood dye first. Then use a black oil stain. This gives a deep void-like color. Standard stains often look like dark brown. You want true charcoal. I tried three different stains before finding the right mix. Test your colors on scrap wood first. Never test on the wall.
Contrast with Furniture
Pair dark walls with light leather. A tan leather sofa against a black slat wall is a classic cabin look. It feels masculine and steady. Add a few green plants. The green pops against the dark wood. It feels alive.
6. Mixed Width Slat Patterns for Visual Interest
Perfectly uniform slats can feel clinical. For a true cabin feel, try mixing widths. Use some one inch slats and some two inch slats. This mimics the randomness of nature. I saw this in a boutique hotel in Vermont. It looked like modern art. It was more interesting than a standard pattern.
Designing the Rhythm
Do not be too random. Create a repeating pattern. For example, two thin slats and one thick slat. Repeat that across the wall. This keeps the eye moving but prevents it from feeling chaotic. I sketched my pattern on paper before buying wood. It saved me from buying too much of one size.
Cost Considerations
Buying different sizes can be more expensive. You might have to rip down wider boards yourself. If you have a table saw, this is easy. If not, you might pay a premium at the lumber yard. Pine is a good choice for this style to keep costs down.
7. Wood Slat TV Surround with Cable Management
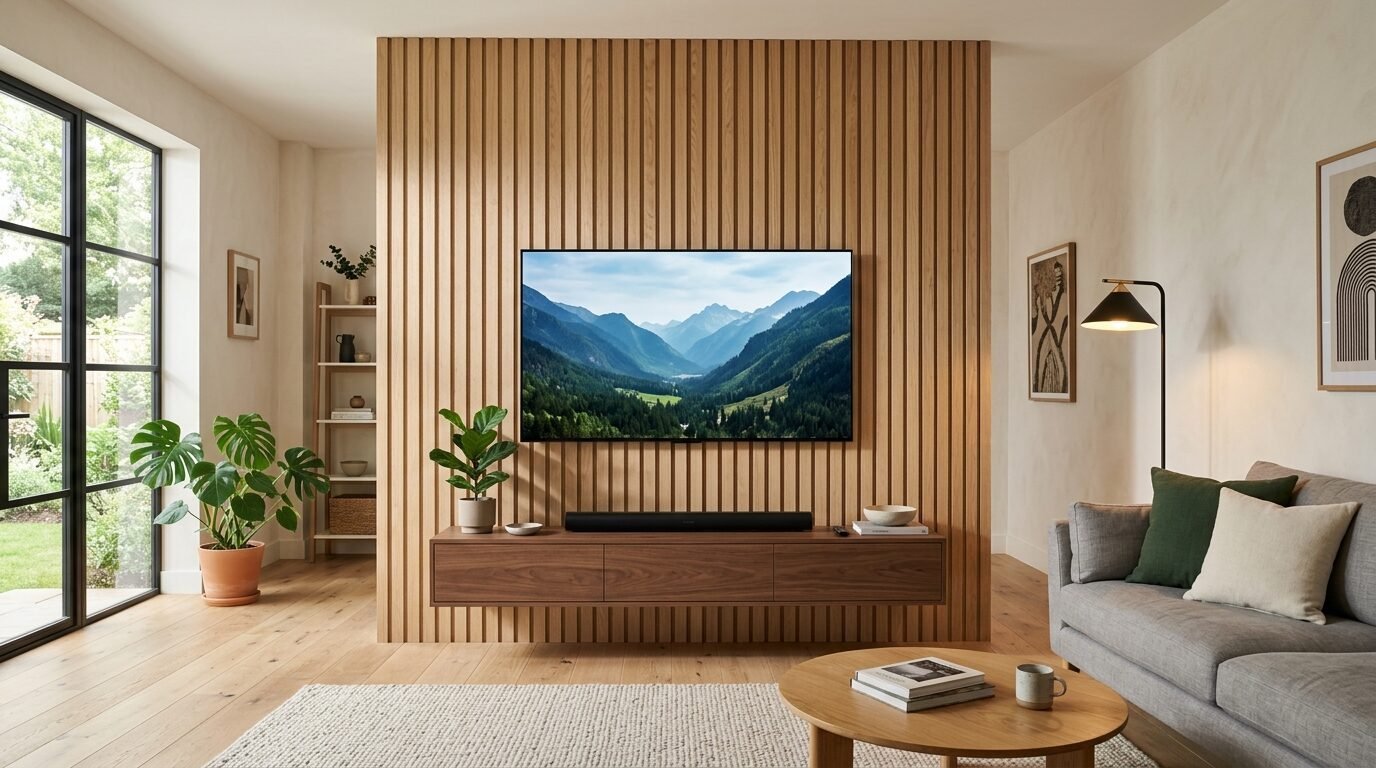
Wires ruin the cabin vibe. A slat wall is the perfect way to hide them. You can mount the TV directly to the slats. Run the wires in the gaps behind the boards. I did this in my own living room. The result was a clean, wireless look. It makes the technology feel like part of the room design.
Mounting Tips
Ensure your TV mount is secured to the wall studs. Do not trust the slats to hold the weight. Most slats are only half an inch thick. That is not enough for a large TV. Use long lag bolts that go through the slats and into the framing. Safety is the priority here.
Access Panels
Create a small removable section of slats. This allows you to add new cables later. I used industrial strength velcro for my access panel. It looks like the rest of the wall. But I can pull it off in seconds. It is a lifesaver when you get a new game console or soundbar.
8. Hidden Door Slat Integration
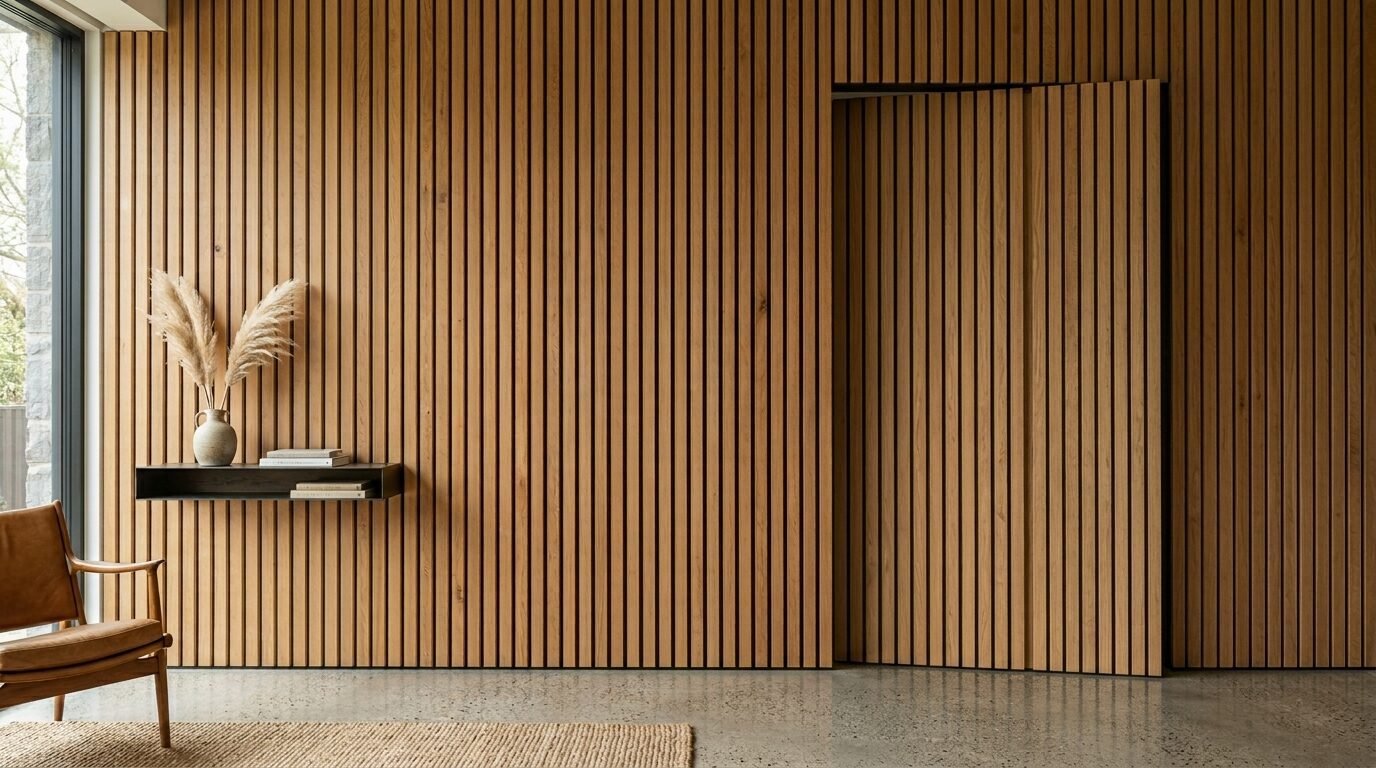
This is the ultimate “cool factor” for a modern cabin. You can cover a door in the same slats as the wall. When the door is closed, it disappears. I saw this used for a pantry door in a high end kitchen. It looked like a solid wood wall. Then, someone pushed it and a room appeared. It feels like a secret passage.
Hardware Requirements
You need heavy duty pivot hinges. Standard hinges will not work with the extra weight of the wood. The door must swing perfectly flat. Soss hinges are also a great option. They stay hidden when the door is closed. This is a project for someone with good carpentry skills.
Alignment Challenges
The gaps on the door must match the gaps on the wall. Even a sixteenth of an inch error will give the secret away. Take your time. Measure twice. Cut once. I recommend hanging the door first. Then install the slats across the whole wall and door at once. Cut the slats at the door seam last.
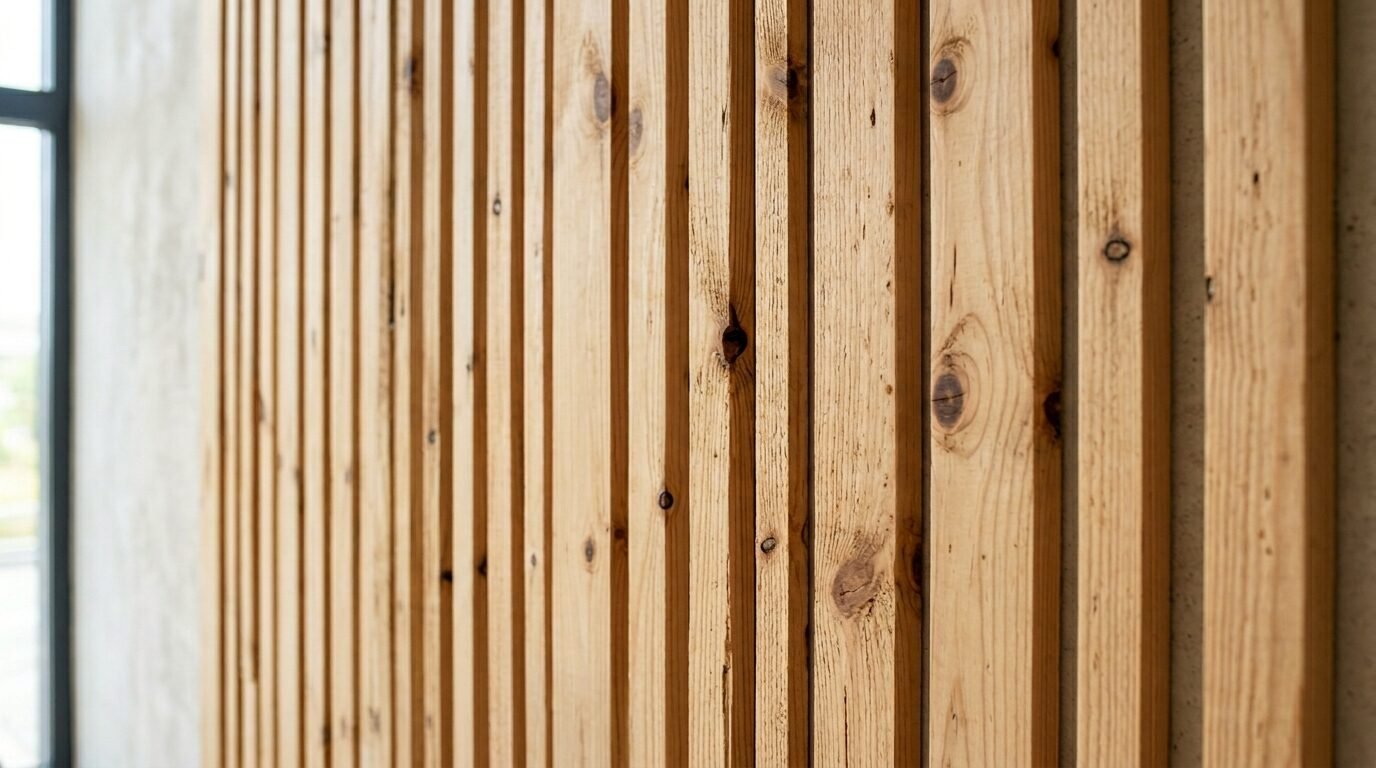
9. Reclaimed Wood Slat Texture
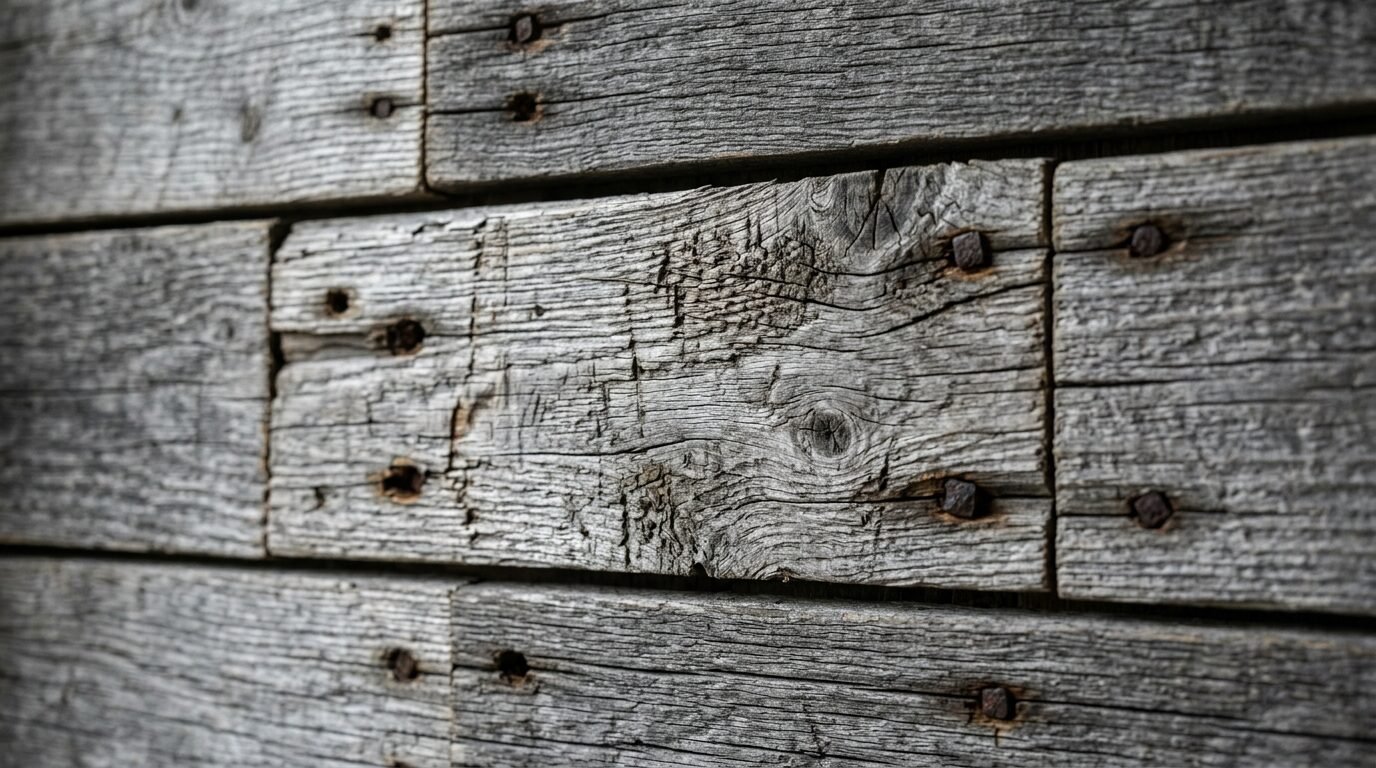
Modern cabins often use recycled materials. Reclaimed wood has history. It has nail holes and grey weathering. You can rip old barn wood into slats. This adds a layer of soul to the room. It feels less like a new construction and more like a renovated piece of history.
Cleaning Old Wood
Reclaimed wood can be dirty. It might have bugs or lead paint. Always plane the wood or sand it heavily. I use a nylon brush attachment on a drill to clean the grain. It removes the dirt but keeps the texture. Wear a mask. You do not want to breathe in old barn dust.
Sourcing Reclaimed Lumber
Look for local salvage yards. Sometimes you can find old fences or pallets for free. Be careful with pallets. Only use ones marked “HT” for heat treated. Avoid ones with chemical markings. I once found old redwood fencing that made beautiful slats for a bathroom.
10. White Oak Slats for Scandi Cabin Style
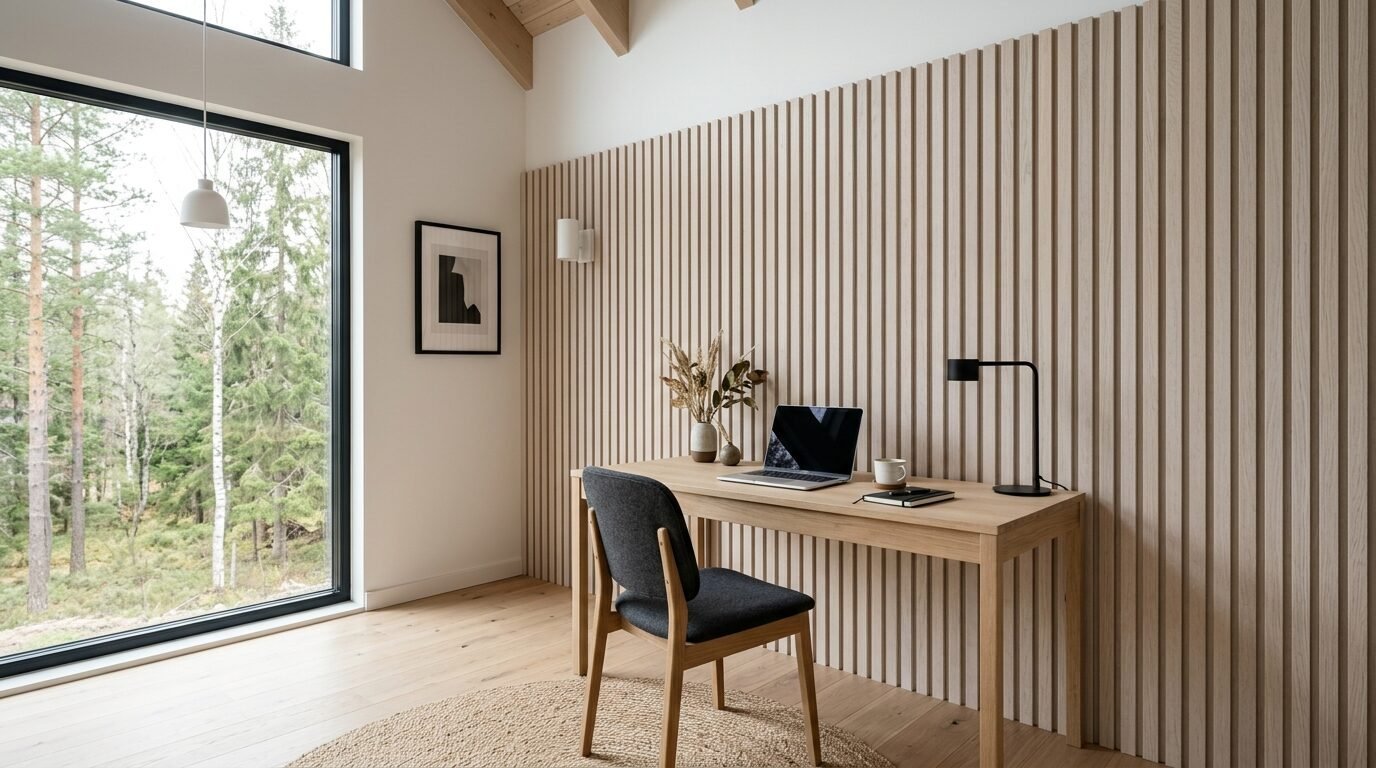
Scandinavian design is very popular in modern cabins. It focuses on light, airy spaces. White oak or ash are the best woods for this. They are pale and bright. They reflect light instead of absorbing it. This is great for small cabins with few windows.
Preventing Yellowing
White oak can turn yellow over time with standard finishes. Use a finish with a “white active” or “nordic” tint. This keeps the wood looking raw and pale. I prefer Bona NordicSeal. It looks like there is no finish on the wood at all. It is a very clean look.
Minimalist Spacing
For a Scandi look, keep the gaps small. A quarter inch gap is plenty. This creates a subtle texture. Large gaps feel more aggressive and industrial. Small gaps feel soft and calm. This works well behind a desk or in a home office.
11. Acoustic Felt Backed Slat Panels
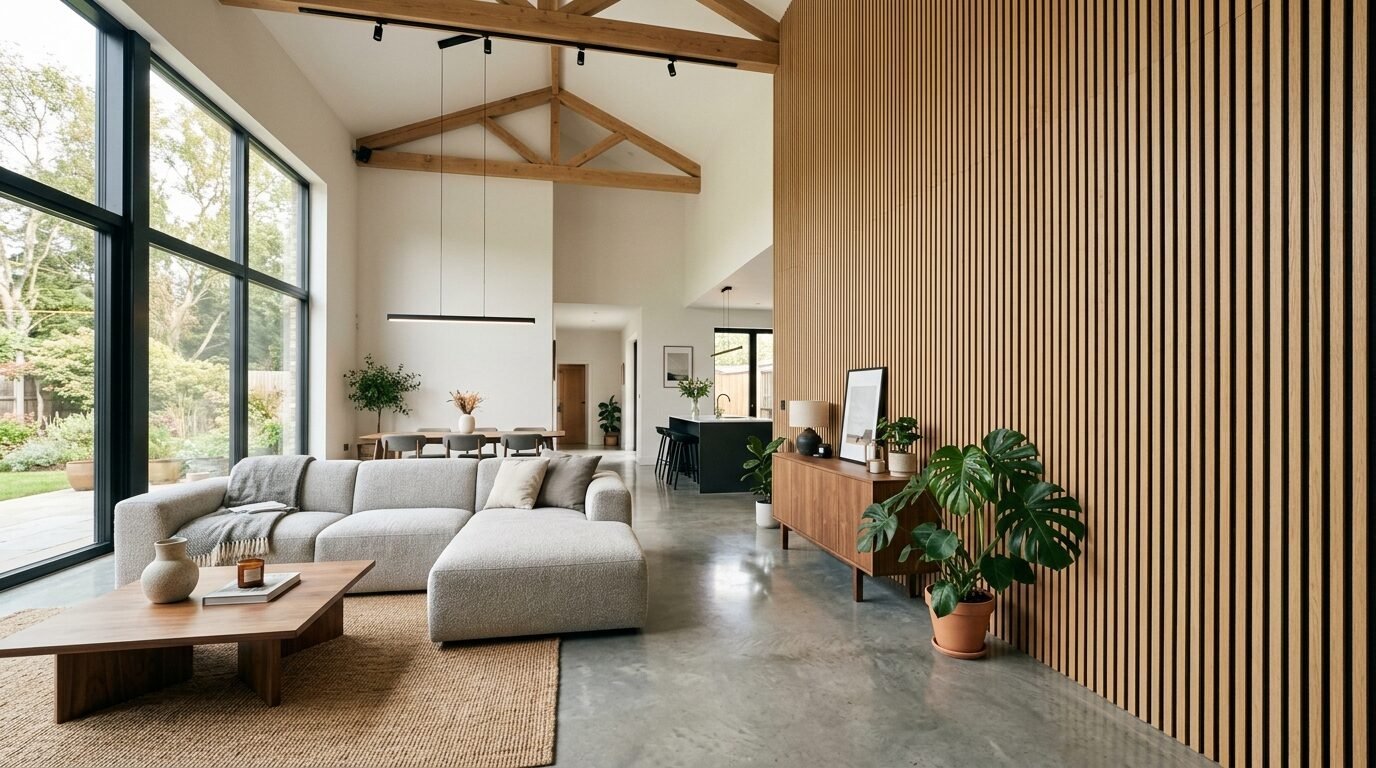
Modern cabins with lots of glass and wood can be echoey. It makes conversation difficult. You can buy pre-made slat panels with felt backing. The felt absorbs sound. The wood diffuses it. I installed these in a tall living room with vaulted ceilings. The difference in sound quality was immediate. No more echoing footsteps.
Installation Speed
These panels come in large sheets. Usually four feet by eight feet. You can cover a whole wall in an afternoon. This is much faster than installing individual slats. If you are short on time, this is the way to go. They are more expensive, but they save you hours of labor.
Brands to Watch
Companies like WoodUpp and Artuz make great panels. They use recycled plastic for the felt. I have used several brands. The quality of the wood veneer varies. Check samples before you buy a full pallet. Some look like real wood. Others look like cheap plastic wrap.
12. Bathroom Wood Slat Accents
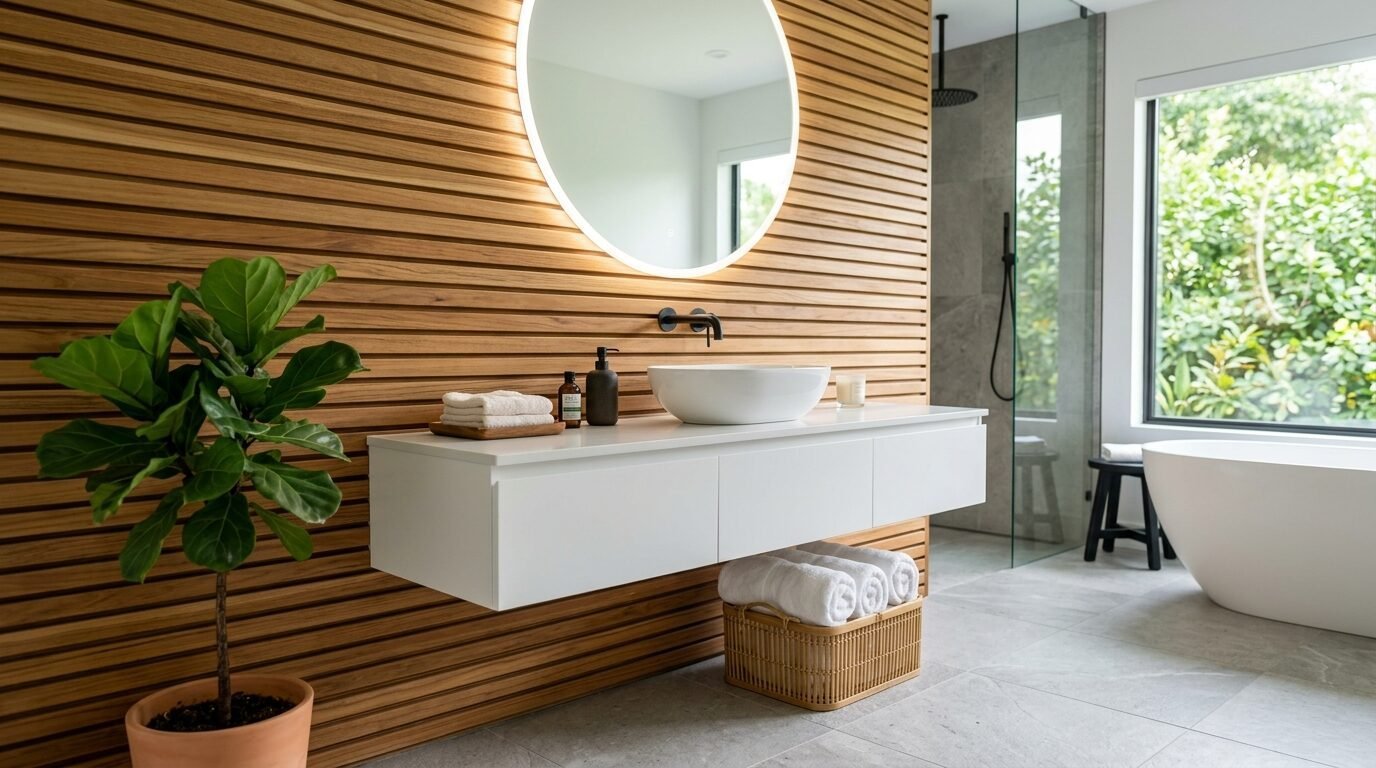
Can you use wood slats in a bathroom? Yes. It makes the bathroom feel like a spa. I love the look of slats behind a floating vanity. You just have to choose the right wood. Teak or Cedar are the best. They handle moisture naturally. They will not rot or mold easily.
Waterproofing Strategies
Even with teak, you need a good sealer. Use a marine grade finish. This is what they use on boats. I also recommend keeping the slats away from the direct splash zone of the shower. Use them on a dry wall. Ensure you have a strong vent fan to remove humidity.
Maintenance in Wet Areas
Wipe the wood down once a month with a damp cloth. Check for any signs of water spotting. If the wood looks dry, apply a fresh coat of oil. I noticed that cedar smells amazing when it gets warm from a hot shower. It adds a sensory layer to the room.
Wood Slat Comparison Table
| Wood Type | Cost | Durability | Best For |
| White Oak | High | Very High | Scandi Style, High Traffic |
| Walnut | Very High | High | Luxury, Living Rooms |
| Pine | Low | Medium | Budget DIY, Painted Walls |
| Cedar | Medium | High | Bathrooms, Outdoor Areas |
| Reclaimed | Variable | Medium | Rustic Texture, Feature Walls |
Frequently Asked Questions
Do wood slats collect a lot of dust?
Yes. Dust settles on the horizontal surfaces of the slats. I use a vacuum with a soft brush attachment once a month. It is not as bad as people think. If you use vertical slats, the dust has less space to land. Horizontal slats require more cleaning.
Can I install a slat wall over drywall?
Absolutely. You can nail them directly into the studs through the drywall. I recommend painting the drywall black first. This makes the gaps look like deep shadows. If the wall is white, the gaps look busy. Black paint hides the wall behind the slats.
What is the average cost of a slat wall?
For a standard ten foot wall, expect to pay between four hundred and twelve hundred dollars. Pine is the cheapest option. Walnut is the most expensive. If you do the labor yourself, you save about fifty percent of the total cost.
Should I stain the slats before or after installation?
Always stain before. It is impossible to get a brush into the small gaps once the slats are on the wall. Lay the boards out on sawhorses. Stain all four sides. Let them dry completely. Then install. This ensures a perfect finish with no missed spots.
Are wood slats still in style for 2026?
Yes. The trend has shifted toward more natural and varied patterns. People are moving away from the “office” look and toward the “cabin” look. Using mixed widths and natural finishes keeps the style fresh. It is a timeless way to add warmth to a room.
How do I handle outlets on a slat wall?
You can buy outlet extenders. This brings the plug flush with the wood. I cut the wood carefully around the outlet box. Use a jigsaw with a fine tooth blade. It takes patience. A messy cut around an outlet ruins the whole wall.
Can I use wood slats on a curved wall?
Yes. This is one of the best uses for slats. Thin slats can follow a curve easily. You might need to use more glue and fewer nails. I saw a curved slat wall in a hallway that looked incredible. It felt like organic movement.
Do I need to use a backer board?
You do not have to. But a black backer board makes the job easier. It gives you a flat surface to glue to. It also covers any imperfections in your existing wall. I usually use thin plywood painted matte black as my backer.
Conclusion
Wood slat accent walls are a powerful tool for home design. They offer texture. They provide warmth. They bring that modern cabin feel into any space. Whether you choose the luxury of walnut or the simplicity of pine, the result is the same. You create a home that feels more connected to nature. Start small. Try a bathroom or an entryway. Once you see the impact, you will want to add slats to every room. I have seen it happen many times. It is a rewarding project that adds real value to your life. Take your time with the measurements. Focus on the finish. You will have a wall that people cannot stop touching.

Anya Castellan is the Founder and Editor-in-Chief of Home Wall Trends. An art history graduate of the Rhode Island School of Design with twelve years of experience writing for leading American design publications, she specializes in composition, gallery wall theory, and the quiet architecture of domestic space. A former contributing editor at Architectural Digest and guest lecturer at Parsons School of Design, Anya personally reads and signs off on every piece before it is published.