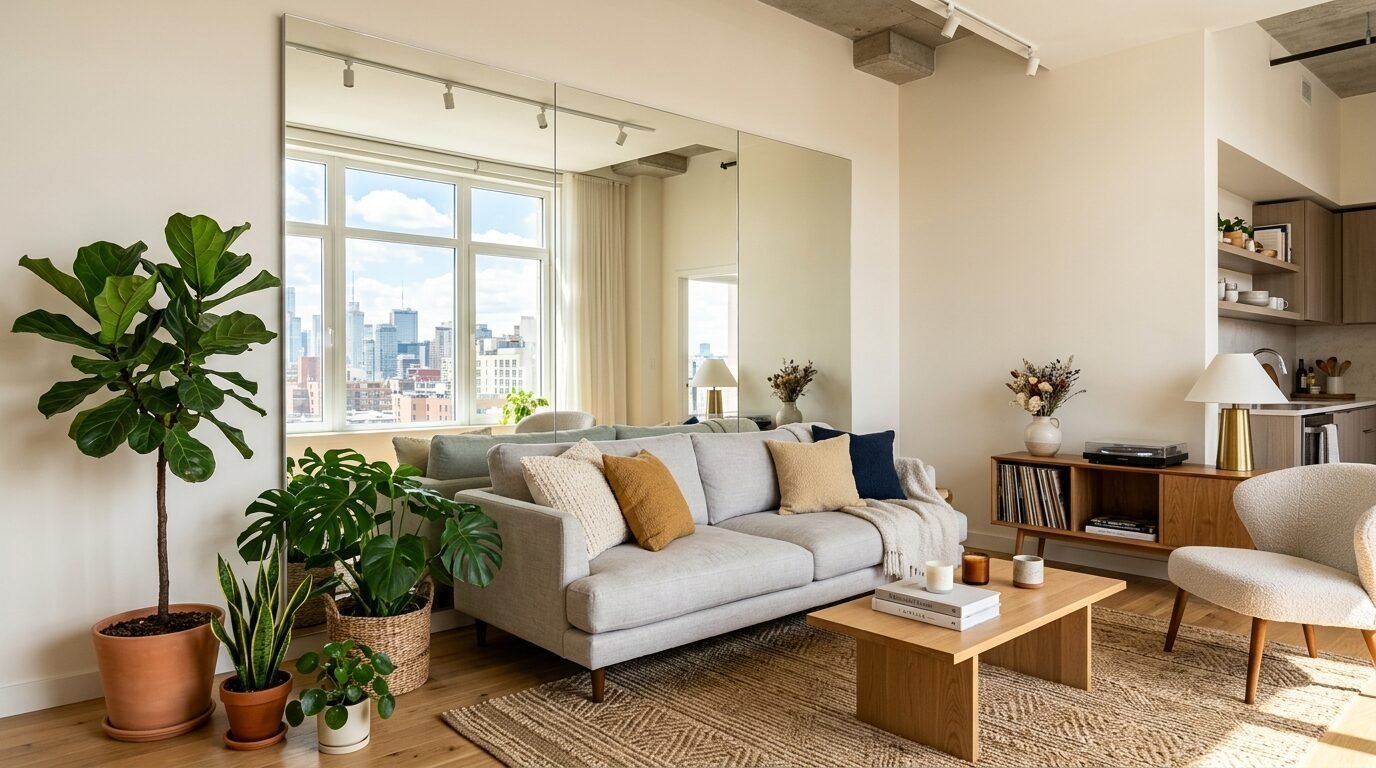
Last winter, a client named Sarah moved into a three-hundred-square-foot studio apartment in Manhattan. The dark walls felt tight. The single window faced a brick alleyway. She felt trapped in a concrete box. We changed the entire feel of the room with a strategic layout of polished glass panels. By mounting twelve square glass tiles opposite her window, the cramped room instantly felt twice as large. Natural light bounced into every dark corner. This guide shows you exactly how to replicate that high-end look in your own home without stress.
Summary of Small Room Mirror Transformations
Mounting a mirror wall in a small space instantly alters depth perception and multiplies available light. This project requires minimal tools and can be completed within a single weekend. Total costs vary from fifty dollars for basic adhesive panels to three hundred dollars for heavy framed grids. By selecting the correct mounting system, renters and homeowners alike can achieve flawless results that elevate their daily living environment.
In my experience, people often hesitate to try large glass installations because they fear wall damage or alignment errors. I have seen amateur decorators make simple mistakes that lead to broken glass or cracked plaster. This guide removes the guesswork. You will find specific tool assessments, step-by-step layout plans, and real-world fixes for common installation missteps. The goal is a safe, level, and beautiful finish that looks like a professional design firm handled it.
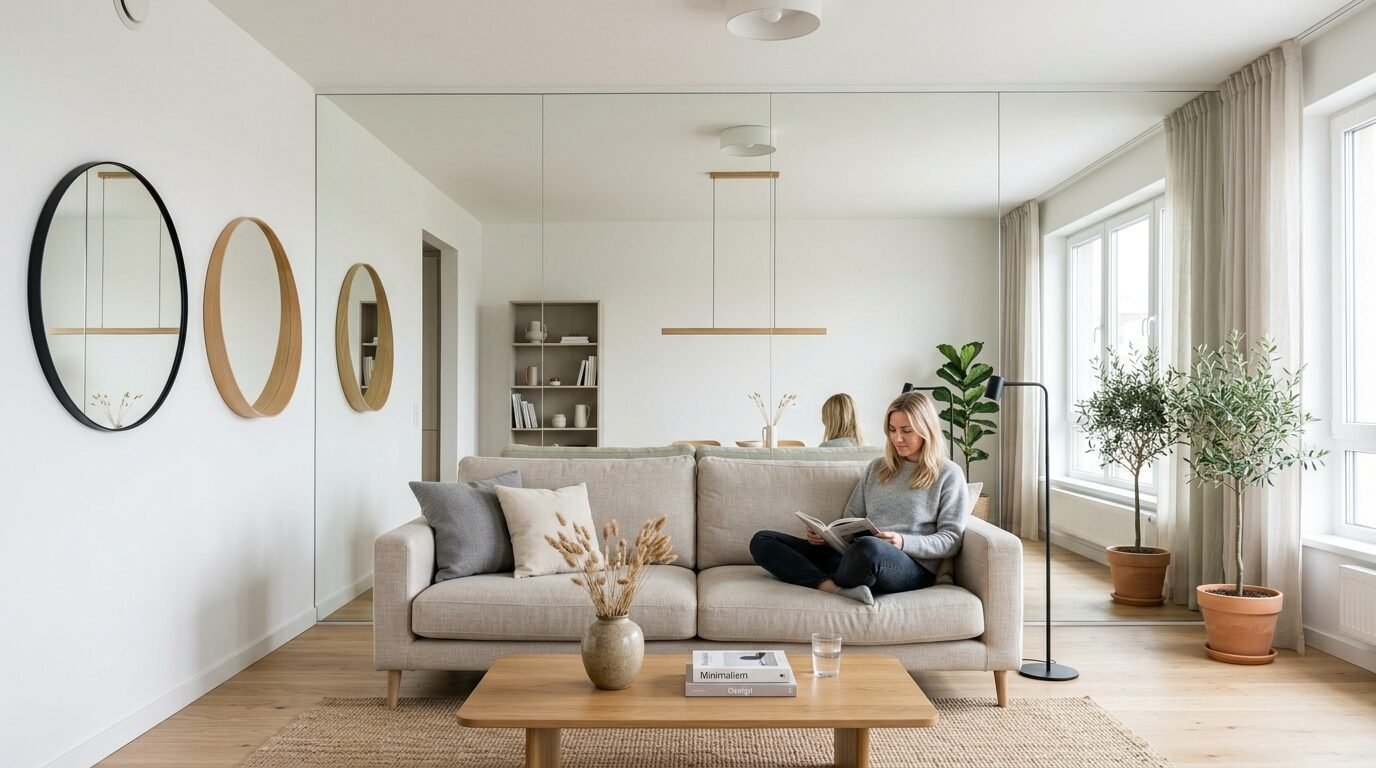
Why Small Spaces Need Large Reflections
Large reflective surfaces trick the human eye by mimicking architectural openings like windows or doorways. This optical shift removes the visual boundaries of a cramped perimeter wall. When you place reflective surfaces across from a light source, you double the visual impact of that window. The room feels open, bright, and airy.
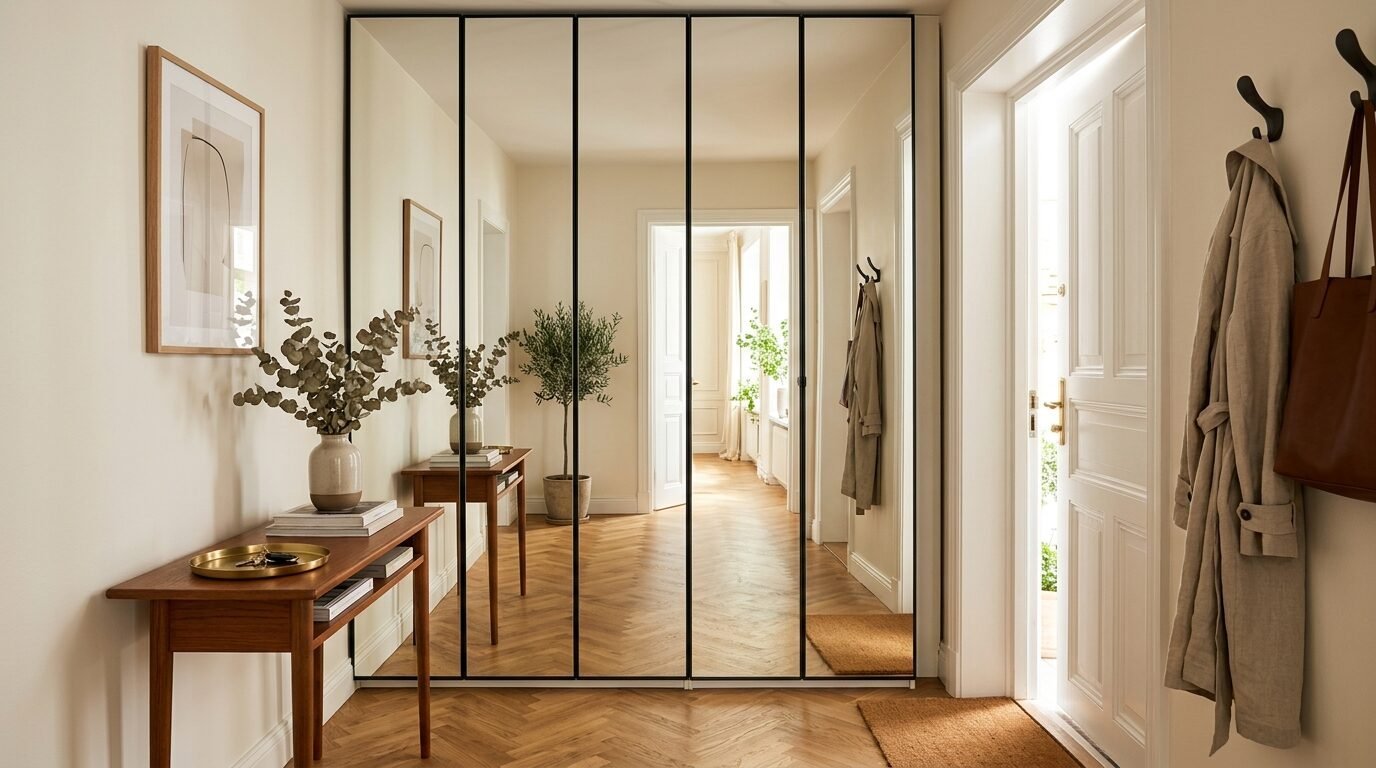
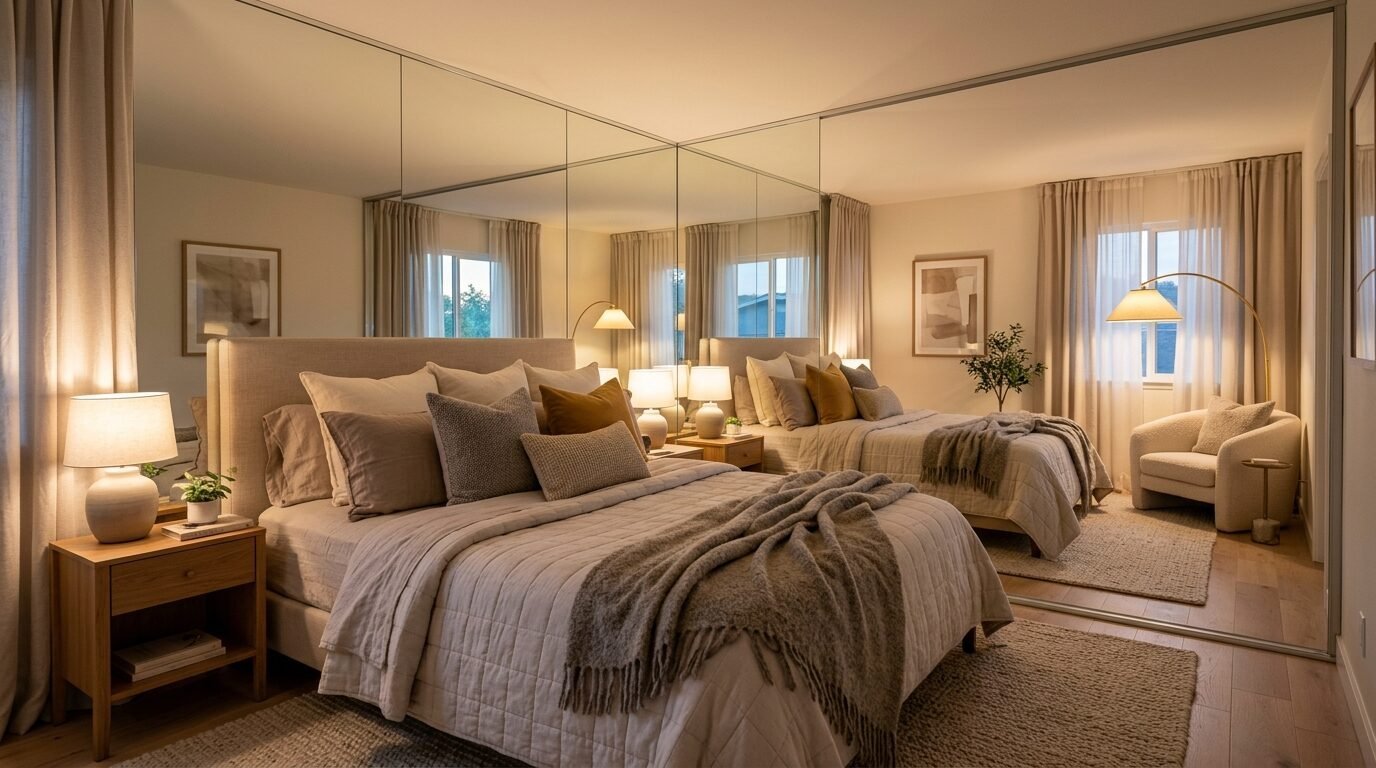
Three months ago, I helped a homeowner remodel a narrow entryway. The hallway felt claustrophobic. We mounted three full-length vertical panels along the left wall. The transformation was immediate. The hallway no longer felt like a tunnel. Instead, it felt like an expansive gallery space. This simple change is a staple of dream apartment decor because it fixes structural layout flaws without expensive construction.
Reflective walls also serve as a foundational element of easy room decor. They require no complex color matching. They reflect your existing furniture and decor pieces. If you admire the high-end Italian aesthetic known as idee arredamento soggiorno, you know that clean lines and large glass panels dominate those luxury layouts. You can get that exact vida de luxo style on a tiny budget by using standard glass sheets.
Selected Tools and Supplies for Mirror Projects
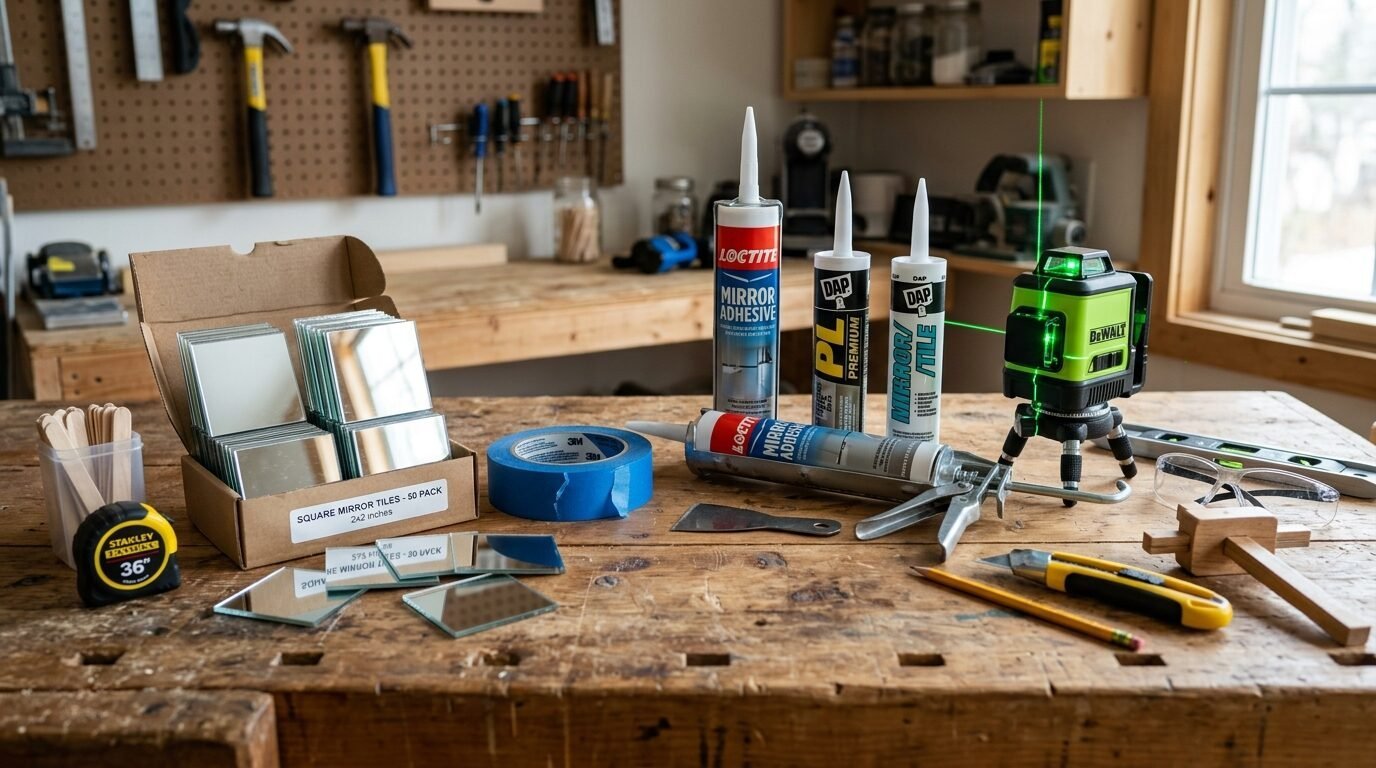
Choosing the right supplies prevents the glass from slipping and ensures your lines remain perfectly straight. You must match your adhesive or hardware to your specific wall type and rental status. Standard drywall requires different support than plaster or concrete walls.
Here is an honest look at the supplies I use and recommend:
- IKEA LOTS Mirror Tiles: These four-pack square tiles are perfect for budget setups. They are lightweight and simple to place. The flaw is that thin glass distorts if your wall has any bumps.
- Command Large Picture Hanging Strips: This is the top choice for rental homes. They leave no marks upon removal. The flaw is they have a strict weight limit of sixteen pounds per set.
- Loctite PL 520 Mirror Mastic: This adhesive offers an unbeatable permanent hold for heavy glass sheets. The flaw is that it permanently destroys drywall if you ever try to pull it down.
- Gorilla Heavy Duty Construction Adhesive: This formula grabs surfaces quickly and resists moisture. The flaw is it sets very fast, leaving you little time to adjust crooked tiles.
- Target Threshold Framed Mirrors: Excellent choice for a classic grid look. These pieces offer solid stylish room decor value. The flaw is the heavy frames require sturdy wall anchors.
- Home Depot Laser Level: This tool projects straight lines across your entire wall. The flaw is the initial cost for a tool you might use only twice a year.
- Blue Painter Tape: Required for marking layouts without peeling your wall paint. There is no major flaw to note.
- Oasis Crafts Frameless Glass Tiles: These tiles offer beautiful bevelled edges for a polished look. The flaw is they are easily chipped during shipping.
How to Plan Your Mirror Wall Design Layout
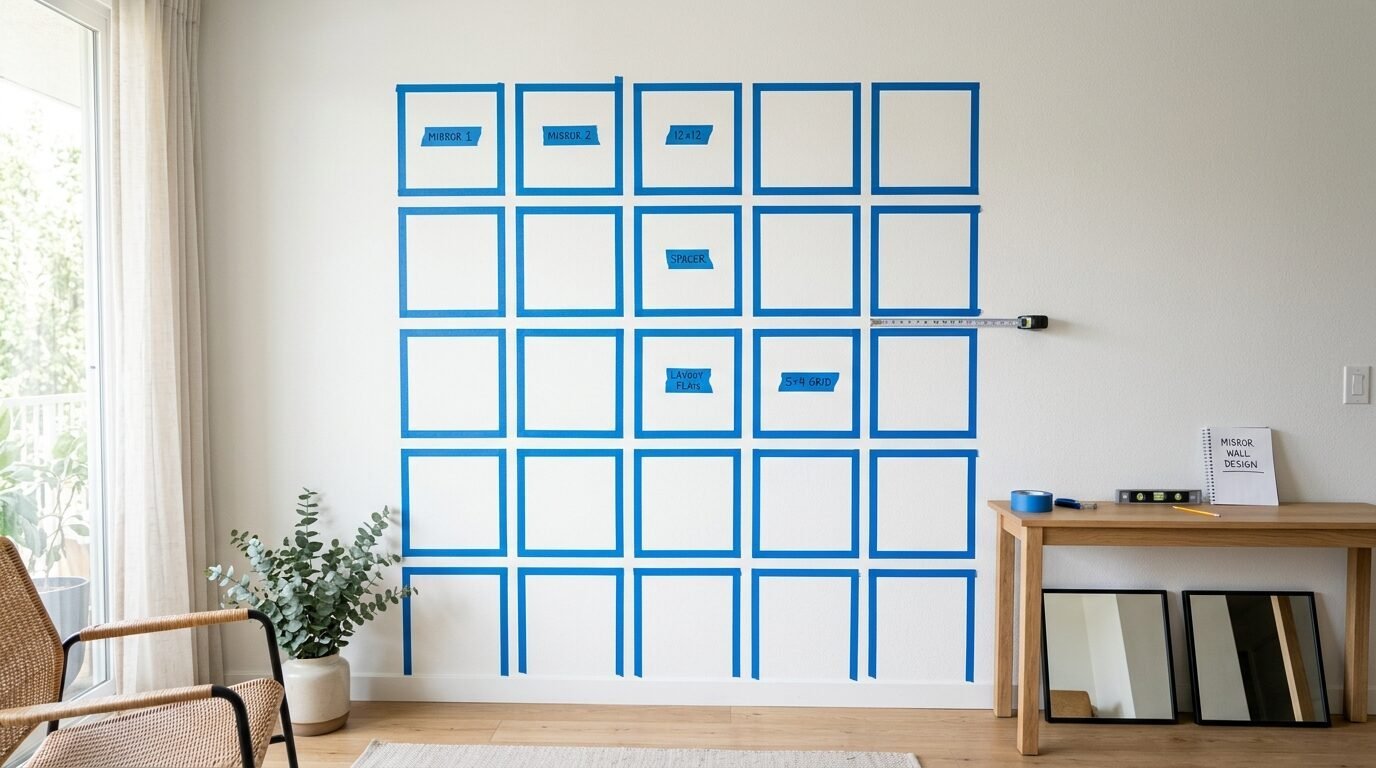
A successful layout relies on exact measurements and clear pencil marks before any adhesive touches the wall. Never try to guess the center point of your wall by sight alone. Minor placement errors multiply quickly across a large grid.
I learned this lesson the hard way during an apartment bedroom decor project two years ago. I did not use a level line for the first row of glass squares. By the time I reached the fourth row, the entire grid tilted downward by two inches. I had to pull down the panels, patch the wall, and start over. Now, I always draw a complete grid map on the wall using painter tape first.
Measure the total width and height of your target wall area. Divide that space by the width of your glass panels. Leave a consistent one-eighth-inch gap between each panel to allow for house settling and wall shifts. This gap prevents the glass edges from grinding together and cracking over time. This careful planning stage is the secret to professional room makeover inspiration stories.
Step by Step Mirror Installation Guide
Following a strict installation sequence ensures your glass wall remains secure and perfectly level for years. Gather all your supplies before you unbox the glass panels to avoid accidental scratches.
1. Clean the Wall Surface
Scrub the wall with isopropyl alcohol to remove dust, grease, and fingerprint oils. Rubbing alcohol dries fast and leaves no soapy residue behind. A clean wall ensures your tape or mastic bonds perfectly to the paint layer.
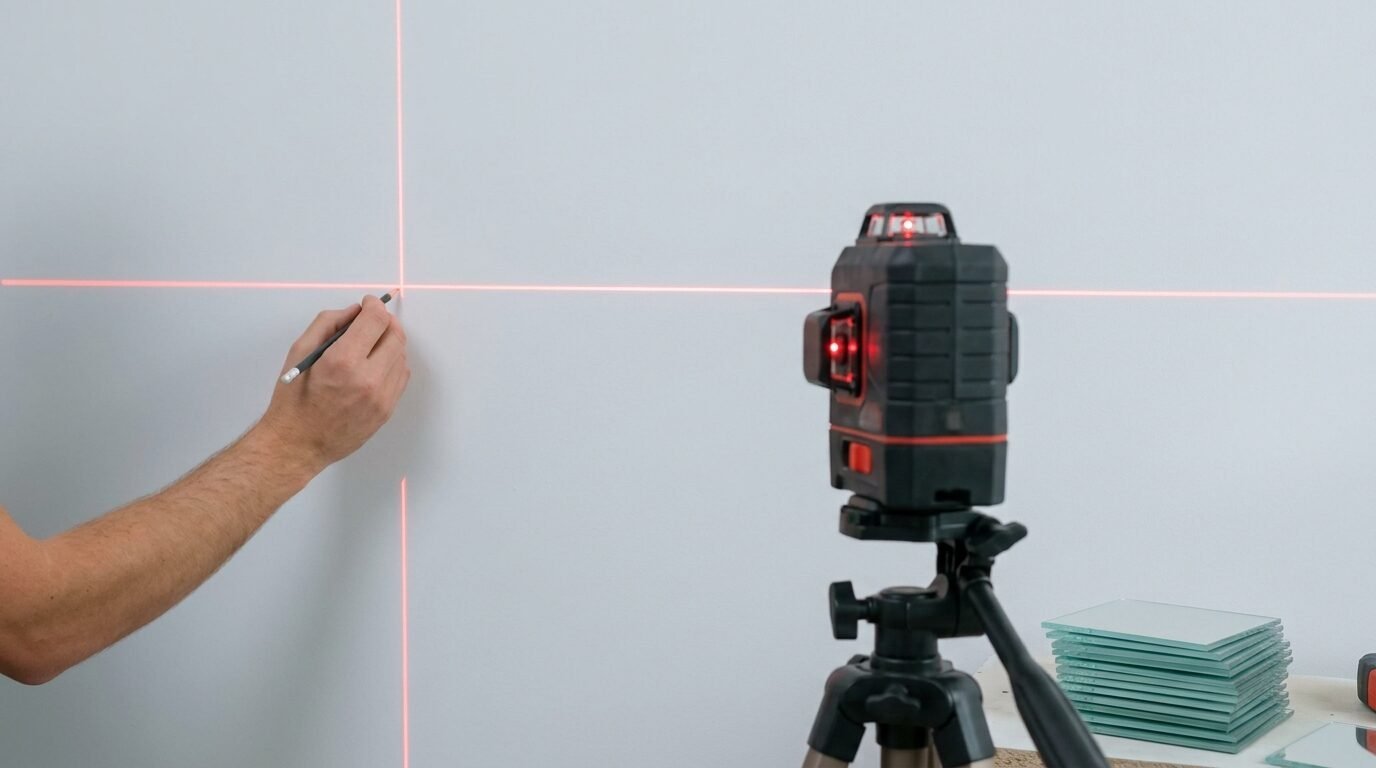
2. Project Your Base Guideline
Turn on your laser level and align the beam with the bottom edge of your planned layout. Use a pencil to trace this line across the wall. This base line acts as the foundation for your entire project.
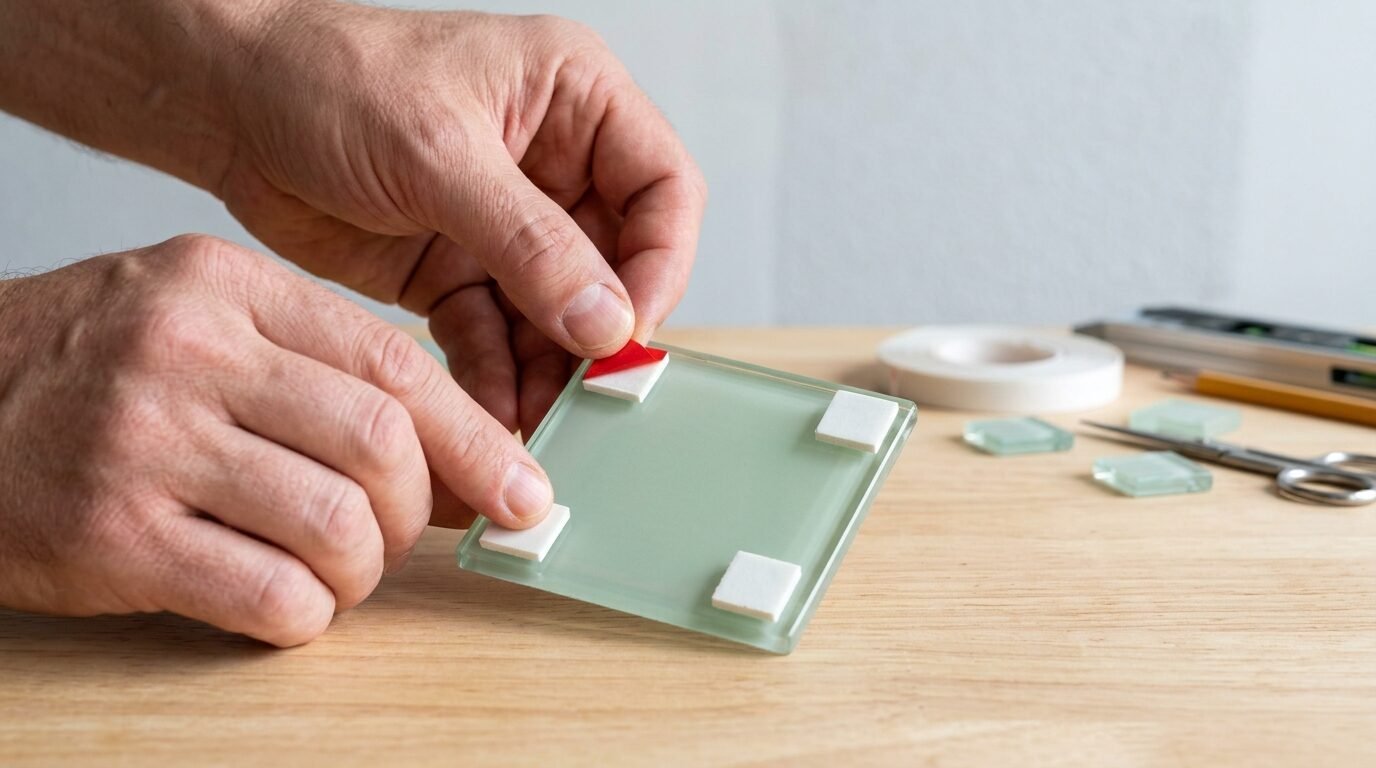
3. Apply the Mounting Material
If you use Command strips, press them firmly onto the back of the glass tile and hold for thirty seconds. If you use mastic adhesive, apply small dime-sized dots four inches apart. Keep the adhesive two inches away from the glass edges so it does not ooze out when pressed.
4. Position the First Tile
Align the bottom edge of your first tile with your pencil line. Press the glass firmly against the wall. Hold it in place with steady pressure for one full minute to ensure the bond takes hold.
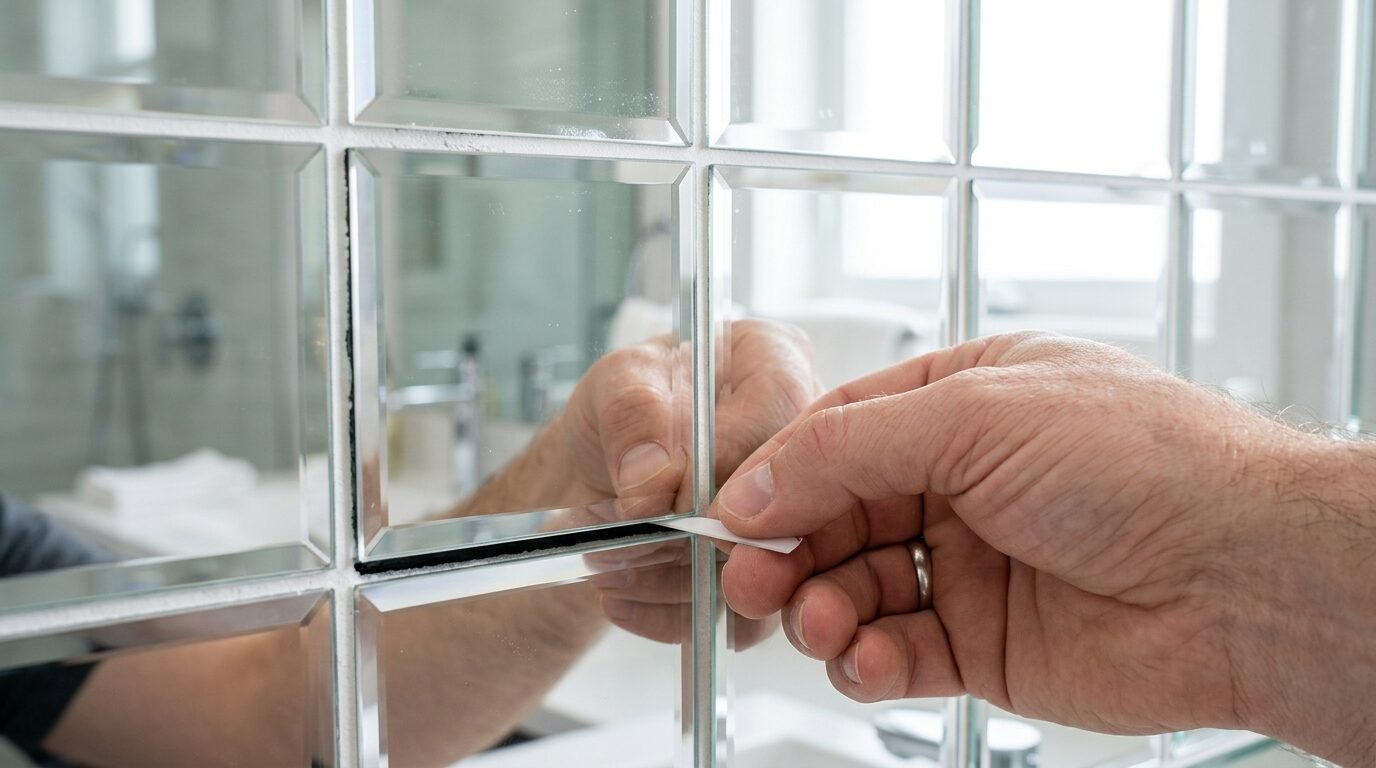
5. Secure with Painter Tape
Place strips of blue painter tape across the front corners of the tile, anchoring the tape to the wall. This tape supports the weight of the glass while the adhesive cures completely over the next twenty-four hours.
6. Build Outward and Upward
Place the next tile beside the first one, using plastic spacers to maintain your one-eighth-inch gap. Repeat the mounting steps until your entire pattern is complete. Leave the support tape in place until the following day.
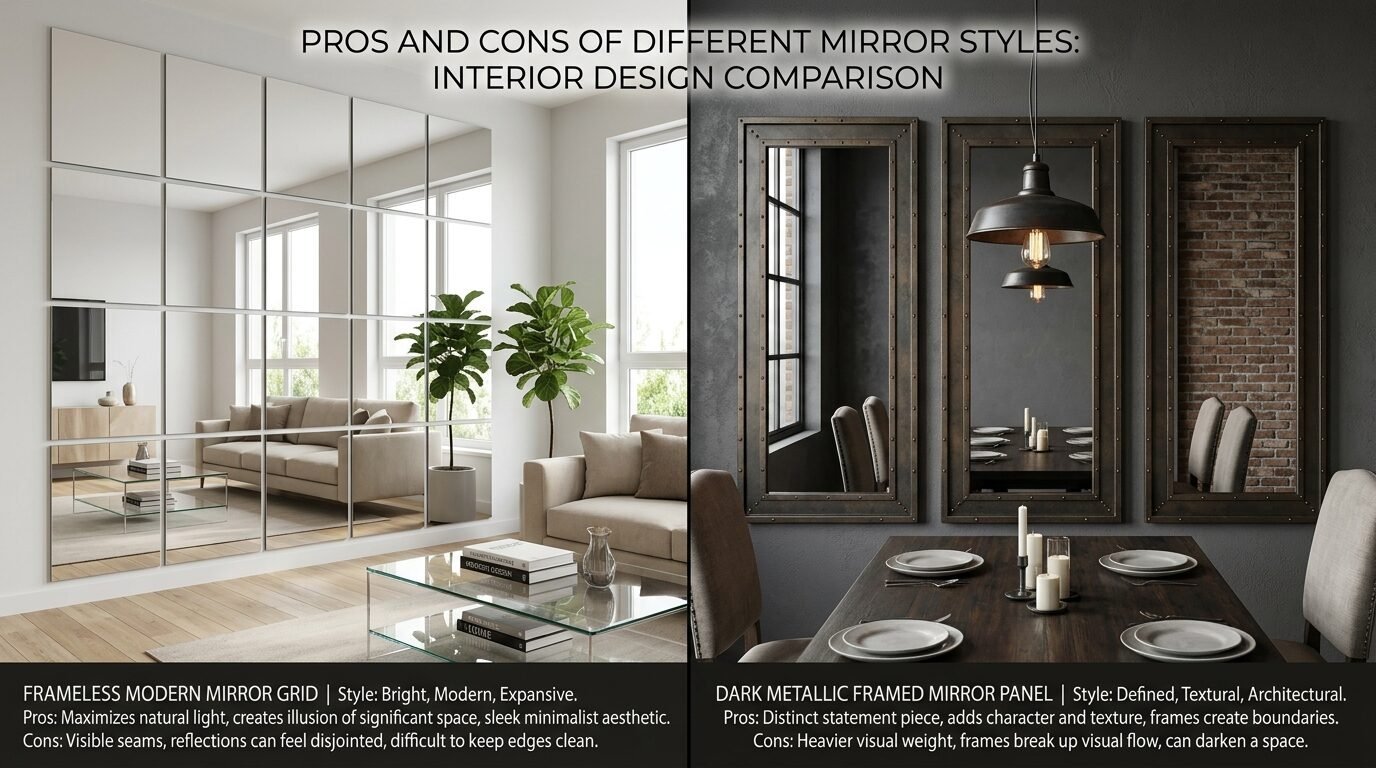
Pros and Cons of Different Mirror Styles
| Mirror Type | Major Advantages | Notable Flaws | Ideal Space |
| Frameless Square Tiles | Low cost, modern appearance, easy to cut | Shows wall warps, thin glass quality | Small bedroom accent walls |
| Large Single Sheets | Zero line breaks, maximum reflection | Heavy weight, hard to carry up stairs | Entryways and narrow halls |
| Framed Grids | Classic style, covers wall flaws | High price, heavy anchor needs | Living rooms and dining areas |
| Hexagon Peel and Stick | Playful design, simple placement | High distortion, hard to clean seams | Small home office nooks |
Comparison of Mirror Framing Options
The choice between a frameless setup and a framed grid dictates the overall mood and maintenance needs of your space. Frameless tiles offer a sleek look that blends into the background of a modern room. They maximize the raw amount of reflected light because there are no dark borders to absorb the rays.
Framed grids offer a bolder design statement. Thick black or metallic frames turn the installation into an intentional focal point. This look anchors a room and pairs well with industrial or rustic furniture styles. Framed pieces are also easier to move if you relocate to a new apartment next season.
In my experience, frameless panels work best in ultra-tight areas under one hundred square feet. The lack of frames prevents the wall from looking busy or cluttered. For slightly larger rooms, a framed grid offers excellent structure and a classic touch of luxury.
Troubleshooting Common Mirror Wall Mistakes
Addressing installation problems quickly protects your walls from damage and saves your glass pieces from breaking. If a tile looks crooked or slips out of place, do not wait for the adhesive to dry before you act.
If a tile begins to sag right after installation, your adhesive layer is either too thick or lacks initial tack. Immediately pull the tile away from the wall. Scrape off the wet mastic with a putty knife. Clean the wall area with alcohol again. Reapply the adhesive using smaller dots, and use extra painter tape to anchor the tile to the wall while it sets.
If you notice a funhouse distortion effect in your finished reflection, the wall behind the glass is uneven. Drywall often bows inward between wall studs. To fix this issue without tearing down the project, place small foam shims behind the corners of the distorted tiles. These shims level out the glass surface and restore a true, accurate reflection.
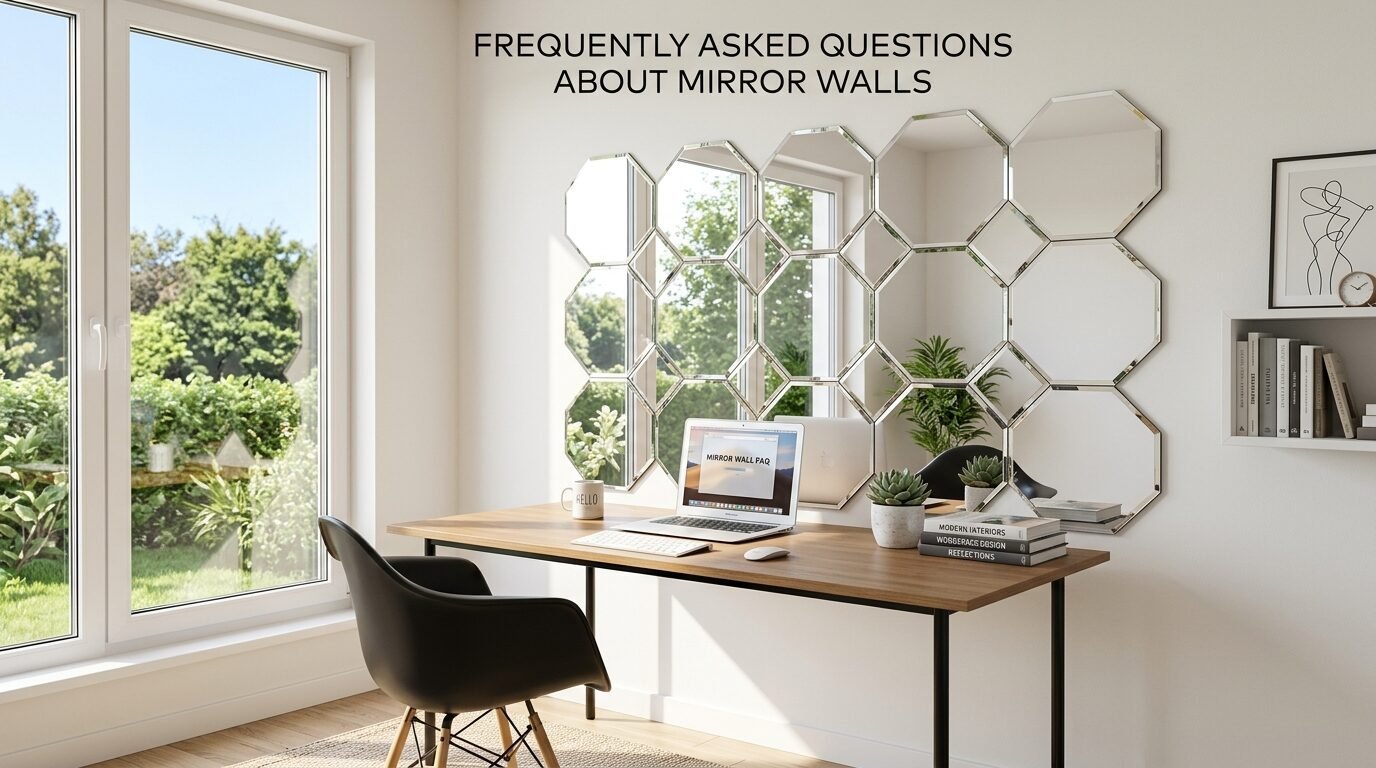
Frequently Asked Questions About Mirror Walls
Can I build a mirror wall in a rental apartment?
Yes, you can build a reflective wall in a rental by using heavy-duty hook-and-loop hanging strips. Avoid liquid adhesives or heavy anchors that leave deep holes in the drywall sheet.
How do I clean the gaps between the mirror tiles?
Run a dry microfiber cloth or a soft canned-air nozzle along the gaps to clear out dust. Avoid spraying liquid glass cleaner directly into the seams because moisture can damage the reflective backing.
What size mirror tiles work best for small spaces?
Twelve-inch square tiles offer the best balance of easy installation and clean look. Smaller tiles create too many grid lines, which makes a tight room feel cluttered.
Will a mirror wall work on textured drywall?
Heavy textures like orange peel or popcorn prevent adhesives from bonding correctly. You must sand the target area smooth or mount the glass onto a thin plywood backing board first.
How do I remove permanent mirror mastic from a wall?
Slide a long, flexible wire saw behind the glass panel to slice through the adhesive layer. Once the glass is free, use a heat gun and a putty knife to soften and scrape the leftover mastic off the drywall.
Do mirror walls cause safety risks for pets?
Pets might occasionally bump into large glass reflections at first. Place a small potted plant or a basket on the floor in front of the glass wall to mark the physical boundary clearly.
Can I mix different shapes of mirrors on one wall?
Mixing shapes often looks chaotic in a confined area. Stick to a uniform shape like squares or vertical rectangles to keep the tiny space looking organized.
How do I prevent bathroom mirror walls from fogging?
Apply a thin layer of specialized commercial anti-fog solution to the glass surface every three months. This coating keeps the reflection clear during hot showers.
Is it safe to hang heavy mirrors on plaster walls?
Plaster is brittle and cracks easily under direct pressure. Always pre-drill your pilot holes and use specialized toggle bolts that expand behind the wood laths for secure support.
Where is the worst place to put a mirror wall?
Avoid placing large reflective panels directly opposite a cluttered storage shelf or a television screen. The glass will multiply that visual clutter and distract your eyes.
How much weight can rental hanging strips hold?
Top brands offer strips that hold up to sixteen pounds per four-set pack. Always weigh your glass panel on a digital scale before purchasing your hanging strips.
Should I put a frame around my tile grid?
A frame is optional but helpful. Adding a thin wooden trim around the outer border hides raw glass edges and gives the project a built-in look.
Final Thoughts on Room Makeover Inspiration
Transforming a cramped room does not require massive renovation budgets or professional construction crews. By taking exact measurements, choosing the correct mounting supplies, and working row by row, you can establish an expansive oasis in any tiny apartment. Grab your measuring tape, select your favorite tile style, and start mapping out your layout this afternoon.

Anya Castellan is the Founder and Editor-in-Chief of Home Wall Trends. An art history graduate of the Rhode Island School of Design with twelve years of experience writing for leading American design publications, she specializes in composition, gallery wall theory, and the quiet architecture of domestic space. A former contributing editor at Architectural Digest and guest lecturer at Parsons School of Design, Anya personally reads and signs off on every piece before it is published.