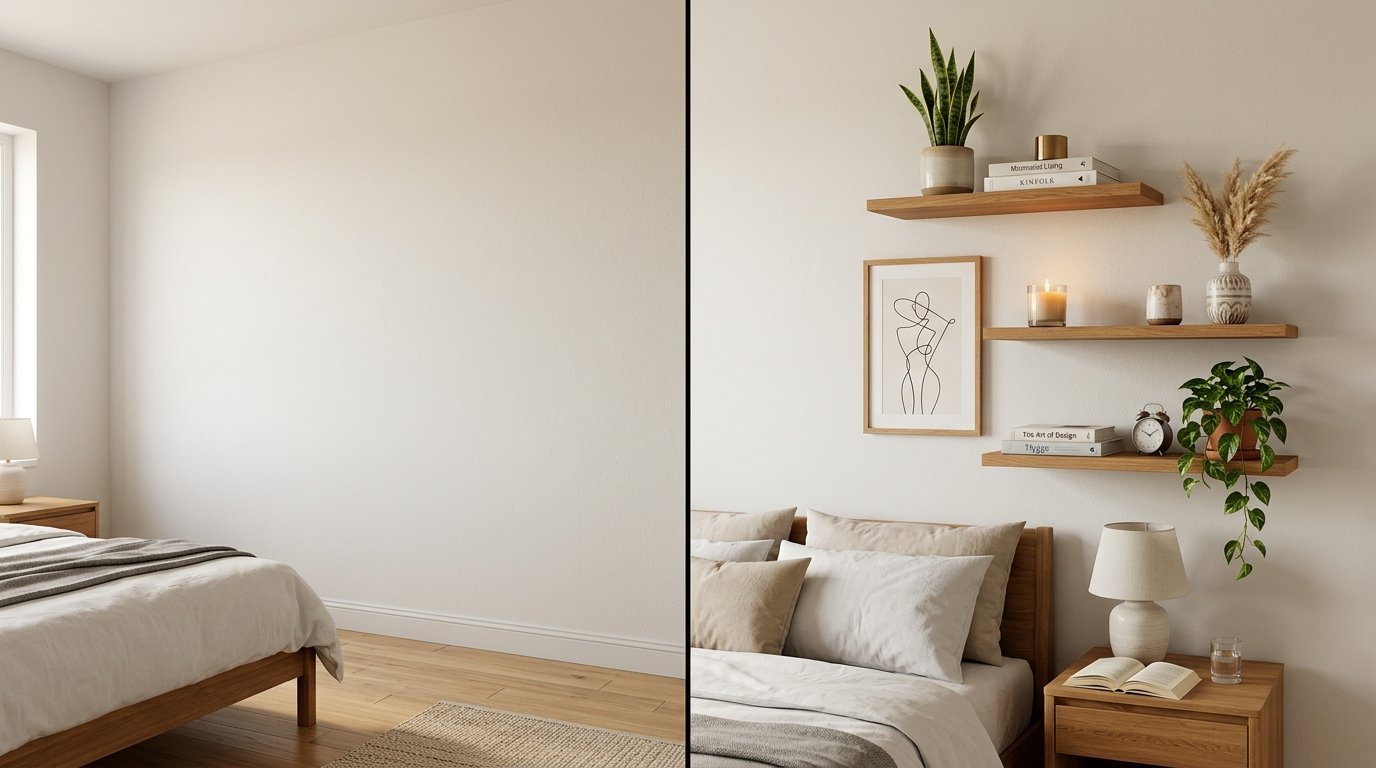
Empty walls cause friction in a home. Last winter, I stared at a blank wall in my bedroom for weeks. It felt cold. It felt incomplete. I bought three white ledges. I threw some random books and a heavy candle on them. It looked worse. It looked like a grocery store display.
That failure forced me to study how professionals manipulate vertical space. Interior designers do not just place items on a ledge. They balance weight, texture, and height. They use specific formulas to draw the eye upward.
This guide reveals the exact layout secrets that turn basic wall planks into high-end visual features. You will learn how to mix shapes, group objects, and use lighting to get a premium look.
Executive Summary
Decorating wall planks requires a balance of scale, color, and depth. This comprehensive guide breaks down 25 proven layouts to elevate your home walls. You will discover how to use overlapping frames, organic plants, and raw textures to create focal points. We cover specific placement guidelines for bedrooms, kitchens, and living rooms. This guide includes a real-world cost analysis, material comparisons, and a troubleshooting roadmap for common styling mistakes. You can apply these rules immediately to make your home look curated, cozy, and expensive.
1. The Layered Lean Technique
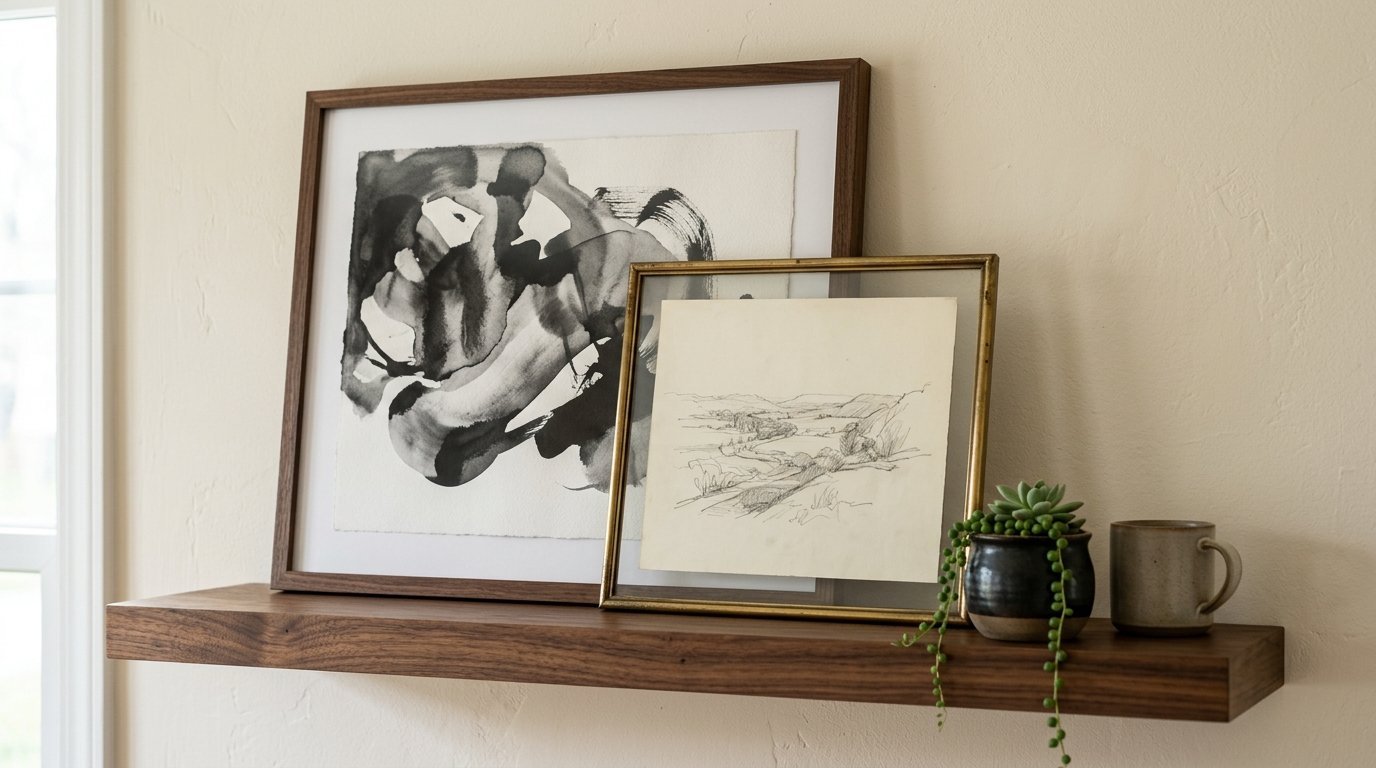
Leaning frames creates instant casual luxury. Do not hang every picture. Place a large framed art piece directly on the wood plank. Overlay a smaller frame in front of it at a slight angle.
I used this method in a client project in Chicago last October. We paired an oversized black and white architectural photograph with a smaller charcoal sketch. The overlap hides about twenty percent of the back image. This creates depth.
Choose frames with different widths to prevent a flat look. A thick wooden border behind a thin metal border works best. Keep the artwork tonal. Mix a bold print with a muted landscape to avoid visual chaos.
2. Dynamic Height Triads
Grouping objects in threes is a foundational rule. The human brain naturally seeks patterns in odd numbers. Select three items with distinct heights to build a visual triangle.
Place the tallest item on the left side. Position the medium item on the right side. Put the shortest item in the middle, slightly forward.
Pro Tip: Your tall item should be at least double the height of the short item.
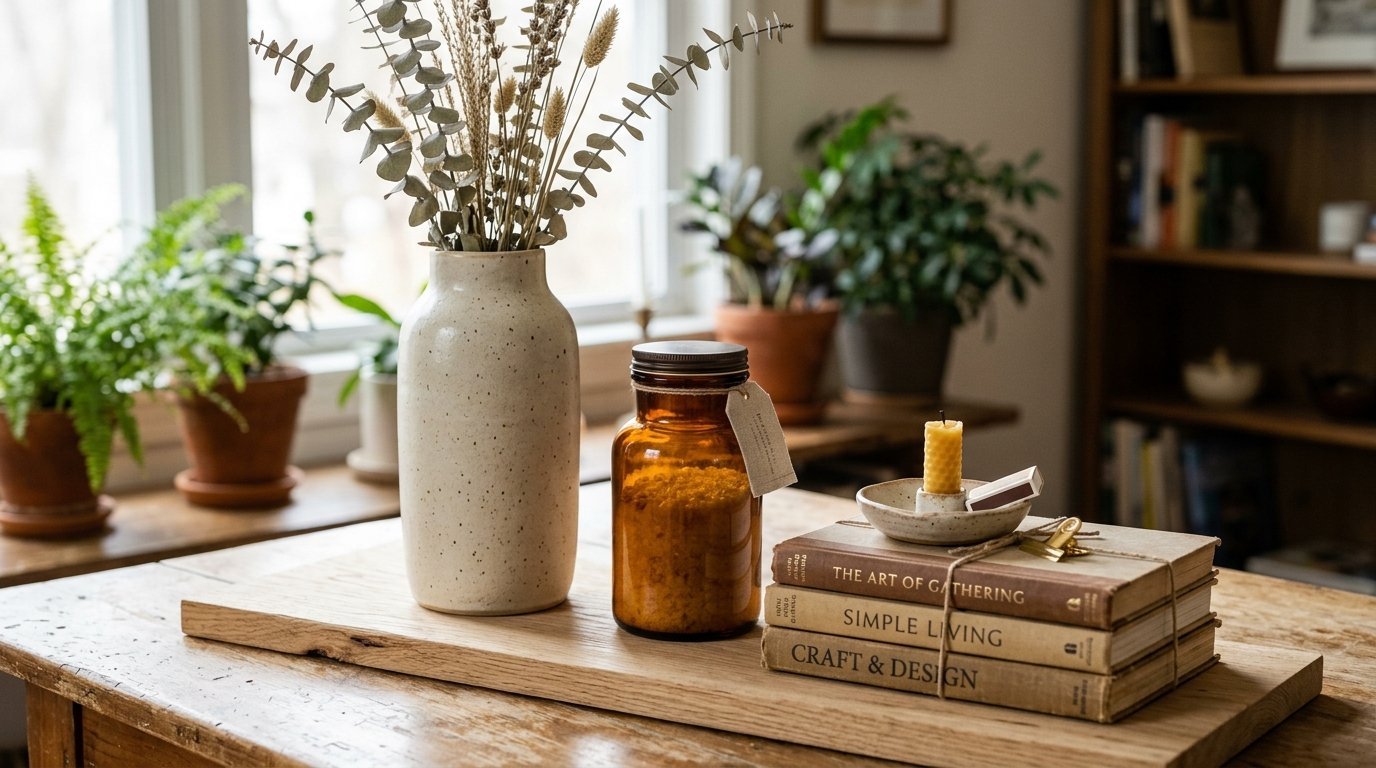
In my own living room, I style a tall ceramic vase, a medium glass jar, and a short stack of leather books. The eye moves smoothly across the trio. This prevents the arrangement from looking blocky or stagnant.
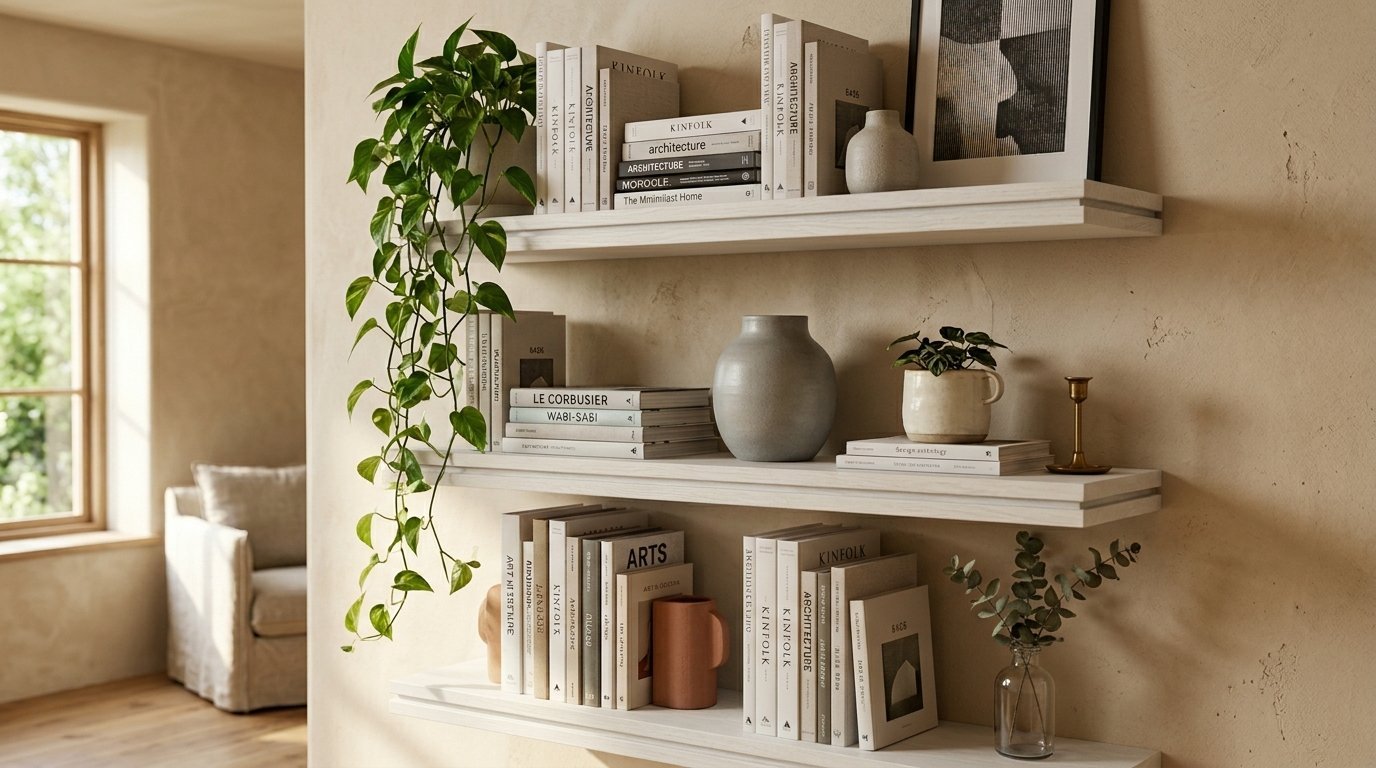
3. Organic Cascade Trails
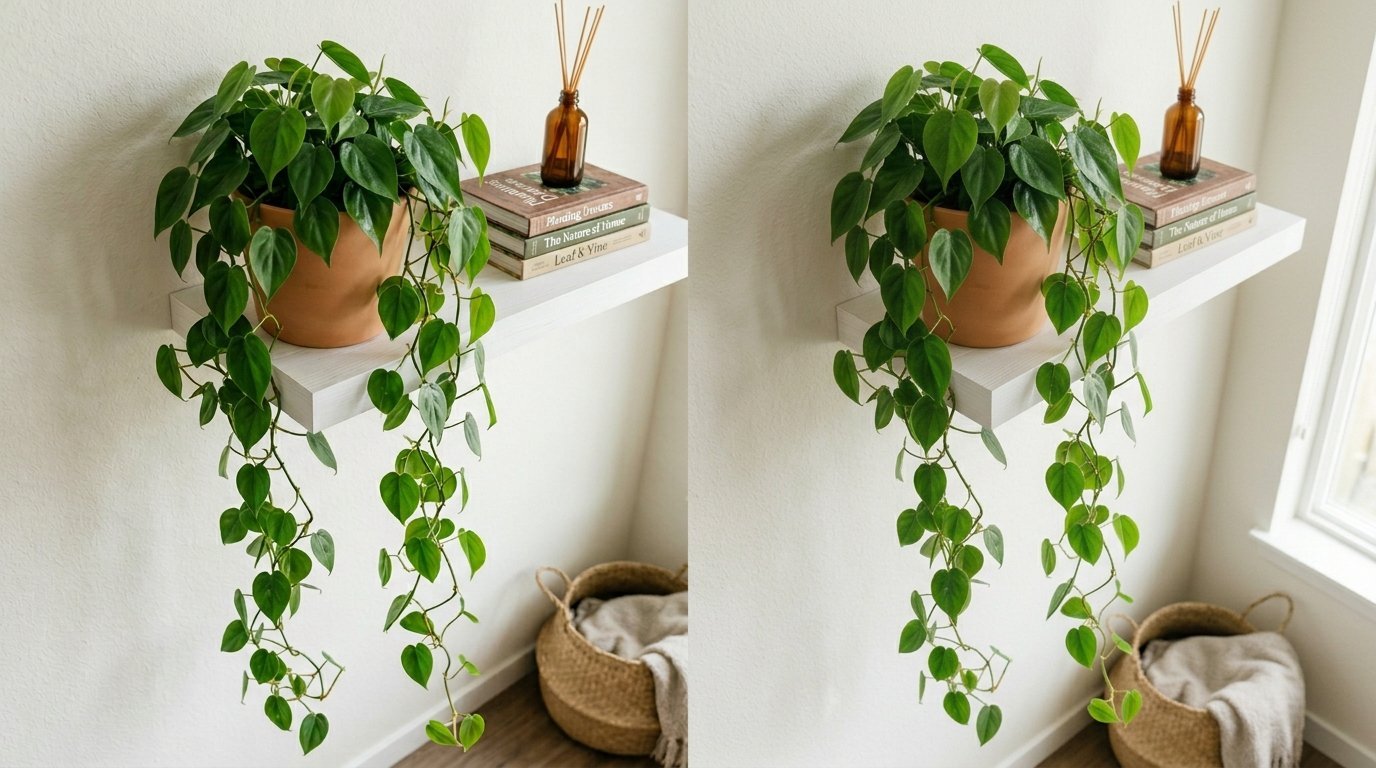
Plants breathe life into rigid structures. Trailing vines break up the hard horizontal lines of wood or metal planks.
Use a Pothos or a Heartleaf Philodendron for a dramatic draping effect. Place the pot on the outer edge of a top plank. Let the green stems spill down over the lower planks.
I recommend matte ceramic pots or terracotta vessels. These materials add an earthy texture that balances glossy plant leaves. Ensure the pot has a deep saucer beneath it. This protects your wall paint from water leaks during maintenance.
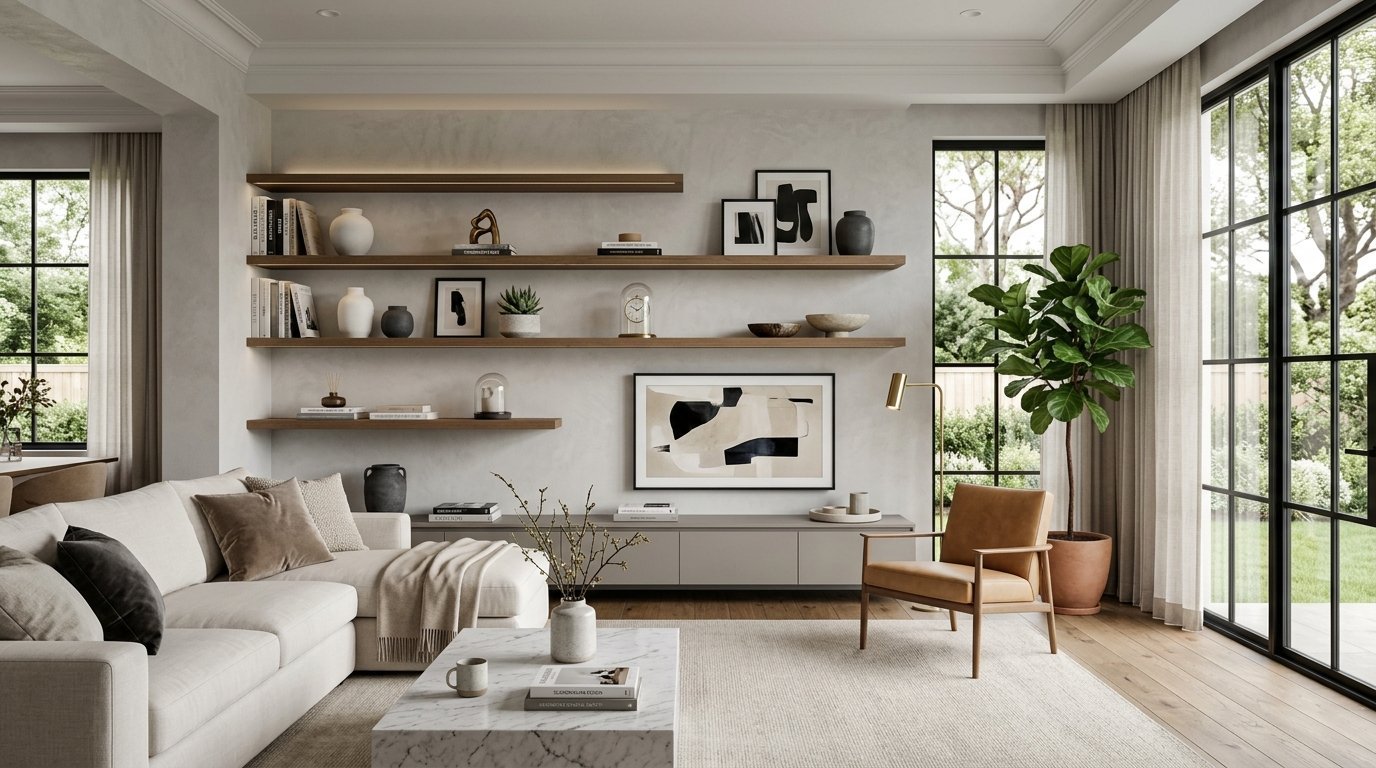
4. Monochrome Object Clustering
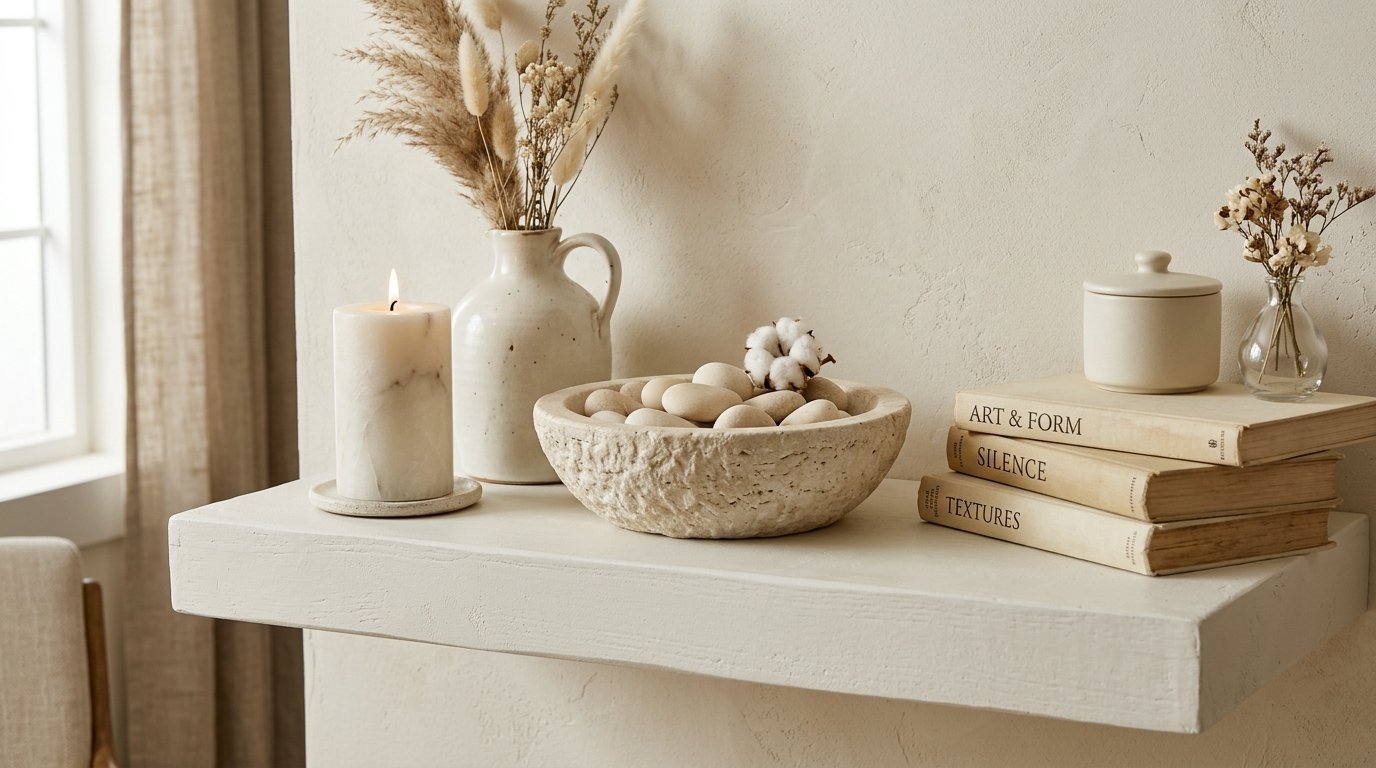
Color clutter makes a small room feel chaotic. Group items that share an identical color palette to create a high-end look.
Select five to seven objects in varying shades of cream, beige, and soft white. Mix a matte ceramic bowl, a marble pillar candle, stone bookends, and a painted vase.
The uniform color binds the collection together. The focus shifts entirely to the shapes and textures. I saw this work perfectly in a small modern apartment. The monochrome cluster made the narrow wall space feel twice as wide.
5. Architectural Book Stacking
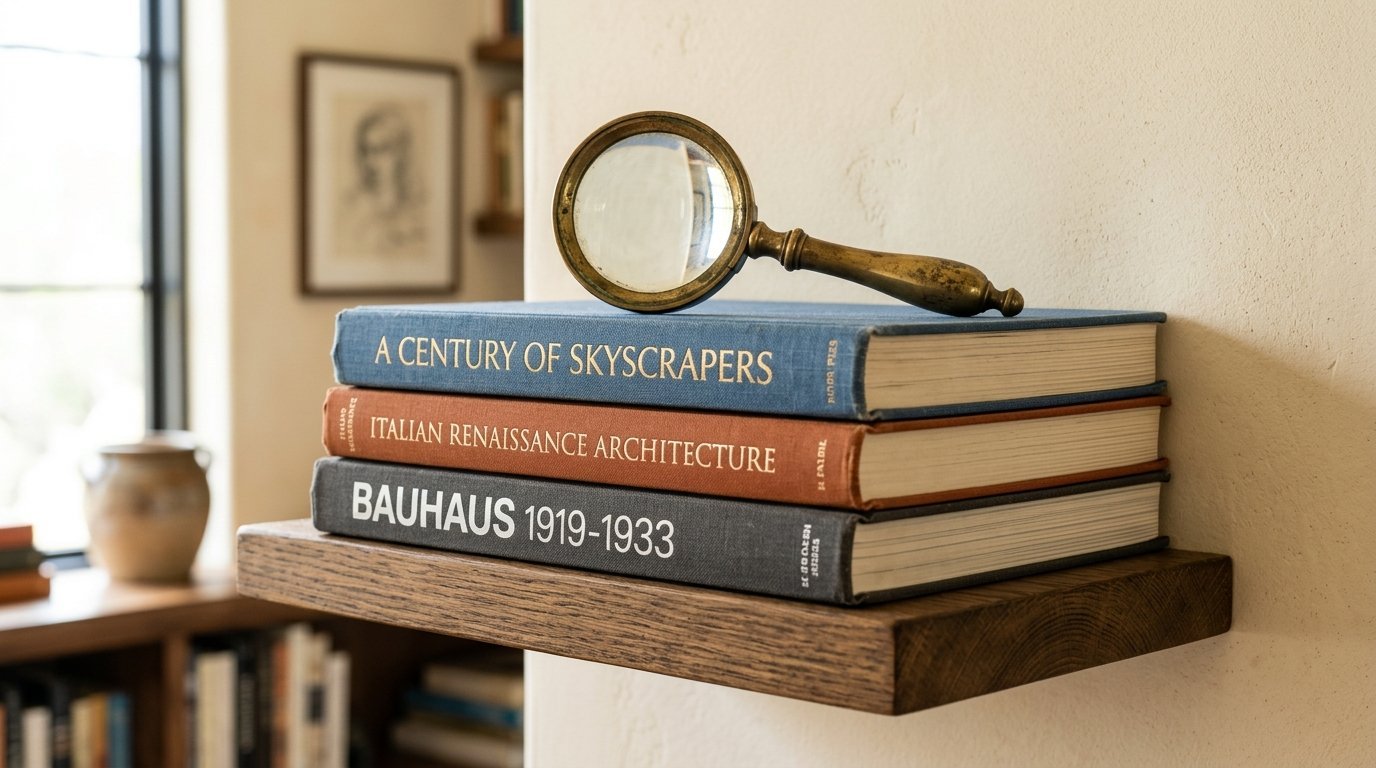
Books are design tools, not just reading material. Avoid lining them up vertically from left to right like a school library.
Stack three to four heavy hardcover books horizontally. This creates a solid platform. Place a small decorative object on top of the stack. A brass magnifying glass or a crystal geode works well.
Remove the glossy paper dust jackets. The raw cloth binding underneath looks premium and textured. Group books by spine color for a cleaner visual flow.
6. Asymmetrical Balance Layouts
Symmetry can feel stiff and sterile. Asymmetry feels modern, relaxed, and deliberate.
On a two-plank vertical stack, do not duplicate your placements. If you place a heavy object on the left side of the top plank, place a heavy object on the right side of the bottom plank.
Balance a large vase on one side with a tight cluster of three small items on the opposite side. The visual weight remains equal, but the layout stays interesting. This movement keeps the viewer engaged.
7. Metallic Accent Anchors
Every display needs a touch of reflection to catch light. Metal objects add a polished contrast to dry wood tones.
Incorporate brass, copper, or brushed nickel elements. Use metallic candle holders, small bowls, or vintage scissor pieces.
Spread these accents thinly. One metallic piece per plank is the limit. Too much shiny metal looks gaudy. A single brass piece next to a matte ceramic jug creates a beautiful balance of rough and smooth textures.
8. Transparent Glass Depth

Solid objects block your vision and can make a tight space feel crowded. Glass vessels allow light to pass through.
Use amber glass bottles, clear pharmacy jars, or tinted green vases. Place them near a window where natural light can hit them.
The sunshine shines through the glass and casts soft colored shadows on your wall. This makes the entire setup feel airy and light. I often use vintage blue glass bottles found at flea markets to add a subtle hint of color.
9. Sculptural Texture Contrast
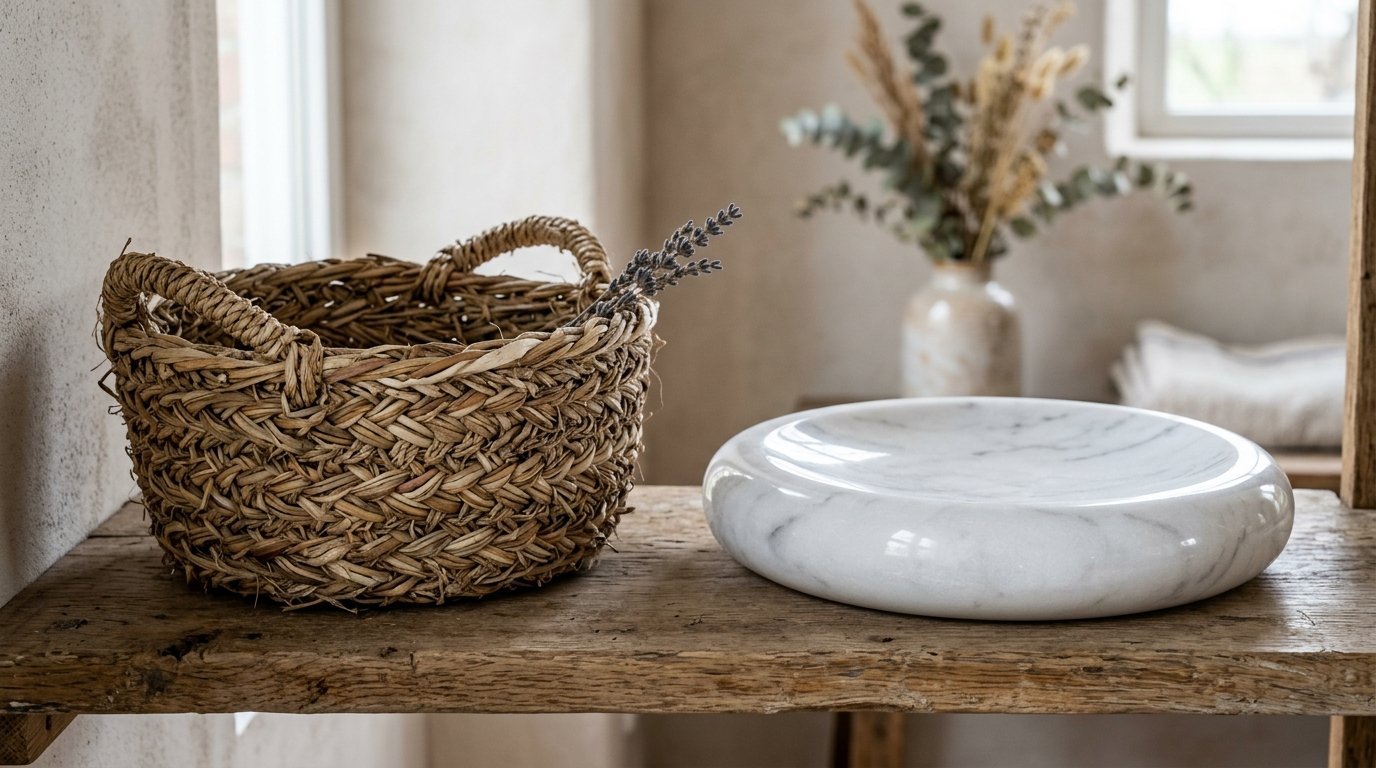
Texture prevents a clean neutral space from looking boring. Combine rough materials with smooth surfaces.
Pair a coarse, hand-woven small basket with a sleek, polished marble dish. Place a piece of rough driftwood next to a smooth porcelain cup.
The sharp friction between the surfaces creates visual tension. It makes people want to reach out and touch the display. Touch the surfaces yourself when styling to feel the contrast.
10. The Gallery Wrap Extension
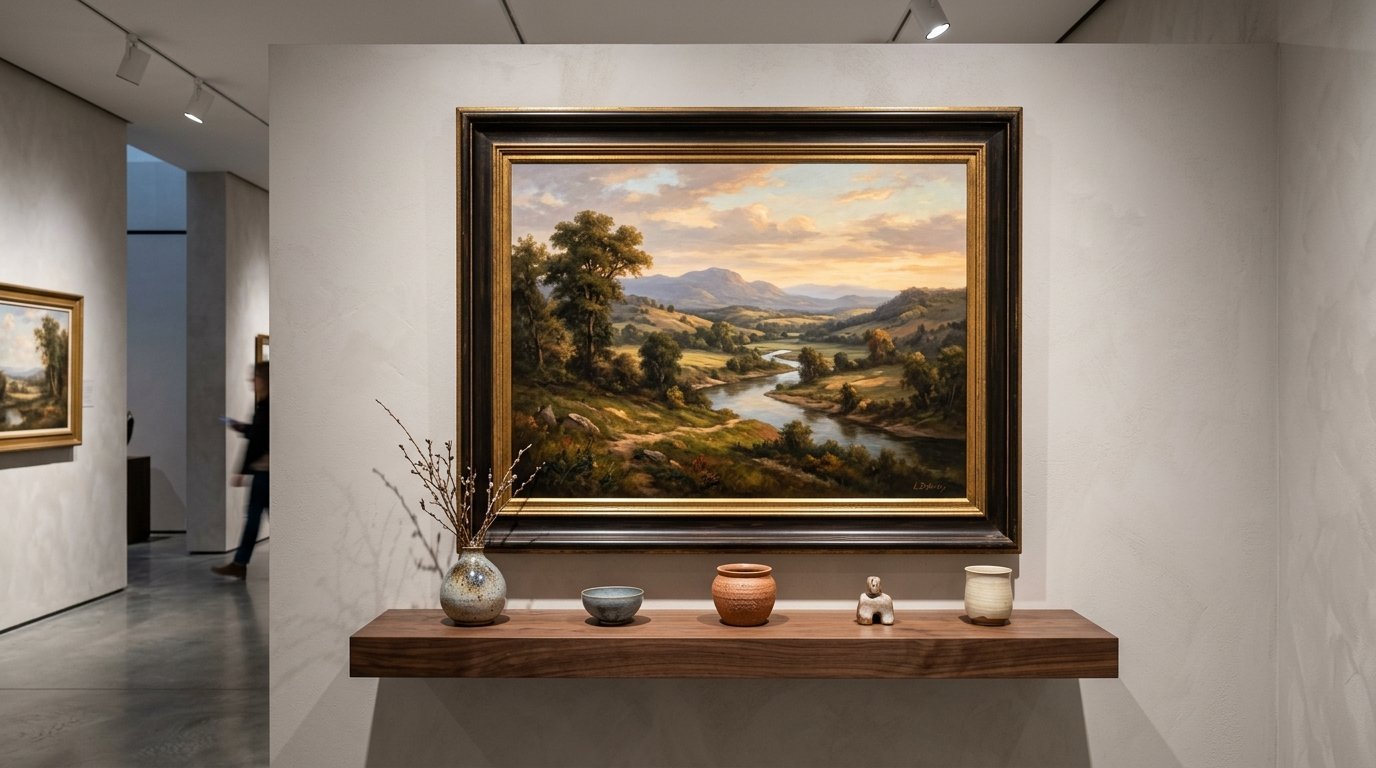
Do not let your decor stop at the edge of the wood plank. Extend the visual story onto the surrounding wall.
Hang a large piece of art on the wall just above the plank. Let the bottom frame of the art drop an inch below the shelf line.
Place smaller items on the plank directly in front of the hanging art. This weaves the wall and the shelf into a single cohesive installation. It makes the shelf look built-in rather than floating.
11. Minimalist Negative Space
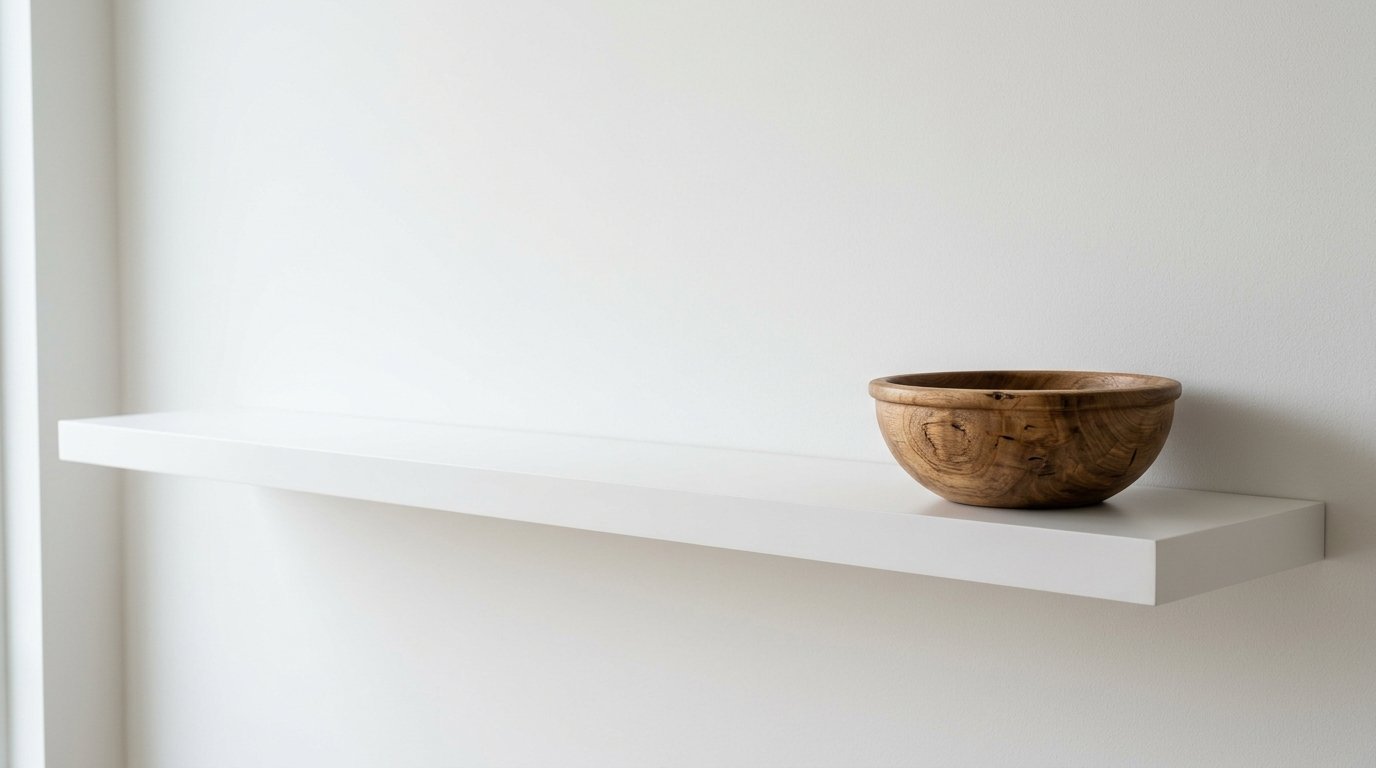
An overstuffed display looks messy. Empty space has real design value. It gives your eyes a place to rest.
Leave one-third of your plank completely blank. Do not feel the need to fill every square inch.
If you have a beautiful, expensive hand-turned wooden bowl, let it sit alone on a plank. The empty space around the bowl highlights its shape and craftsmanship. It signals that the object is special.
12. Vintage Oddity Curation
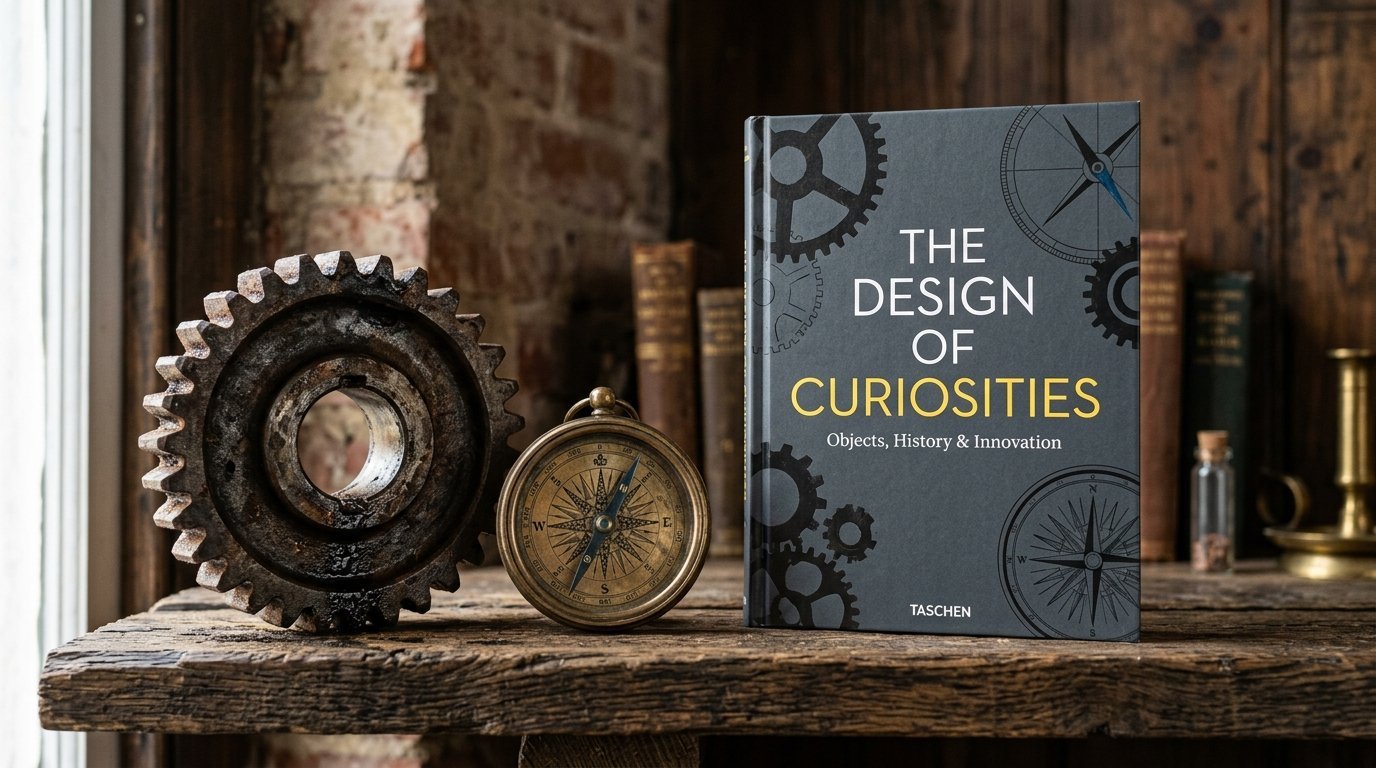
Mass-produced decor lacks soul. Personal spaces need objects that tell a story.
Incorporate thrifted finds, antique clocks, or old brass compasses. Look for items with a natural patina or worn edges.
I found an old iron gear at a garage sale three years ago. It sits next to modern design books on my wall. Visitors always ask about it. It acts as an instant conversation starter.
13. Linear Scent Stations
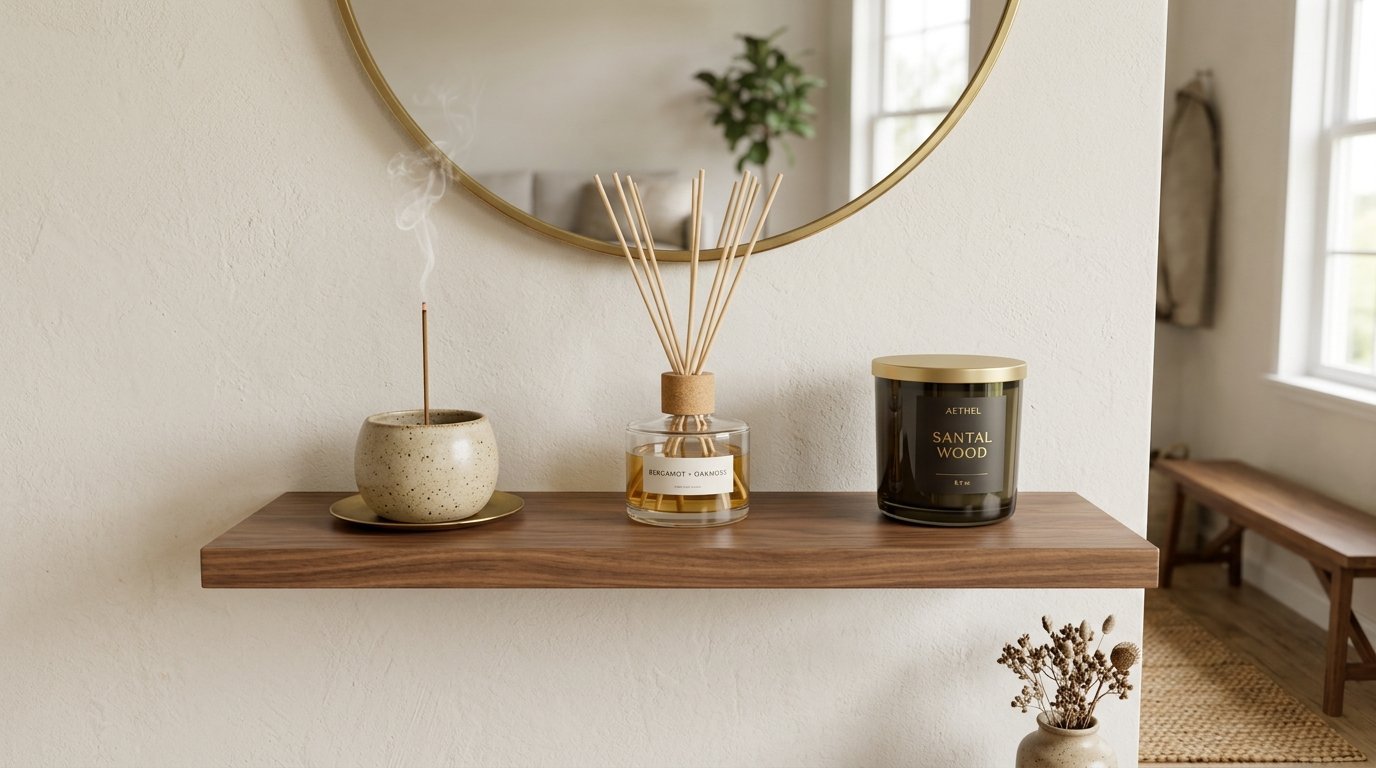
Functional items can serve as high-end decor when arranged correctly. Use your wall planks to hold your daily scent rituals.
Line up a ceramic incense burner, a sleek reed diffuser, and a minimalist candle jar. Keep the vessels in the same material family.
This layout works beautifully in entryways or bathrooms. It provides a visual treat while scenting the air. Keep the matches in a small decorative stoneware dish next to the candles.
14. Linear Kitchen Spice Rails
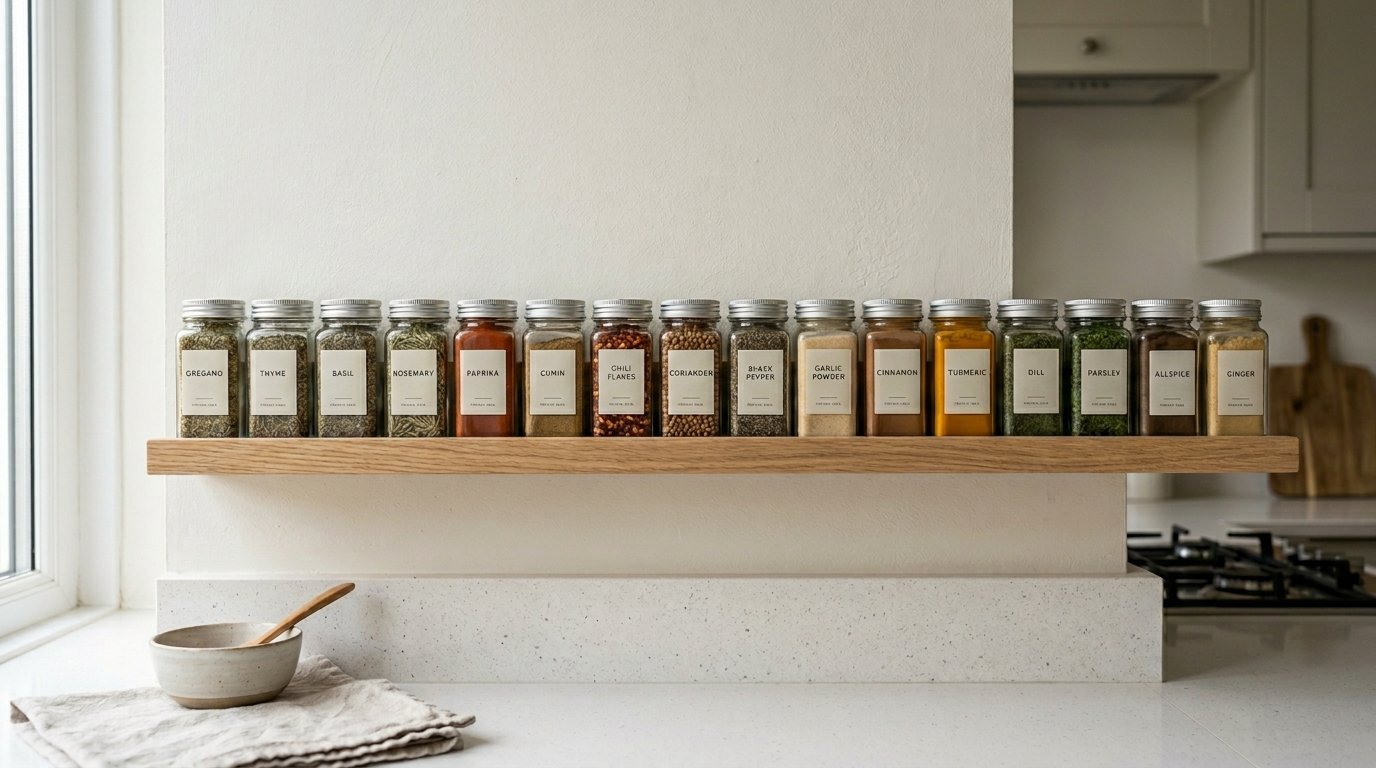
Kitchen planks demand utility. You can turn everyday cooking ingredients into a striking design feature.
Transfer dried spices into identical glass jars with clean, waterproof labels. Arrange them alphabetically or by color tone along a low plank.
The repetition of uniform jars creates a satisfying graphic pattern. It mimics the look of a luxury pantry. This layout saves counter space while keeping essential ingredients within arm’s reach.
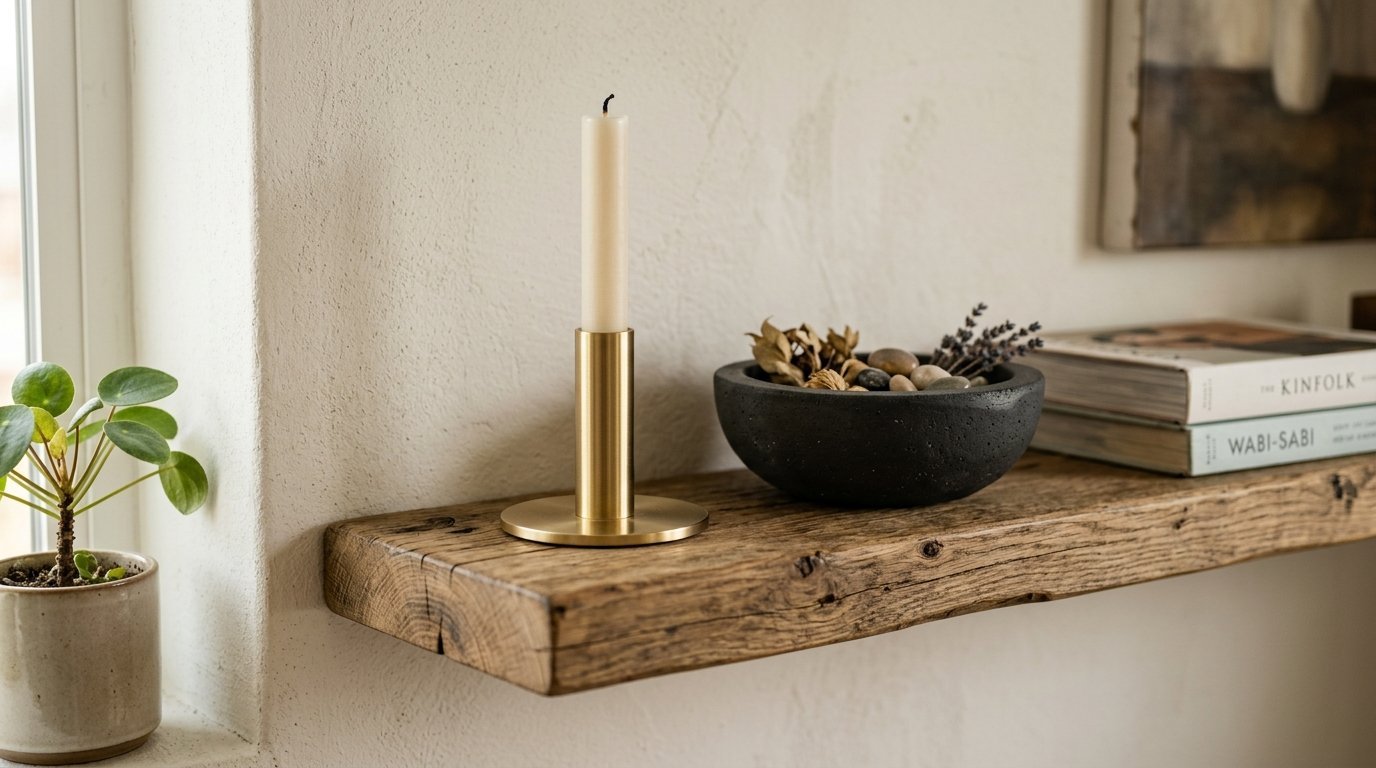
15. Cozy Bedroom Ceramic Sets
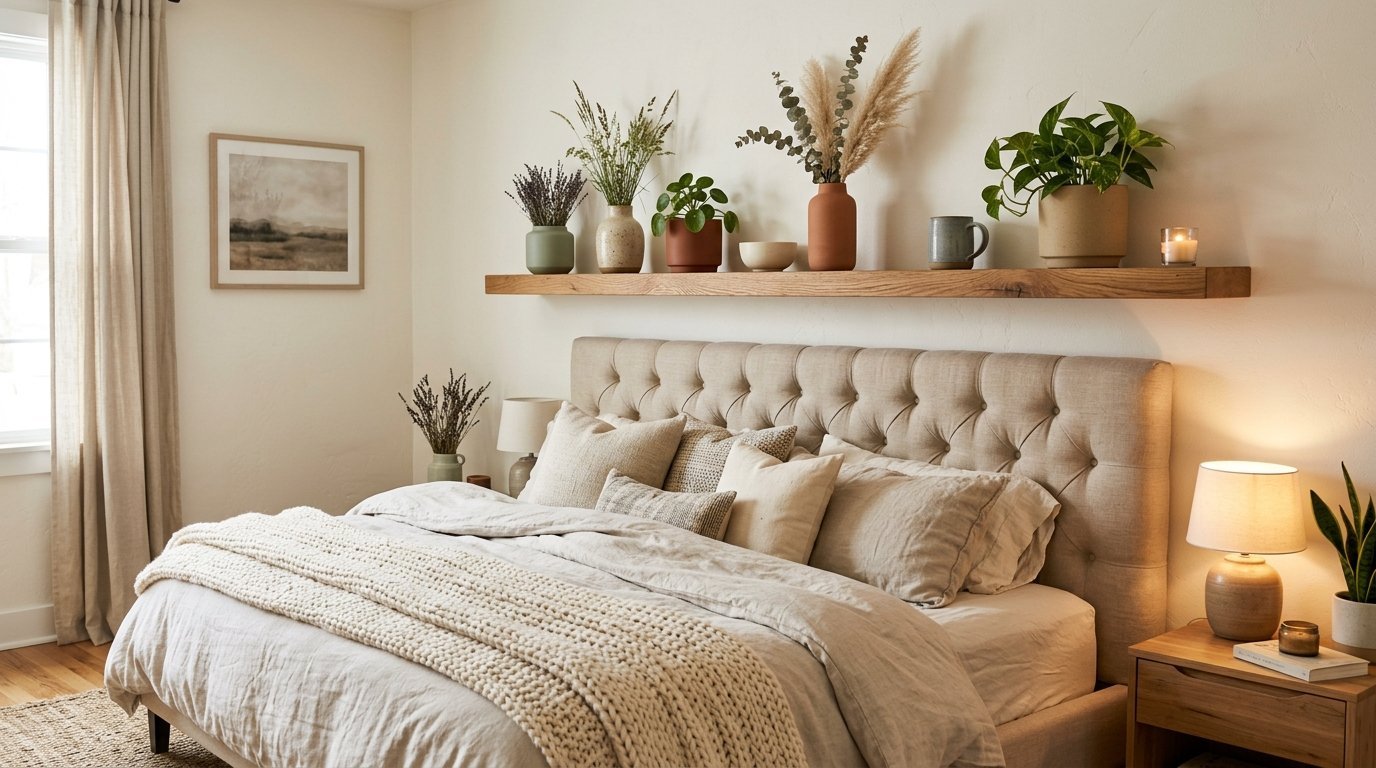
Bedrooms require soft, calming visual inputs. Avoid sharp metal or bright colors near the bed.
Select low-profile ceramic pots in matte finishes. Use shades of soft gray, terracotta, or warm tan.
Leave the vessels empty or add a few stems of dried lavender. The simple shapes promote relaxation. I prefer placing these on a single long plank directly above the headboard.
16. Vertical Plate Displays
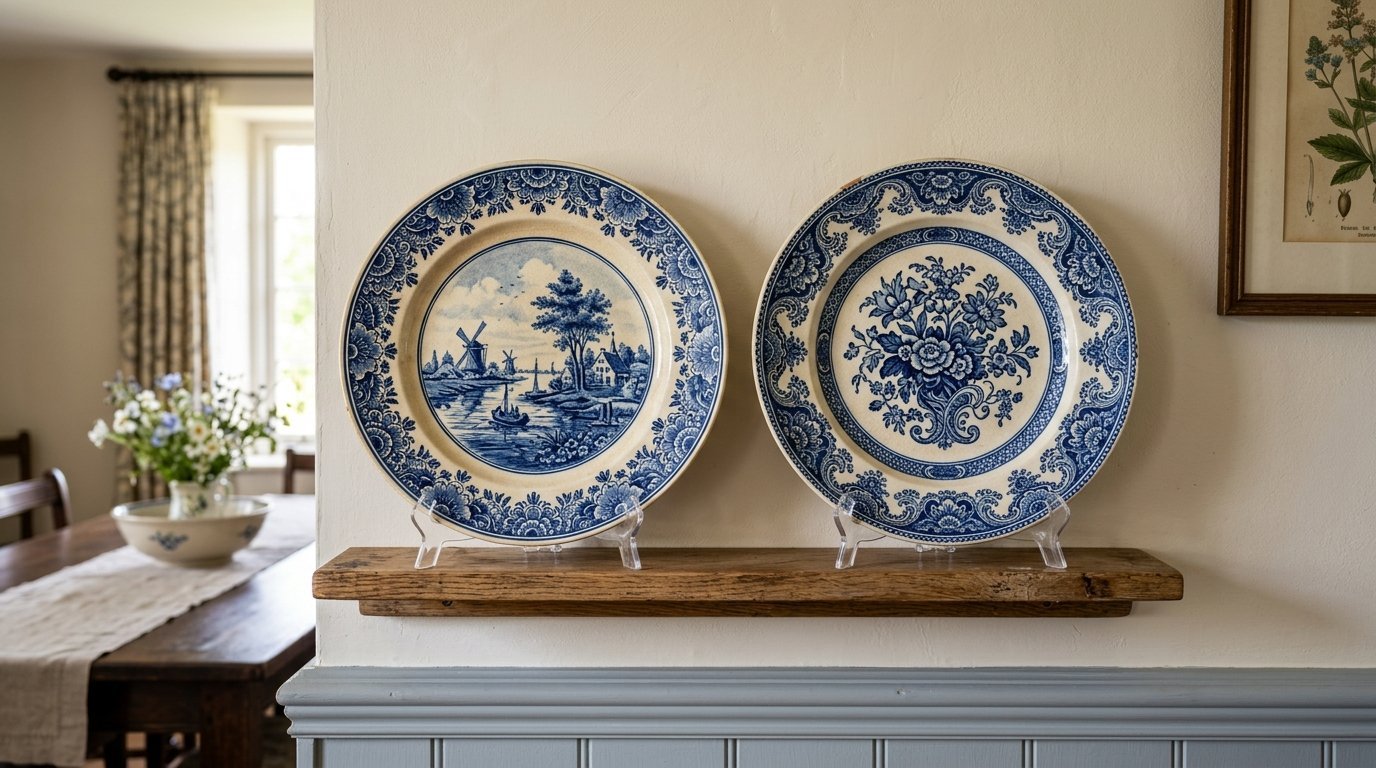
Plates are art pieces when lifted off the dining table. Use vintage ceramic platters or painted clay saucers.
Rest the plates against the back wall on the plank. Use small, hidden acrylic stands to prevent them from sliding forward.
Overlap a smaller salad plate slightly in front of a larger dinner platter. Choose pieces with intricate rim details. This adds a classic, historic feel to a dining room wall.
17. Botanical Specimen Jars
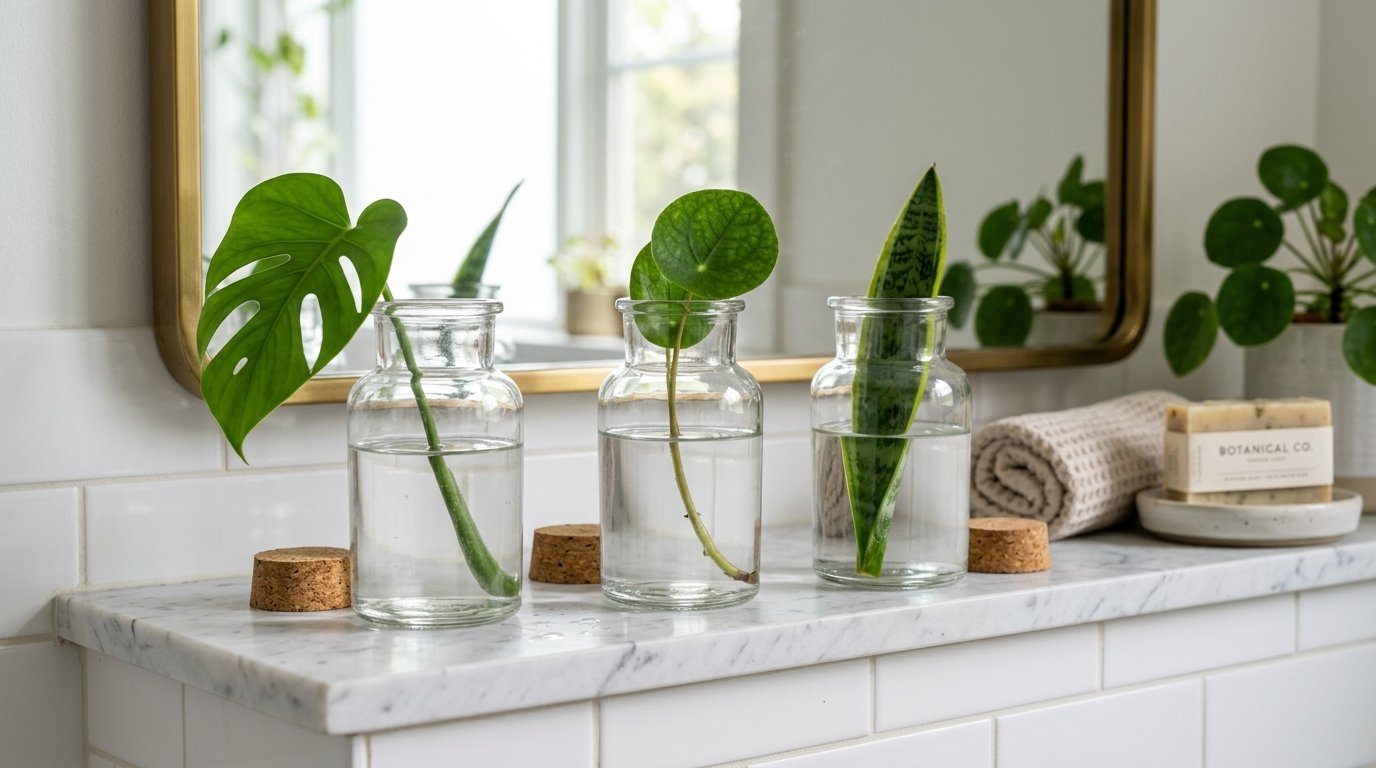
Bring the outdoors inside with a scientific twist. Use clear glass vials to display single plant cuttings.
Fill three matching glass jars with water. Place a single monstera leaf, a fern frond, and an eucalyptus stem in each jar.
The clean water and green stems look crisp against a white wall. This layout is inexpensive to create and easy to refresh. Change the water weekly to keep the display looking crystal clear.
18. Hanging Textile Backdrops
Break up hard surfaces by adding woven fibers behind your shelves. Textiles soften the entire room.
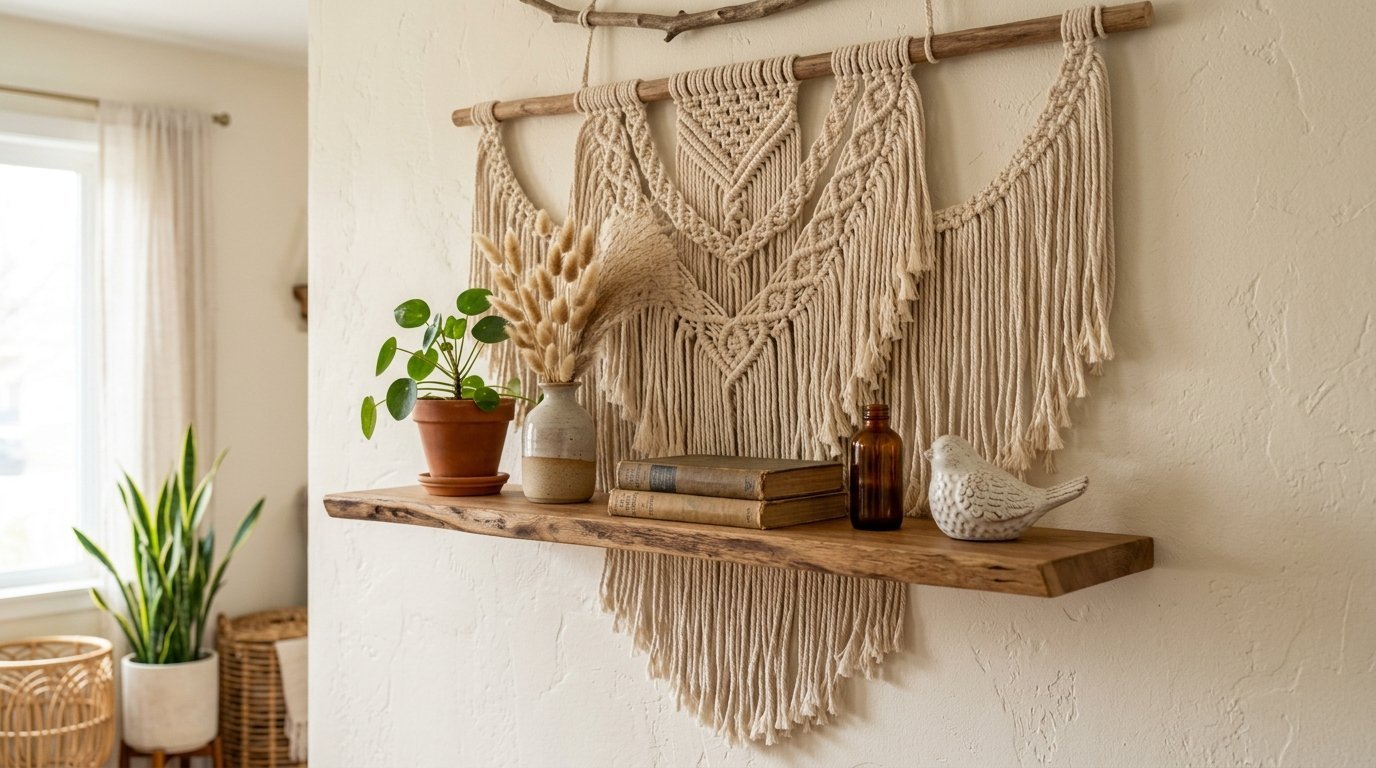
Hang a small woven tapestry or a macrame piece on the wall. Mount your floating plank directly over the lower section of the textile.
The fringe hangs down behind the items on the shelf. This creates a rich, multi-layered background. It works exceptionally well in bohemian or eclectic spaces.
19. Low Profile Gallery Ledges
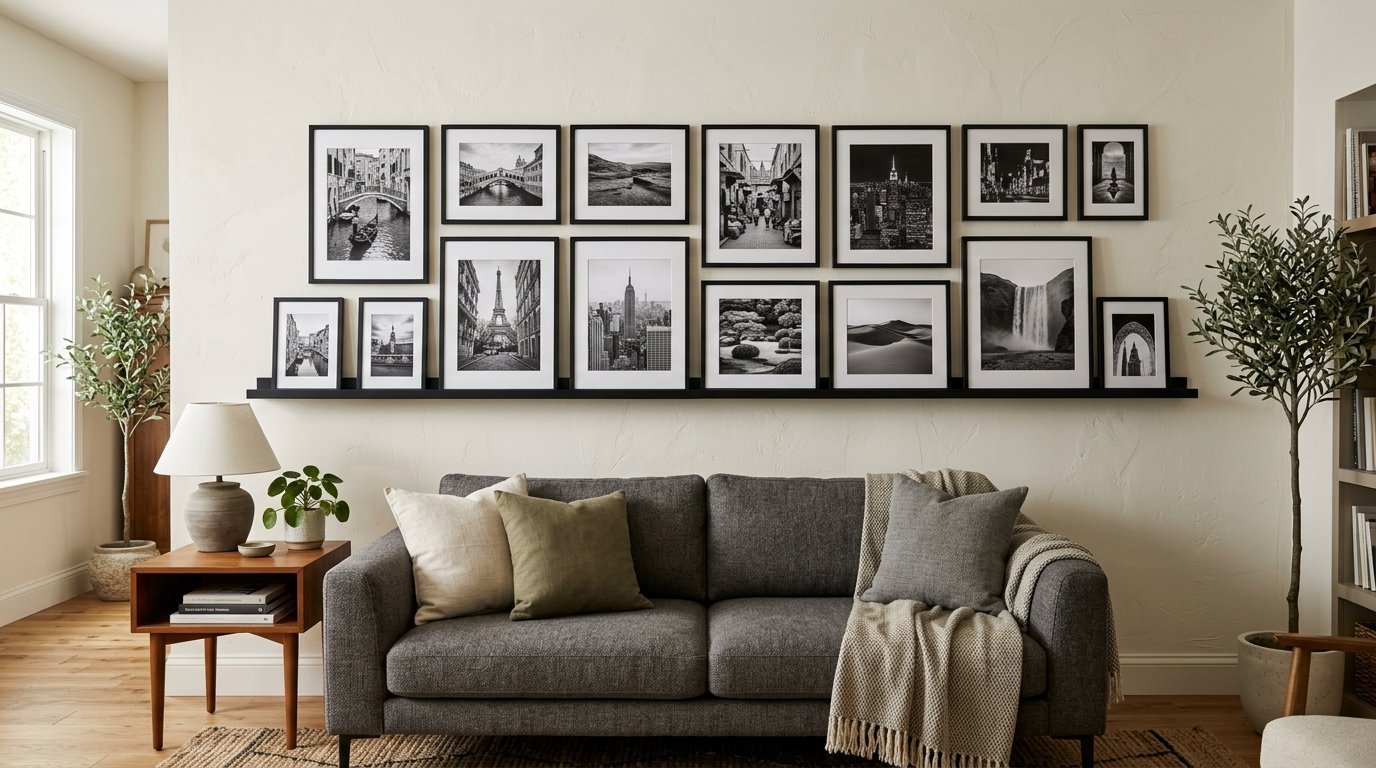
Long, shallow planks are perfect for holding thin items. Use a ledge with a front lip to secure frames safely.
Line up six to eight black frames along a single ten-foot wall plank. Keep the frames identical in size for a modern look.
Fill the frames with personal black and white family travel photos. The consistent framing makes the collection look like a professional art exhibition. It keeps photos organized without cluttering side tables.
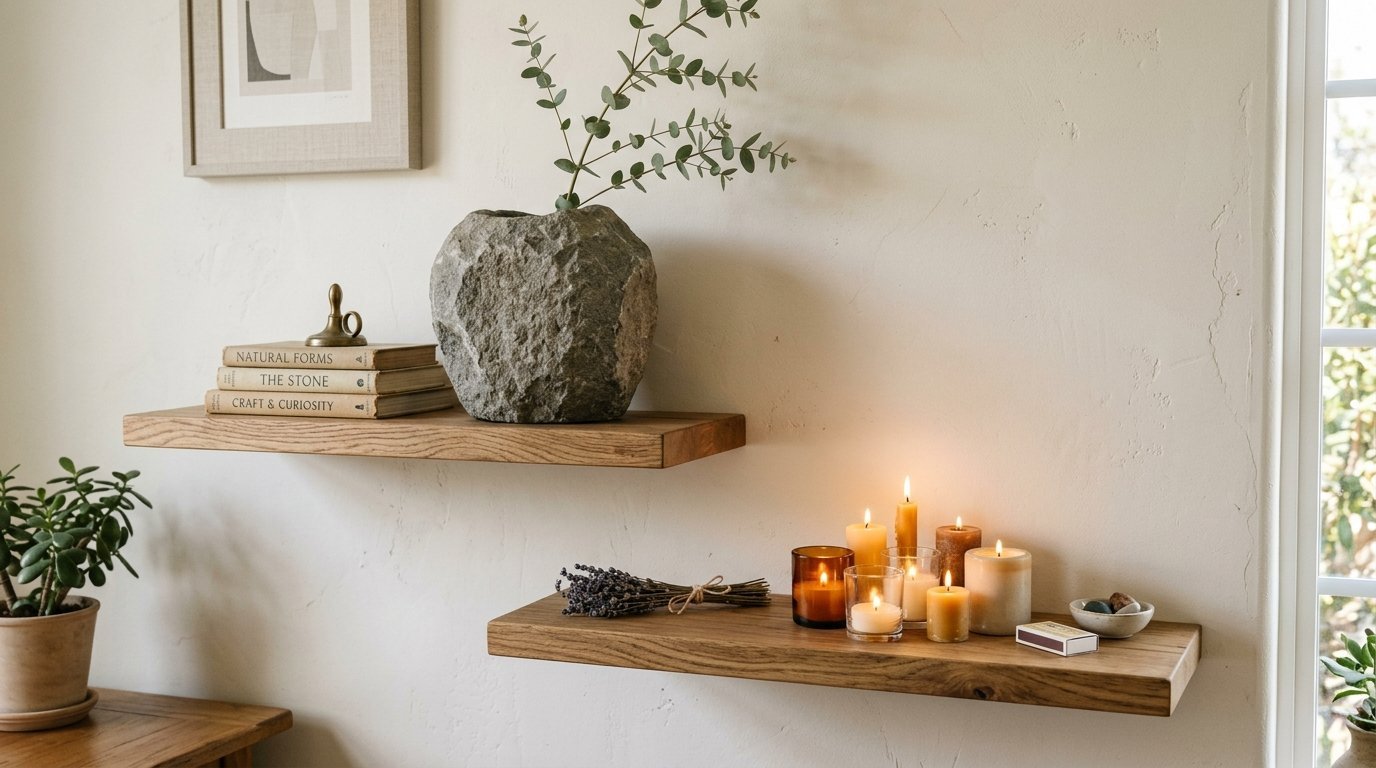
20. Sculptural Coral and Stone
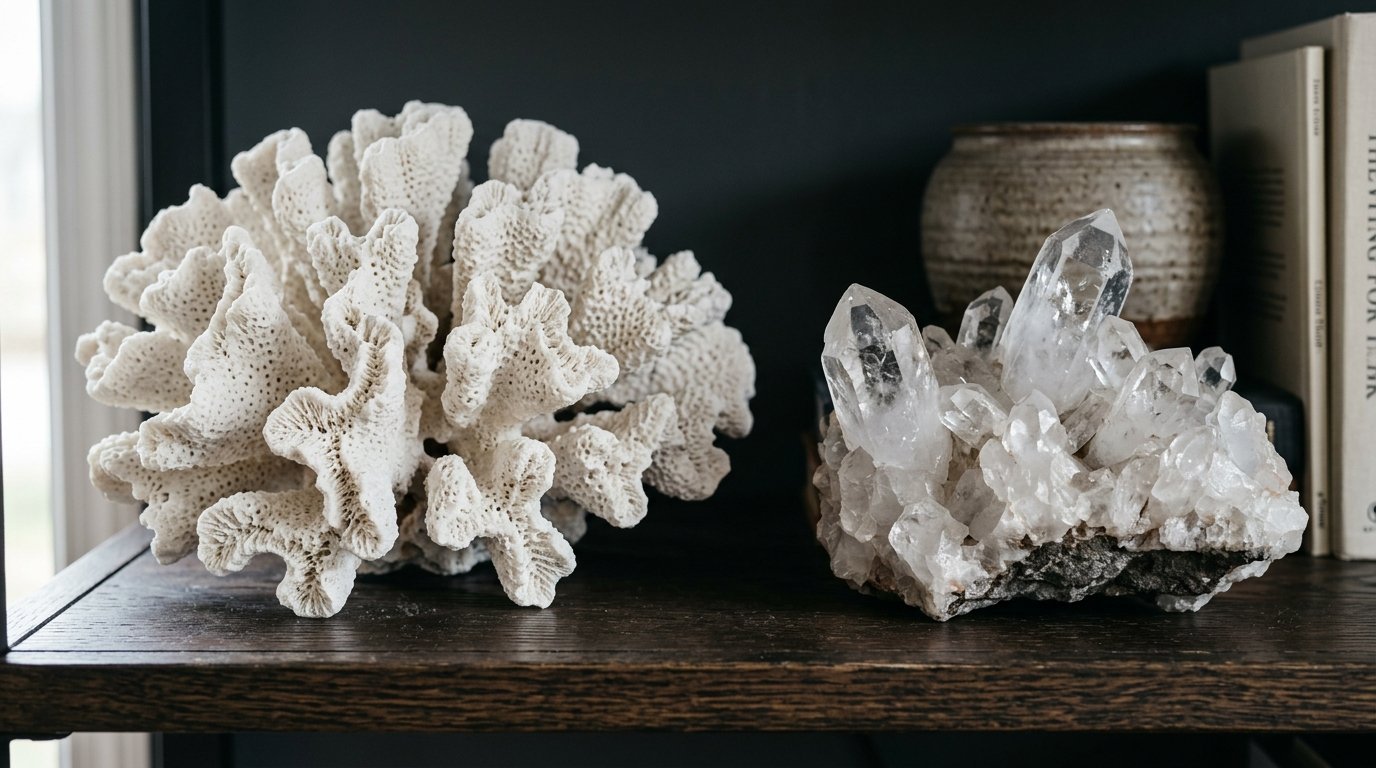
Natural elements have irregular shapes that contrast with straight shelves. Use ocean or mountain finds.
Place a large piece of white sea coral on a dark wood plank. Put a heavy chunk of raw quartz crystal next to it.
The jagged, unpredictable edges of the stone break the straight line of the shelf. These items do not feel dated because nature never goes out of style. They add an organic luxury to the wall.
21. Illumination Under-Glow
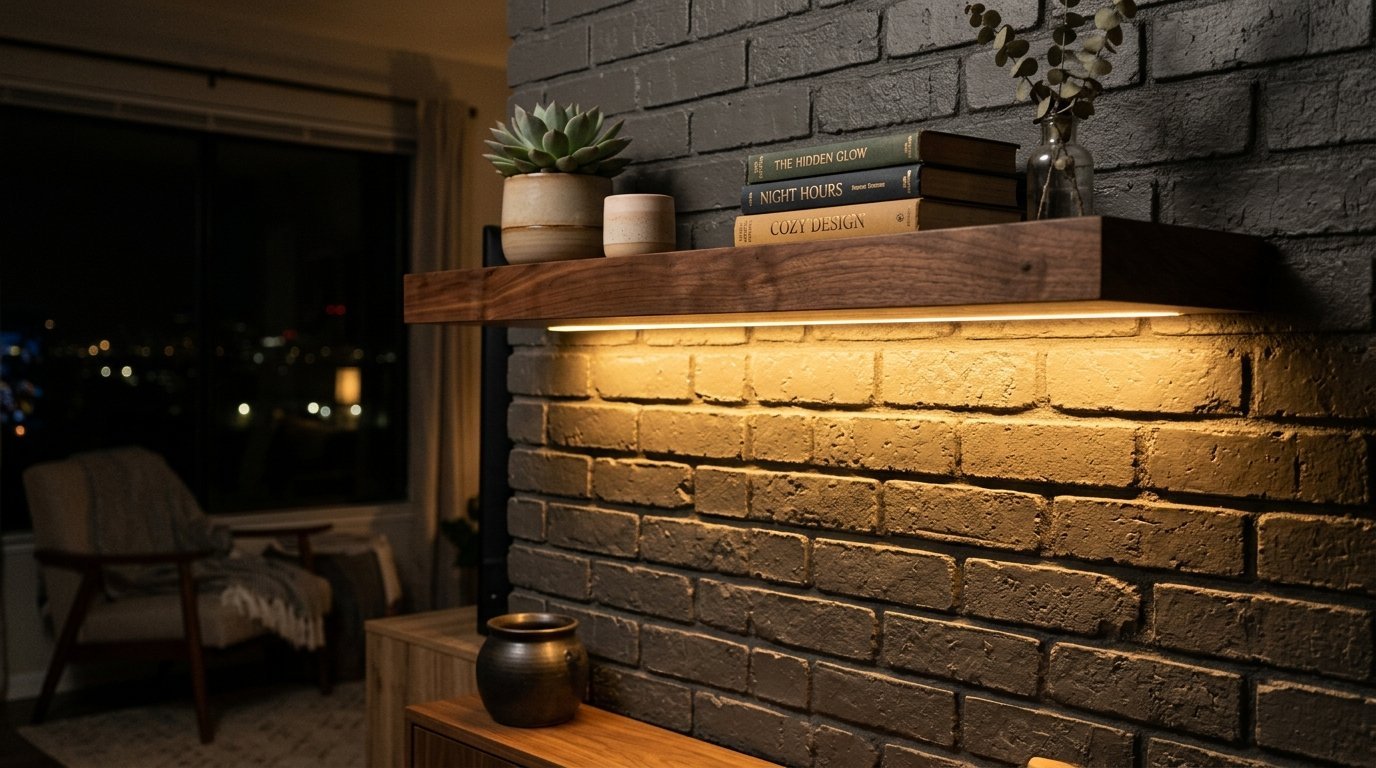
Lighting changes how object shapes appear. Add hidden light sources to create drama at night.
Install a slim, rechargeable LED light strip underneath the bottom of your floating plank. Direct the light downward along the wall.
The soft glow washes down the wall surface and highlights textures. It creates a floating illusion for the shelf itself. Use a warm light tone around 2700 Kelvin to keep the room feeling cozy.
22. Balanced Mirror Insets

Mirrors expand small rooms by bouncing light across the walls. Use a round mirror to break up boxy layouts.
Place a small, round framed mirror on the shelf, leaning against the wall. Position it on the right third of the plank.
Balance the mirror by placing a stack of horizontal books on the left side. The mirror reflects the opposite side of the room, adding instant depth to your display.
23. Leather Strap Suspensions
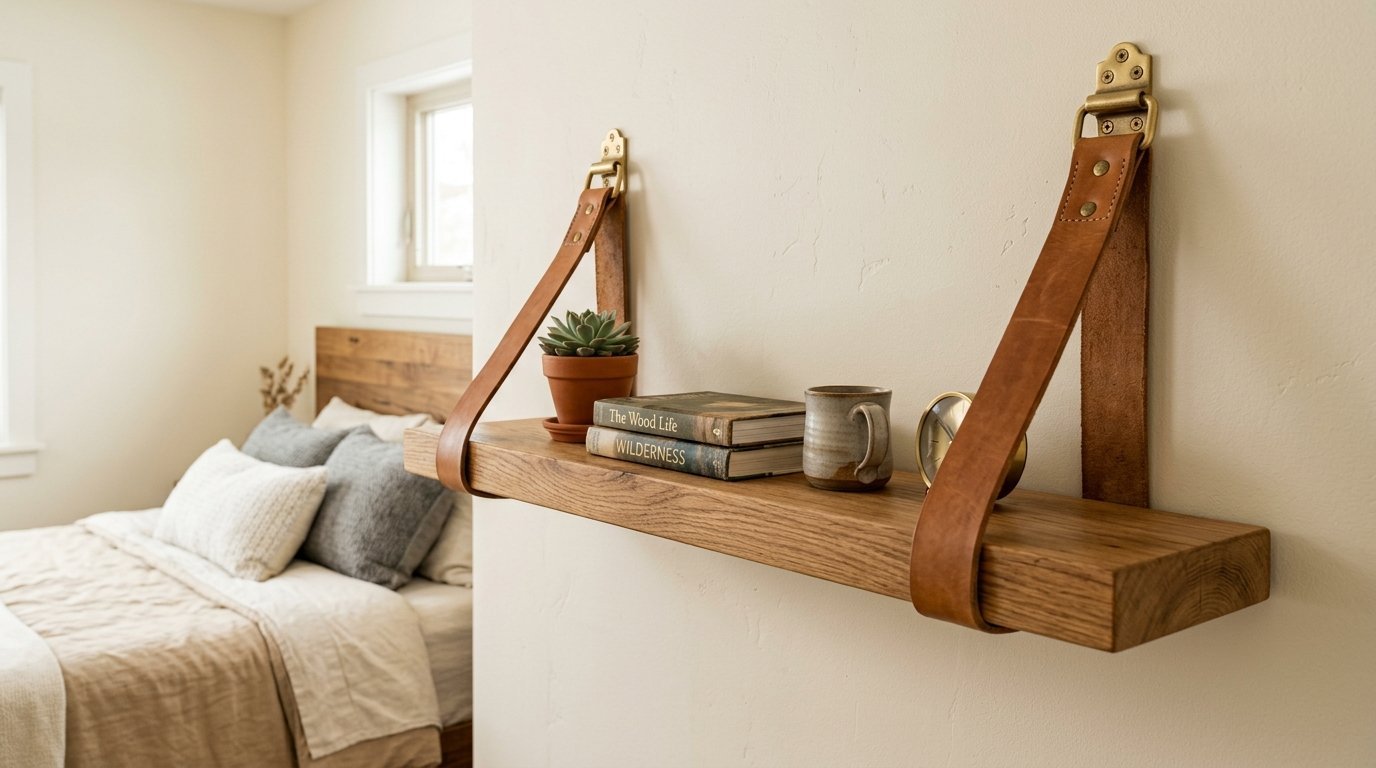
The mounting hardware can become part of the design. Use thick leather loops to support your wooden planks.
Secure two heavy tan leather straps to the wall studs. Slide a raw oak plank through the loops.
The contrast between the soft leather and the hard wood looks tailored and high-end. This style works exceptionally well in rustic, industrial, or Scandinavian spaces. It adds a handcrafted touch to the wall.
24. Graphic Typography Elements
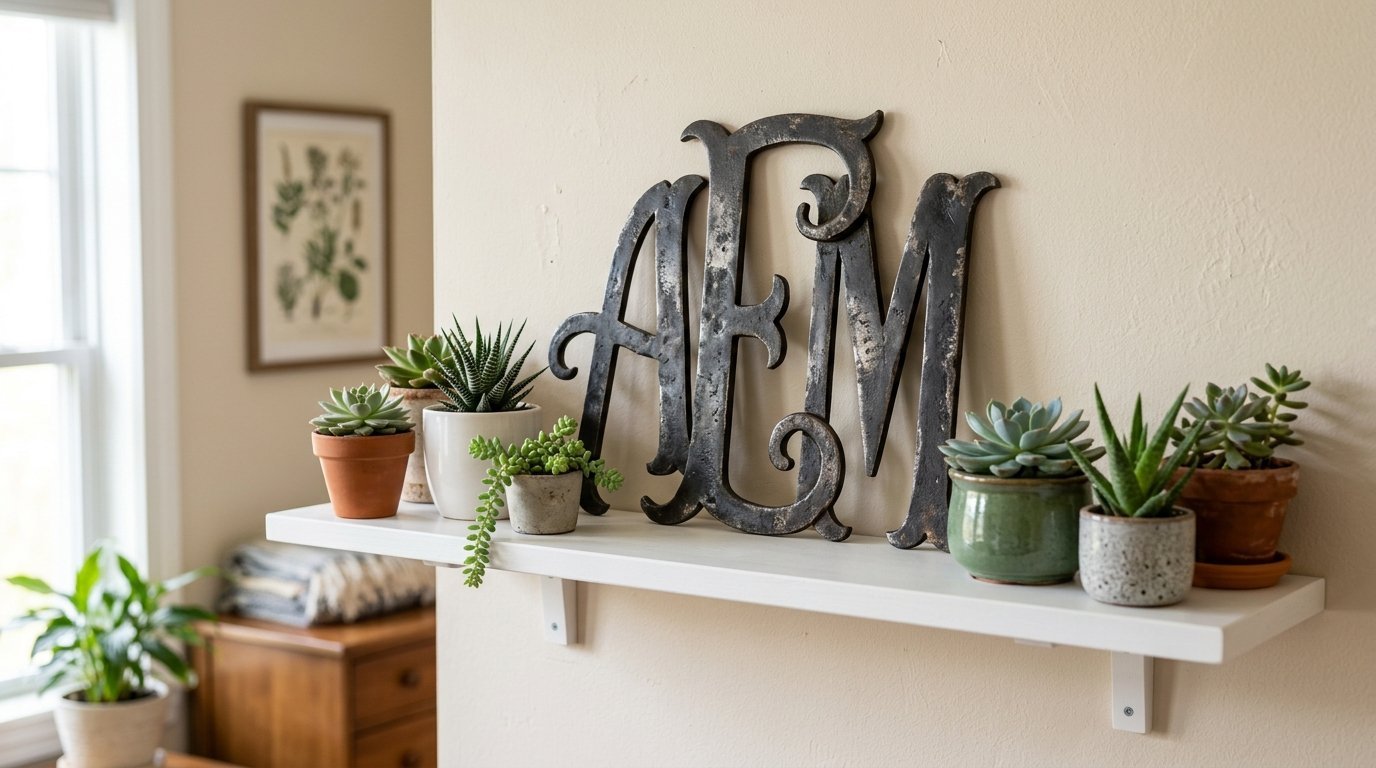
Add an industrial edge by incorporating bold lettering. Vintage signs or graphic prints work well.
Place a single large metal letter on the shelf. Use the first letter of your family surname for a personal touch.
Surround the graphic letter with soft items like small plants or candles. The sharp, clean lines of the typography give the display a modern, editorial feel.
25. Seasonal Nature Rotations
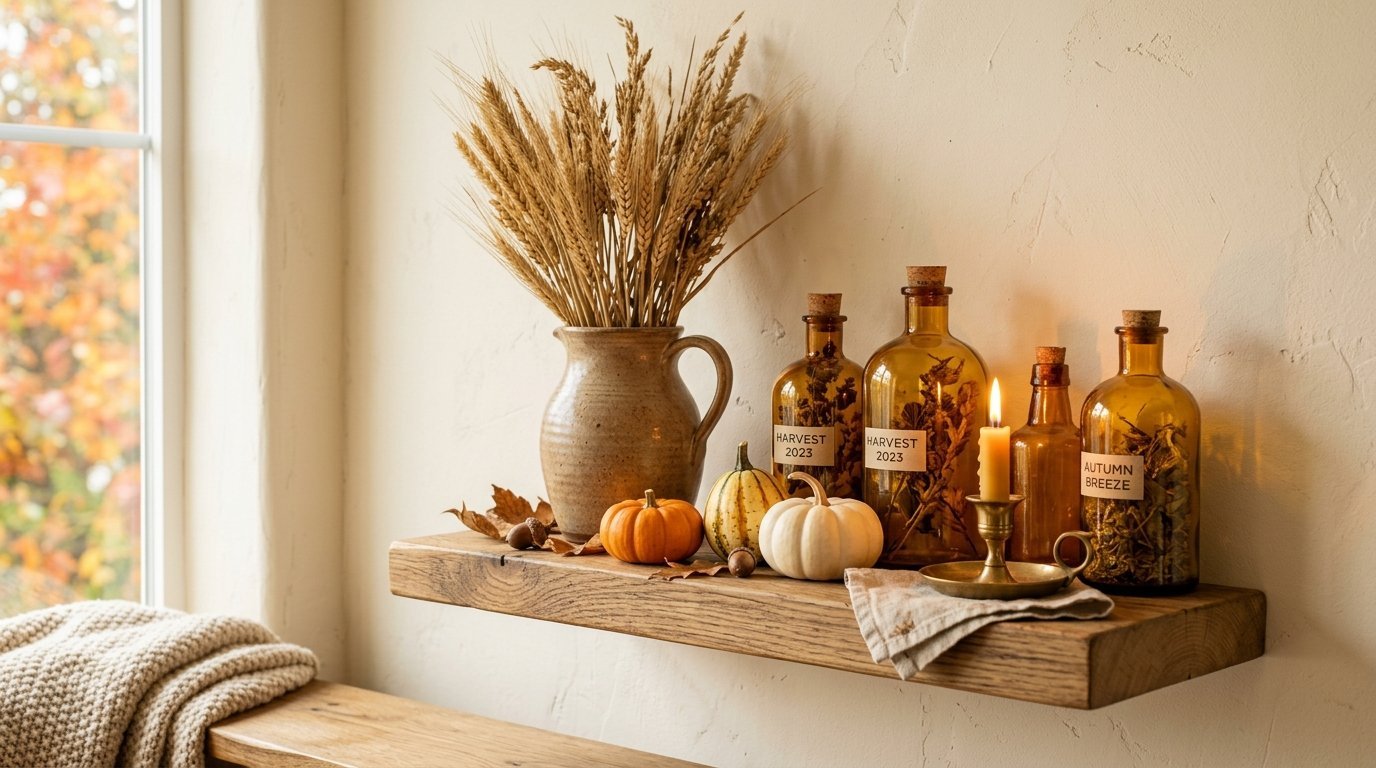
Keep your home feeling fresh by changing your decor with the weather. Rotate your shelf items four times a year.
Display fresh flowers and pale ceramics in the spring. Swap them for pieces of driftwood and green glass jars in the summer. Use dried wheat stalks and amber bottles in autumn. Pinecones and brass brass accents fit winter perfectly.
This small rotation keeps your home aligned with the natural world outside. It prevents your wall display from ever feeling stale or forgotten.
Interior Design Your Home: Material and Tool Guide
Choosing the right materials determines the safety and beauty of your wall shelves. The wrong anchor can cause your entire display to pull out of the drywall.
| Material Type | Weight Capacity | Best Visual Style | Ideal Room Placement | Cost Range |
| Solid White Oak | Up to 50 lbs | Modern, Scandinavian | Living Rooms, Bedrooms | $60 – $120 |
| Reclaimed Barn Wood | Up to 45 lbs | Rustic, Industrial | Dining Rooms, Kitchens | $45 – $90 |
| Tempered Glass | Up to 20 lbs | Minimalist, Glam | Bathrooms, Sleek Offices | $30 – $65 |
| Painted MDF | Up to 30 lbs | Traditional, Clean | Nurseries, Closets | $15 – $40 |
Essential Installation Tools
- Digital Stud Finder: Essential for locating wood studs behind drywall.
- Torpedo Level: Ensures your shelves do not slant or slope.
- Toggle Bolts: Use these heavy-duty anchors when studs are unavailable.
- Laser Level: Perfect for lining up multiple shelves across a wide wall.
Common Shelf Styling Failure Points
Styling shelves is a process of trial and error. Most homeowners make three common mistakes when setting up their vertical displays.
The Barcode Effect
This happens when you line up books or objects of identical height in a straight row. It creates a boring, repetitive line that tires the eye. Break this up by inserting a round bowl or a short stack of horizontal books to change the rhythm.
Overcrowding the Planks
Packing too many small knick-knacks onto a single shelf creates visual clutter. It looks messy from across the room. Remove forty percent of the items. Group the remaining objects into distinct clusters with open space between them.
Ignoring Weight Distribution
Placing all your heavy, dark objects on the top shelf makes the installation look top-heavy. It causes subconscious anxiety for people sitting underneath. Position your largest, darkest, and heaviest items on the bottom shelf. Place lighter glass and smaller items near the top.
Frequently Asked Questions
How do I choose the right height to hang my floating shelves?
Hang your main shelf at eye level. This is usually between 58 and 62 inches from the floor. If you are mounting shelves above a sofa, leave 10 to 12 inches of space between the top of the sofa back and the bottom of the lowest shelf. This prevents people from bumping their heads when they sit down.
Can I mix different wood tones on the same wall display?
Yes. You can mix wood tones if they share the same undertone. Keep all woods either warm-toned or cool-toned. Do not pair a yellow-toned oak shelf with a pink-toned cherry wood frame. Pair a dark walnut shelf with light maple accents for a clean, high-contrast look that feels deliberate.
What is the easiest way to hide ugly shelf brackets?
Buy true floating shelves that utilize an internal metal bracket system. These brackets slide completely inside pre-drilled holes in the back of the wood plank. The bracket becomes entirely invisible once pushed flush against the wall. This creates a clean, magical look.
How do I dust a complex shelf display without ruining the layout?
Take a quick photo of your styled shelves on your phone before you begin cleaning. Remove all the items to dust the wood surface with a microfiber cloth. Use your phone photo as a visual blueprint to return every object back to its exact place in seconds.
Should I paint my shelves the same color as my wall?
Painting your shelves the exact color as your wall creates a seamless, built-in look. It makes the shelves blend in, pushing the focus entirely onto the colorful objects you display. Use a satin or semi-gloss finish on the shelves so they are easy to wipe clean
Conclusion
Transforming an empty wall from a cold afterthought into a designer feature relies entirely on foundational styling rules. By leaning frames, stacking books horizontally, grouping by threes, and utilizing empty space, you eliminate visual clutter. The perfect mix of natural woods, smooth ceramics, and reflective glass brings professional balance to your home layout. Use the 25 specific arrangements detailed here to create a captivating vertical story that feels collected, curated, and fully complete.

Anya Castellan is the Founder and Editor-in-Chief of Home Wall Trends. An art history graduate of the Rhode Island School of Design with twelve years of experience writing for leading American design publications, she specializes in composition, gallery wall theory, and the quiet architecture of domestic space. A former contributing editor at Architectural Digest and guest lecturer at Parsons School of Design, Anya personally reads and signs off on every piece before it is published.