
Last Tuesday I watched a client spend three hundred dollars on custom oak slabs. She mounted them directly into drywall without anchors. The next morning her entire display crashed onto the floor. Ruined drywall and broken glass everywhere. I see this exact mistake weekly. People buy beautiful hardware but skip the basic math of weight distribution. You want that clean aesthetic look for your walls. You want your space to feel airy and open. I have installed over two hundred hidden bracket systems. I will show you exactly what works. You will get it right the very first time.
You will master the exact steps for picking and hanging hidden brackets. I share my personal blueprints for finding wall studs without expensive tools. We will cover weight limits and bracket styles. You will know exactly which hardware holds ten pounds versus fifty pounds. I give you a clear cost breakdown covering fifteen dollar budget buys up to two hundred dollar premium oak slabs. You will see how to blend these pieces with your existing cupboard design perfectly. I also share my strict cleaning routine for keeping mirrored or glass displays spotless. You will save time and money. You will skip the common failures that ruin drywall. Your home hall design will look professionally styled. This guide gives you the exact blueprint I use for every single installation.
The Hidden Bracket System Explained
How Invisible Hardware Actually Works
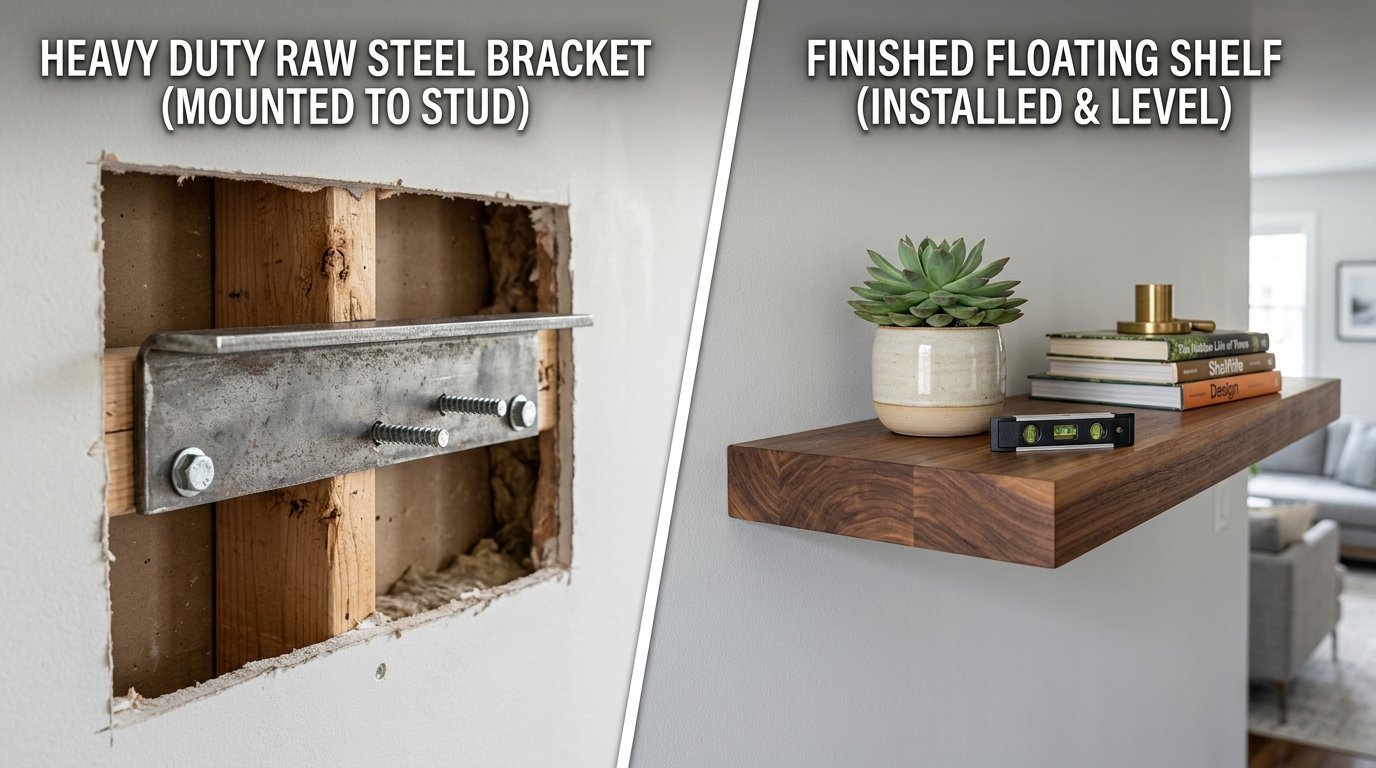
People think floating pieces defy gravity. They do not. A heavy metal bracket hides inside the wood. You bolt this bracket directly to your wall framing. The wood slips over steel rods extending from the plate. The tight fit creates the illusion of floating.
I have tried flimsy plastic anchors. They always fail. You need solid steel for any real weight. The rods must be at least six inches long. The back plate must sit flush against your drywall. I always tell my clients to buy the hardware before they buy the wood. You need to know the bracket dimensions first. This is a basic rule for easy woodworking projects.
Weight Limits You Must Believe
Drywall holds almost nothing. One drywall anchor might hold five pounds safely. A single steel rod bolted into a wood stud holds fifty pounds. I tested this in my own living room last year. I loaded books onto a hollow core piece. It sagged within three days.
I switched to a solid pine block on steel rods. It holds sixty pounds of hardcover books perfectly today. You must weigh your items before buying anything. Books weigh more than you think. Small potted plants get heavy after watering. Kitchen dishes stack up fast. Plan for double the weight you think you need.
Picking the Right Wood Material
Solid hardwood is heavy but stays straight. Pine is cheap but warps over time. MDF is heavy and sags if not supported correctly. Hollow core looks thick but holds very little weight.
I prefer solid walnut for a classy bedroom feel. I use cheap pine for basic garage storage. You must match the material to the room. Kitchens need waterproof finishes. Bedrooms need warmer tones. Your interior design your home choices dictate the material. I bought cheap MDF for a bathroom once. The moisture ruined it in four months. I only use sealed hardwood in wet rooms now.
Styling and Room Placement Plans
Upgrading Your Bedroom Decor
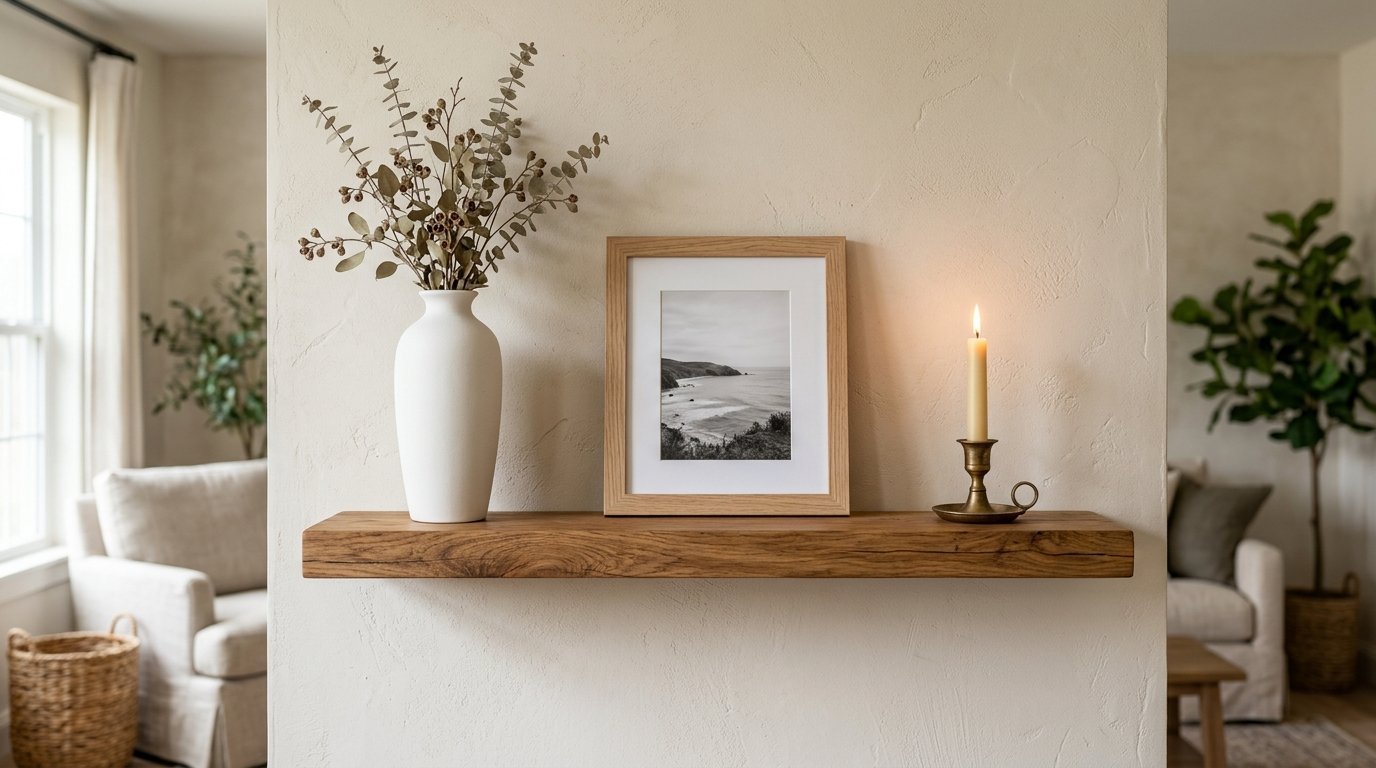
Your bedroom needs peace and order. A cluttered nightstand ruins sleep. I replace bulky nightstands with floating pieces. This clears floor space instantly. Room decor bedroom diy projects start here.
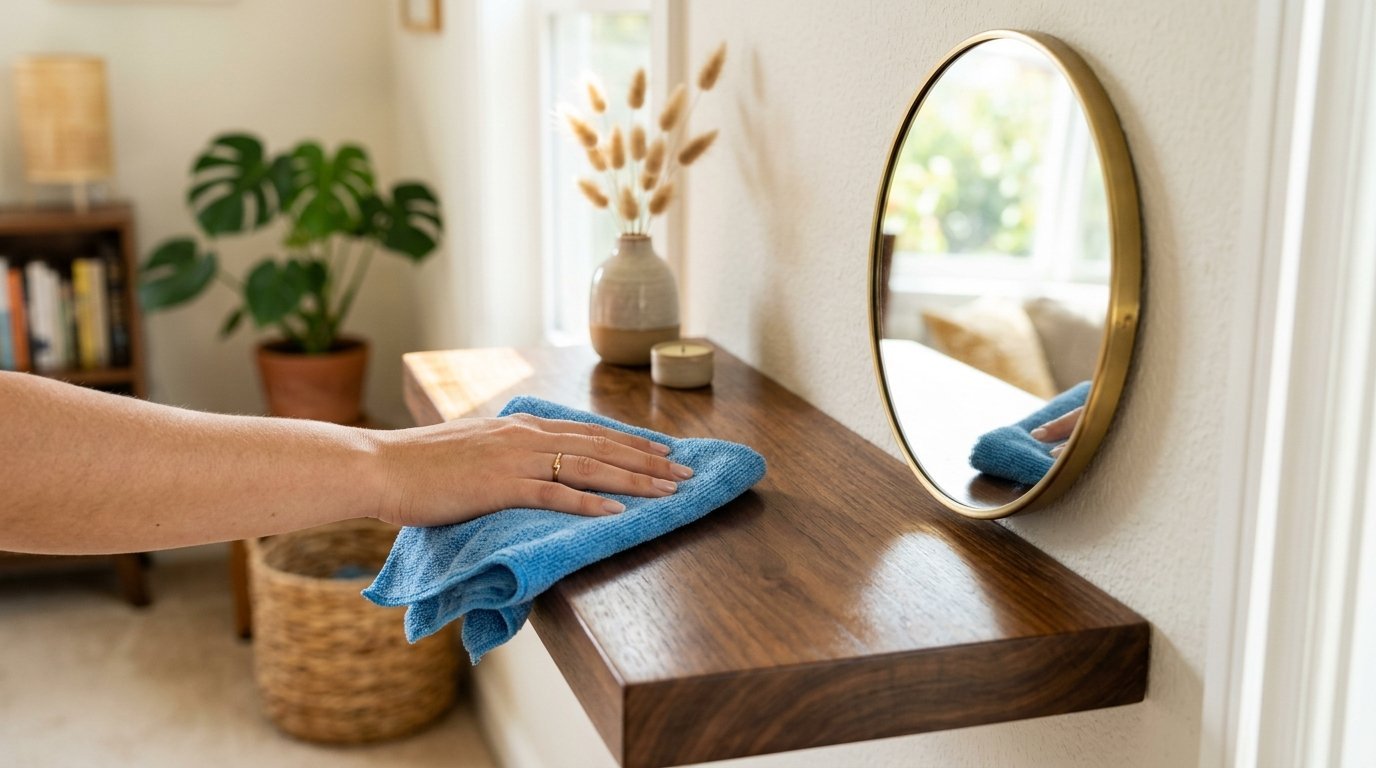
I place a small wooden slab exactly twenty inches above the floor. This matches the bed height perfectly. I keep styling minimal. One lamp and one book. A small ornate mirror looks great resting on the wood. I use a Norwex microfiber cloth to keep the glass dust free. I clean the mirror weekly with ninety percent rubbing alcohol. This melts away hairspray drops without damaging the delicate silver backing. Your high end styling pieces will last decades with this care.
Transforming Your Home Hall Design
Hallways feel narrow and dark. Big bookcases make them worse. Floating pieces fix this. You keep the floor completely clear. The hallway feels wider immediately.
I install them high up on the wall. About sixty inches from the floor works best. This keeps them out of shoulder traffic. I style these with small trailing plants. I place framed family photos in a straight line. This creates a clean look. You can match the wood finish to your floor. This ties the whole house together smoothly.
Matching Your Cupboard Design
Kitchens look heavy with too many closed cabinets. I always remove one upper cabinet. I replace it with two open slabs. This opens up the entire room.
You must match the thickness of your new slabs to your cupboard doors. If your doors are one inch thick then buy one inch thick slabs. This keeps the lines consistent. I paint the wood to match the cabinets exactly. Or I use a contrasting dark wood against white cabinets. This brings a modern farmhouse feel. You store daily items here. Coffee mugs and cereal bowls work perfectly.
Italian Living Room Inspiration
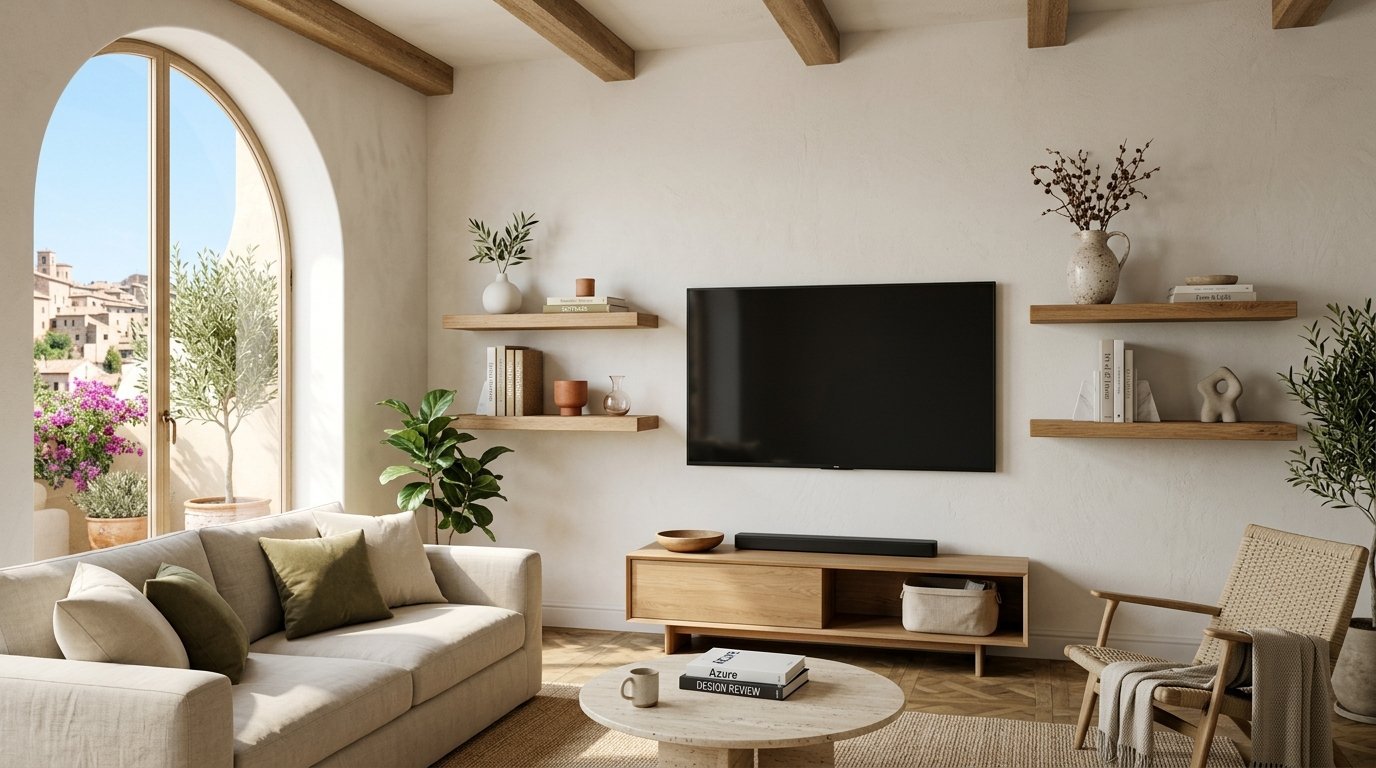
Idee arredamento soggiorno translates to living room furnishing ideas. Italian design loves clean lines. They mix old architecture with modern minimal furniture. Floating hardware fits this perfectly.
I use extra thick slabs in the living room. Three inches thick looks very high end. I place them flanking the television. Or I put up a staggered gallery wall. This breaks up a large blank space. The focus stays on your art and books. The hardware completely disappears.
Step By Step Installation Guide
Finding Your Wall Studs Without Fail
Stud finders lie all the time. I never trust my Zircon stud finder completely. I use a strong rare earth magnet. I slide the magnet slowly across the wall. It sticks to the drywall screws hidden under the paint.
Those screws are attached to the wooden studs. I mark that exact spot with a pencil. Studs sit exactly sixteen inches apart in most houses. I measure sixteen inches over and find the next screw. This trick never fails me. You will hit solid wood every time. This is the biggest secret for wall decor design.
Drilling and Securing the Hardware
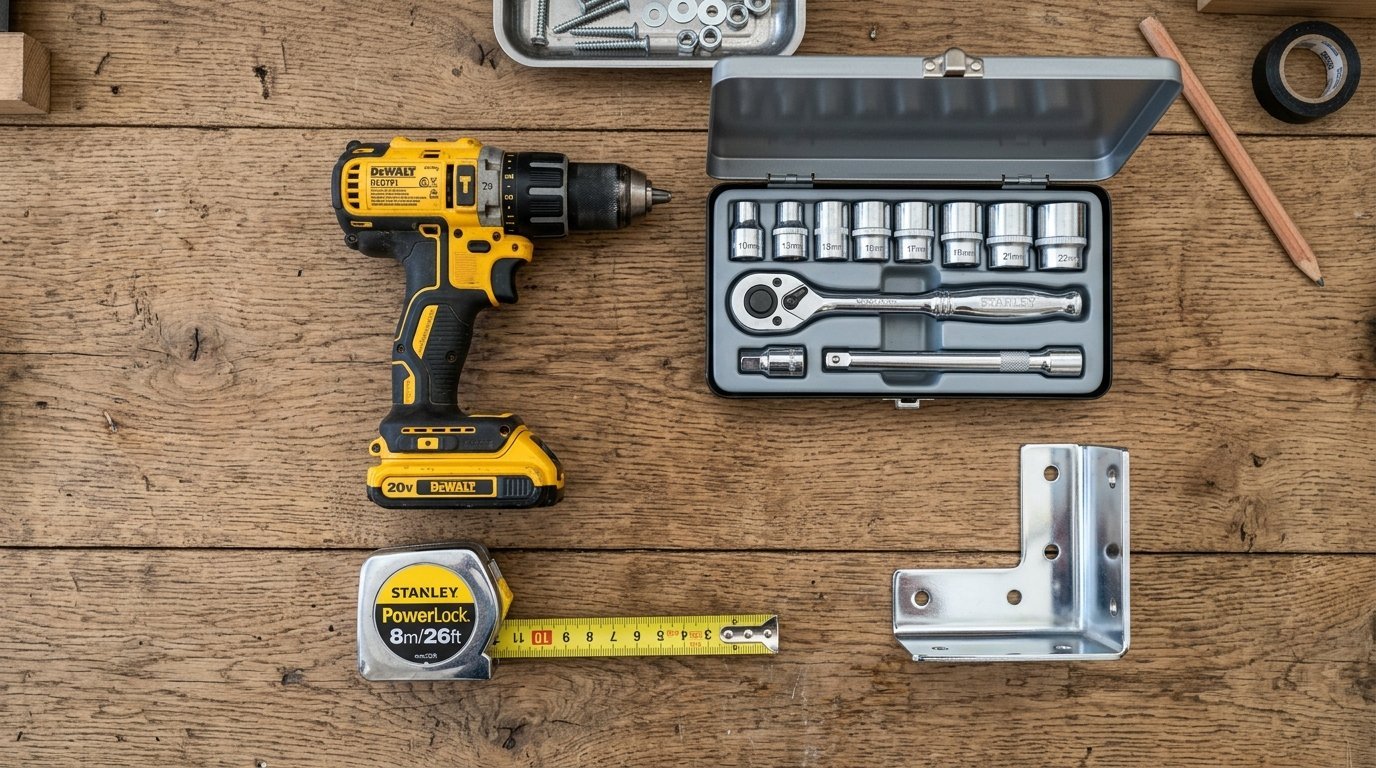
You need a power drill. Do not try this with a hand screwdriver. I use a DeWalt power drill with a wood bit slightly smaller than the lag bolt. This pilot hole stops the wood stud from splitting.
I hold the bracket against the wall. I check it with a bubble level. I mark the holes with a pencil. I drill my pilot holes three inches deep. I use a socket wrench to drive the lag bolts in tight. The bracket should not move even a millimeter. If it wiggles your shelf will sag.
The Leveling Trick I Rely On
A bracket might look level on the wall. The steel rods might not be perfectly straight. I place a small level directly on the steel rods before I slide the wood on.
If they aim down slightly I fix it. I put a tiny metal washer behind the bottom of the bracket plate. This tilts the rods up slightly. When I slide the heavy wood on it settles perfectly level. This takes two extra minutes. It saves you from things rolling off the edge later.
Keeping Everything Clean and Safe
My Strict Cleaning Routine
Dust collects fast on open surfaces. I dust every Tuesday morning. I use dry 3M microfiber cloths first. I never spray water directly onto the wood. Water ruins the finish over time.
If I have glass objects or small mirrors sitting there I clean them separately. I use Sprayway glass cleaner or Method for tough spots. Invisible Glass works great too. I spray the cloth not the glass. This stops liquid from running down into the wood finish. I care for my items safely. This prevents glass damage and silver rot on antique frames.
Watching for Long Term Sag
Gravity never stops pulling. You must check your hardware every six months. I place my level on the wood twice a year. If I see a tilt I act fast.
I remove the items. I slide the wood off the rods. I tighten the lag bolts into the wall. Wood shrinks and expands with seasons. Sometimes the bolts loosen slightly. Catching this early prevents a total collapse. If the drywall looks crushed behind the plate you have too much weight. You must remove heavy items immediately.
Real Costs and Tool Requirements
Budget Hardware Realities
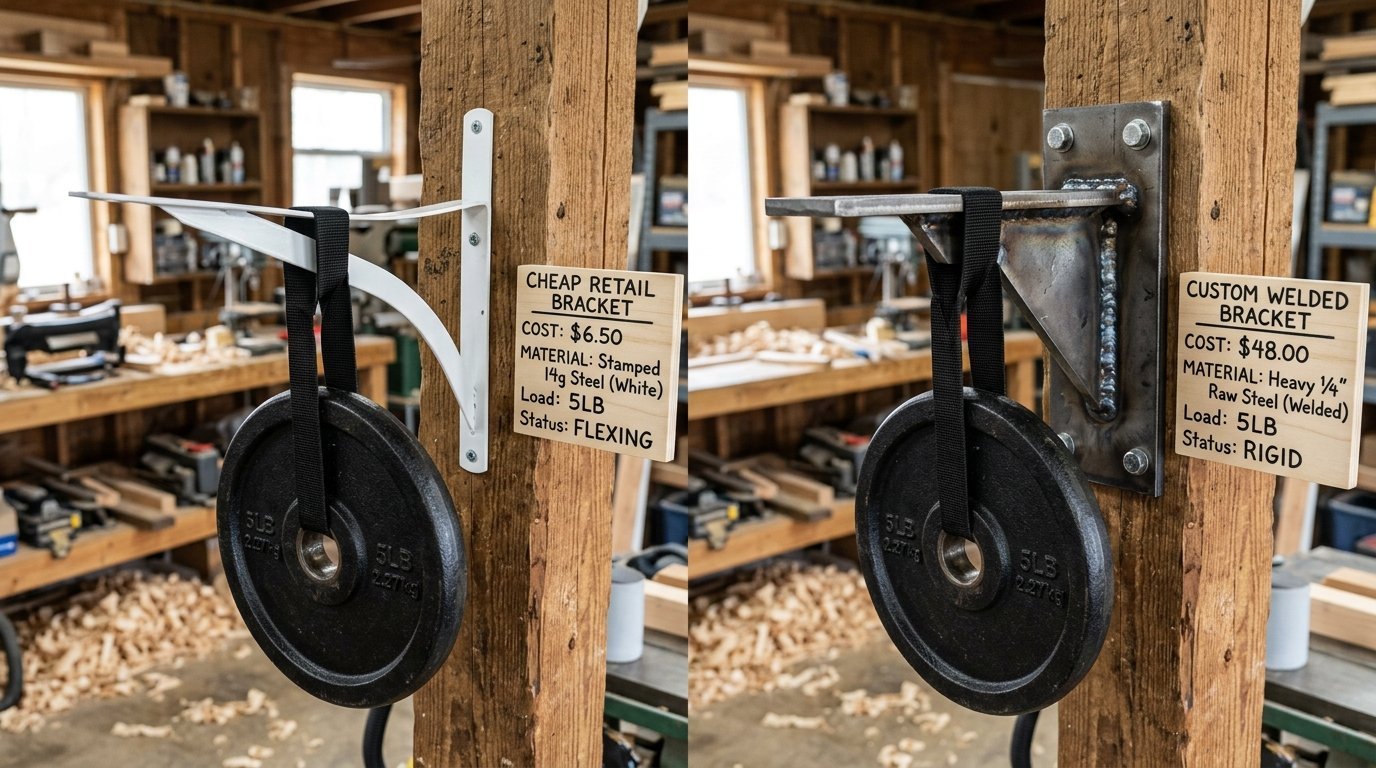
You can buy cheap kits for twenty dollars online. I bought a set last month to test. The metal was thin. The rods bent under ten pounds of weight.
The included drywall anchors snapped in half. You get what you pay for. I only use these cheap kits for displaying very light items. Small plush toys or empty decorative boxes work fine. Never put books on twenty dollar hardware.
Professional Grade Hardware
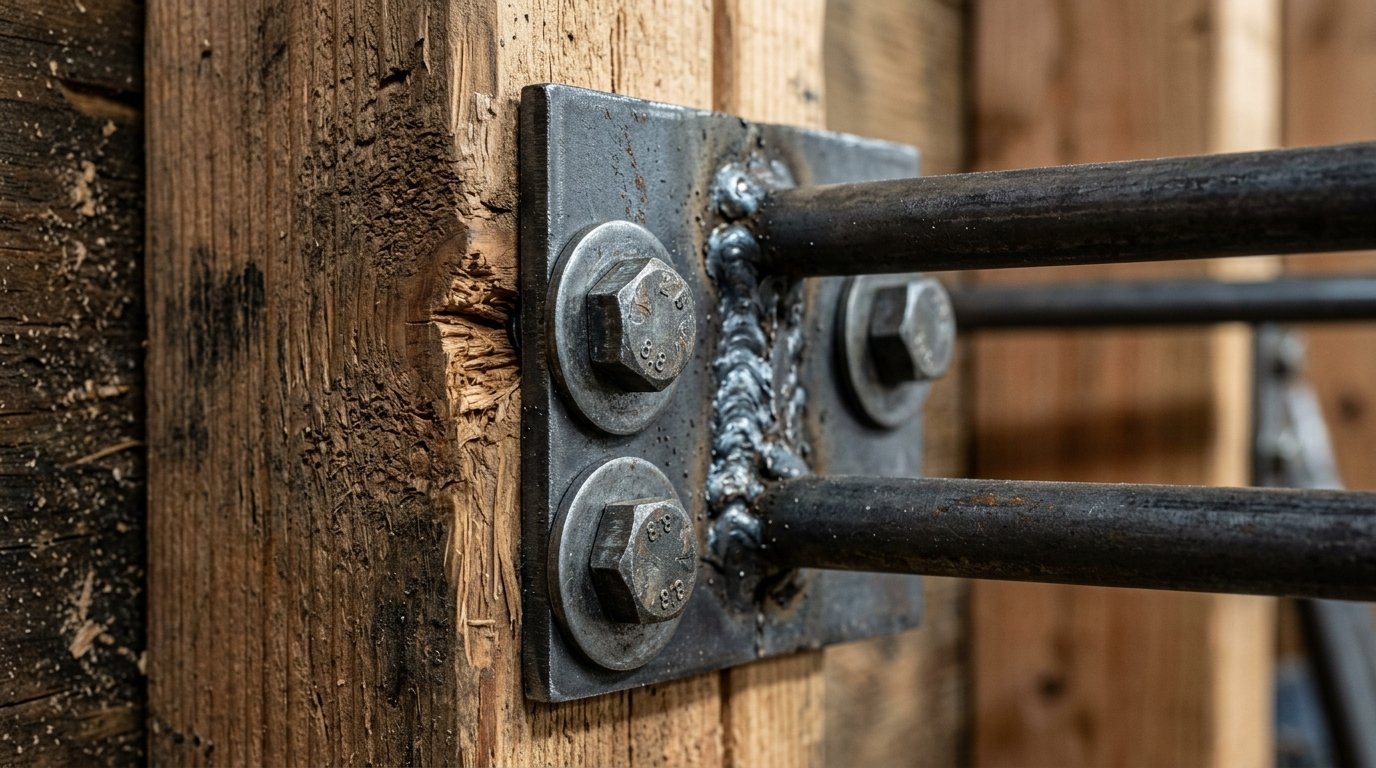
I spend fifty dollars on the bracket alone. Heavy duty steel brackets come from specialty metal shops. They weld the rods to the back plate. They do not bend.
I spend another fifty to one hundred dollars on the wood slab. You are looking at one hundred fifty dollars per unit for a quality setup. This is cheaper than buying a solid oak bookcase. It lasts longer too.
Tools You Must Own
You need a tape measure. You need a two foot bubble level. You need a power drill with wood bits. You need a socket wrench set for the lag bolts.
Do not buy cheap tools. Borrow good tools from a neighbor if you have to. A cheap drill strips the screws. A cheap level lies to you. Good tools make easy woodworking projects actually easy.
Installing Lighting to Your Display
Battery Powered LED Strips
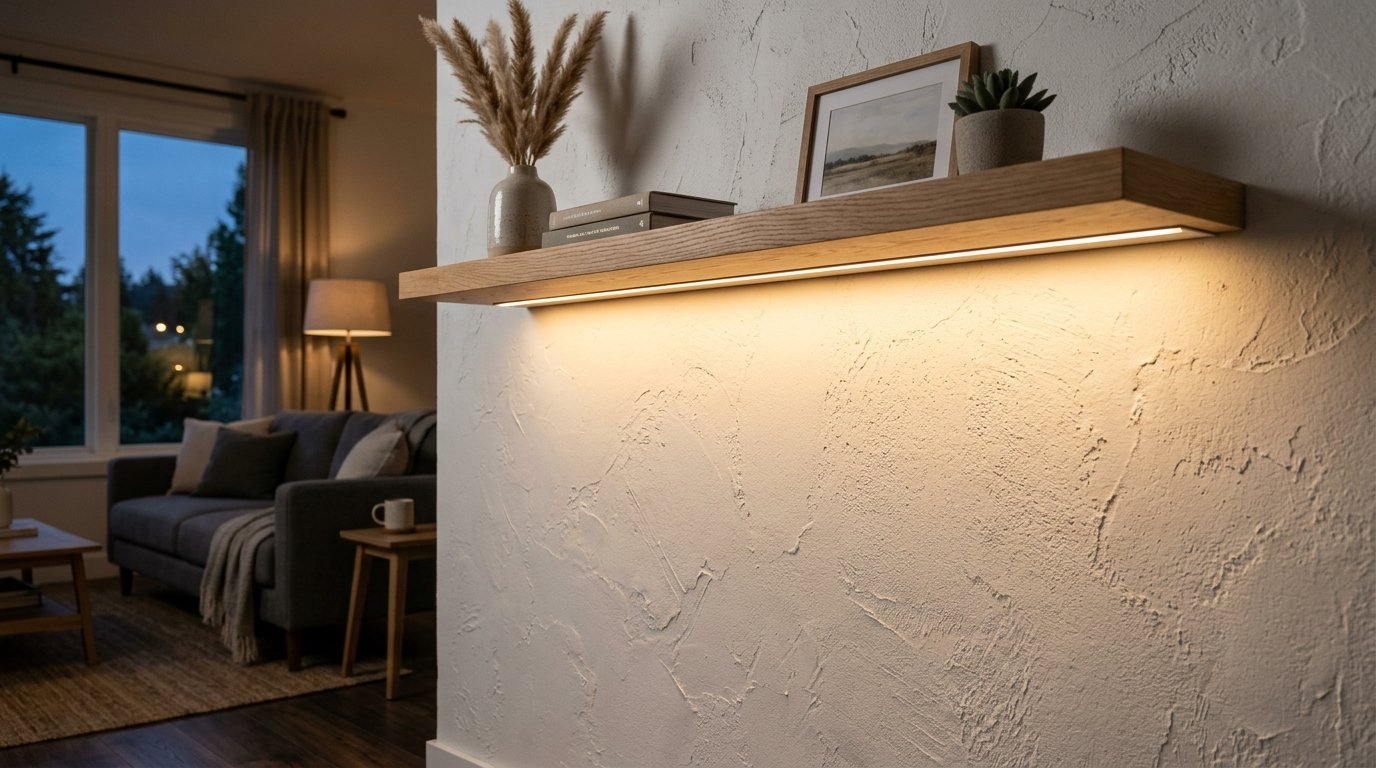
You can make your display look like a high end museum easily. I buy thin LED strips online. I stick them directly under the back edge of the wood. The light washes down the wall.
It creates a warm glow in the evening. I only use battery powered strips for this. You do not want ugly black cords hanging down your wall. I buy strips with a small remote control. I hide the battery pack by carving a small hole in the top of the wood. Nobody can see it unless they are eight feet tall.
Puck Lights vs Tape Lights
Puck lights cast harsh circles of light. I hate how they look. They cast weird shadows on your items. Tape lights cast an even wash of light.
I always choose warm white tape lights. The color temperature should be around two thousand seven hundred kelvin. This matches standard incandescent bulbs. Cool white lights make your living room feel like a hospital. Tape lights are very cheap now. You can cut them with scissors to fit the exact width of your wood.
Hiding Wires for Hardwired Options
If you are doing a full room remodel you can hardwire the lights. You must hire an electrician for this. They run low voltage wires behind the drywall. The wires come out exactly where the bracket sits.
We route a tiny channel into the back of the wood slab. The wire sits inside this channel. The LED strip connects neatly. This costs about five hundred dollars per wall. It looks incredible. I only do this for permanent custom homes.
Room by Room Specifics
The Bathroom Storage Problem
Bathrooms lack storage. Pedestal sinks look nice but hold nothing. I put a small floating piece above the toilet. I only use teak wood or sealed cedar in bathrooms.
The shower steam ruins standard pine fast. I apply three coats of marine grade polyurethane to the wood. Water beads up and rolls right off. I keep extra towels and glass jars here. I wipe the glass jars down with alcohol every week. Hairspray makes them sticky very fast.
Coffee Bar Setup in the Kitchen
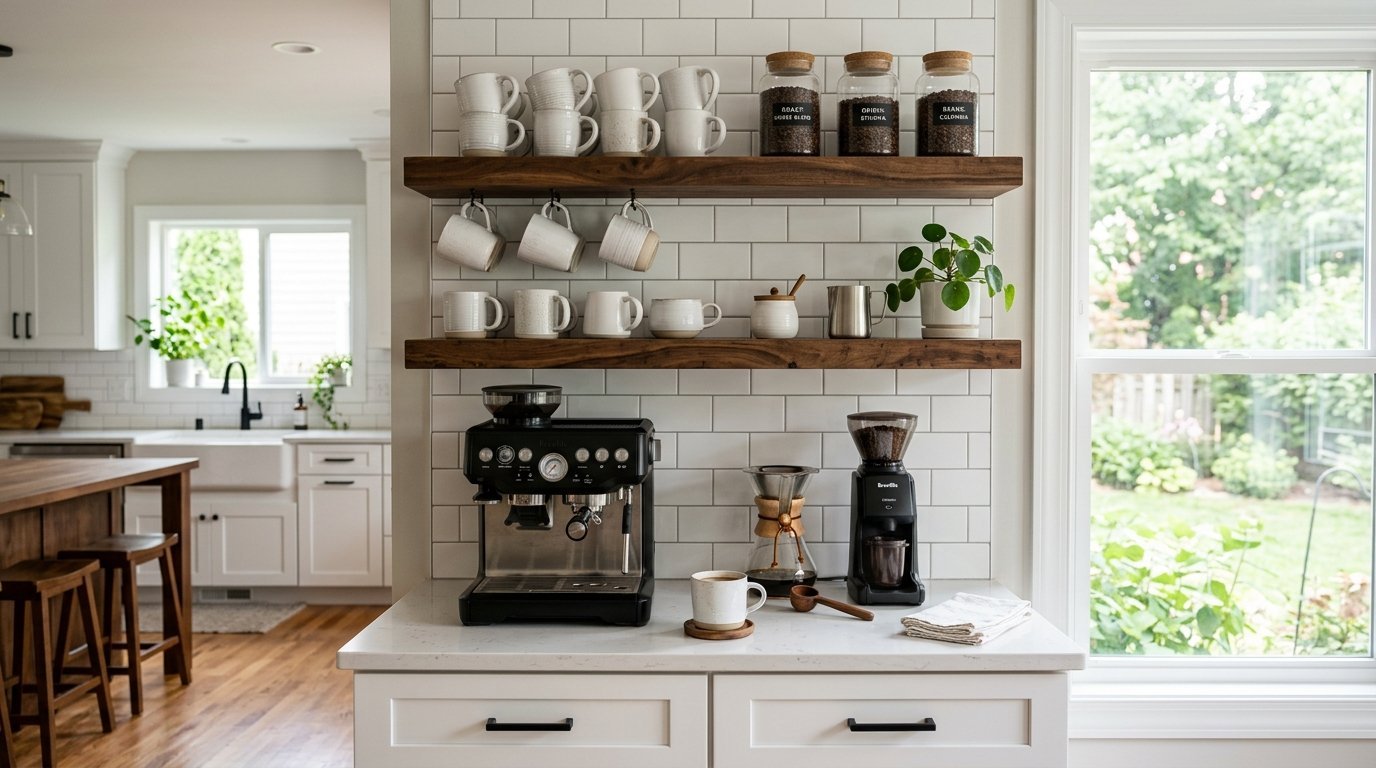
Every home needs a dedicated coffee station. Counter space is too rare to waste. I make a coffee bar using two heavy walnut slabs. I place the espresso machine on the counter.
I mount the first slab exactly eighteen inches above the machine. This holds the coffee bean jars and the grinder. I mount the second slab fourteen inches above that one. This holds all the ceramic mugs. The heavy iron brackets are completely hidden. The dark walnut looks beautiful against white subway tile.
Childrens Room Safety Rules
Kids pull on everything. They will try to climb your wall decor. I never put heavy items on open surfaces in a childs room. I use lightweight acrylic hardware instead of heavy wood.
I screw the brackets into three separate studs for maximum hold. I only place soft toys and small paperbacks up high. I check the brackets every single month. I never mount anything directly over a crib or a bed. A falling book causes serious harm. Safety beats aesthetics here every single time.
Advanced Wood Preparation Steps
Sanding for a Perfect Finish
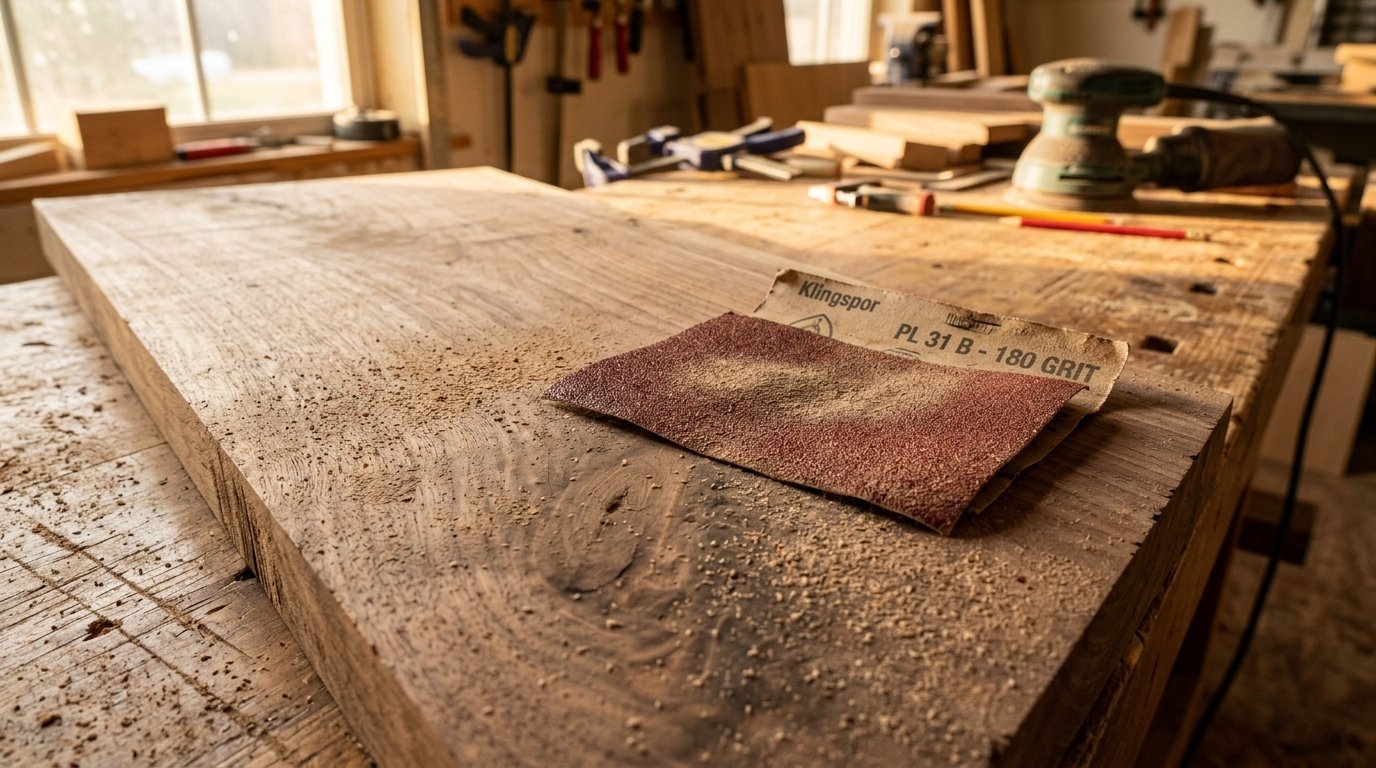
Rough wood holds dust. You cannot clean rough wood easily with a microfiber cloth. It snags the fibers. I spend hours sanding my raw wood slabs.
I start with eighty grit paper to remove the saw marks. I move to one hundred twenty grit to smooth the surface. I finish with two hundred twenty grit. The wood feels like glass at this stage. I wipe all the sawdust off with a sticky tack cloth. Do not skip this work. Your paint or stain will look terrible on rough wood.
Choosing Between Stain and Paint
Stain absorbs into the wood. It shows the natural rings and grain. I use dark walnut stain on cheap pine. It makes the pine look expensive.
Paint sits on top of the wood. Paint hides ugly knots and weird colors. I use a high density foam roller for paint. A brush leaves ugly lines. I apply a primer coat first. The primer stops the wood knots from bleeding yellow through the white paint. A good paint job takes three days to dry fully. Do not rush this work.
Sealing the Wood Properly
Paint and stain offer no real protection against water. You must seal the wood. I use Minwax water based polyurethane. Oil based sealers turn yellow after five years.
Water based sealers stay crystal clear. I apply three very thin coats. I let each coat dry for four hours. I lightly sand between coats with a brown paper bag. The paper bag is just rough enough to knock down the tiny dust bumps. Your final coat will feel perfectly smooth. Water rings from drinking glasses will wipe right off.
Troubleshooting Common Mistakes
The Wall is Bowed or Crooked
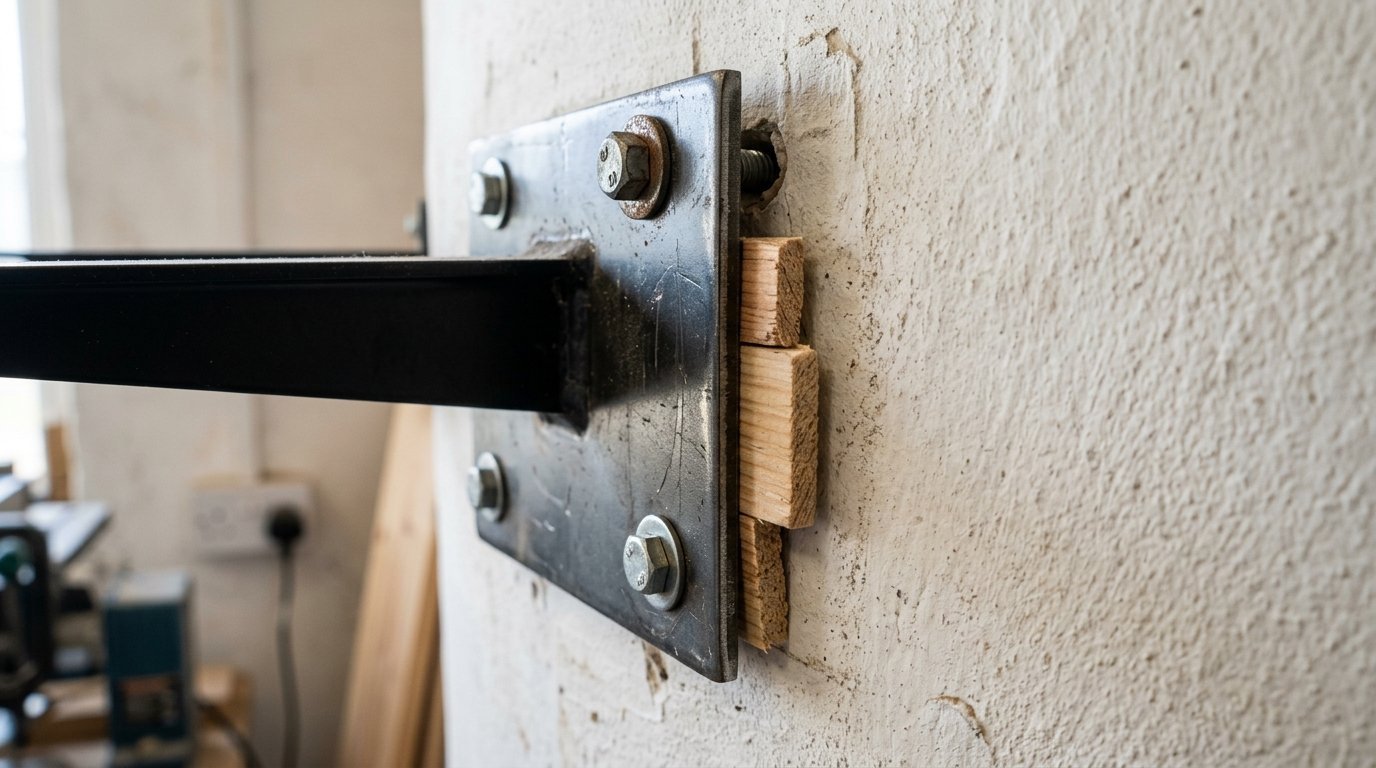
Old houses have terrible walls. Plaster walls bulge in the middle. When you tighten a straight bracket to a curved wall the bracket bends. The steel rods will point in different directions. Your wood will not slide on.
I use wooden shims to fix this. I place thin pieces of wood behind the bracket where the wall dips away. I tighten the bolts slowly. I watch the steel rods. When they are perfectly parallel I stop tightening. I cut the extra shim wood away with a razor knife.
The Holes Do Not Align
Sometimes you drill a hole in the wood slab slightly crooked. The steel rod will not slide in. Do not hit the wood with a hammer. You will break your wall.
I use a long drill bit to widen the hole inside the wood slightly. Making the hole one millimeter wider gives you wiggle room. The wood will slide on easily. The tight fit against the back plate keeps everything tight.
Hitting a Pipe or Wire
This is my worst nightmare. Drilling into a water pipe floods your house in minutes. Drilling into a wire causes a fire. I look at the wall carefully before drilling.
I never drill directly above or below a light switch. Wires run straight up and down. I never drill directly behind a bathroom sink wall. Vent pipes live there. I drill very slowly. Wood chips come out white. If I see black plastic shavings I stop immediately. I patch the small hole and pick a new spot.
Hardware Brand Cost Breakdown and Reviews
The Big Box Store Hardware
I visit large home stores frequently. They sell kits wrapped in plastic. A basic white kit costs twenty five dollars. The metal inside feels very light.
I bought five kits for a client last year. Three of the steel rods were bent right out of the box. I returned them immediately. You waste hours driving back to the store. The wood finish chips easily on these cheap models. I only buy these for very light duty laundry room soap storage. Never trust them for heavy books.
The Specialty Metal Shop Brackets
I buy heavy hardware from custom metal workers online. A quarter inch thick steel plate costs forty dollars. The rods are welded by hand. They hold over one hundred pounds without bending.
I waited two weeks for shipping on my last order. The wait was completely worth it. You pay more upfront but you never worry about the weight again. I paint the steel plate with rust blocking spray paint before mounting. This stops any rust from bleeding onto your wall paint over the years.
Custom Hardwood Slabs from Mills
Buying wood at a big store limits your choices to thin pine boards. I visit local lumber mills instead. They sell thick rough slabs of walnut and maple. A raw slab costs about sixty dollars.
You must sand it yourself. You must route the holes yourself. A long wood drill bit costs twenty dollars. The effort pays off massively. Your shelf design will look like custom furniture. Visitors always ask where I bought my walnut pieces. Doing the work yourself saves hundreds of dollars per room.
Regional Styling and Material Choices
Coastal Humidity Problems
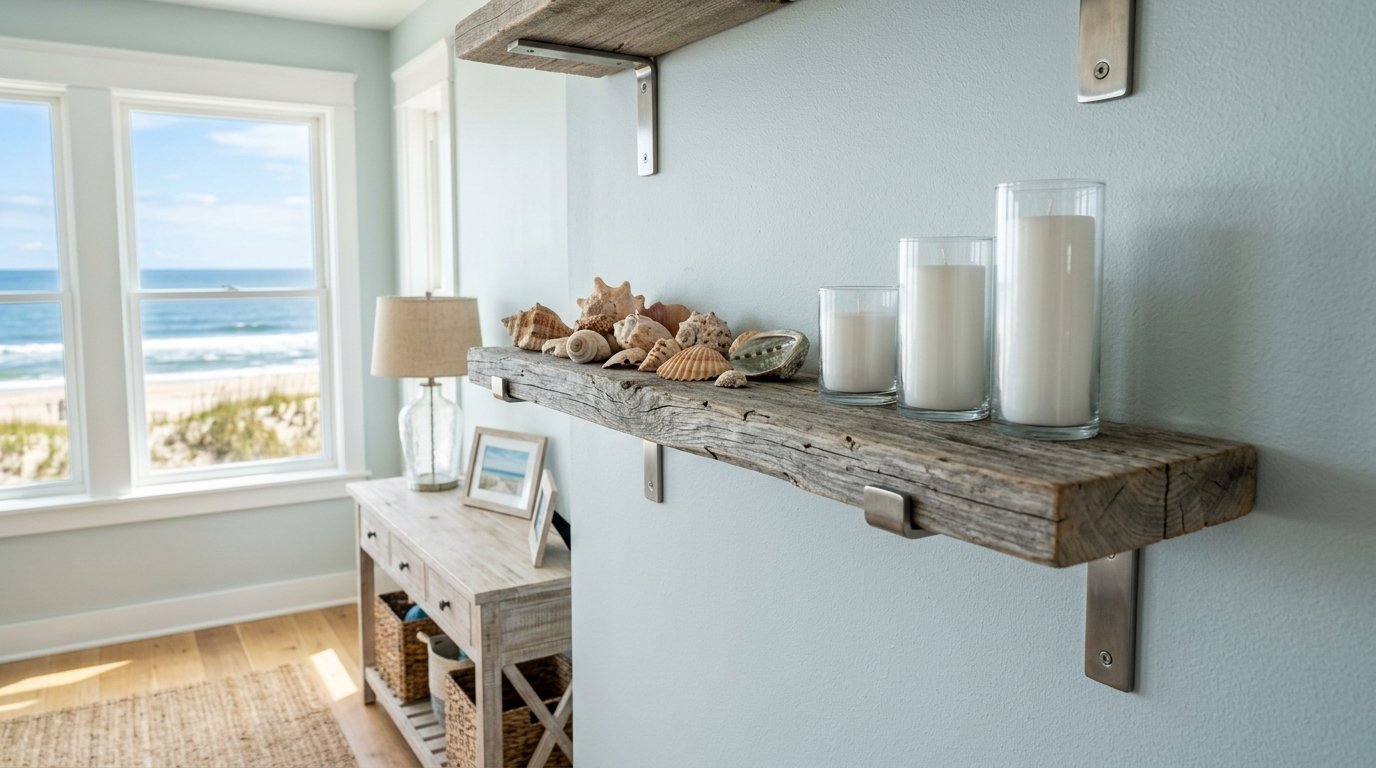
Houses near the ocean deal with constant salt air. Salt rusts cheap metal instantly. Moisture warps raw wood. I worked on a beach house project last summer. We used stainless steel hardware only.
Stainless costs double but it never rusts. We sealed the oak slabs with marine grade varnish. Four coats on every side. Even the back side touching the wall got sealed. Unsealed back edges absorb moisture from the drywall. The wood bows outward in three months. We skipped cheap MDF entirely. MDF swells up like a sponge near the ocean.
Dry Desert Cracking
Houses in dry climates face the opposite problem. Zero humidity pulls moisture out of the wood. A wide pine slab will crack right down the middle during the first summer.
I tell my clients in dry areas to buy kiln dried lumber only. The kiln bakes the moisture out slowly before you buy it. I also apply a thick wax paste over the sealed wood. The wax locks the remaining moisture inside. You reapply the wax every twelve months. This stops the ugly spider cracks from forming on your display.
Historic Home Installation Realities
One hundred year old houses do not have standard drywall. They have plaster and lath walls. Lath means thin wooden strips covered in heavy plaster. A stud finder is completely useless here.
The magnet trick does not work either because old nails are everywhere. I drill a tiny test hole through the plaster. I push a stiff wire into the hole. I feel around inside the wall cavity for the solid wood framing. Plaster crumbles easily. You must use a masonry drill bit to get through the plaster layer without cracking the whole wall. It takes twice as long. The beautiful historic look makes the effort worth it.
Specific Styling Accessories and Layouts
The Rule of Three in Decorating
Empty wood looks boring. Crowded wood looks messy. I follow the rule of three for styling. I place items in groups of three. A tall vase stands next to a medium frame and a small candle.
The human eye loves odd numbers. It forces the eye to move around the display. I applied this rule in a clients living room yesterday. We took twenty items off her wall. We left only nine items grouped in threes. The room instantly felt expensive and calm.
Stacking Books the Right Way
Most people stand books straight up. They fall over easily. Heavy bookends take up too much space. I stack books horizontally. Three big art books lay flat.
I place a small metal object on top of the stack. This anchors the visual weight. I leave six inches of empty space before the next group of items. Empty space matters just as much as the items you display. The empty space lets the beautiful wood grain show through.
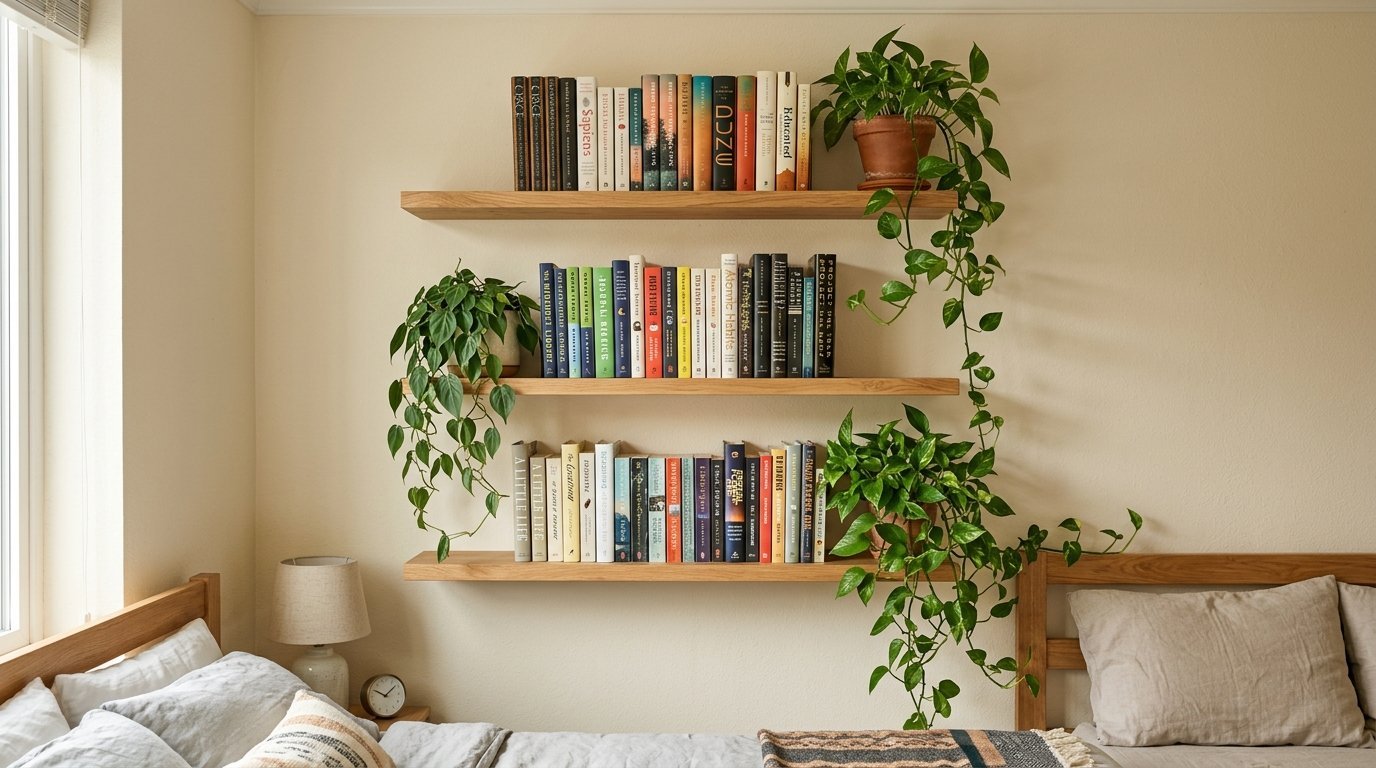
Incorporating Living Plants
Plants bring life to static hardware. Pothos plants trail down perfectly over the edge. You must buy waterproof saucers for the pots.
Clay pots sweat moisture through the bottom. This moisture leaves dark black rings on your wood finish. I place a thick cork pad under every ceramic pot. I water the plants in the sink. I let them drain completely before putting them back on the wall. This protects your hard work from water stains forever.
Professional Measuring Tricks
Making a Paper Template
Holding a heavy steel plate against the wall while marking holes is exhausting. I trace the steel plate onto a piece of cardboard. I poke holes where the drill spots are.
I tape this lightweight cardboard to the wall. I place my level on the cardboard. I adjust the tape until it sits perfectly level. Then I drill right through the cardboard holes into the wall. This guarantees perfect alignment. You will never drill a crooked hole again using this trick.
The Tape Measure Hack
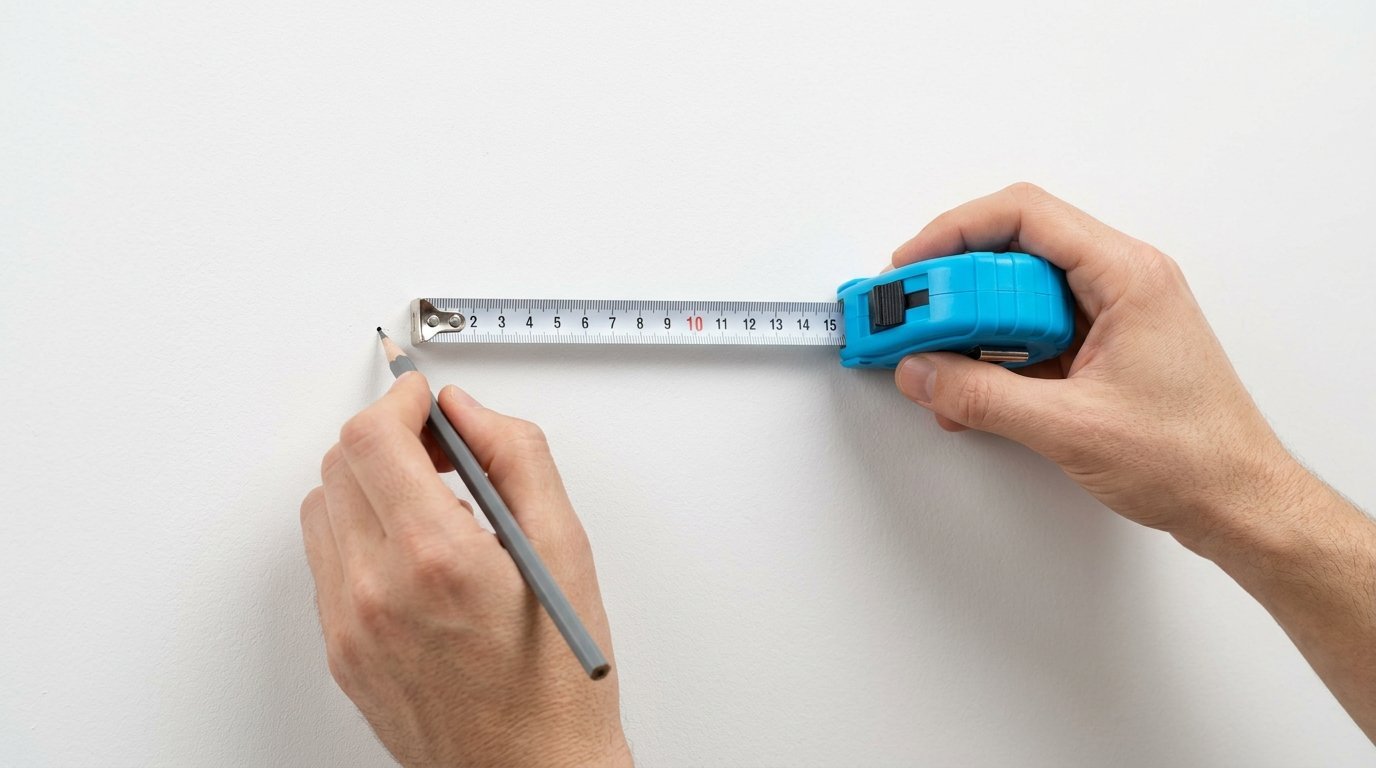
You need to know exactly how deep to drill your pilot holes. If you drill too shallow the bolt stops halfway. If you drill too deep you might hit a wire.
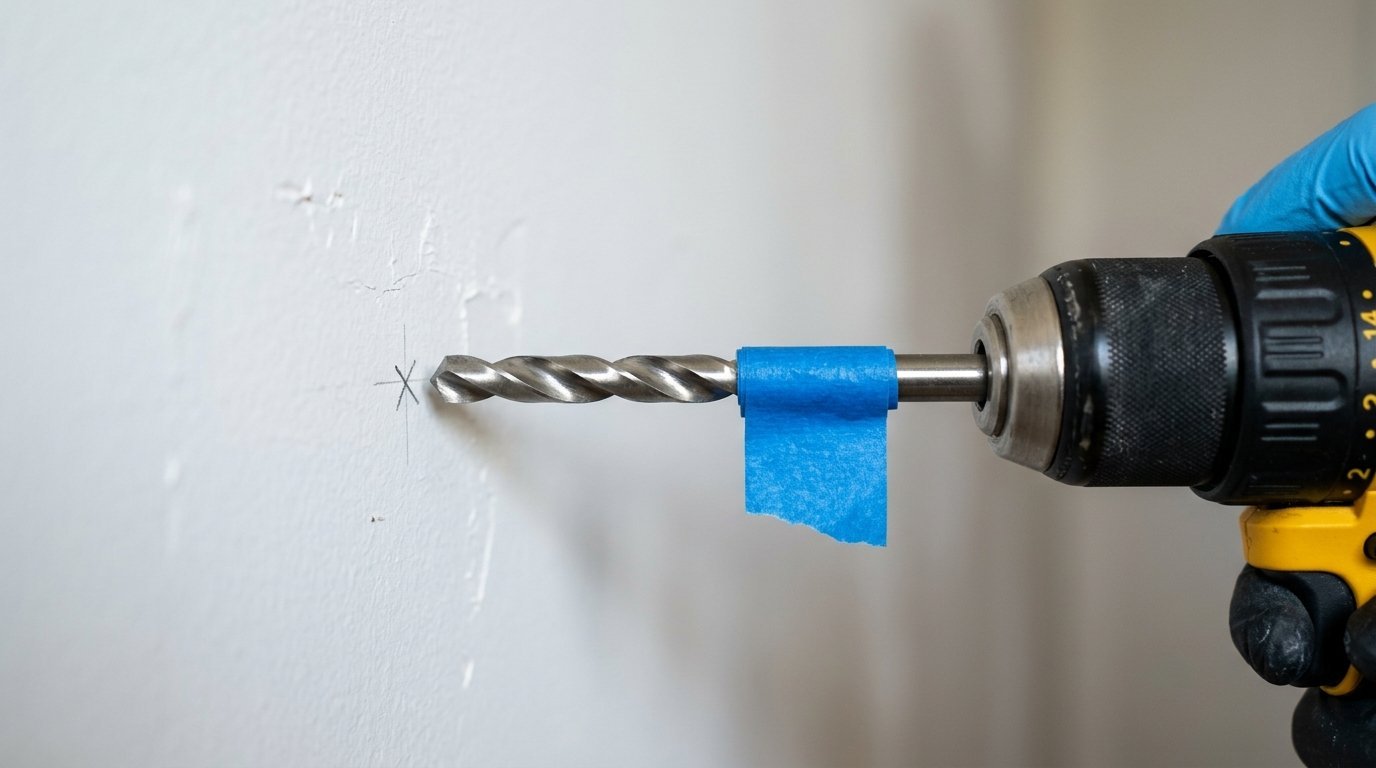
I measure the lag bolt against my drill bit. I wrap a piece of 3M blue painters tape around the drill bit exactly where the bolt ends. I drill into the wall until the blue tape touches the drywall. I stop immediately. Every hole becomes exactly the right depth. This small trick saves hours of frustration.
Dealing with Unlevel Floors
Old houses have sloping floors. If you measure up from a crooked floor your hardware will be crooked. I never measure from the floor in old houses.
I measure down from the ceiling. Ceilings are usually much straighter than floors. If both are crooked I trust my bubble level over any tape measure. The hardware must be perfectly level to gravity. A crooked display makes round objects roll right off the edge.
Expanding Your Collection Safely
Putting Up Tiers Later
You might want another row of storage next year. You must plan for this now. I always buy extra matching hardware on the first day. Metal shops change their designs. Wood mills run out of specific tree species.
Buying everything at once guarantees a perfect match later. I store the extra hardware in my garage. When the client wants more storage we are ready immediately.
Relocating to a New Room
Sometimes you want to move your display to a new room. Removing the heavy hardware leaves large holes in the drywall. I pull the lag bolts out slowly with a socket wrench.
I never use a drill to remove them. The drill spins too fast and rips the drywall paper. I fill the holes with DAP heavy spackle. I sand it flat after twenty four hours. I prime the spots before painting. The wall looks brand new again. You can reuse the steel hardware forever.
Real Failure Stories and Lessons
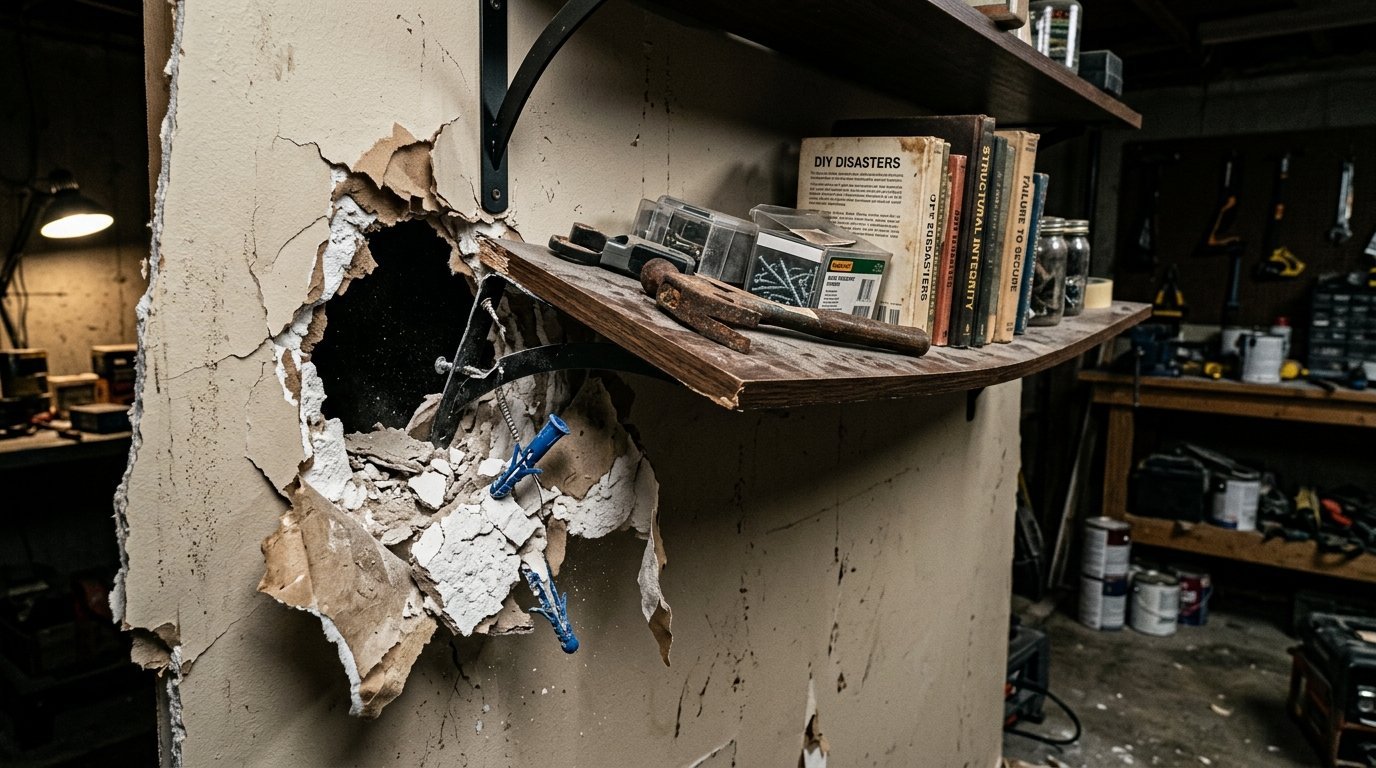
The Drywall Anchor Disaster
My neighbor bought a beautiful walnut slab. She refused to find the wall studs. She used four large plastic drywall anchors instead. She loaded the wood with heavy ceramic plates.
I heard the crash from my driveway. The drywall ripped open completely. She had two giant holes in her kitchen wall. She had to hire a drywall professional to patch the holes. The repair cost four hundred dollars. She lost her favorite dishes. We fixed it the next week by mounting into the actual wood framing. The display holds tight today.
The Unsealed Water Ring Catastrophe
A client wanted a raw natural look. He refused any polyurethane sealer. He put cold water glasses on the raw oak daily. Condensation dripped down. The oak turned jet black where the water sat.
Oak has tannins that react with water and metal. The black rings went deeper than we could sand out. He had to throw the entire expensive piece of wood in the trash. We started over with a heavily sealed piece. Raw wood belongs outside not inside a working kitchen.
The Drooping Bracket Mistake
I made a huge mistake early in my career. I used a thin steel bracket to hold fifty pounds of books. I hit the studs perfectly. But the steel was too weak.
The rods bent slowly over a month. The books slid right off the front edge onto a glass coffee table. The table shattered. I learned my lesson about weight limits that day. I only buy quarter inch thick welded steel now. Over engineering your hardware prevents dangerous accidents.
Frequently Asked Questions

How much weight can a floating shelf really hold?
A properly installed steel bracket screwed into two wooden studs holds over fifty pounds. Hollow wall anchors might hold ten pounds safely. Always rely on wall studs for anything heavier than a few small picture frames.
Can I install these on metal studs?
Yes but you need special hardware. Standard lag bolts pull right out of thin metal studs. You must use heavy duty toggle bolts. They snap open behind the metal stud. I still keep weight very light on metal framing.
Do I have to hit two studs?
For anything longer than twenty inches yes you must hit two studs. If you only hit one stud the unit acts like a seesaw. It will eventually pull out of the drywall on the unheld side.
Why is my shelf tilting down in the front?
Your bracket is bending or your wall is crushing. The weight is pulling the steel rods downward. Remove all items immediately. You must reinstall the bracket with better anchors or buy a thicker steel bracket.
Can I cut hollow core shelves to fit my wall?
No. Hollow core relies on the solid edges for strength. If you cut the end off you expose cardboard honeycomb. The piece will lose all structural integrity. Only cut solid wood or solid MDF.
What is the best depth for books?
Books need at least ten inches of depth. Twelve inches is better for large art books. Anything shallower than eight inches only works for paperbacks and small picture frames.
How far apart should I space multiple shelves?
I measure fifteen to eighteen inches of vertical space between each tier. This leaves enough room for tall books and plants to grow. Measure your tallest item first and give three extra inches.
Will command strips work for floating brackets?
Never. Command strips handle vertical sheer weight well. They cannot handle the rotational pull of a bracket pulling away from the wall. Your items will fall and break within hours.
Can I install these over wallpaper?
Yes but the bracket will crush the wallpaper permanently. If you ever remove the hardware you will have ruined circles on your wallpaper. Cut a small square of wallpaper away where the bracket sits.
How do I hide the gap against an uneven wall?
Walls are never perfectly flat. A straight piece of wood leaves gaps. I run a tiny bead of clear silicone caulk along the back edge. It fills the gap and disappears when dry.
Is MDF better than real wood?
MDF is completely flat and paints perfectly smooth. Real wood has grain and tiny warps. I use MDF for modern painted looks. I use real wood when I want natural warmth and texture.
Can I mount these above a radiator?
I strongly advise against this. Heat rises. The constant extreme temperature changes warp real wood quickly. The heat also dries out glued seams on MDF causing peeling.
Do corner shelves need different hardware?
Corner layouts offer extreme strength. You can hold the wood from two different walls. I use simple wooden cleats screwed into the studs on both walls. The wood sits on top. It is very strong.
What paint finish is best?
Semi gloss or satin paint works best. Flat paint shows every single fingerprint and dust speck. Semi gloss wipes clean easily with a damp microfiber cloth.
Final Thoughts on Your Floating Shelf Project
You have the blueprint now. You know how to find the studs with a magnet. You know why fifty dollar steel brackets beat twenty dollar plastic kits every time. Start with one small project. Pick a short two foot slab for a bedroom wall. Test your skills there. Once you feel the solid grip of a lag bolt driving into a pine stud you will feel total confidence. Your walls will look clean and styled. You can completely change a room in one Saturday afternoon. Grab your level and your drill. Your clean minimal space is waiting for you.

Anya Castellan is the Founder and Editor-in-Chief of Home Wall Trends. An art history graduate of the Rhode Island School of Design with twelve years of experience writing for leading American design publications, she specializes in composition, gallery wall theory, and the quiet architecture of domestic space. A former contributing editor at Architectural Digest and guest lecturer at Parsons School of Design, Anya personally reads and signs off on every piece before it is published.