Staring at a massive white expanse feels intimidating. You sit on your couch and stare at the drywall. You start searching for ideas for empty wall space. You fear making the wrong choice. Making holes causes anxiety. Buying oversized art costs hundreds of dollars. You want a home that feels styled. You need a room ready for photography. Making a choice stalls your progress. I spent hours analyzing blank drywall in my own house. I tested layouts with paper. I made mistakes with tape and nails. You need a exact plan before you pick up a hammer. This guide gives you exact ideas for empty wall space.
You will get a exact system for styling massive spaces. You will see costs for different materials. You will read exact measurements for spacing frames. I share my failures with DIY projects so you avoid them. We cover a photo layout wall blueprint for oversized canvases. We walk through mirror care for perfect reflections. We cover spacing rules for hallways. You will finish reading with a clear plan. You will know exactly where to place your first nail. Your home will feel finished.
Where Do I Start With Ideas For Empty Wall Space
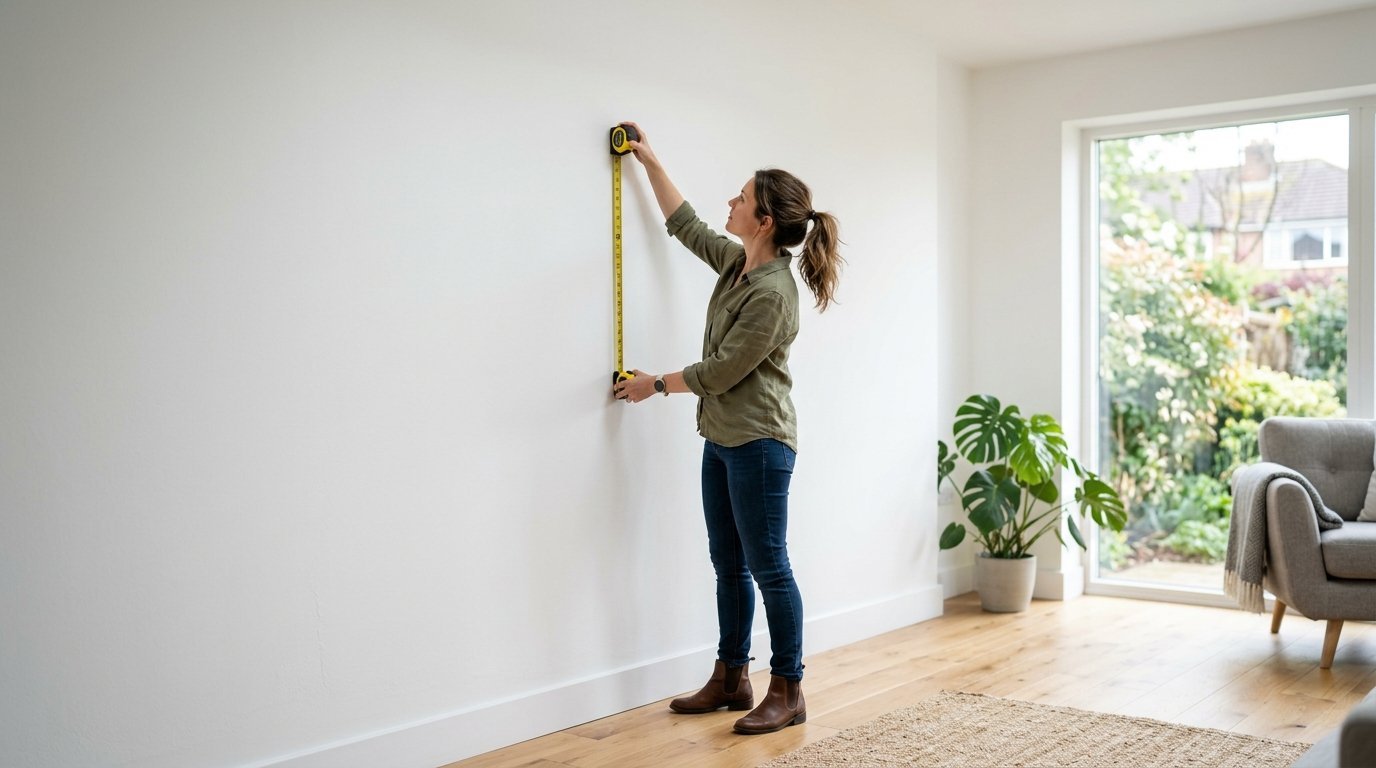
Scale dictates everything in interior styling. Small frames look lost on a massive surface. You must measure your available drywall first. Grab a tape measure. Record the width and height.
Write these numbers down. Most people buy items too small for their rooms. A couch requires art that spans at least two thirds of its width. You need pieces that command attention.
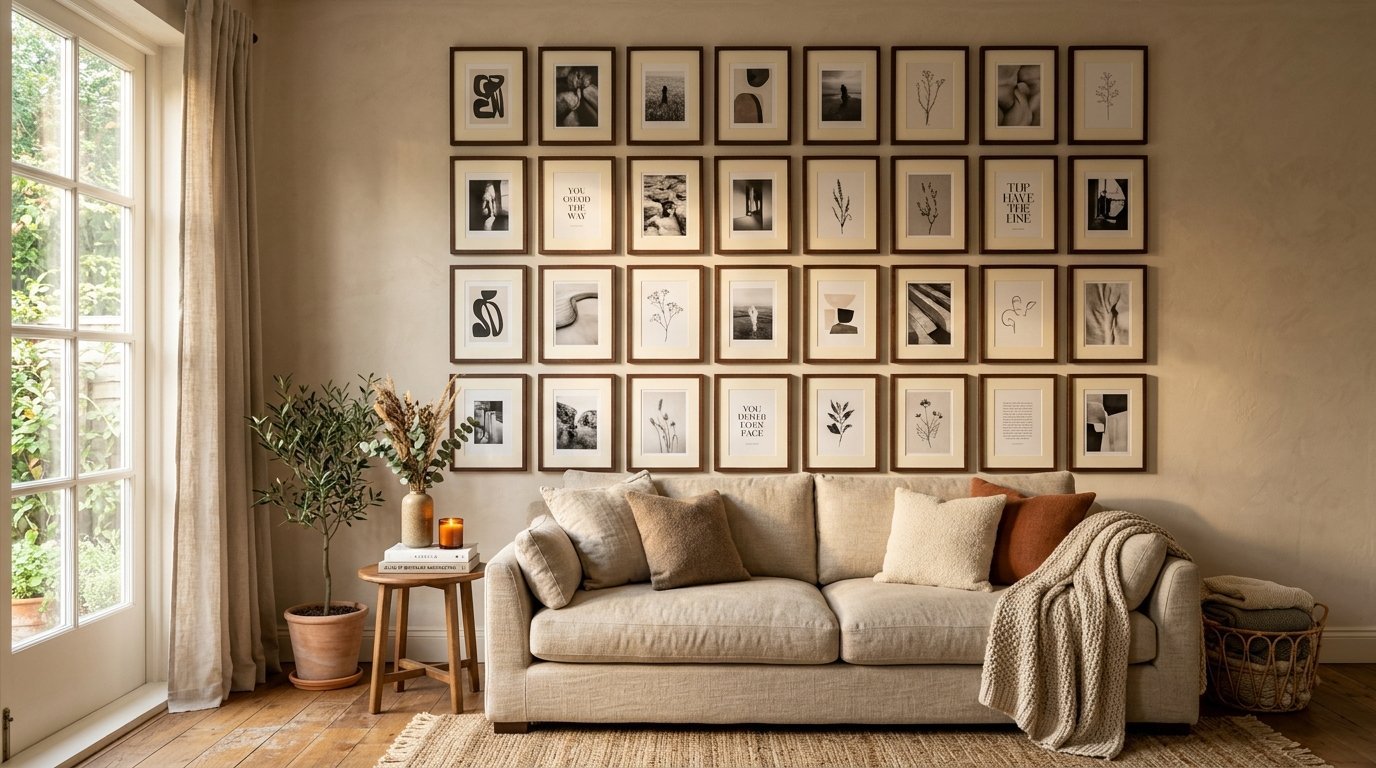
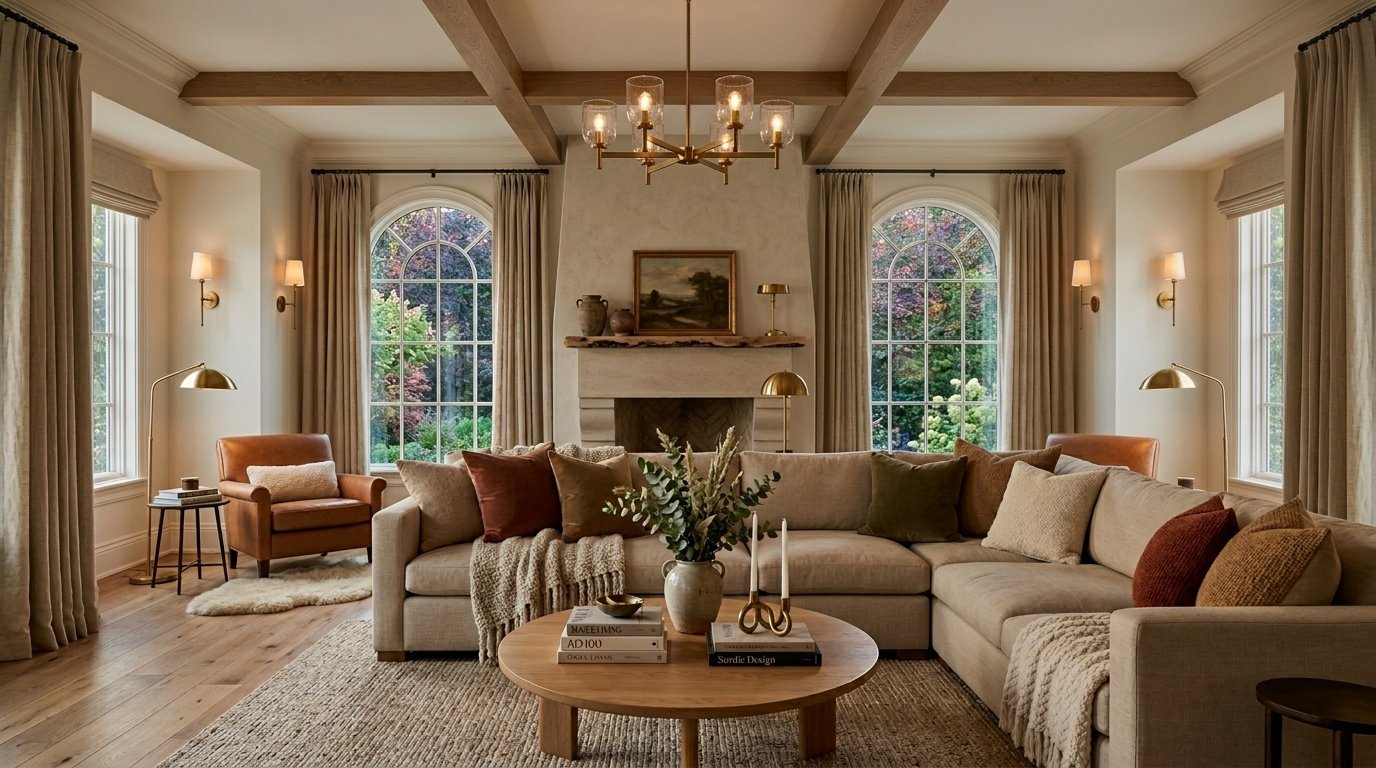
Start by picking a anchor piece. This anchor sits in the center. You position smaller items around it. You might pick a giant canvas. You might pick a woven textile. You must choose one massive item first.
I prefer creating photography ready living spaces. I want every angle ready for a picture. Large plants in the corners frame the edges. Placing a bench below the art grounds the arrangement. You stop the pieces from floating in space.
Cost expectations matter here. Giant canvases cost hundreds. Thrift stores offer cheap oversized frames. You can paint over old thrifted art. This saves money. This guarantees custom colors.
You must follow strict rules for scaling items correctly.
- Measure your ceiling height from floor to top corner
- Measure your total available width excluding doors
- Calculate two thirds of that total width
- Mark this safe zone with small pieces of blue tape
Never guess dimensions while standing in a store. You will always guess wrong. Write your measurements in your phone.
- Buy a metal tape measure
- Keep a digital note of room dimensions
- Snap a photo of the space before shopping
Planning A Photo Layout Wall That Looks Intentional
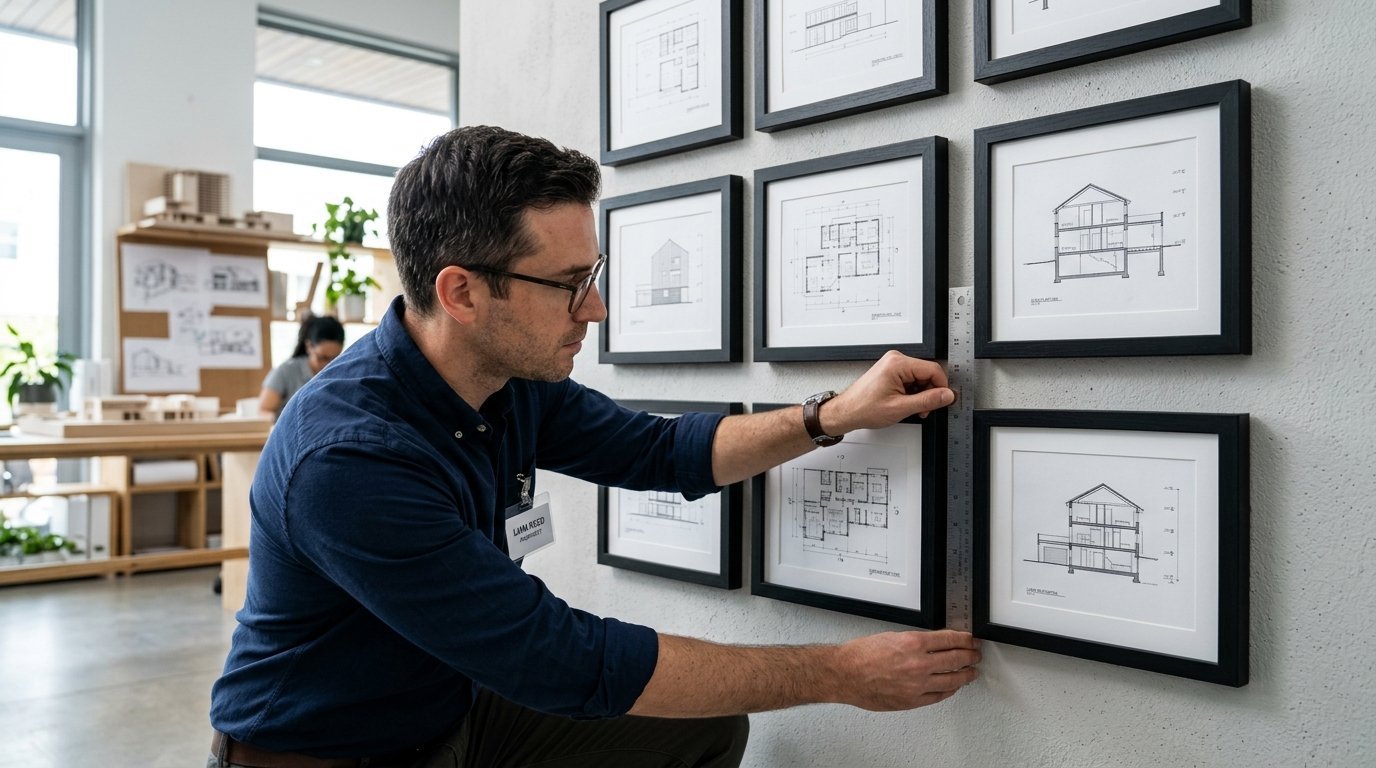
A grid system demands perfection. A gallery arrangement forgives mistakes. You must choose your path before picking up tools.
Grid arrangements require exact matching frames. You buy six or nine identical squares. You measure exact two inch gaps between them. One misaligned nail ruins the entire look. You need a laser level for this.
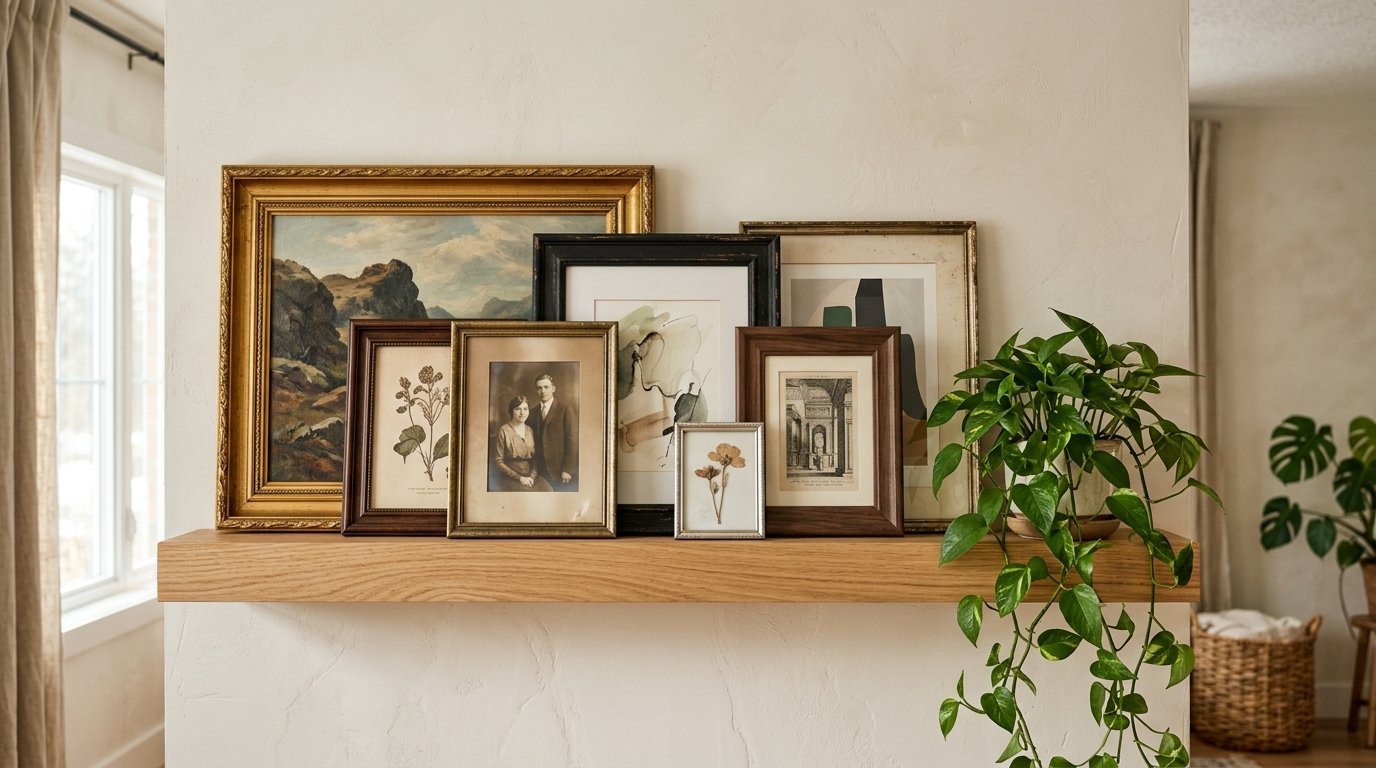
Organic groupings allow different sizes. You mix gold frames with black frames. You mix vintage wood with modern metal.
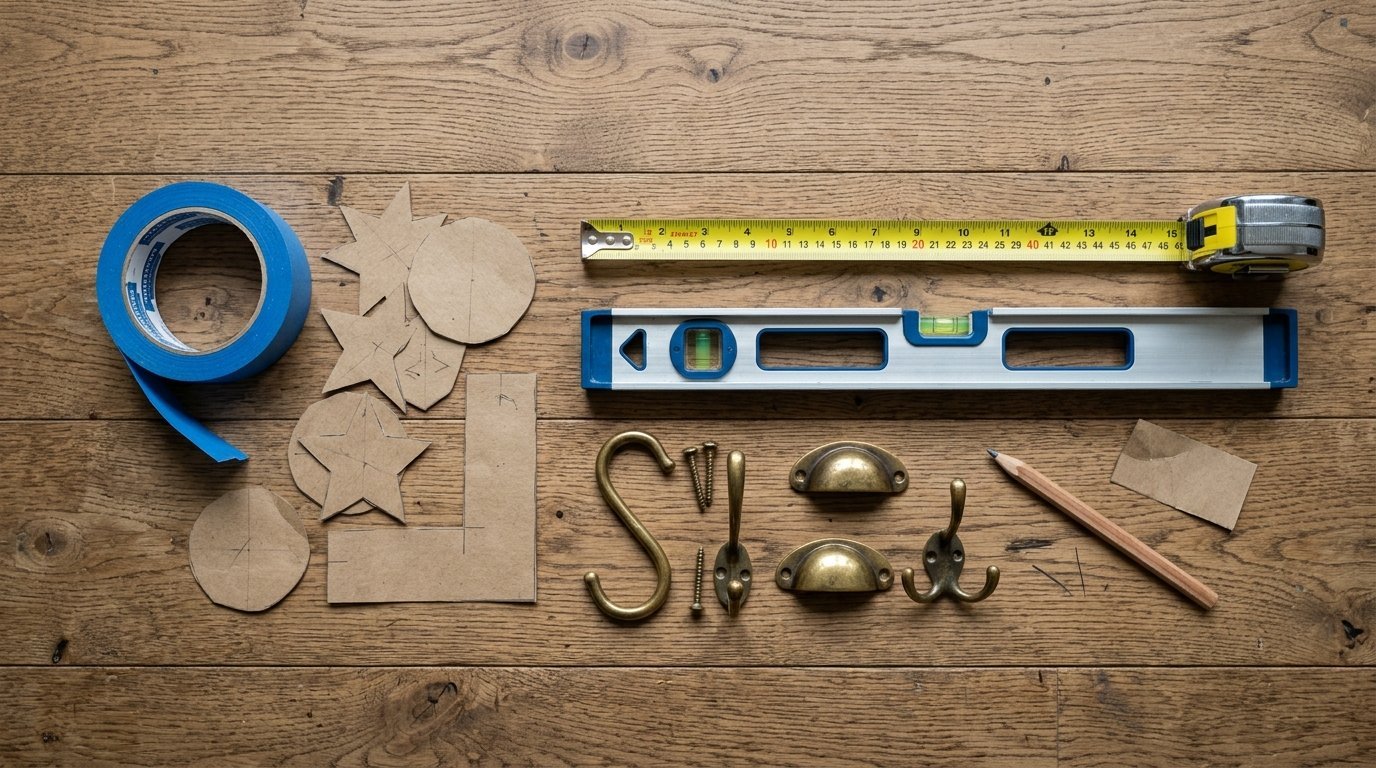
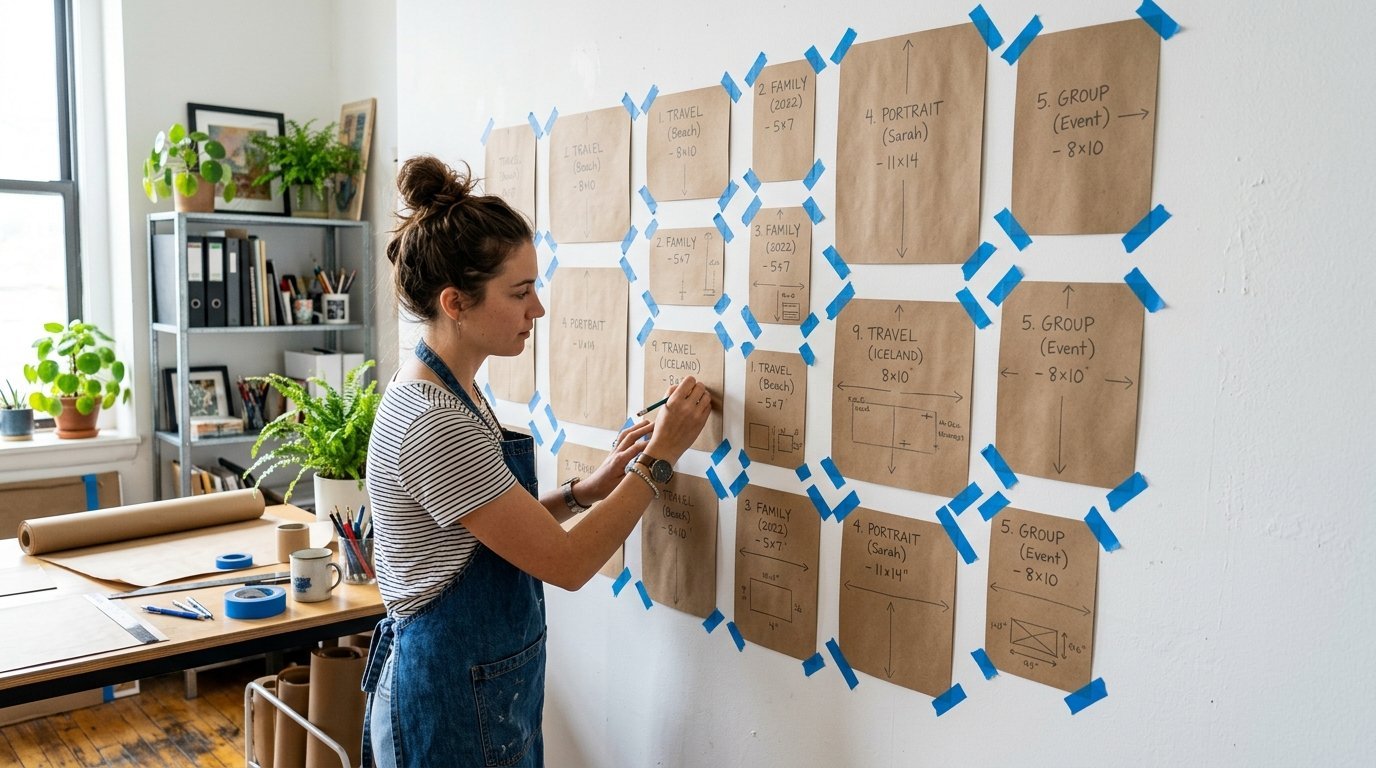
Never hang things directly. You will ruin your drywall. Use kraft paper. Place your frames on the paper. Trace the edges. Cut the paper out. Tape the paper cutouts to your drywall using painter tape.
Stand back. Leave the room. Come back ten minutes later. Look at the paper shapes. Do they feel balanced? You can move paper easily. Moving nails requires patching compound and fresh paint.
I use 3M Command strips for small frames. They hold tight. They peel off cleanly. For heavy items you must find a stud. Use a magnetic stud finder. Find the screws in your drywall. Mark the stud center. Drive your screw there.
Gather your supplies before starting this project.
- Rolls of brown kraft wrapping paper
- Blue painter tape designed for delicate surfaces
- A sharp pencil for marking holes
- A metal ruler for exact spacing
- A heavy duty hammer
- An assortment of picture hooks rated for different weights
Never rush the paper template phase. Leave the paper up for three days. Walk past it in the morning. Look at it at night. Does it feel heavy on one side? Move the paper.
The Secret To Mirror Backgrounds And Reflective Styling
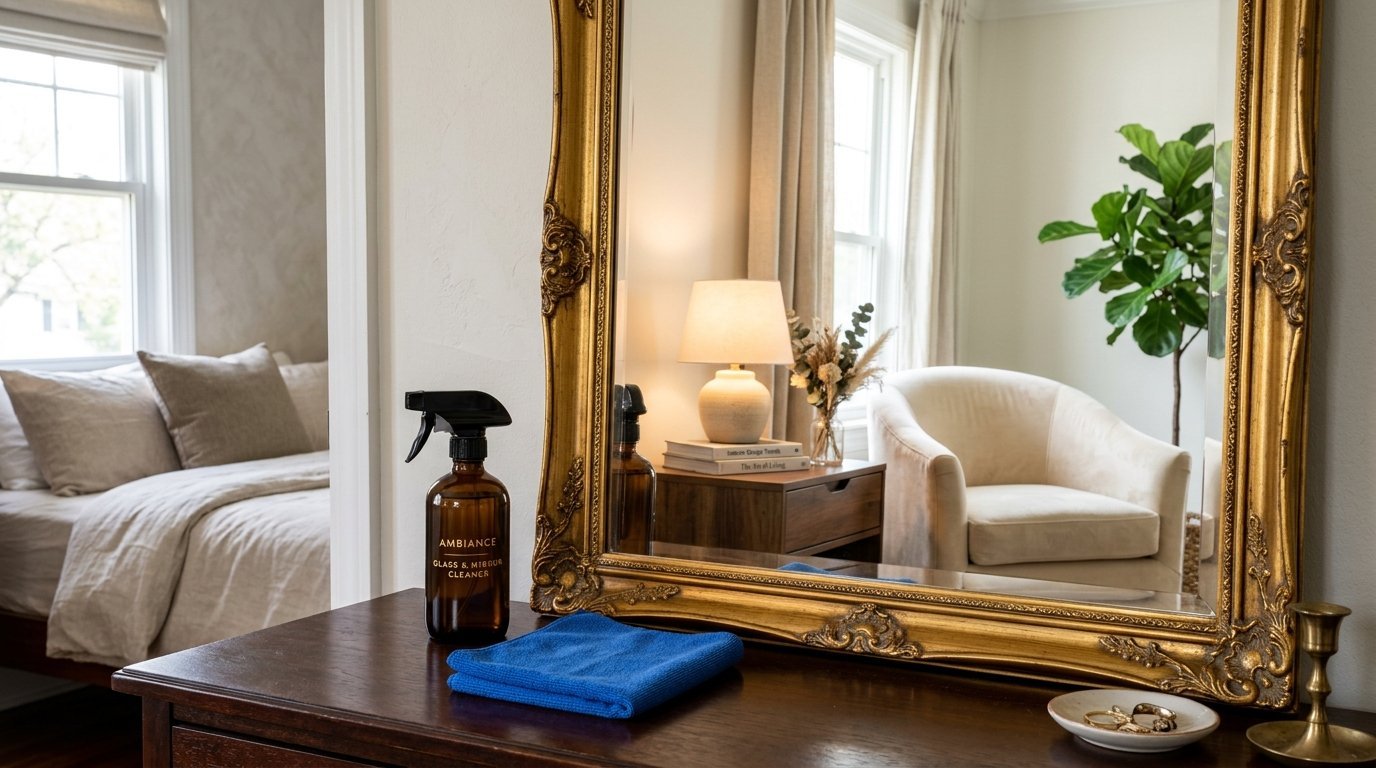
Mirrors double your visual room size. They bounce light into dark corners. They create perfect photography backgrounds. You must maintain them perfectly for this to work.
I noticed this issue with a gold frame in my Classy Bedroom last summer. Moisture accumulates behind the glass. The edges turn black. The silver backing degrades.
I saw this destroy a beautiful piece in my hallway three years ago. The bathroom humidity traveled down the hall. It settled on the glass.
You must dry your glass completely. Never let liquid sit on the edges.
In my experience a dusty frame or cloudy glass ruined the feel of my home last year. I changed my entire cleaning routine.
Here is my exact cleaning system. You need distilled water. You need isopropyl alcohol. Mix them in a spray bottle.
Never spray directly on the glass. The liquid drips down. It ruins the backing. Spray your cloth first.
I prefer using Norwex microfiber cloths. 3M microfiber cloths work well too. You must wipe in a specific pattern. Start at the top left. Wipe across to the right. Move down slightly. Wipe back to the left. This prevents streaks.
Sometimes I use commercial products. Sprayway glass cleaner foams up nicely. Method works for light dusting. Invisible Glass leaves zero residue.
Your cleaning kit requires specific items.
- One dark glass spray bottle
- Distilled water with zero minerals
- Seventy percent rubbing alcohol
- Two Norwex flat weave cloths
- One 3M fluffy drying towel
Never use paper towels. They leave white lint everywhere. They scratch delicate surface coatings. Wash your cloths in hot water. Never use fabric softener. Fabric softener coats the fibers in wax. Wax smears on your glass. Your mirrors will shine. Your photos will look professional. Your reflection will be flawless.
Fresh Painting Hanging Ideas For Instant Scale
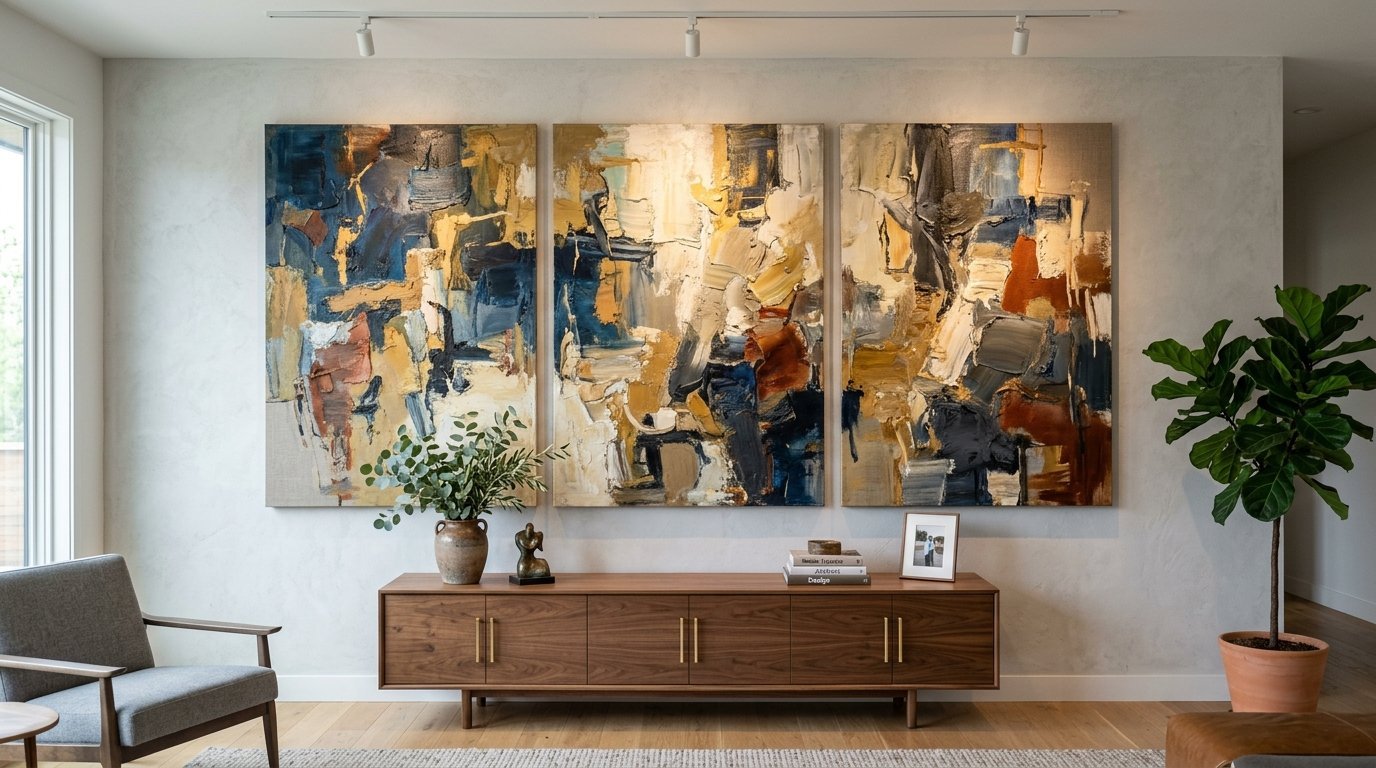
Oversized art fixes massive walls instantly. One giant piece makes a stronger statement than fifty tiny ones.
You can split one image across three panels. We call this a triptych. You space the panels two inches apart. This covers massive width. This costs less than one giant custom canvas. Finding hanging paintings on the wall ideas requires patience.
You can hang textiles. A large vintage rug looks incredible on a huge surface. You mount a curtain rod near the ceiling. You clip the rug to the rings. This absorbs sound. This warms up a cold room.
Canvas stretching offers another cheap route. Buy raw canvas. Buy stretcher bars. Staple the canvas over the wood. Buy a sample pot of black paint. Paint a massive abstract arch. This costs thirty dollars. It covers five feet of space.
Never hang art too high. The center of the piece must sit at eye level. Eye level sits around fifty seven inches from the floor. Measure fifty seven inches up. Make a mark. The center of your art goes over that mark.
You have options for massive scale that cost under fifty dollars.
- Hang a vintage wool blanket over a sturdy rod
- Frame a piece of graphic wallpaper in custom trim
- Mount a giant paper map using magnetic wooden poster hangers
- Stretch raw linen over custom wooden stretcher bars
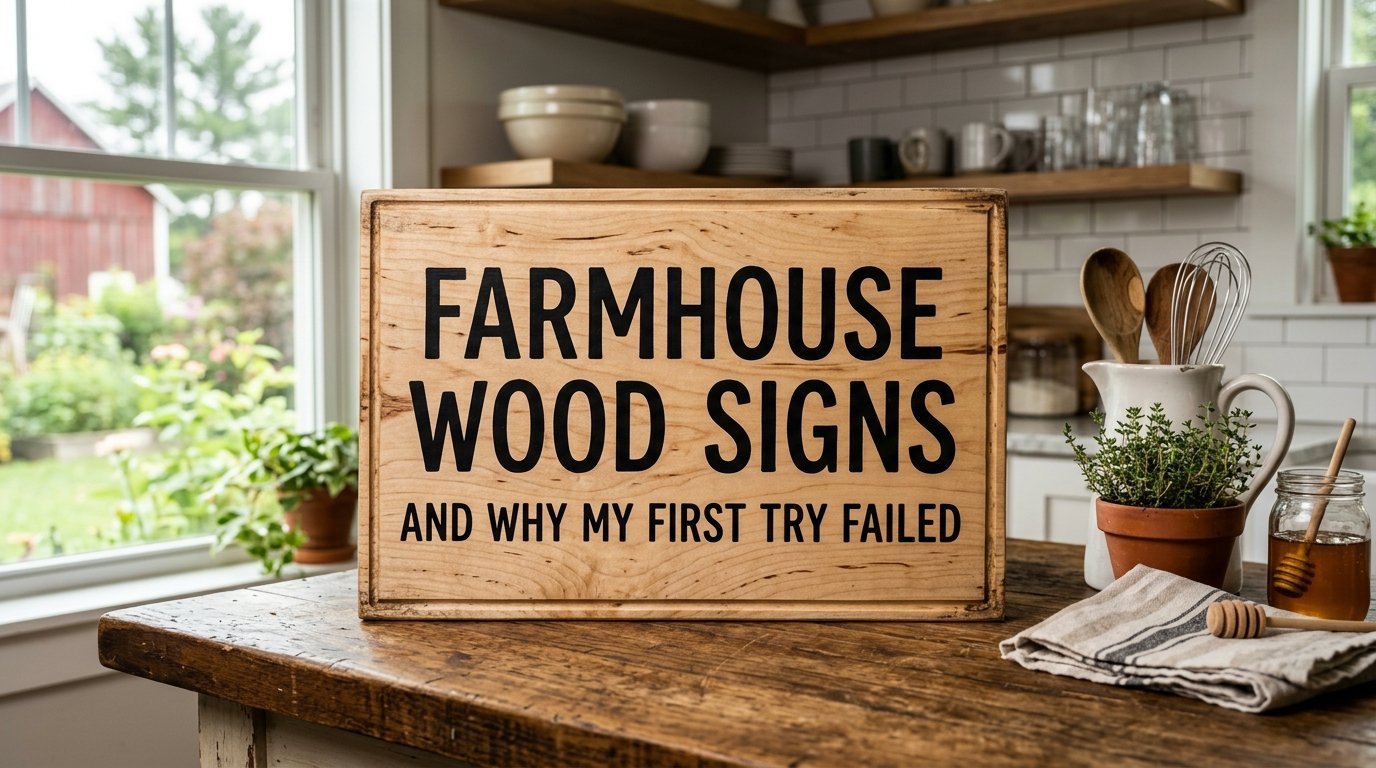
Farmhouse Wood Signs And Why My First Try Failed
Farmhouse styling uses natural textures. Wood grains warm up cold paint colors. Hand lettered signs feel welcoming.
Three months ago I threw a fresh piece of pine right into the trash. I tried to craft a farmhouse welcome sign.
I bought cheap pine. I did not sand it. I painted lettering directly on the raw grain. The paint bled. The letters looked blurry. The wood warped three days later.
You must prepare wood correctly. Buy sanded birch plywood. Apply a wood conditioner first. Paint your base color. Let it dry for two days.
Use a vinyl stencil for lettering. Press the stencil edges down hard. Paint over the stencil with your base color first. This seals the edges. Then paint your letter color. Peel the stencil while wet. Your lines will be perfectly crisp.
Frame the edge with dark walnut stained wood. This creates a finished border. This stops warping. Secure the frame with wood glue and brad nails.
Follow my exact sequence for perfect signs.
- Sand the birch face with two hundred twenty grit paper
- Wipe all dust away with a sticky tack cloth
- Apply clear water based sanding sealer
- Roll on two thin coats of matte latex paint
- Stick your vinyl stencil down firmly
- Paint the base color over the stencil edges to seal them
- Dab your contrasting letter color using a dry foam brush
- Peel the plastic stencil away immediately while paint remains wet
Creative Hanging Paintings On The Wall Ideas
Nails damage drywall. Renters cannot drill massive holes. You have other choices.
Picture rails exist in old historic homes. They sit near the ceiling molding. You buy brass hooks. You attach wire to your art. You hang the wire from the brass hooks.
You can install a modern picture rail. IKEA sells cheap picture ledges. You mount the ledge with three screws. You lean the art against the drywall.
This allows constant shuffling. You swap art every week. You never make new holes. You layer small frames in front of large frames.
Floating shelves serve the same purpose. You buy thick chunky wood shelves. You mount them with hidden brackets. You place books next to your art. You drape a trailing plant over the edge. You will find painting hanging ideas for awkward corners using these shelves.
Leaning art on the floor works for massive pieces. A six foot mirror looks great leaning. A massive canvas looks casual resting on the baseboard. Just secure the top edge with a hidden strap. This stops it falling on pets or kids.
Renters require specific damage free hanging gear.
- 3M Command heavyweight velcro strips
- OOK brand tiny brass pins that leave microscopic holes
- Tension rods for hanging textiles inside window frames
- Over the door hooks adapted for hanging tall mirrors
How To Style A Long Blank Wall Ideas That Flow
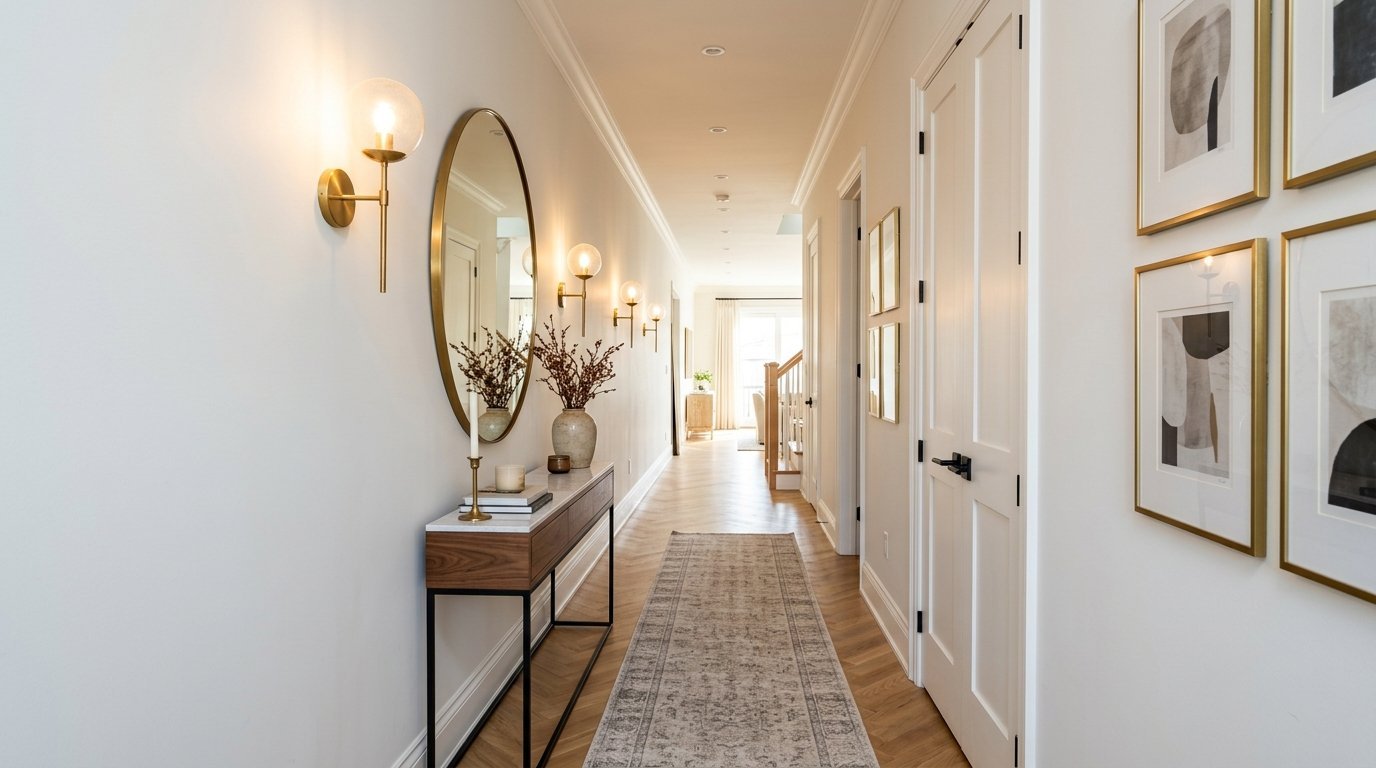
Hallways cause headaches. A long narrow corridor feels like a bowling alley. You must break the length visually. You need long blank wall ideas that break up the tunnel.
Do not hang a straight line of tiny pictures. This makes the space feel longer. This creates a tunnel.
Create specific zones instead. Place a slim console table halfway down the corridor. Hang one large mirror over it. Place a tall lamp on the table. This stops the eye. This breaks the tunnel.
Use lighting to your advantage. Install plug in wall sconces. Mount them every four feet. The pools of light create visual rhythm.
Paint the far end a dark color. Dark colors pull surfaces forward visually. A black door at the end makes the corridor feel shorter.
Hang vertical pieces. Tall narrow art forces you to look up. This distracts from the extreme length.
Break up extreme length using visual stops.
- Place a tall olive tree at the halfway mark
- Lay a runner rug sideways to force a visual break
- Paint a color blocked arch exactly in the middle
- Hang a protruding double sided clock
Bohemian And Art Deco Wall Decor Layout Ideas
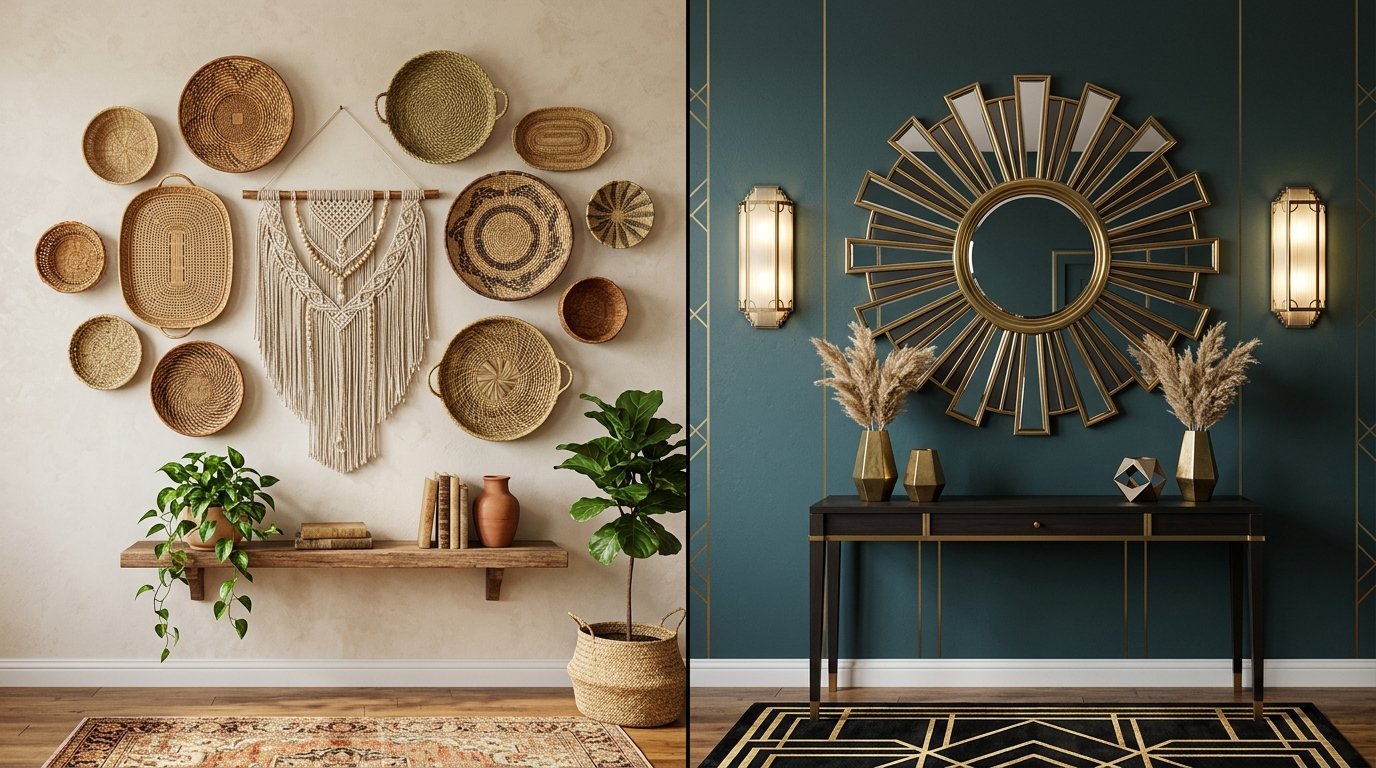
Your layout must match your room style. Different aesthetics require different rules. We outline wall decor layout ideas for tall ceilings in these styles.
Bohemian styling ignores strict grids. You want texture. You hang a woven macrame piece next to a thrifted oil painting. You attach woven baskets directly to the drywall.
You buy shallow flat baskets from thrift stores. You arrange them in a sweeping curved line. They look like they are floating across the room.
Art Deco demands symmetry. You need gold metals. You need geometric shapes. You hang a massive sunburst mirror in the absolute dead center. You place matching gold sconces exactly two feet on either side.
Precision matters for Art Deco. Use a tape measure. Use a level. If the sconces sit off by one inch the whole arrangement fails.
Mix your finishes carefully. I prefer mixing matte black metal with raw wood. This keeps the room from looking like a catalog.
Bohemian texture sourcing requires specific shopping trips.
- Hunt for vintage brass plates at estate sales
- Buy hand woven African Binga baskets online
- Find massive driftwood pieces on the beach
- Search for vintage copper molds at flea markets
Art Deco styling demands specific geometric materials.
- Symmetrical mirrored panels with beveled edges
- Polished brass or chrome metallic accents
- Stepped pyramid frame profiles
- Velvet covered backing boards
Managing Corners And Weird Architectural Details
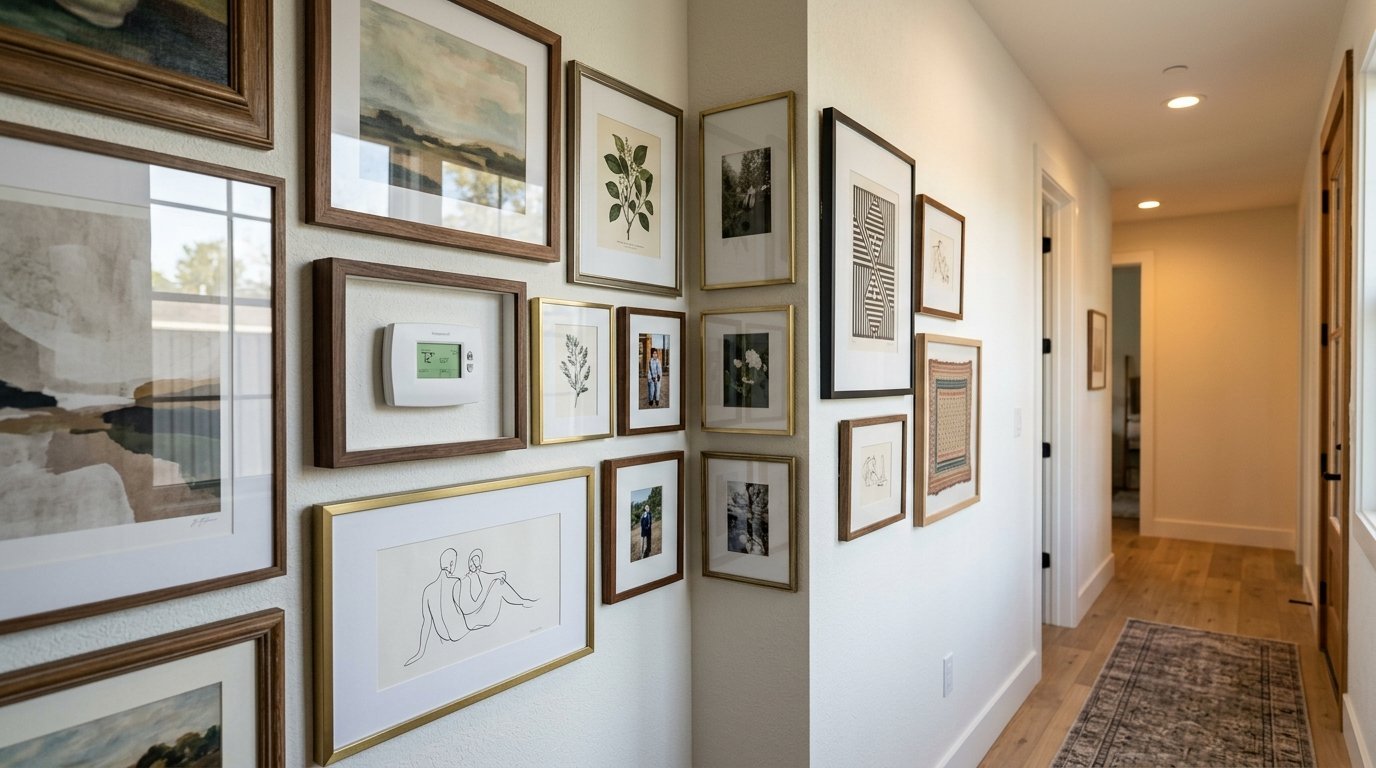
Blank spaces wrap around corners. Thermostats ruin perfect center lines. Light switches get in the way.
Never pretend the thermostat does not exist. Incorporate it. Construct a shallow box over the electrical panel and attach a canvas to the door. Create a gallery arrangement around it. Place frames above and below the plastic box. It disappears into the collage.
Handle odd corners with asymmetrical styling. Hang art on the larger surface. Leave the smaller return surface totally blank. Negative space gives your eyes a place to rest.
Slanted ceilings cause confusion. You live in a room with angled roof lines. Never step your frames down the stairs. Draw a straight horizontal line. Hang all tops on that exact line. Let the bottoms fall where they may.
Handle strange architecture with specific tricks.
- Paint the ugly thermostat exactly the same color as the drywall
- Hang curtains floor to ceiling even if the window is tiny
- Mount a shelf straight across the sloped ceiling base
- Place a tall floor lamp in front of low electrical outlets
Shopping For Materials Without Wasting Money
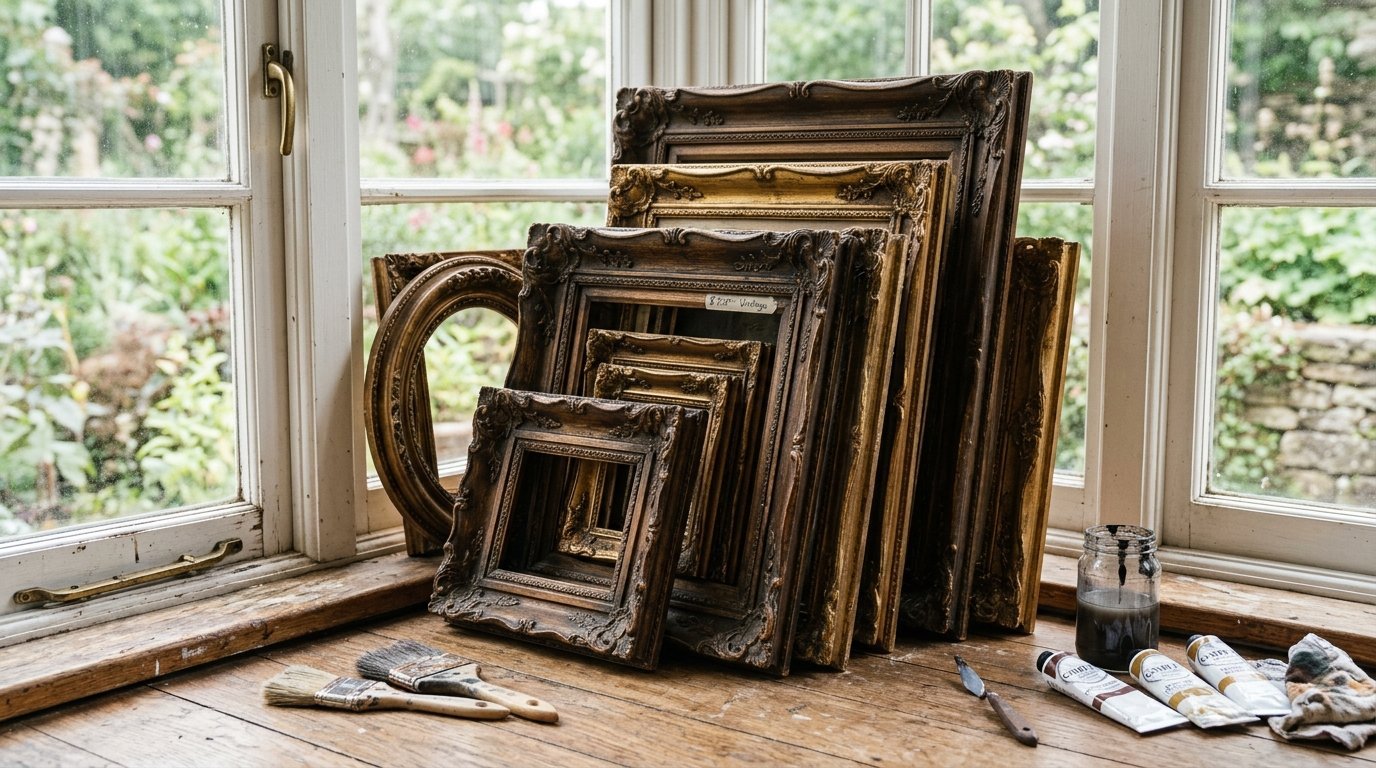
Decorating gets expensive fast. You must shop strategically to find ideas for empty wall space that fit your budget.
Custom framing costs a fortune. Frame shops charge hundreds for basic black borders. Never pay for this.
Buy standard frame sizes. Sizes like sixteen by twenty or eighteen by twenty four cost very little. Buy them at craft stores.
Order custom cut mats instead. A custom mat costs fifteen dollars. You put your weird sized art in the custom mat. You put the mat in the cheap standard frame. It looks like a five hundred dollar custom job.
Thrift stores hide amazing frames. You look past the ugly old art inside. You check the corners. Are they solid wood? Does the joint feel tight? Buy it. Throw the old art away. Paint the wood.
Print digital files at local copy centers. You buy a file online for five dollars. You print it as a blueprint or engineering print for four dollars. You have massive art for under ten dollars.
Hunt for supplies using my secret sources.
- Check local library sales for massive vintage art books to cut up
- Visit architectural salvage yards for carved wooden panels
- Browse hotel liquidation sales for giant framed lobby mirrors
- Buy custom tint paint from the hardware store for custom canvases
The Final Polish And Lighting Touches
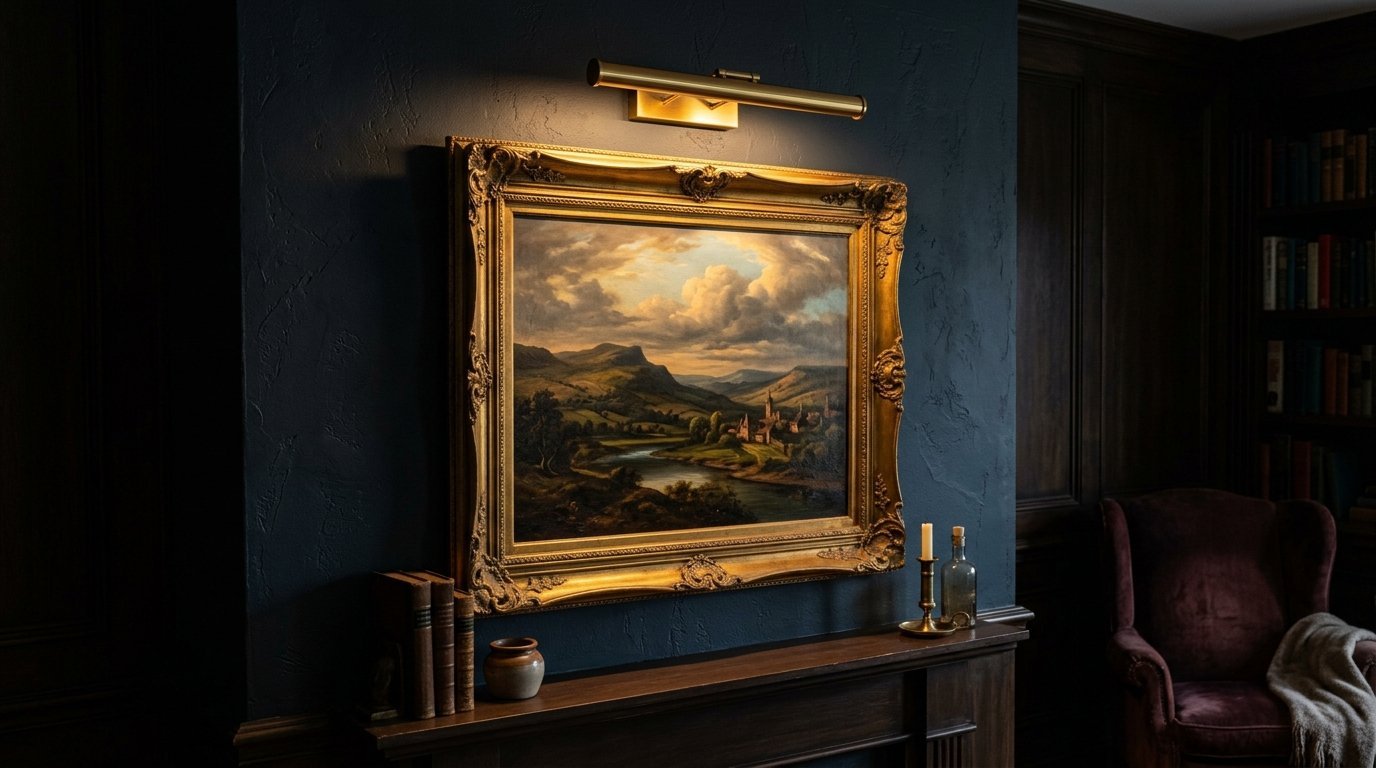
You finish hanging your pieces. The room still feels flat. You need light.
Art galleries look amazing because of directed light. Your house relies on terrible ceiling fixtures.
Buy battery operated picture lights. They cost around thirty dollars. You mount them to the top of your frame. They shine a warm glow directly onto the canvas. No wires required. They use remote controls.
This one tiny detail changes everything. The room feels expensive. The art looks vibrant.
Ensure you use warm tone bulbs. Look for two thousand seven hundred kelvin on the box. Cold white light makes homes feel like hospitals. Warm light makes homes feel cozy.
Make cheap art look expensive with lighting.
- Mount a rechargeable brass picture light dead center
- Place a small floor uplight behind your artificial olive tree
- Install dimmers on every single switch in the room
- Hide light strips behind a leaning floor mirror
Common Layout Mistakes You Must Avoid
You ruin a room by ignoring spacing rules. People stick a tiny frame high up near the ceiling. It looks ridiculous.
These spacing rules save you from disaster. Your eye notices wrong spacing instantly. You feel uneasy walking into the room. You fix the spacing and the room breathes again.
- Never hang items closer than two inches apart
- Never spread items wider than six inches apart
- Never hang art wider than the furniture sitting below it
- Never align the top edges of frames if the bottom edges look jagged
Frequently Asked Questions
How high should I hang my pictures
The center of the picture must sit fifty seven inches from the floor. This represents average human eye level. If you hang it over a couch leave six to eight inches of gap above the furniture back.
Can I mix different frame colors
Yes. Mixing colors stops the room looking like a hotel. Pick three finishes. Use matte black, natural wood, and brushed brass. Distribute them evenly across your arrangement.
How do I stop frames from sliding out of level
Buy clear museum wax. Stick a tiny ball of wax on the bottom corners of your frame. Press the frame against the drywall. It will never slide sideways again. It peels off safely later.
What size art do I need over a king size bed
A king bed measures seventy six inches wide. Your art should cover roughly fifty inches of that width. You can use one massive fifty inch canvas. You can use two twenty four inch frames side by side.
Is it safe to hang heavy mirrors on drywall
No. Never hang anything over twenty pounds on bare drywall. You must find a wooden stud. If no stud exists you must use heavy duty toggle bolts. A plastic anchor will fail and the glass will shatter.
Should every wall have something on it
Absolutely not. You must leave negative space. If you fill every single surface your home feels chaotic. Choose one focal area per room. Leave the opposing surface bare.
Wrapping Up Your Styling Project
You now possess a exact roadmap. You know how to measure. You know how to clean your glass correctly. You have my specific steps for tracing shapes on kraft paper.
Stop staring at the blank drywall. Buy your painter tape today. Cut out your paper templates tonight. Make your first mark.
Your house requires your personal touch. Do not fear making a hole. A tub of spackle costs four dollars. Mistakes disappear in five minutes.
Grab your tape measure. Look at the massive space. Decide on your anchor piece. Start your layout. You are ready to create a room that stops people in their tracks.

Anya Castellan is the Founder and Editor-in-Chief of Home Wall Trends. An art history graduate of the Rhode Island School of Design with twelve years of experience writing for leading American design publications, she specializes in composition, gallery wall theory, and the quiet architecture of domestic space. A former contributing editor at Architectural Digest and guest lecturer at Parsons School of Design, Anya personally reads and signs off on every piece before it is published.