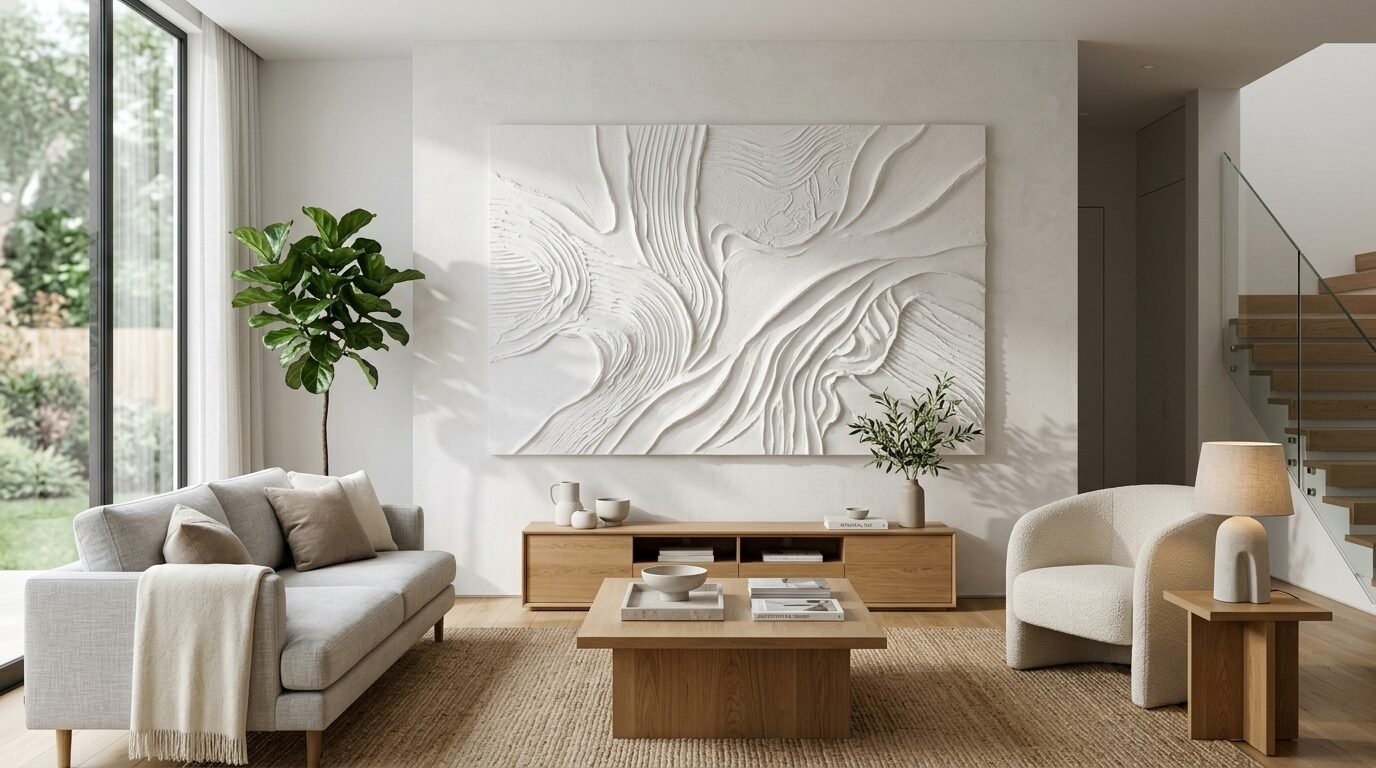
Imagine walking into a luxury furniture store. You see a massive white canvas with deep ridges and soft shadows. It looks like stone or a frozen ocean wave. You look at the price tag. It says nine hundred dollars. Your heart sinks. I know that feeling because I stood in that exact spot two years ago. I realized then that I could make that piece myself. I went to the local hardware store and spent forty dollars instead. That piece now hangs in my living room and every guest asks where I bought it. You can create this high end look without a massive budget. This style of art focuses on feeling and depth rather than perfect drawing skills. It is the perfect project for anyone who wants a custom home. I want to share my hard earned lessons so you skip the messy mistakes I made.
The Big Picture for Beginners
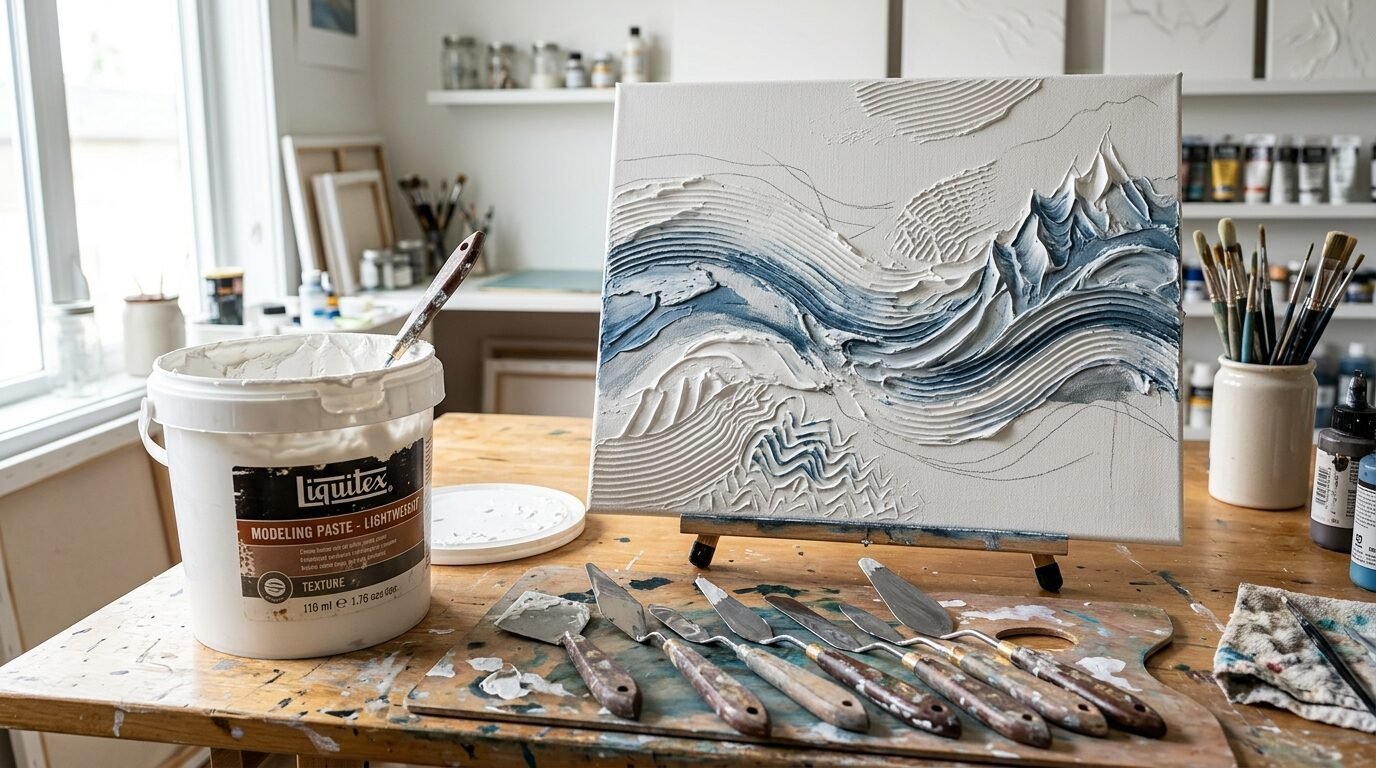
This guide gives you the exact steps to master texture art projects. You will learn why certain pastes crack and how to prevent it. I cover fifteen distinct secrets that separate amateur work from gallery quality pieces. We look at specific tools like palette knives and notched trowels. You will see how to apply gold art painting touches for a luxury finish. I also explain the best way to handle Islamic art canvas designs using 3D methods. We look at cost breakdowns for different materials. I share my experience with hardware store joint compound versus artist modeling paste. By the end of this read you will have a clear plan. You will know how to prep your space and seal your work for years of beauty. This is about making art that feels as good as it looks.
1. Choose a Heavy Duty Wood Framed Canvas
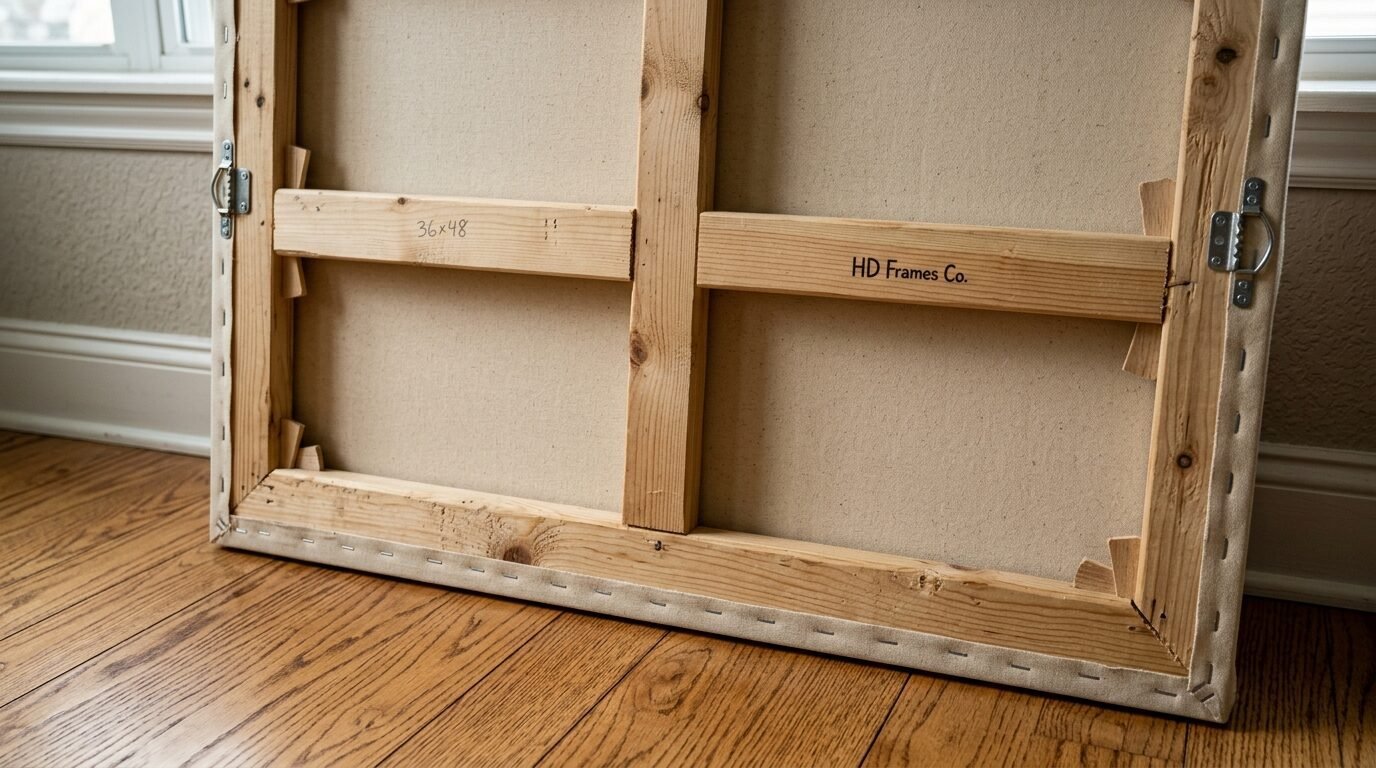
The weight of the paste is the first thing people forget. A standard cheap canvas will sag under the pressure of thick texture. I tried a thin craft store canvas for my first sculpture art projects. Within three hours the wood frame warped. The center of the canvas bowed like a hammock. Now I only use gallery wrapped canvases with thick wood supports. Look for frames that are at least one inch thick. If the canvas feels bouncy you can slide a piece of cardboard behind it. This provides a firm surface while you press your tools into the paste. Heavy duty canvases cost about ten dollars more but they save your work from ruin. Trust me on this one. A sagging canvas leads to massive cracks as the paste dries. You want a tight surface that stays flat under pressure.
2. Master the Hardware Store Joint Compound Hack
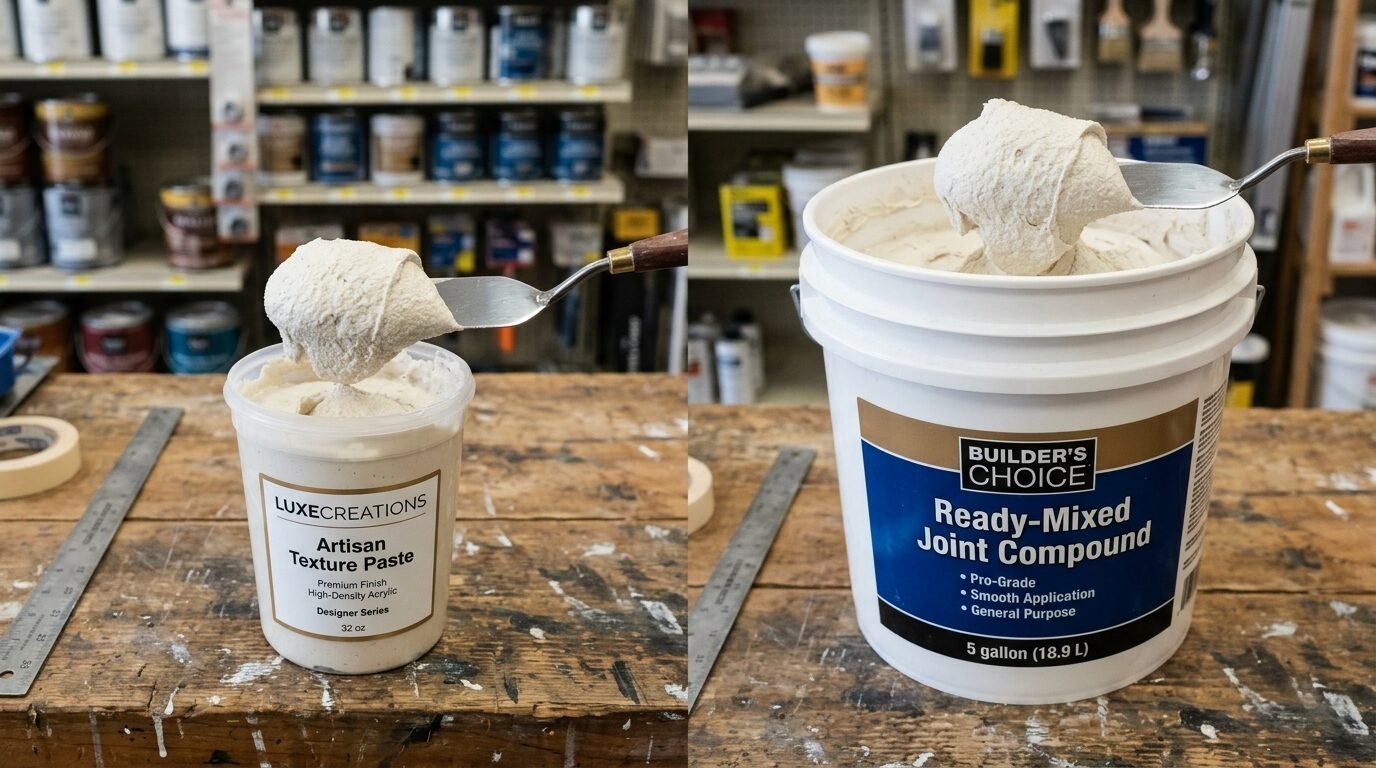
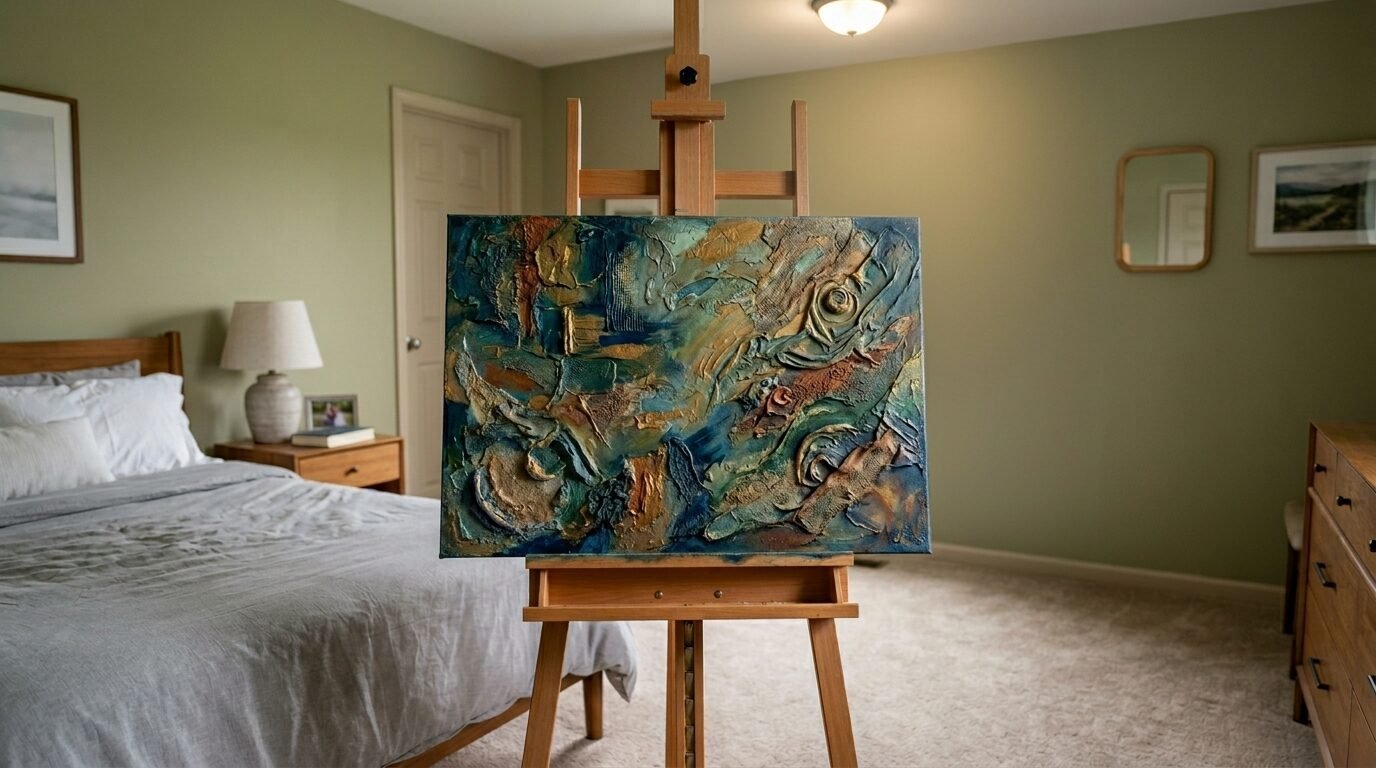
You do not need to buy expensive artist modeling paste for every project. I found that pre mixed joint compound from the hardware store works perfectly. A large bucket costs about fifteen dollars. Artist grade paste of the same size costs sixty dollars. Joint compound has a thick peanut butter consistency that holds its shape. I used this for a massive sixty inch piece in my bedroom. It has held up for three years without a single flake. The only catch is that joint compound is less flexible than artist paste. If you use it on a floppy canvas it might crack. Stick to rigid surfaces when using this budget friendly option. It is the secret to making diy abstract canvas art without breaking the bank. Just make sure you get the pre mixed kind. Mixing the powder yourself creates dust and air bubbles.
3. Mix in White Glue for Extra Strength
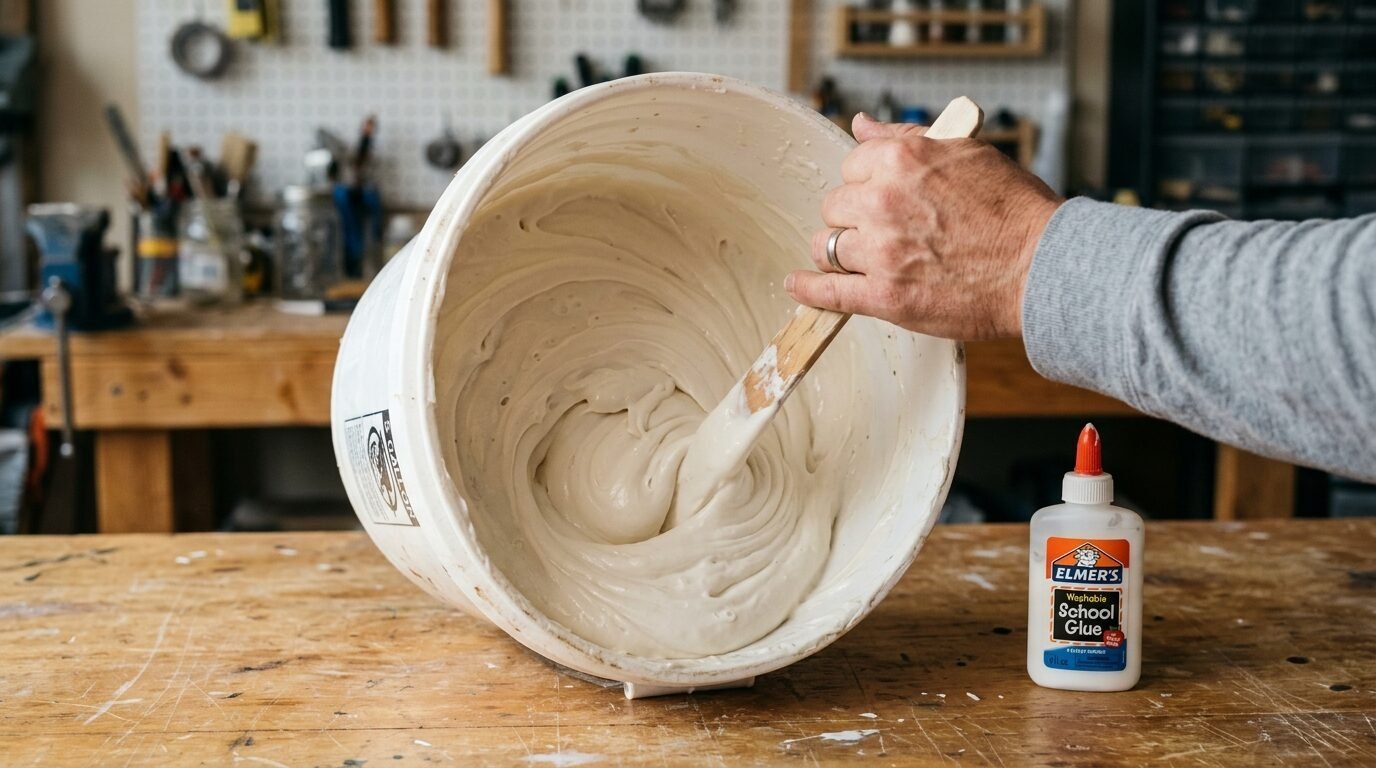
Joint compound can be brittle once it dries completely. I noticed this when I tried to move a piece and the edges chipped. I started mixing in a cup of white school glue to my paste buckets. The glue acts as a binder. It gives the material a bit of stretch as it cures. This simple step prevents the sculpture from becoming chalky. I’ve tried this with several brands of glue. Any standard PVA glue works well. Use a ratio of one part glue to ten parts paste. Stir it slowly by hand. Do not use a power drill mixer. Power mixers trap air inside the paste. Those bubbles will pop while your art dries and leave tiny holes. The glue also helps the paste stick to the canvas surface better. This is vital for long term durability in your diy canvas wall art.
4. Invest in Metal Palette Knives for Sharp Lines

Plastic palette knives are fine for kids but they bend too much for thick texture. I bought a set of five metal knives for twelve dollars. It changed the way my diy canvas art easy projects looked. Metal knives have a sharp edge that allows for crisp details. They do not lose their shape when you press into heavy paste. I use the long flat knives for creating smooth planes. The small diamond shaped knives are perfect for tiny details or 3D petals. I’ve seen people try to use kitchen spatulas. Spatulas are too rounded. They leave blunt edges that look messy. Metal tools give you the control of a professional sculptor. Clean them with a wet rag immediately after use. If the paste dries on the metal it is hard to remove without scratching the surface.
5. Use a Notched Trowel for Perfect Minimalist Waves
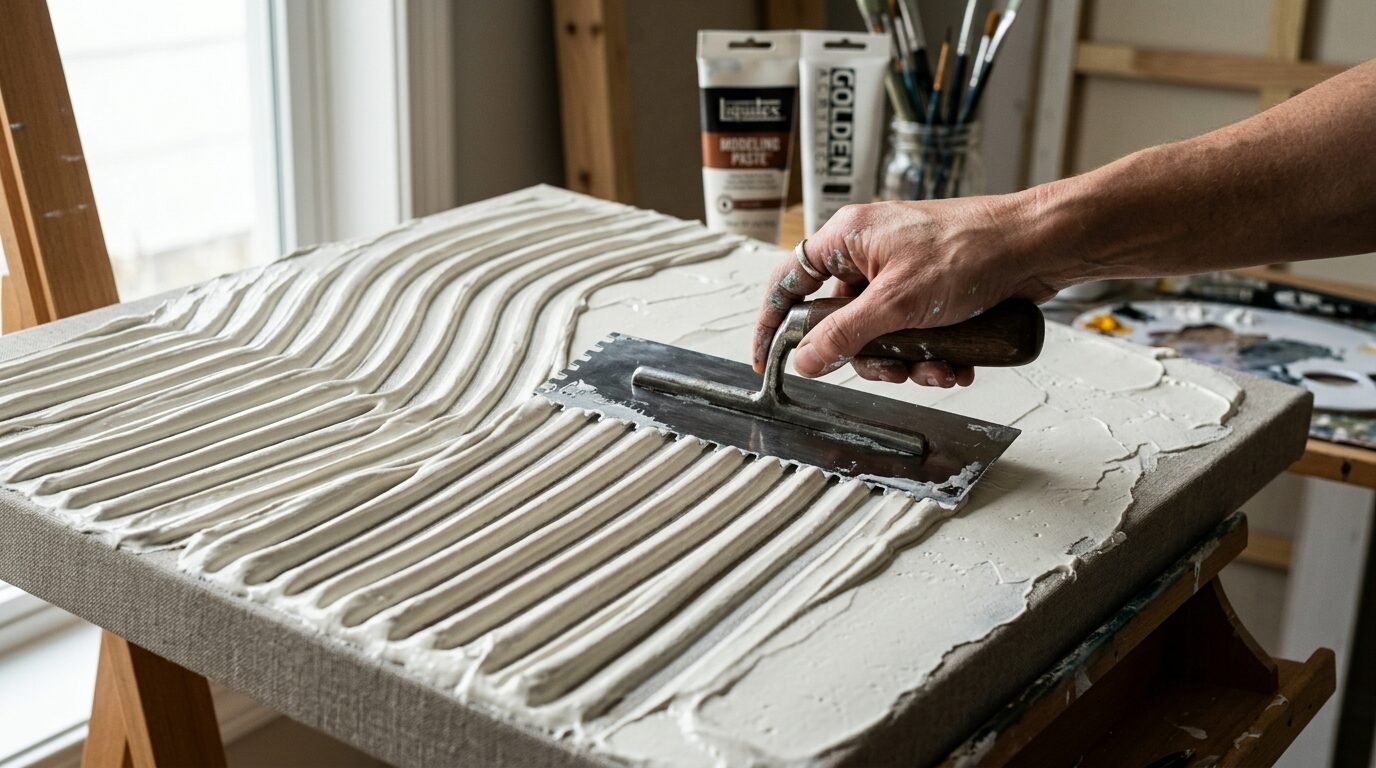
The most popular style on Pinterest right now is the arched wave. You see it in every boho and modern home. The secret tool for this is a notched trowel from the flooring aisle. These tools have square or V shaped teeth. Spread a thick layer of paste over your canvas first. Then pull the trowel across in one smooth motion. I tried doing this with a fork once and it looked terrible. The trowel creates perfectly even lines that look intentional. It mimics the look of high end designer pieces. I used this for a set of three canvases in a nursery. The uniform lines created a calm and organized feeling. Experiment with different notch sizes for different effects. A small notch looks like fine corduroy fabric. A large notch looks like architectural molding.
6. Prime Your Canvas with Gesso First
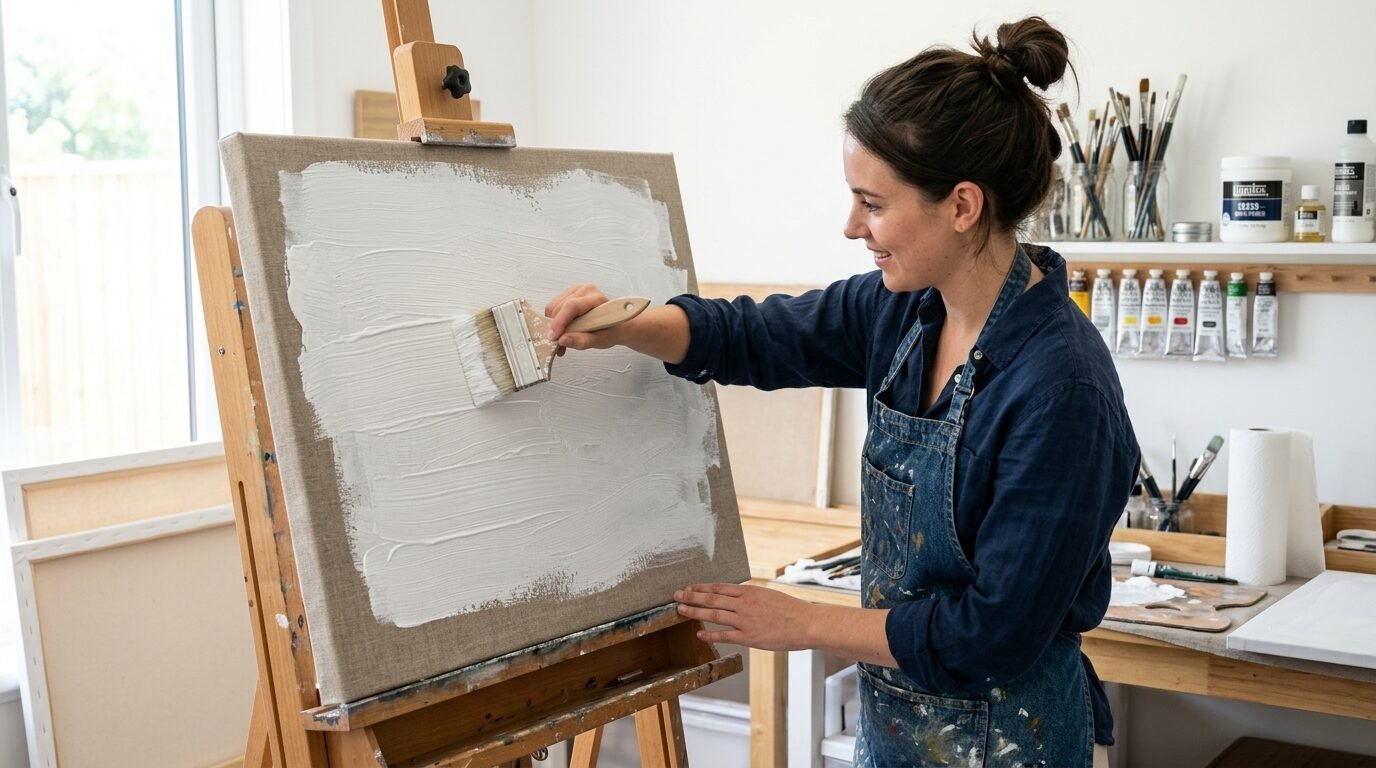
Many canvases come pre primed but they are still very absorbent. The dry canvas pulls the moisture out of the paste too fast. This causes the bottom of your texture to dry while the top stays wet. That tension leads to deep cracks. I always apply one thick coat of white Gesso before I start. Let it dry for two hours. This creates a barrier between the fabric and the paste. I noticed my work became much smoother after I started this. It also helps the paste stay workable for a longer time. You get more time to sculpt your design before it sets. If you skip this the paste can feel “grabby” and hard to move. Gesso is cheap and makes a huge difference in the final quality of your texture art projects.
7. Build Height in Multiple Layers
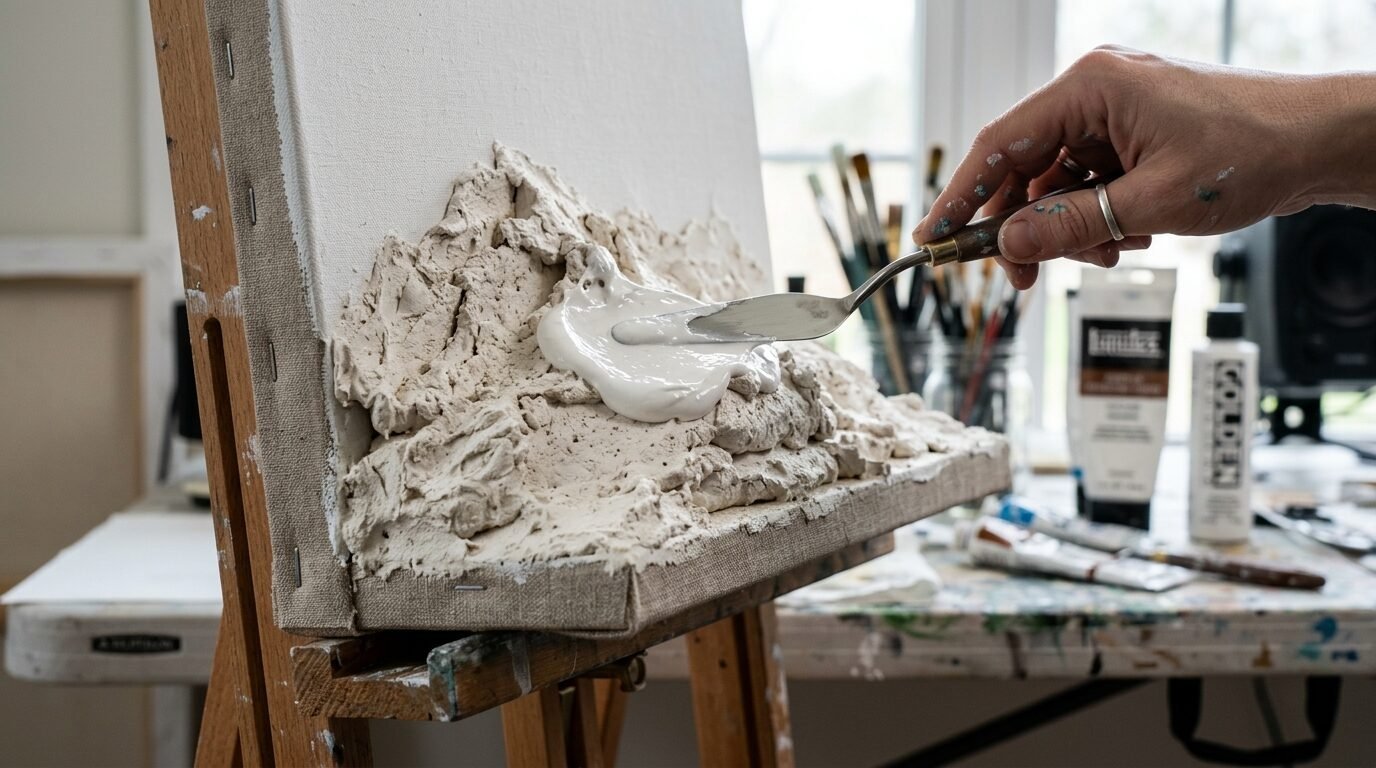
It is tempting to put all the paste on at once. I did this on a piece I called The Mountain. The paste was three inches thick in some spots. It took four days to dry and cracked so badly it looked like a desert floor. Now I build height in layers. If you want a very tall 3D effect do it in half inch increments. Let each layer dry for twelve hours. This allows the moisture to escape evenly. It results in a rock solid sculpture without the structural failure. I used this for a 3D floral piece where the petals stood out from the canvas. By layering I kept the petals sharp and sturdy. This takes more time but the result is worth the wait. Patience is your best friend when working with diy abstract canvas art.
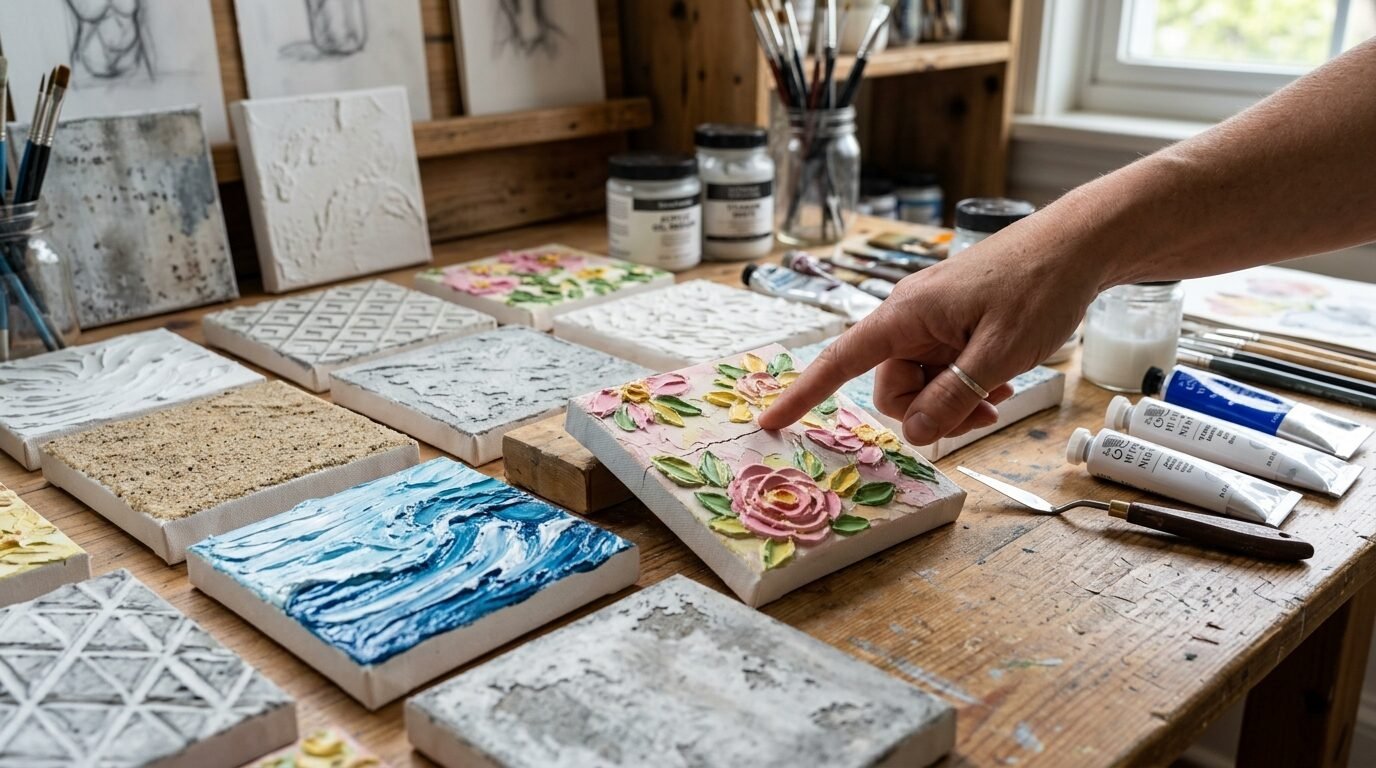
8. Master the Art of the 3D Petal
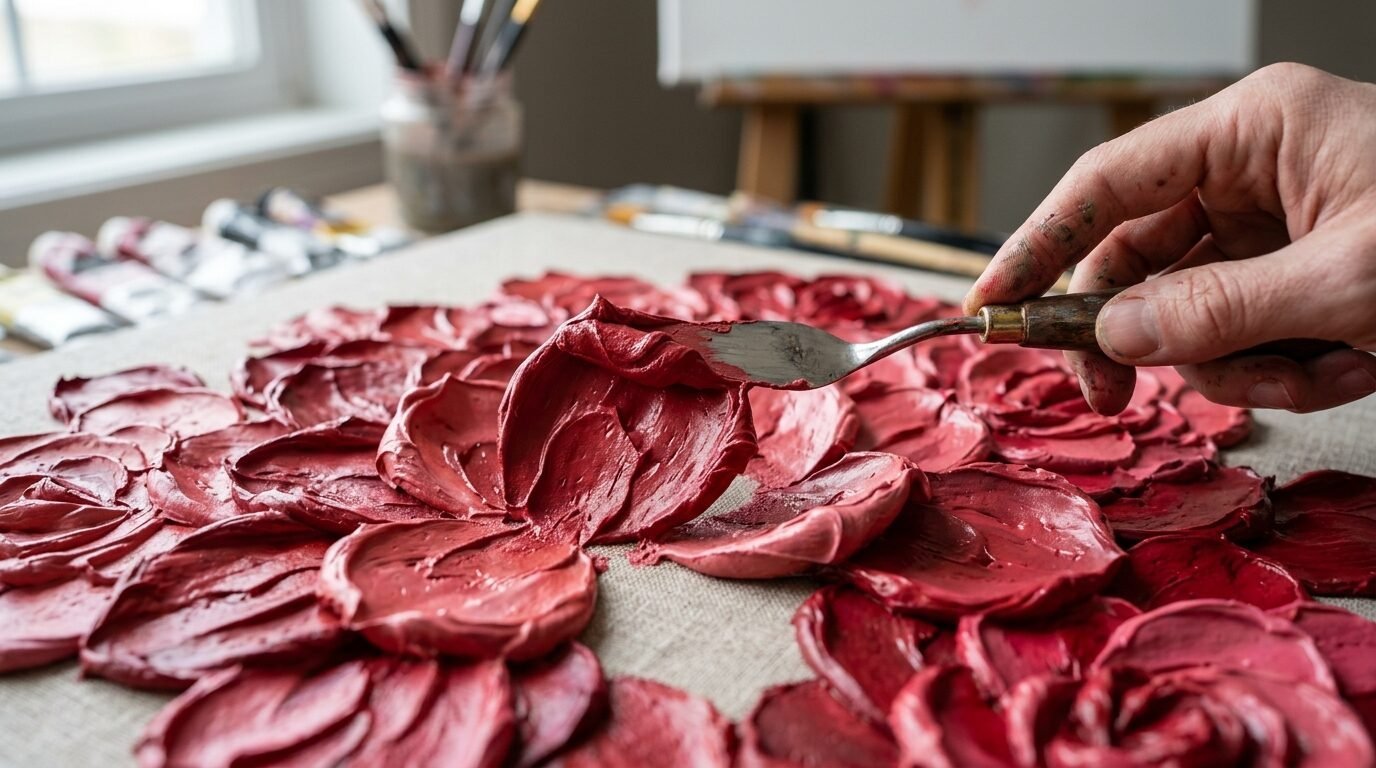
Creating flowers with texture paste is all about the “press and pull” method. Scoop a small ball of paste onto the back of a diamond shaped knife. Press it onto the canvas where you want the outer edge of the petal to be. Then pull the knife toward the center of the flower. This leaves a thick ridge at the edge and a thin flat center. I tried this twenty times on a piece of cardboard before I touched my canvas. It takes a little bit of muscle memory. I’ve noticed that thicker paste works better for this style. If the paste is too thin the petals will sag and lose their shape. I used this technique for a wedding gift last summer. The bride loved that she could feel the texture of the roses. It is a stunning way to handle sculpture art projects for beginners.
9. Use Stencils for Modern Islamic Art Canvas Designs
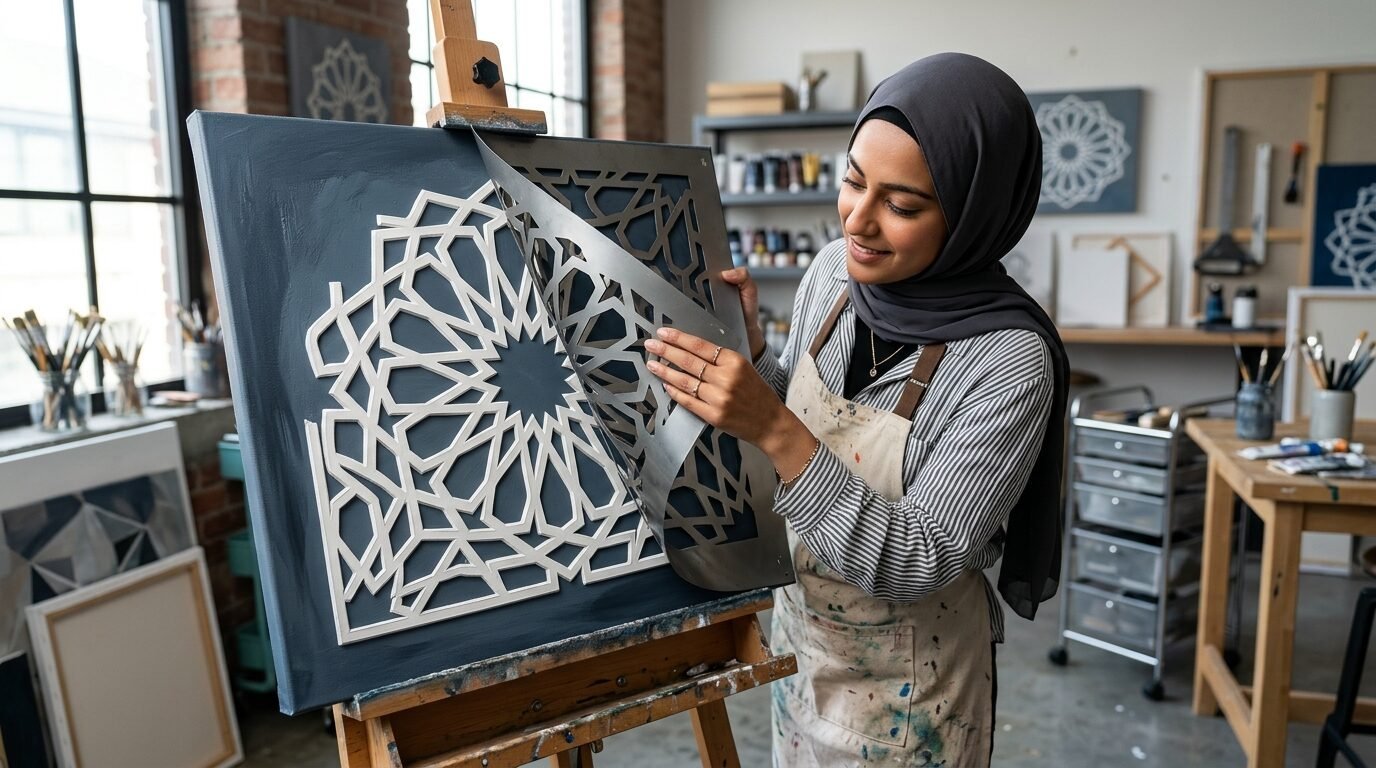
Writing calligraphy with thick paste is extremely difficult by hand. I found that using a custom stencil is the best way to get clean results. Secure the stencil to the canvas with low tack tape. Use a flat palette knife to spread paste over the openings. Peel the stencil back slowly while the paste is still wet. This leaves you with raised 3D letters that look professional. I tried painting the letters after but I found that mixing the color into the paste is better. It prevents the white paste from showing through if the paint chips. Islamic art canvas projects look incredible when you use this method. The shadows created by the raised script add a layer of mystery and beauty. It is a great way to respect traditional art while adding a modern 3D twist.
10. Control the Drying Environment
Temperature and humidity are the enemies of texture art. I once left a wet canvas in a cold garage overnight. The paste froze and then thawed which ruined the bond. I also tried using a hair dryer to speed things up. The top layer dried instantly and then cracked like eggshells. The best place for your art to dry is a room with a steady temperature. Keep it away from windows or heating vents. I’ve seen this work best in a spare bedroom with the door closed. A slow dry is a safe dry. It usually takes forty eight hours for a thick piece to cure completely. Do not touch it or move it during this time. Even a small bump can cause a heavy wave to shift or sag.
11. Sand the Rough Edges for a Professional Finish
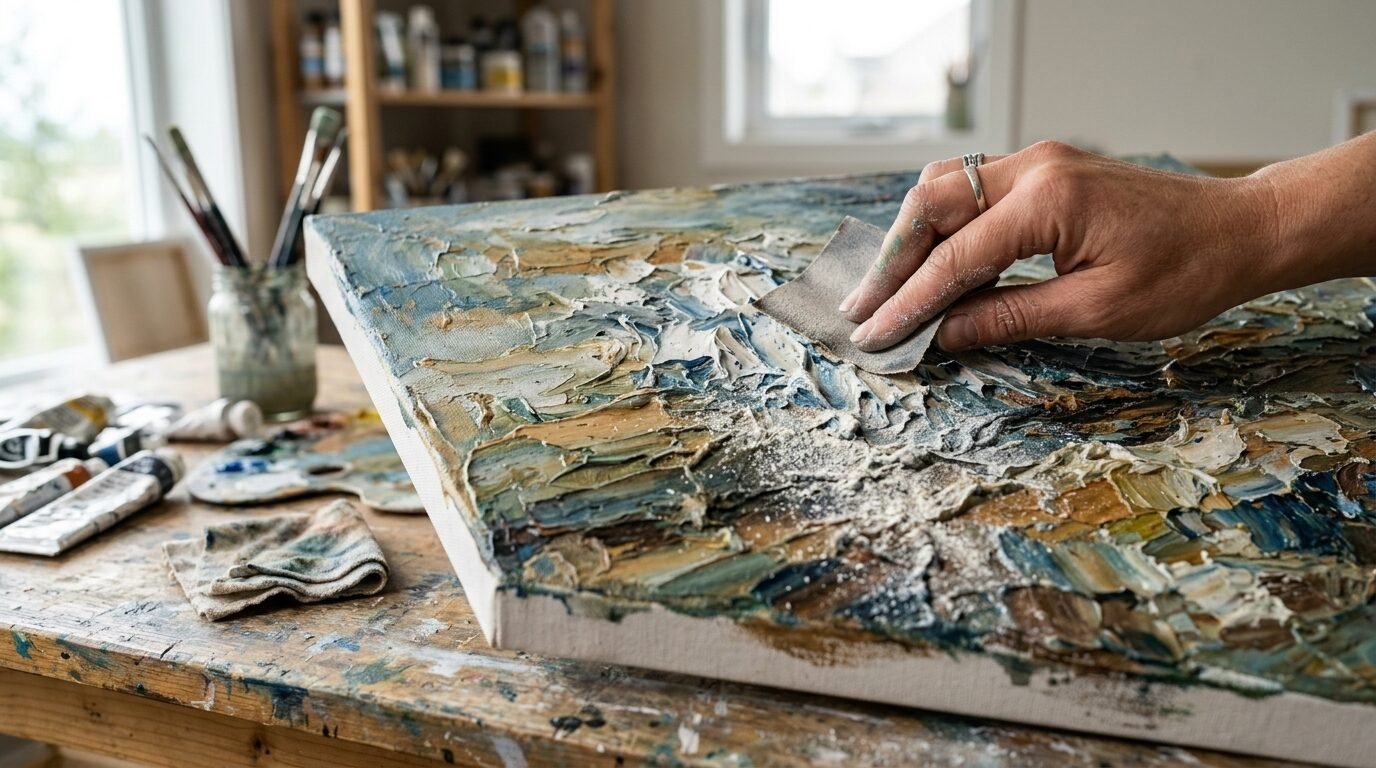
Once the paste is dry you will notice some sharp peaks or messy edges. These can look a bit “arts and crafts” if you leave them. I use a fine grit sandpaper to lightly buff the surface. I usually use 220 grit. This softens the transitions and makes the piece look like carved stone. Be careful not to sand too hard or you will lose the detail. I wear a mask during this step because the dust is very fine. I tried skipping this once and the piece felt scratchy to the touch. Sanding gives your diy canvas wall art a refined and expensive feel. It also makes the surface better for painting later. The paint will glide over the smooth peaks instead of getting caught in tiny jagged bits.
12. Apply Gold Art Painting with the Dry Brush Method
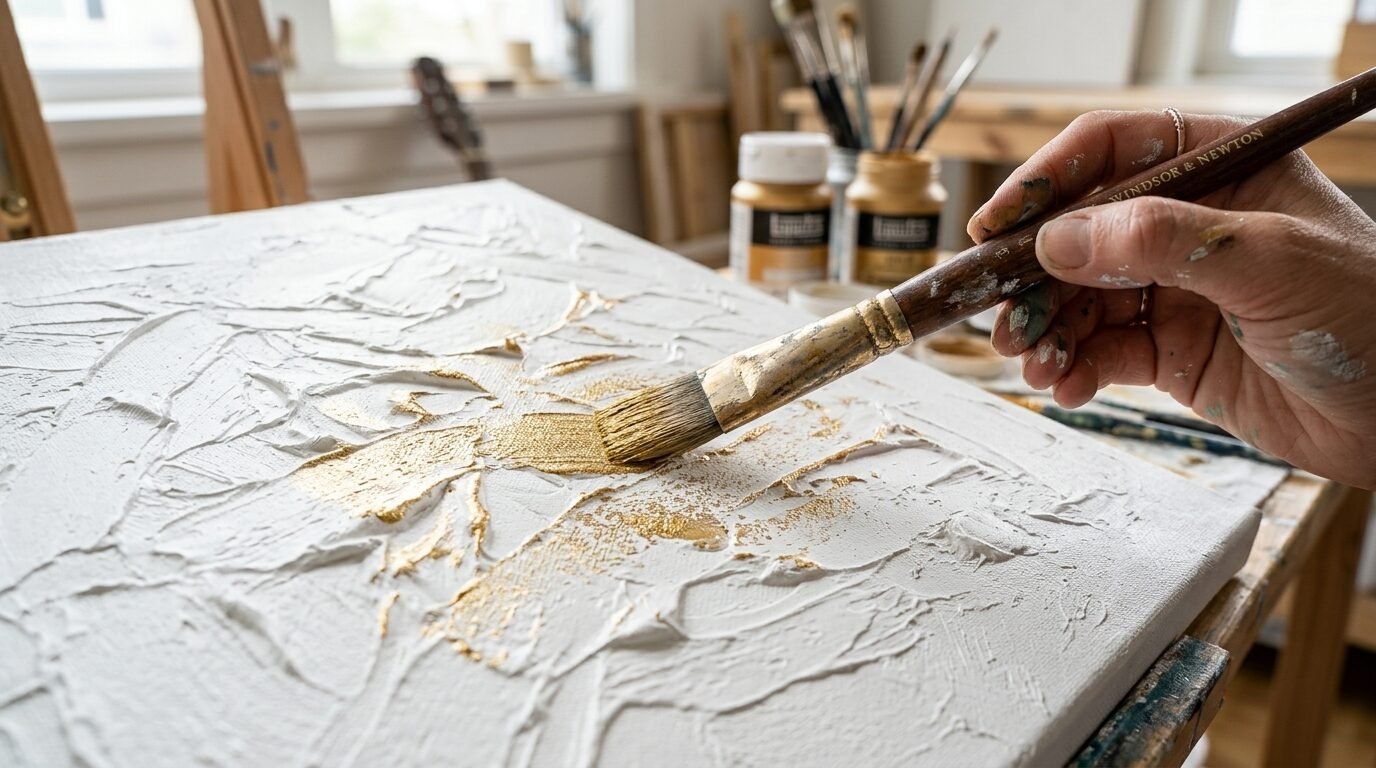
Gold accents can make your art look like it belongs in a mansion. The trick is not to overdo it. I use a technique called dry brushing. Take a stiff brush and put a tiny amount of gold paint on it. Wipe most of the paint off on a paper towel until the brush looks almost dry. Lightly skim the brush over the top of your texture. This only hits the high points and leaves the deep valleys white or dark. It creates a beautiful shimmering effect. I tried using liquid gold leaf once but it was too messy. It ran into the cracks and ruined the shadows. The dry brush gold art painting method is much easier to control. It adds a touch of light without hiding the sculpture work you did.
13. Seal the Work to Prevent Yellowing
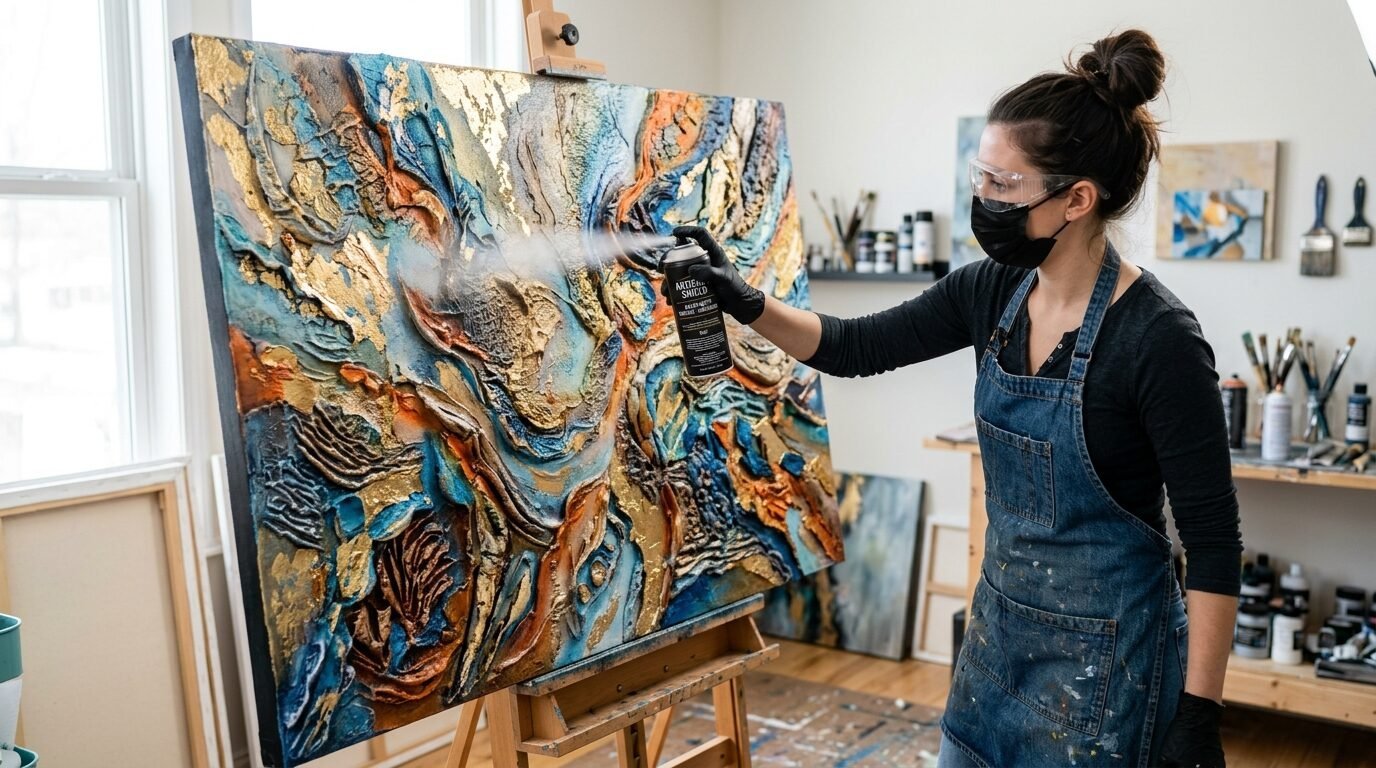
Texture paste and joint compound are very porous. They act like a sponge for dust and oils from your hands. Over time a white piece will turn yellow or gray if it is not sealed. I use a matte spray varnish to protect my work. Spraying is better than brushing because a brush can break off delicate 3D edges. I apply three light coats. This keeps the white bright and prevents moisture from getting inside the paste. I noticed that matte finishes look more like natural plaster or stone. Glossy finishes can make the art look like plastic. I’ve tried several brands and Krylon Gallery Series is my favorite. It goes on clear and does not change the color of the art. This is a vital step for any diy abstract canvas art you want to keep.
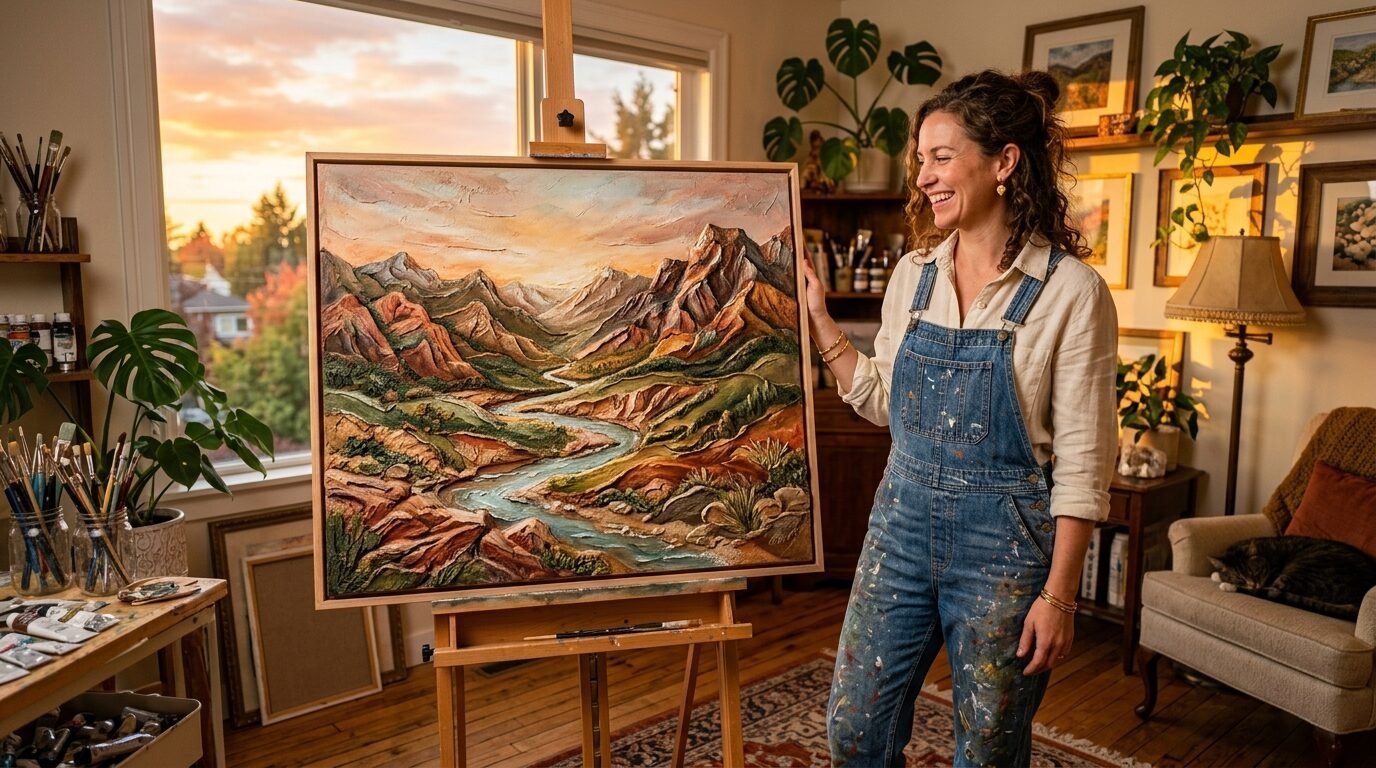
14. Use Side Lighting to Show Off the Texture
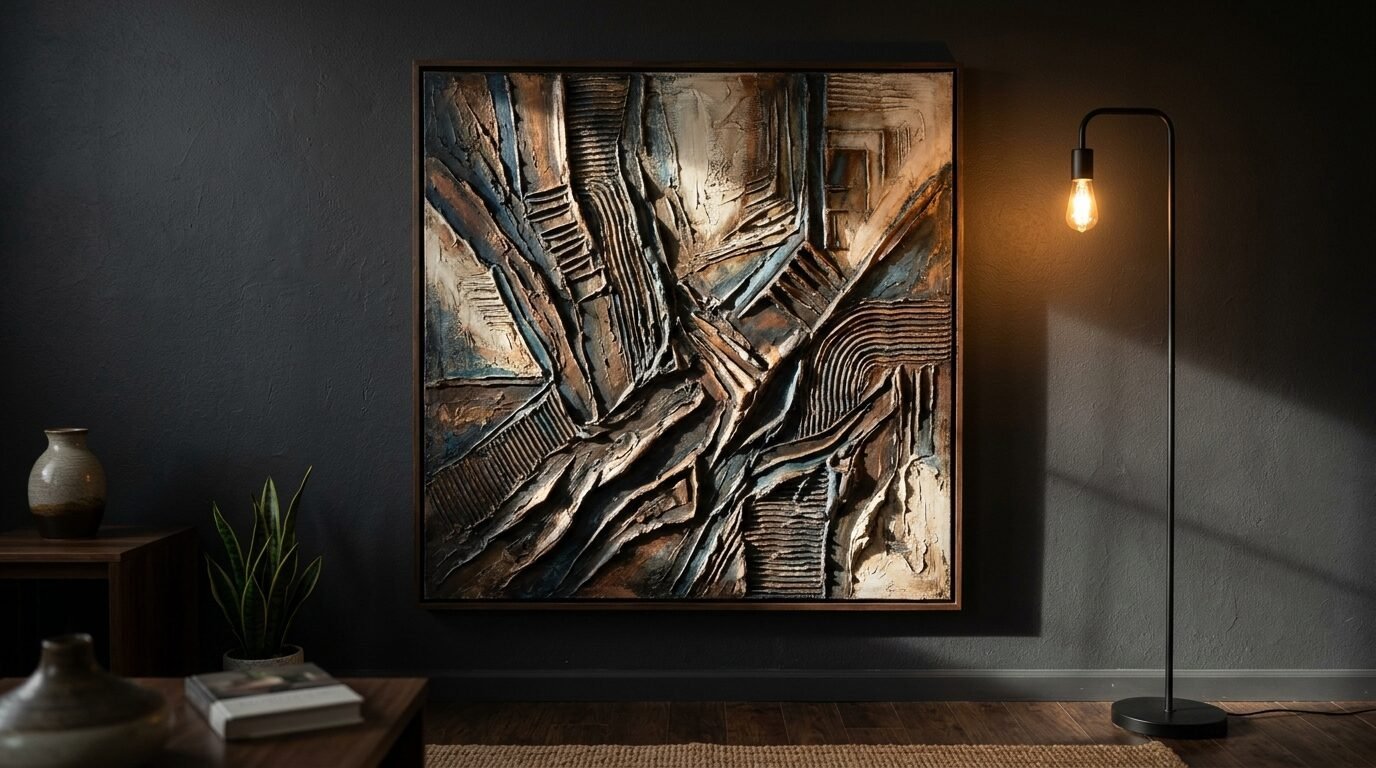
You can make the best art in the world but it will look flat in a dark room. 3D art lives and dies by the lighting. I always hang my textured pieces near a window or under a directional spotlight. The light needs to hit the canvas from the side. This creates the shadows that make the sculpture pop. I’ve seen people put these under direct overhead lights and the texture disappears. I once moved a piece from a hallway to a spot near a floor lamp. It looked like a completely different painting. The shadows became deeper and the waves looked more dramatic. When you are planning where to put your diy canvas wall art think about where the light falls. It is the final secret to making your work look like a gallery piece.
15. Finish with a Floater Frame
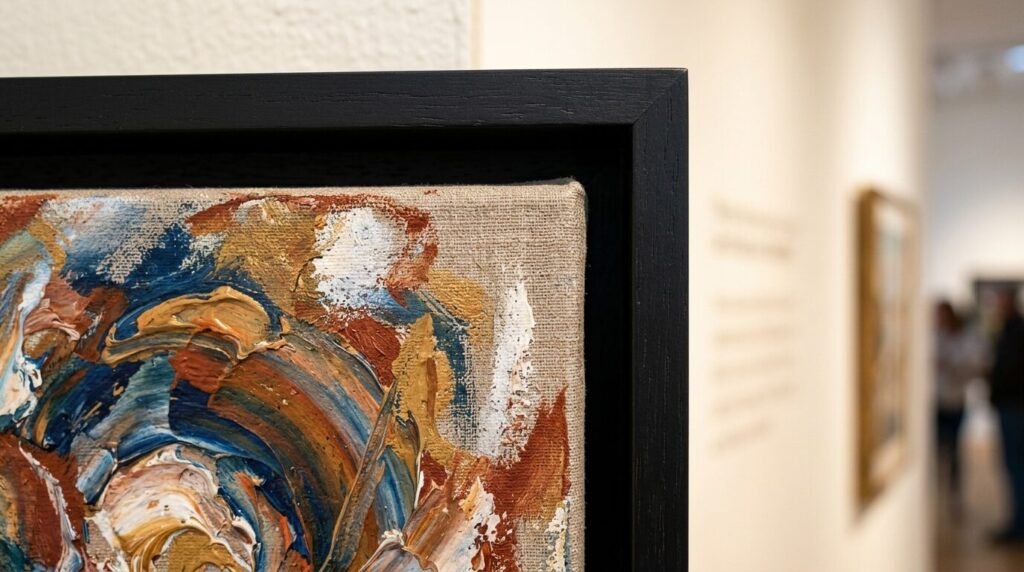
The frame is the “suit” for your artwork. A regular frame covers the edges of the canvas. A floater frame has a small gap that makes the canvas look like it is hovering inside the wood. This is how professional galleries display textured work. I buy mine online or make them myself using simple wood strips. It hides the messy sides of the canvas where the paste might have dripped. I noticed that a black or oak floater frame adds instant value to the piece. I used a dark walnut frame for a large white wave piece and it looked like it cost thousands. It provides a clean border that tells the viewer the work is finished and intentional. This is the ultimate way to complete your diy canvas art easy journey.
Frequently Asked Questions
Can I use a hair dryer to speed up the drying process?
No. Using a hair dryer is one of the fastest ways to ruin your art. The heat causes the top layer of paste to shrink and dry while the bottom is still wet. This creates massive cracks. It can also cause the paste to pull away from the canvas. I tried this once when I was in a rush for a birthday gift. The entire center of the painting cracked within ten minutes. Let the piece dry naturally in a cool room. It takes longer but it preserves the integrity of your sculpture art projects.
How do I fix cracks if they do appear?
Cracks happen even to the pros. If you see a crack do not throw the canvas away. Wait for the piece to be completely dry. Take a small amount of fresh paste on your finger and press it into the crack. Use a damp cloth to wipe away the excess so it is level with the rest of the art. Let it dry and then sand it lightly. I’ve had to do this on almost every large scale project I’ve tackled. Once you paint over it the crack will be invisible. It is part of the process of working with heavy materials.
What is the difference between modeling paste and joint compound?
Modeling paste is made for artists. It is acrylic based and stays flexible after it dries. This means it can handle the natural movement of a canvas without cracking. Joint compound is made for drywall. It is much cheaper but it is very rigid. If you use joint compound on a large canvas that moves it will crack. I use joint compound for my diy abstract canvas art when I am working on wood panels or very sturdy canvases. If I am doing delicate 3D flowers I prefer modeling paste for its strength and detail.
How do I clean my textured art once it is on the wall?
Since the surface is bumpy it will catch dust. Do not use a wet cloth or cleaning chemicals. The moisture can soften the paste if it wasn’t sealed perfectly. I use a soft feather duster or a clean makeup brush to gently sweep away dust. For deep grooves I use a can of compressed air like the ones used for keyboards. I’ve noticed that if you seal your work with a good varnish the dust doesn’t stick as much. Regular dusting keeps your diy canvas wall art looking fresh and white.
Can I mix colors directly into the texture paste?
Yes. Mixing acrylic paint into the paste is a great way to get a solid color. However keep in mind that the paste is white. This means any color you add will turn into a pastel version. If you want a deep red you will have to use a lot of paint which might thin out the paste. I usually prefer to sculpt with white paste and then paint over it once it is dry. This gives me more control over highlights and shadows. I’ve tried both and painting over the dry surface usually looks more professional.
Final Thoughts for Your Next Masterpiece
Starting your journey into texture art projects is an exciting step for any home decorator. You have the power to create something that reflects your personal style. Remember that the first few tries might be messy. I spent weeks covered in white dust before I got my techniques right. Do not let that stop you. The beauty of diy abstract canvas art is that there are no mistakes. If you do not like a shape you can just scrape it off and start over. Use the secrets we discussed to build a strong foundation. Focus on your tools and your drying environment. Most of all have fun with the tactile nature of the work. You are not just painting a picture. You are building a sculpture that will bring life to your walls. I hope you feel inspired to grab a palette knife and start your first piece today.

Anya Castellan is the Founder and Editor-in-Chief of Home Wall Trends. An art history graduate of the Rhode Island School of Design with twelve years of experience writing for leading American design publications, she specializes in composition, gallery wall theory, and the quiet architecture of domestic space. A former contributing editor at Architectural Digest and guest lecturer at Parsons School of Design, Anya personally reads and signs off on every piece before it is published.