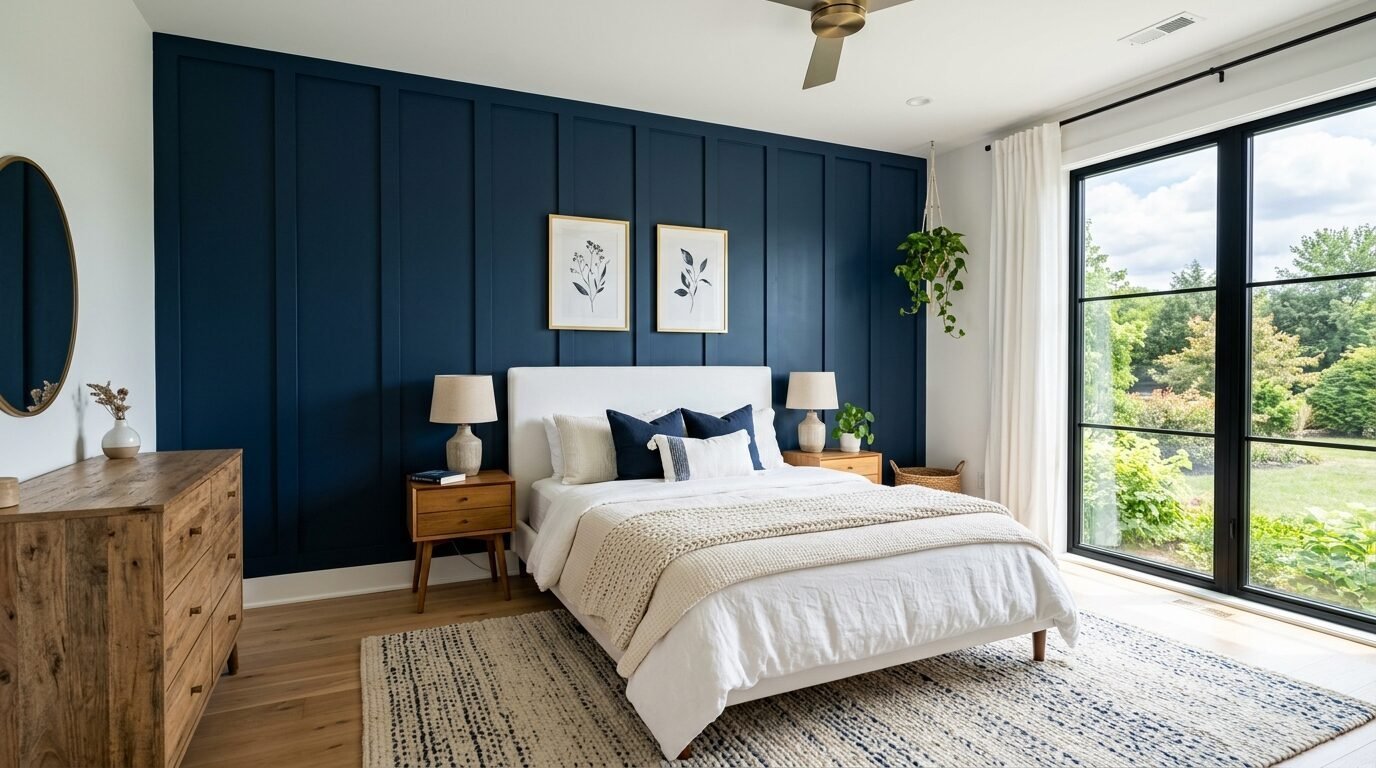
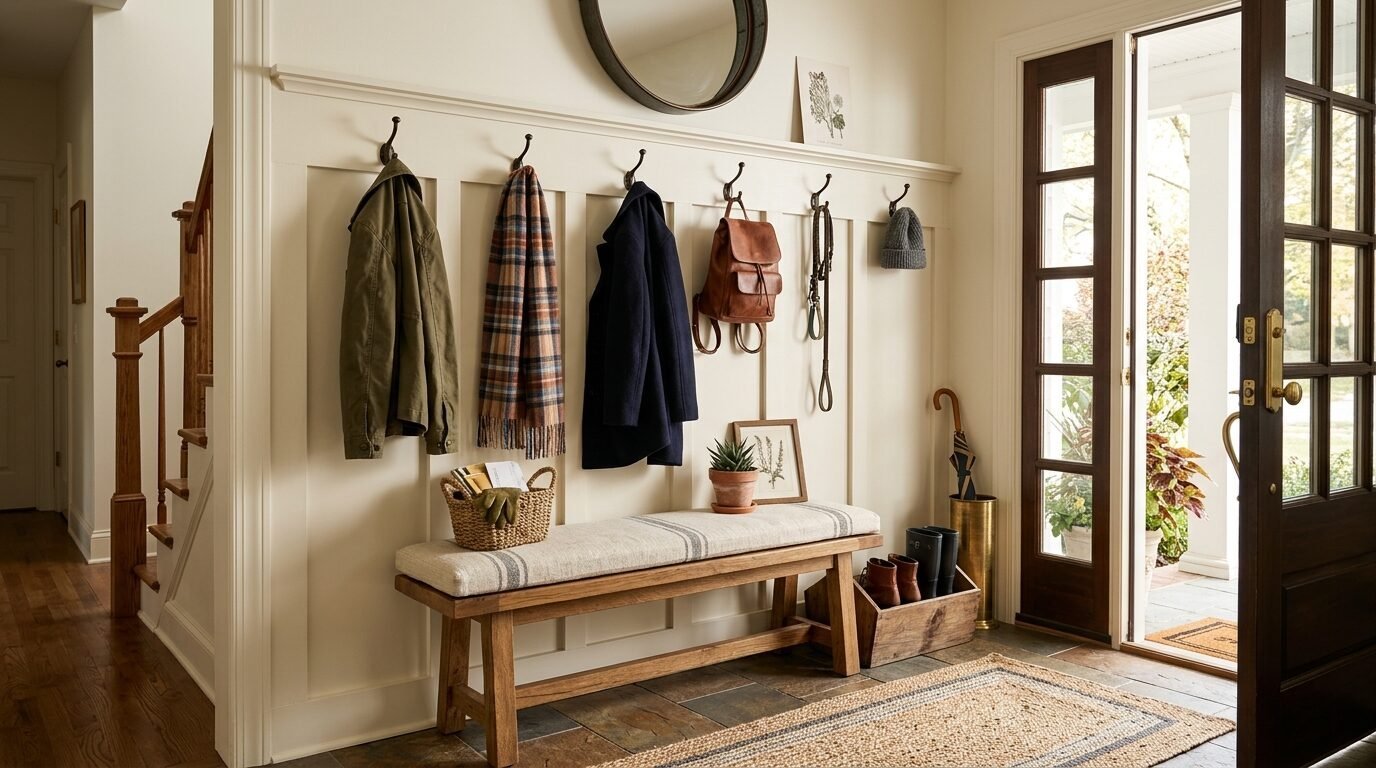
Empty walls feel cold and unfinished. You stare at that big blank space in your bedroom or entryway and know it needs something more than a flat coat of paint. You want character. You want that high-end custom home feeling without the five-figure contractor bill. I felt that exact same way last spring when I looked at my boring home office. I decided to try a DIY wall wood project.
Board and batten is the perfect answer for a quick transformation. It creates depth and shadow. It makes a room feel expensive and grounded. Best of all you can finish the entire project in just two days. In my experience this is the most rewarding home improvement you can do for under two hundred dollars.
This guide covers everything from the initial measurements to the final brush stroke. I have made the mistakes so you do not have to. I once forgot to account for the baseboard thickness and had to rip out four panels. We will avoid that today. Let us get your tools ready and transform your home.
1. Plan Your Design and Layout
The first step is deciding the height and style of your wall. Do you want a full floor to ceiling look or a traditional wainscoting height. Traditional board batten wainscoting usually sits at one third the height of the wall. This look is classic for dining rooms. For a modern bedroom I usually recommend going three quarters up the wall or all the way to the top.
Take a photo of your room. Print it out or use a tablet to draw lines where the boards will go. This helps you visualize the final result before you buy any wood. Think about the furniture in the room. You do not want a vertical batten to end up hidden right behind a headboard or a tall dresser.
I’ve seen many people skip this visual planning. They end up with a wall that looks cluttered or off balance. Spend thirty minutes now to save hours of regret later. Look at salon board ideas for inspiration if you want a more grid like pattern.
2. Choose the Right Wood

Materials
Selection of your board and batten wood is a critical choice. You have three main options. MDF is the most common for DIY wall panel ideas because it is perfectly straight and has no knots. It is also very affordable. If you are painting the wall a solid color MDF is your best friend.
Finger jointed pine is another great choice. It is stronger than MDF and handles moisture better. I prefer pine for high traffic areas like entryways where bags might hit the wall. The third option is solid poplar. It is beautiful and smooth but it costs much more.
For a weekend project I suggest using 1 by 3 boards for the vertical battens and a 1 by 4 for the top rail. Make sure the boards are straight. Put one end on the floor and look down the length of the wood like a telescope. If it bows or twists put it back.
3. Calculate Your Batten Spacing
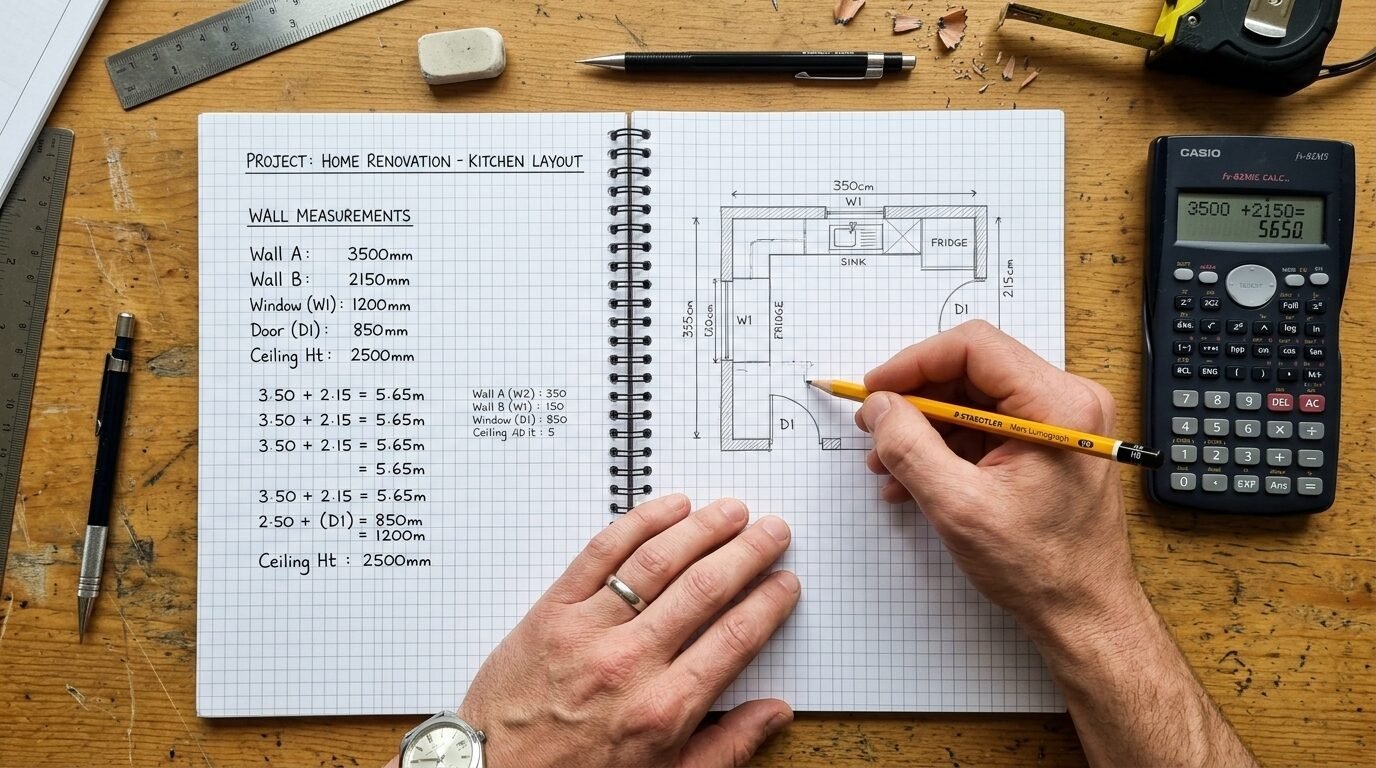
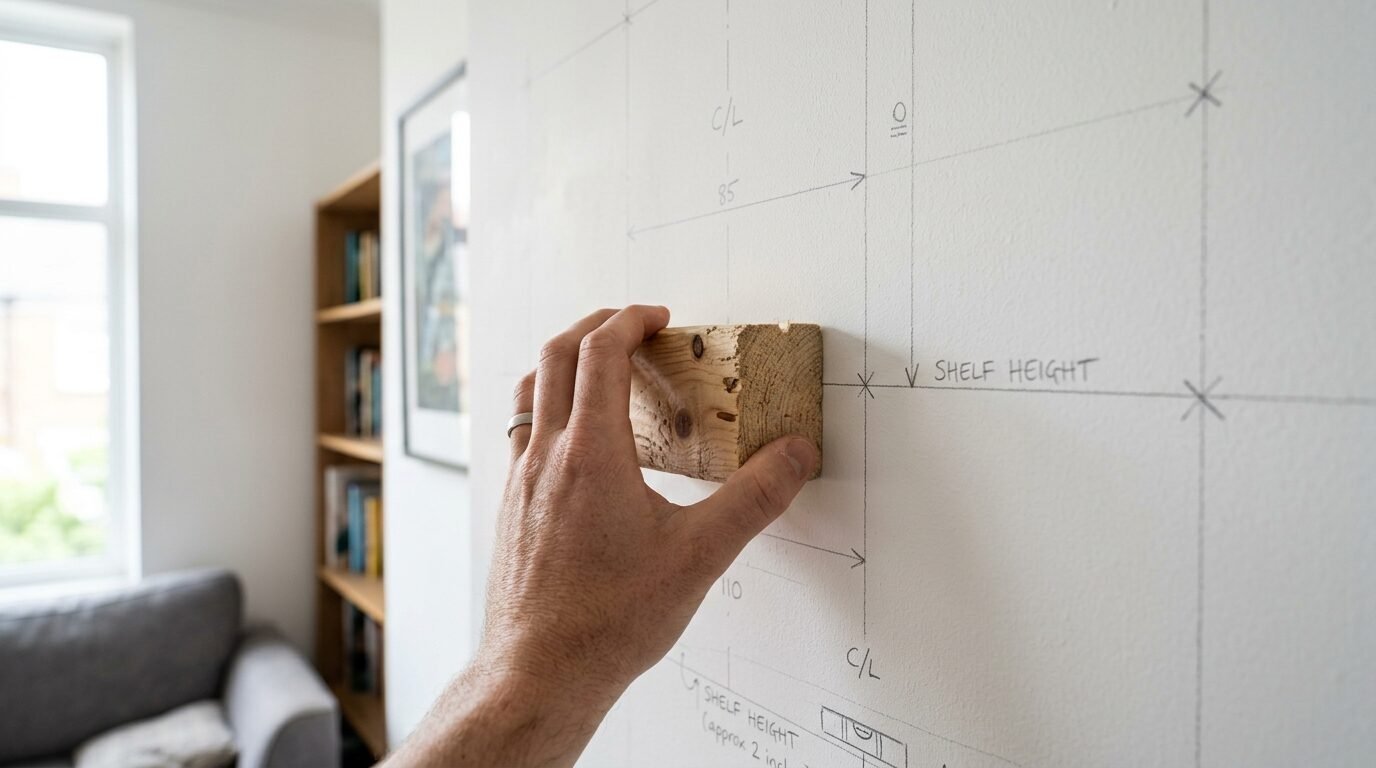
The math is where most people get stuck. You want the gaps between your vertical boards to be exactly the same. First measure the total width of your wall in inches. Decide how many vertical battens you want. Most people space them twelve to eighteen inches apart.
Here is the secret formula I use. Total wall width minus the combined width of all vertical boards. Divide that number by the number of spaces you want. For example if your wall is 120 inches and you have nine battens that are 2.5 inches wide. 120 minus 22.5 is 97.5. Divide 97.5 by 8 spaces. Your gap is 12.18 inches.
Write this number down. Cut a spacer block to this exact size out of scrap wood. This block will be your best friend during installation. It prevents you from having to pull out the measuring tape for every single board. Using a spacer ensures the indoor board and batten looks professional.
4. Gather Your Essential Tools
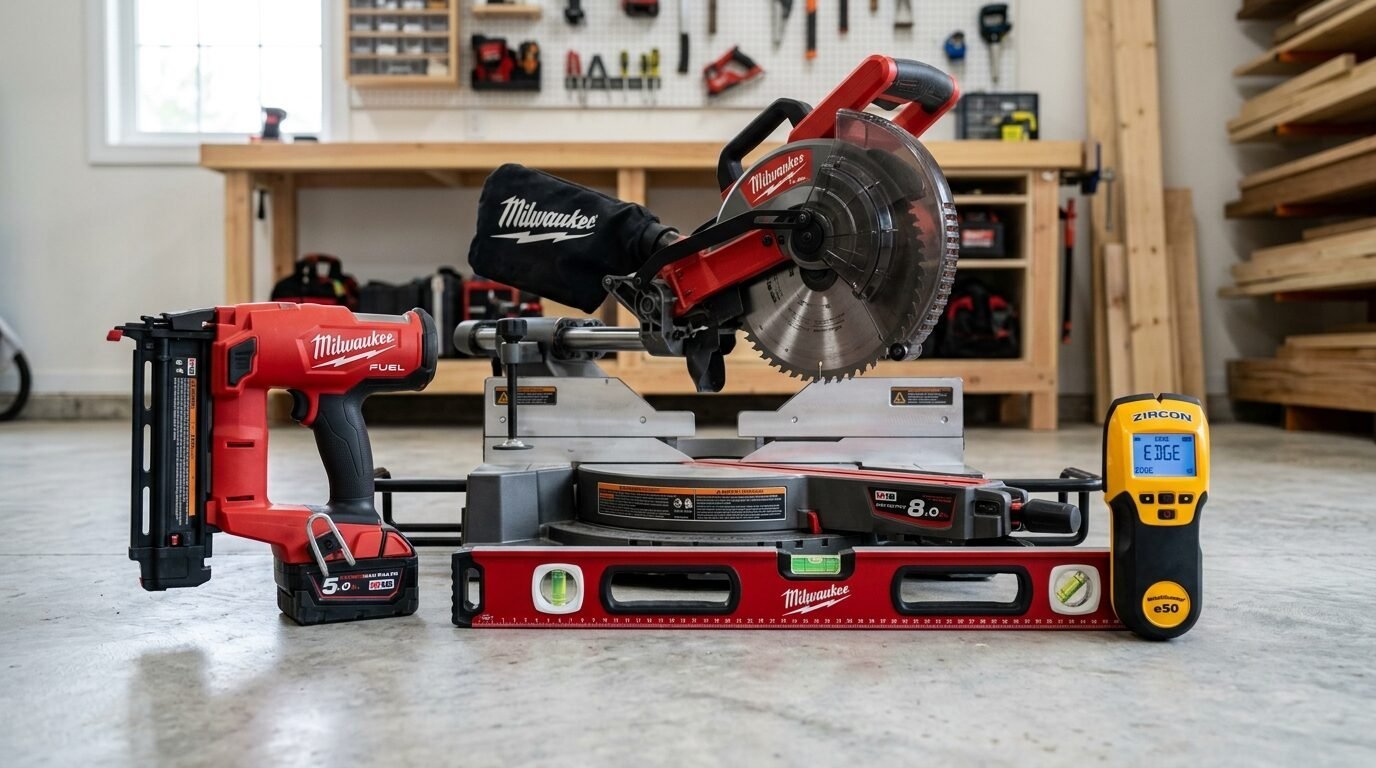
You need the right gear to finish this in a weekend. I recommend the Ryobi Airstrike 18 gauge brad nailer. It is cordless and easy for beginners to handle. You will also need a miter saw to make clean square cuts. If you do not own one many big box stores can make basic cuts for you.
You must have a high quality level. A four foot level is best for checking the top rail. A smaller torpedo level works for the vertical pieces. Get a stud finder to locate the wood framing behind your drywall. Nailing into studs is the only way to make the wall permanent and sturdy.
Do not forget the small things. You need wood filler for the nail holes and paintable caulk for the seams. I have noticed that DAP Alex Plus is very reliable for these projects. You also need a sanding sponge and a good angled paint brush. Having everything on hand on Saturday morning keeps the momentum going.
5. Prepare the Wall Surface
Remove everything from the wall. This includes outlet covers and any existing trim that gets in the way. If your wall has a heavy texture you might want to install thin 1/8 inch hardboard panels first. This gives you a perfectly smooth surface for the paint.
If your walls are relatively smooth you can install the wood directly onto the drywall. Sand down any high spots or old paint drips. Clean the wall with a damp cloth to remove dust. If you are changing the wall color significantly I suggest painting the wall itself before you put the wood up.
I tried installing over a dirty wall once and the adhesive would not stick. It was a mess. Take ten minutes to wipe it down. If you have baseboards decide if you will keep them or replace them. Many people put a thin piece of lattice wood on top of the baseboard to create a ledge for the battens.
6. Install the Top and Bottom Rails
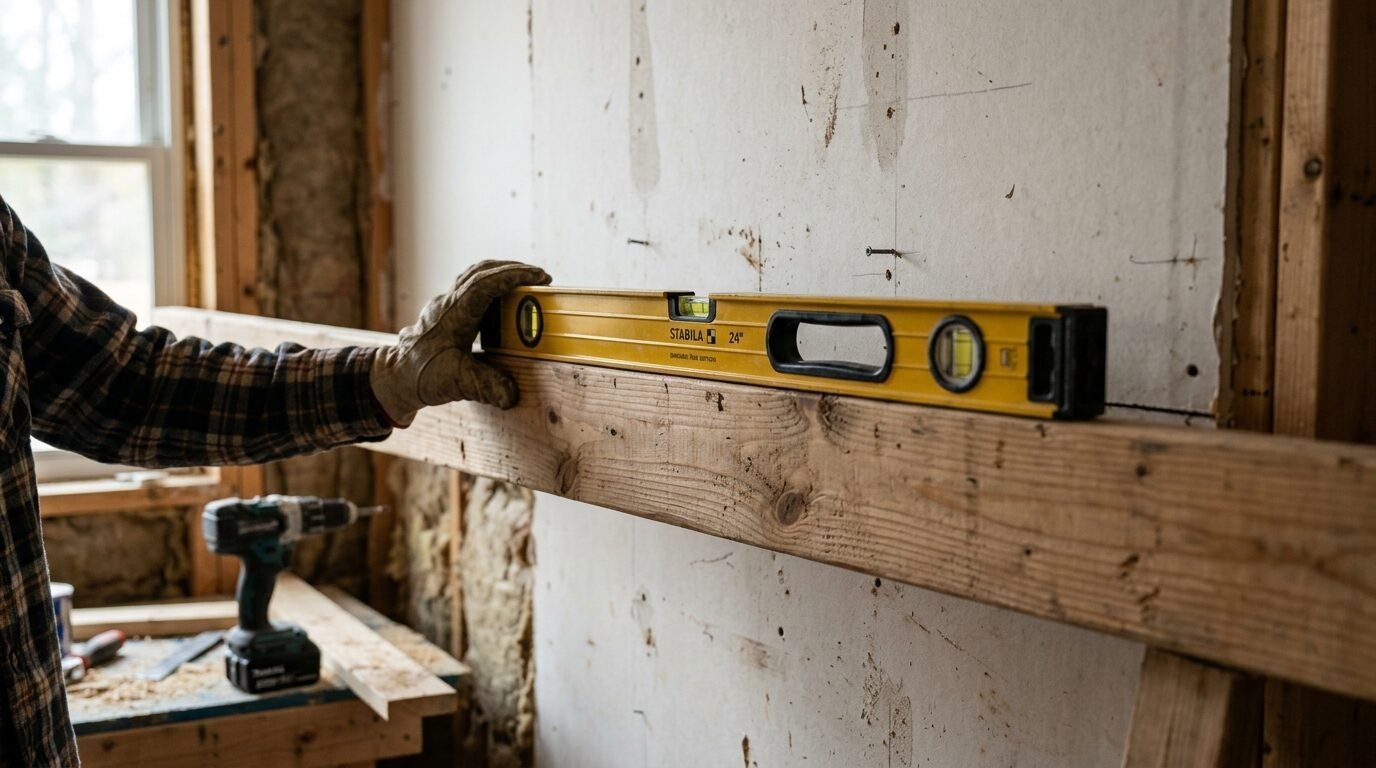
Start with the horizontal pieces. If you are doing a full wall start with the top rail. Use your four foot level to mark a perfectly straight line across the wall. Do not trust your ceiling to be level. Ceilings in old houses often slope and will make your wood look crooked.
Apply a small bead of Liquid Nails to the back of the board. Press it against the wall and align it with your level line. Use your nail gun to fire two nails into every stud. Check the level again after the first few nails. If the board is long you might need a second person to hold the other end.
If you are replacing the baseboard install the bottom rail now. This creates a frame for your vertical pieces. If you are keeping your current baseboards make sure the vertical battens will sit flush against them. Sometimes you need to bevel the bottom of the batten to make the transition look smooth.
7. Secure the Vertical Battens
This is where the wall starts to look real. Start from one corner and work your way across. Use your spacer block to position the first batten. Place the level against the side of the board to make sure it is perfectly vertical or plumb.
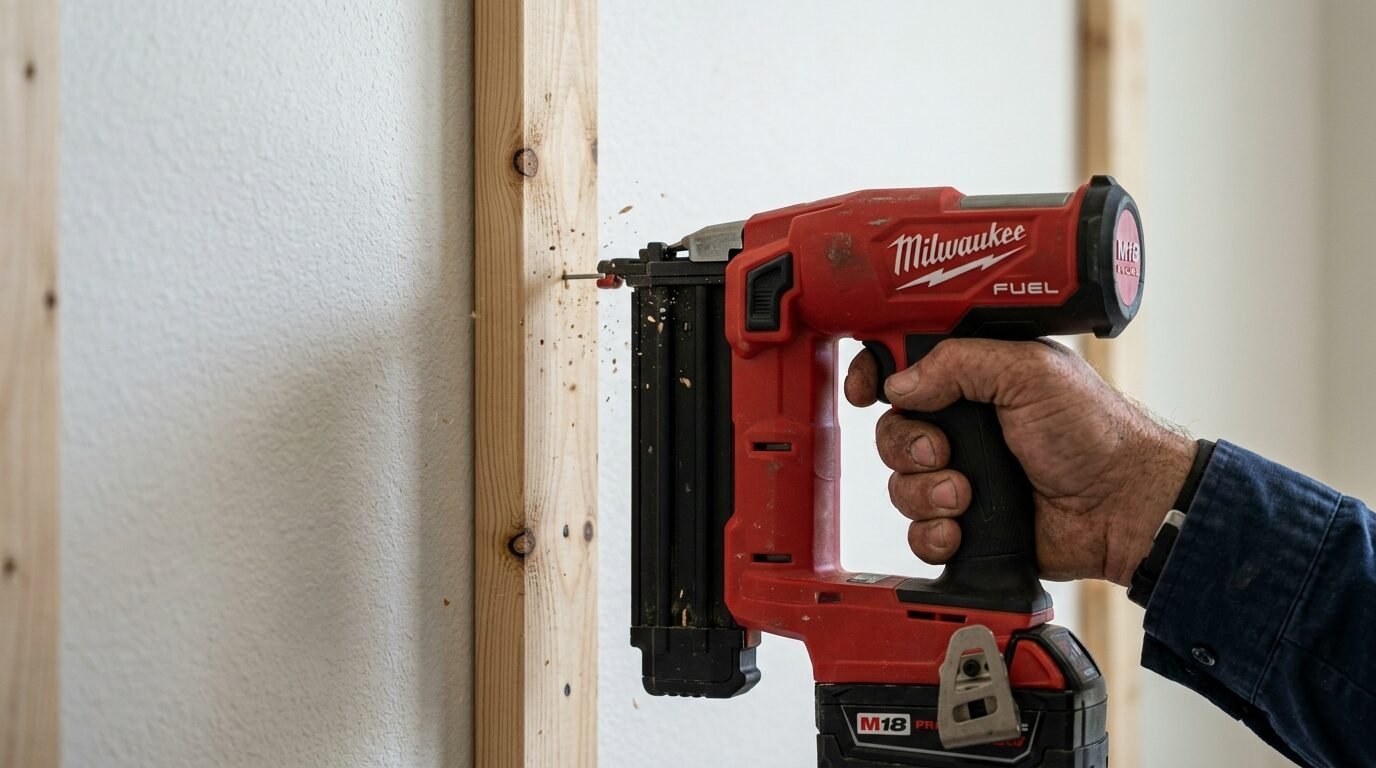
Apply adhesive to the back. Press it firmly. Fire nails into the board every twelve inches. If you are lucky you will hit a stud. If there is no stud where a batten needs to go fire the nails at opposing angles. This creates a dovetail effect in the drywall that holds the wood tight.
Check every single board with your level. Walls are rarely flat. You might find that a board wants to pop out in the middle. Use an extra nail or two to force it into place. I have seen many DIY projects fail because the builder trusted the wall to be straight. Always trust your level instead.
8. Cut and Fit Horizontal Cross Pieces
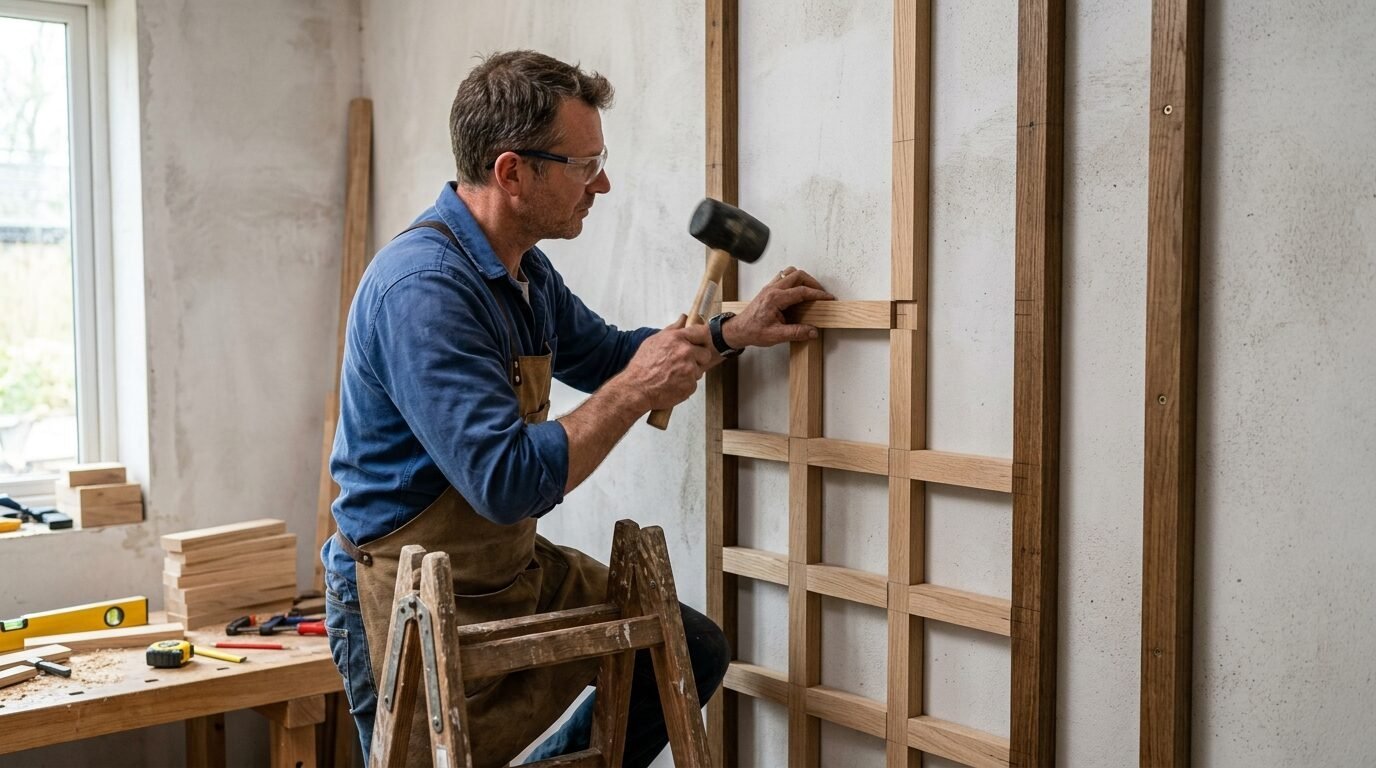
If you want a grid look or a salon board style you will need horizontal pieces between the vertical battens. Measure each gap individually. Do not assume every gap is the same. Houses shift and boards can vary by a tiny fraction of an inch.
Cut your pieces one at a time for a snug fit. If a piece is too tight do not force it or you might bow the vertical battens. Use a piece of sandpaper to shave off a tiny bit of length until it slides in. A tight fit means less work during the filling and caulking stage.
Nail these pieces in using the same adhesive and nail method. If you are doing multiple rows use a laser level to keep everything aligned across the entire wall. This creates a high end look that mimics expensive custom cabinetry. It is the secret to a professional board a d batten wall.
9. Fill the Nail Holes
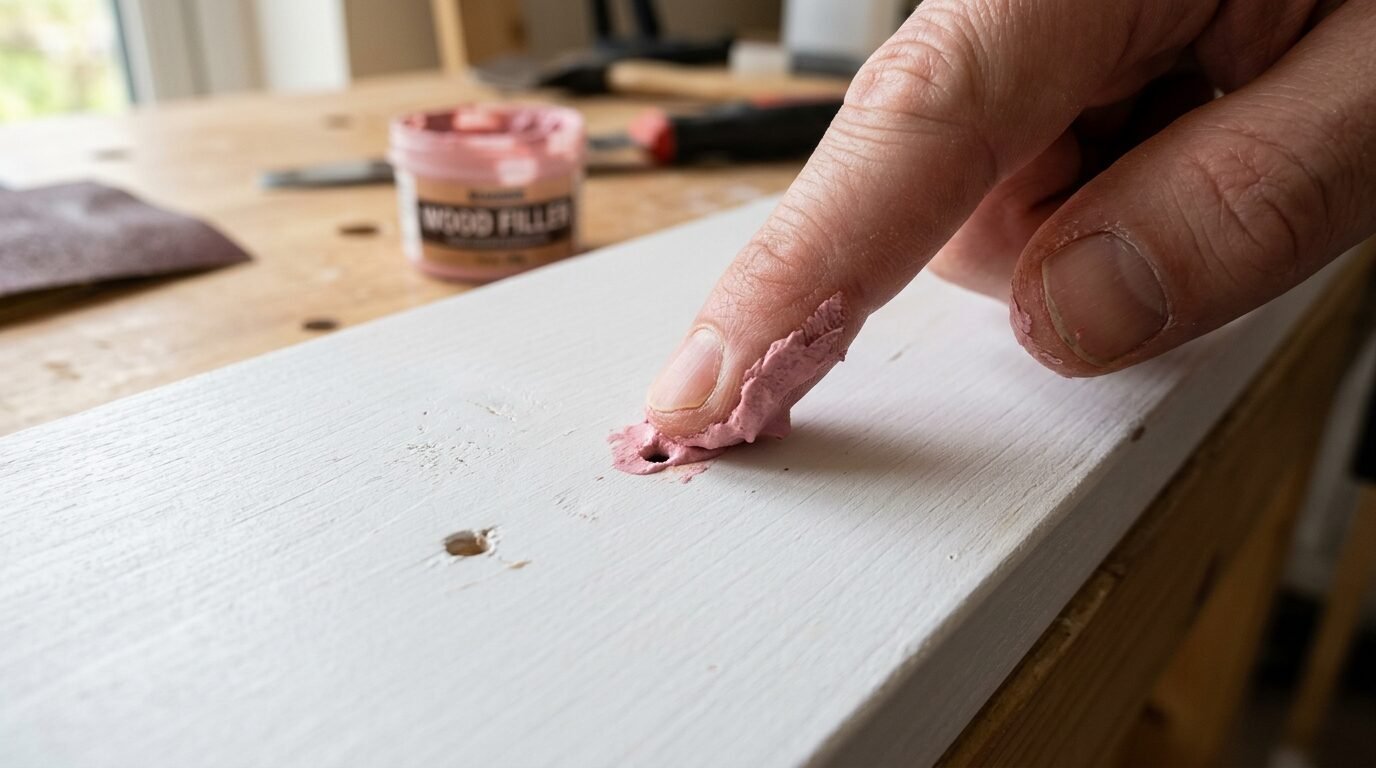
Now comes the part that requires patience. Every nail you fired left a small hole. You want these to disappear. Use a high quality wood filler or Crawford’s spackle. I prefer wood filler because it does not shrink as much as standard wall putty.
Overfill each hole slightly. It should look like a small bump on the wood. Let it dry completely. Usually this takes about thirty minutes depending on the temperature in your room. Once dry use a fine 220 grit sanding sponge to sand the filler flush with the wood.
Run your finger over the hole. If you can feel it you will see it after painting. Sand until it is perfectly smooth. This step separates the beginners from the pros. Take your time here. In my experience skipping the second round of sanding is the most common DIY mistake.
10. Caulk Every Single Seam
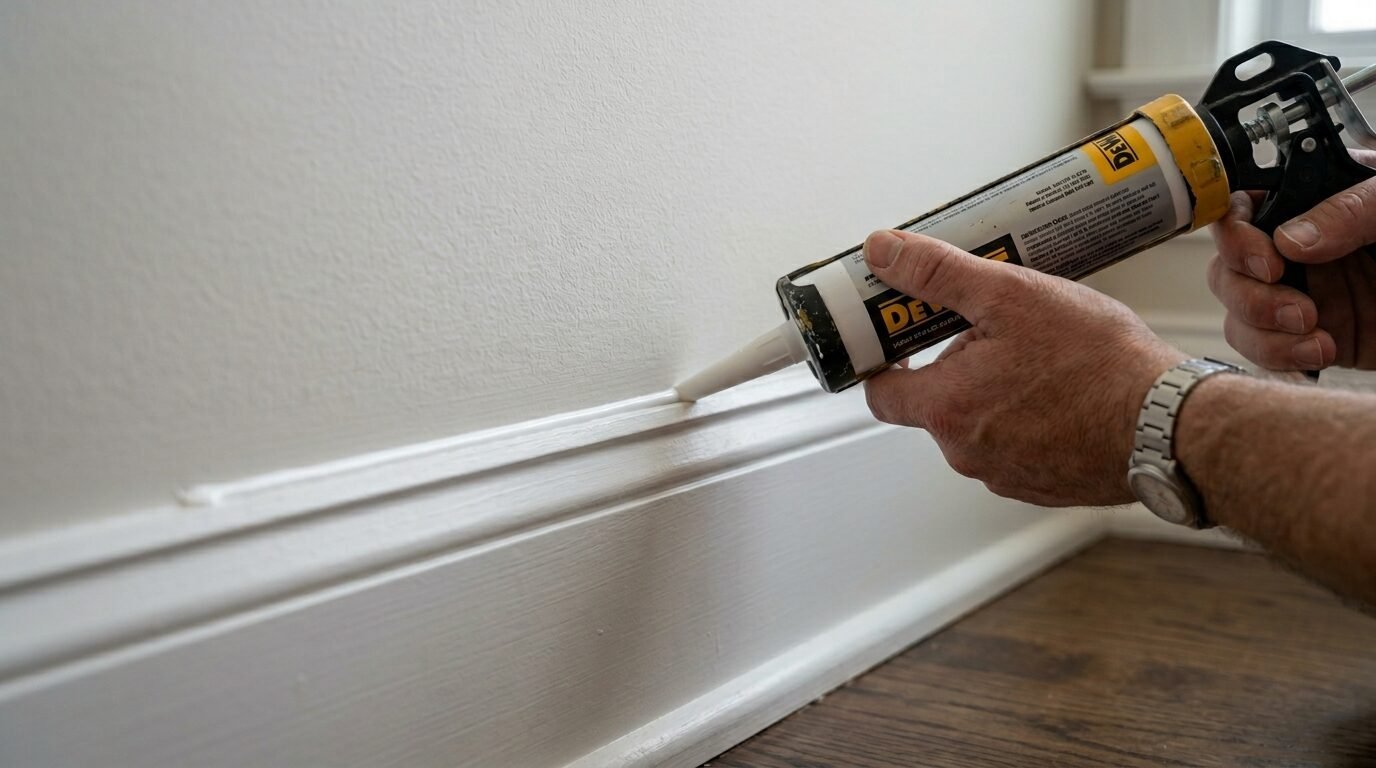
Caulking is the most important step for a professional finish. You must fill the gaps where the wood meets the wall and where the wood pieces meet each other. Without caulk the wall will look like wood stuck on a wall. With caulk it looks like a solid architectural feature.
Cut the tip of your caulk tube at a very small angle. You want a tiny bead. Run the caulk along every edge. Use a wet finger or a caulking tool to smooth the bead immediately. Keep a wet rag in your hand to wipe away excess.
Do not use silicone caulk. It is not paintable. Make sure the tube says paintable acrylic or siliconized acrylic. This step hides any small gaps from imperfect cuts. It makes the indoor board and batten look like it was built with the house. This is what makes wall panals look truly high end.
11. Sand the Wood to Perfection
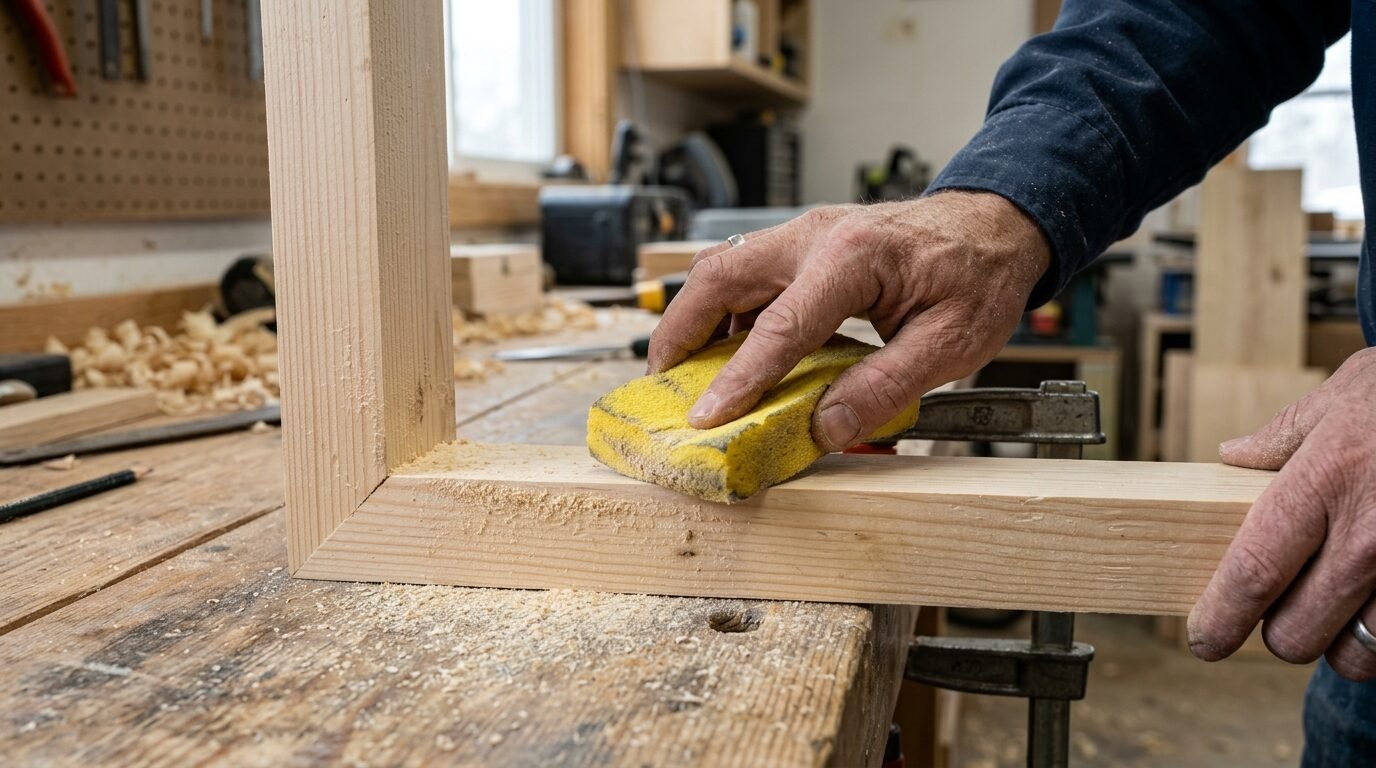
After the wood filler is dry and the caulk has set for an hour do one final pass with your sanding sponge. Focus on the joints where two pieces of wood meet. You want the transition to be invisible. If there is a slight lip between a vertical and horizontal board sand it down until it feels like one piece.
Vacuum the wall and the floor. Use a tack cloth to remove every speck of dust from the wood. If paint is applied over dust it will feel gritty and look dull. This is especially important if you are using a dark paint color. Dark colors show every imperfection.
I once painted a wall without dusting properly and had to sand the whole thing down and start over. It was a hard lesson. Clean the surface until it is spotless. Your diy wall wood deserves a clean start before the color goes on.
12. Apply the Final Paint Finish
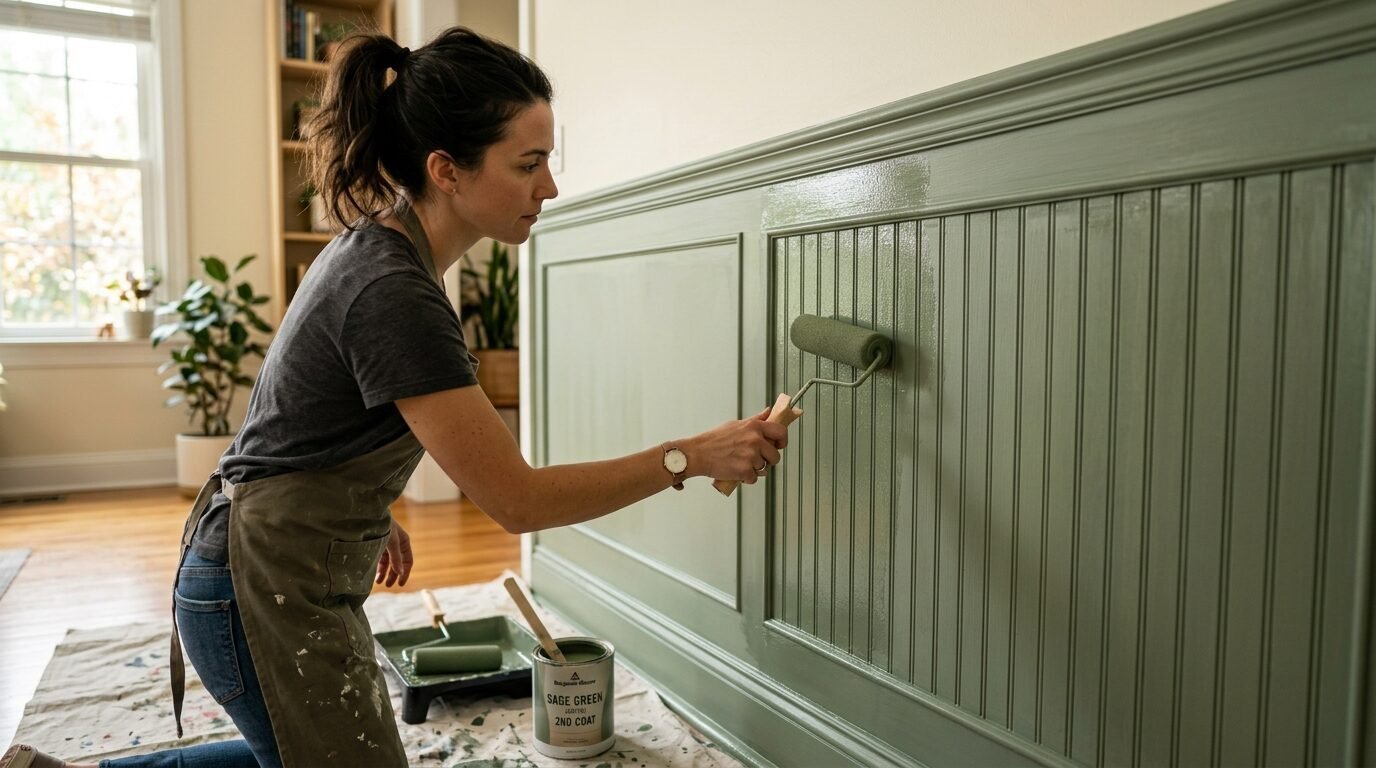
Now you get to see the transformation. Use a high quality primer if you are using MDF or raw wood. This prevents the wood from soaking up all your expensive paint. For the finish coat I recommend a satin or semi gloss sheen. These sheens highlight the shadows and make the trim pop.
Start by cutting in around the edges of every “box” with your brush. Then use a small four inch foam roller to smooth out the brush marks on the flat parts of the wood. The foam roller gives a factory like finish. Work in small sections so the paint stays wet while you blend.
Two thin coats are always better than one thick coat. Wait for the first coat to dry completely before starting the second. Once the second coat is on step back and look at your work. You just built a custom accent wall in a single weekend. Your room will feel completely different.
Board and Batten vs Shiplap
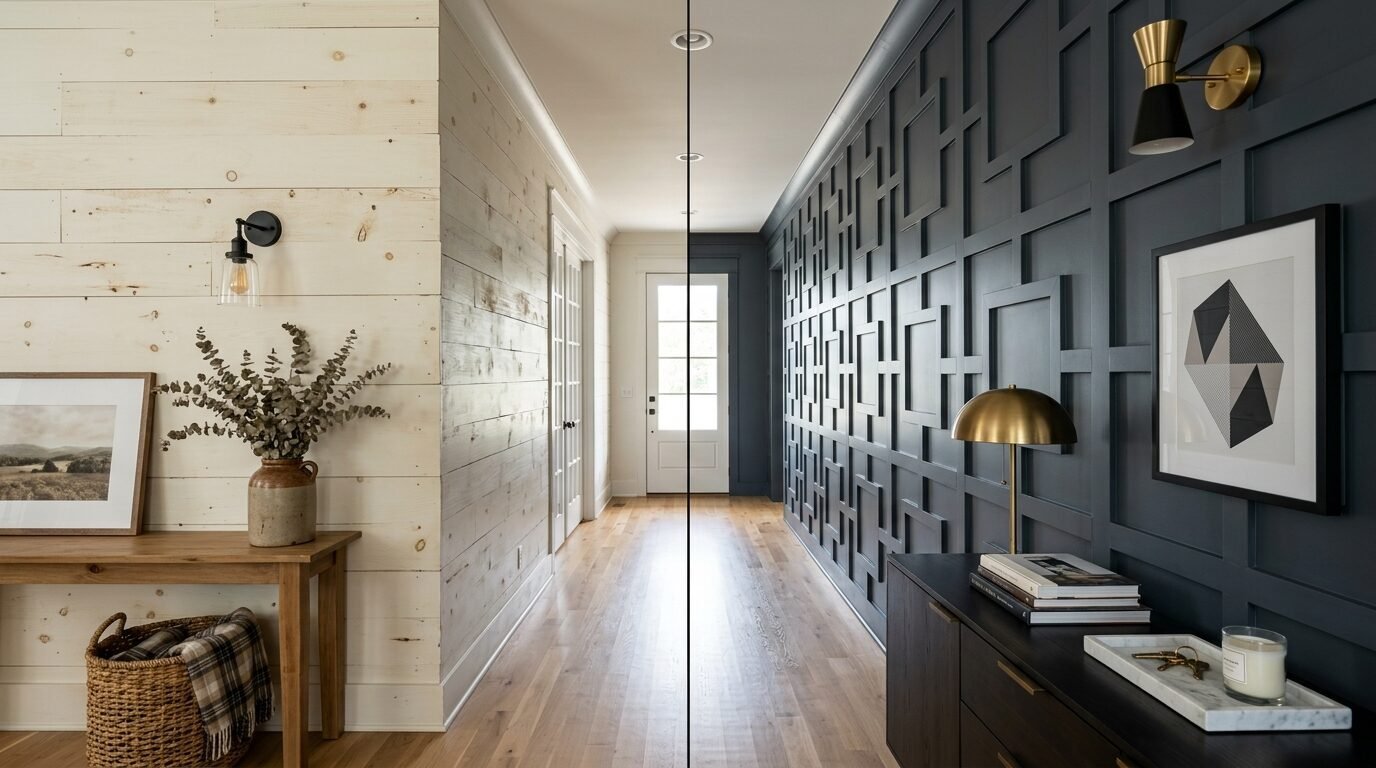
Many people struggle to choose between these two styles. Shiplap is horizontal and feels more rustic or farmhouse. It was very popular five years ago but some designers feel it is fading. Board and batten is more architectural and timeless. It works in modern traditional and even industrial homes.
Board and batten is often easier for a DIYer because you use fewer boards. You do not have to worry about the boards stacking perfectly from floor to ceiling. It also allows you to play with different heights. Shiplap almost always has to cover the entire wall to look right.
In my experience board and batten adds more value to a home. It feels more like a permanent structural upgrade. Shiplap can sometimes feel like a decorative overlay. If you want a look that stays in style for the next decade go with the board and batten wood.
Common Installation Mistakes to Avoid
| Mistake | Consequence | How to Fix |
| Forgetting Studs | Boards pull away from wall | Always use a stud finder and adhesive |
| Trusting the Ceiling | Crooked horizontal rails | Use a level for every single board |
| Large Caulk Beads | Messy transitions and globs | Cut the tube tip very small |
| Skipping Primer | Uneven paint color | Use a dedicated primer for MDF |
| Poor Spacing | Uneven visual weight | Use a spacer block for every gap |
Frequently Asked Questions
What is the best wood for board and batten?
MDF is the best choice for most indoor projects because it is stable and smooth. If you are working in a bathroom or a high moisture area use PVC or finger jointed pine. These materials will not swell if they get wet.
Do I need to use glue on the wall?
Yes you should use a construction adhesive like Liquid Nails. This ensures the boards stay flat against the wall over time. Nails can sometimes pull through drywall but the combination of glue and nails is permanent.
Can I do this over textured walls?
You can but the texture will show inside the boxes. If you want a smooth look you should install a thin piece of hardboard or plywood over the drywall first. This gives you a clean canvas for your battens.
How much does a DIY accent wall cost?
Most weekend projects cost between one hundred and three hundred dollars. This depends on the size of the wall and the type of wood you choose. It is much cheaper than hiring a professional who might charge over a thousand dollars.
What height should board and batten be?
Wainscoting is usually 36 to 42 inches high. Modern accent walls often go up to 72 inches or all the way to the ceiling. Choose a height that aligns with other elements in the room like windows or headboards.
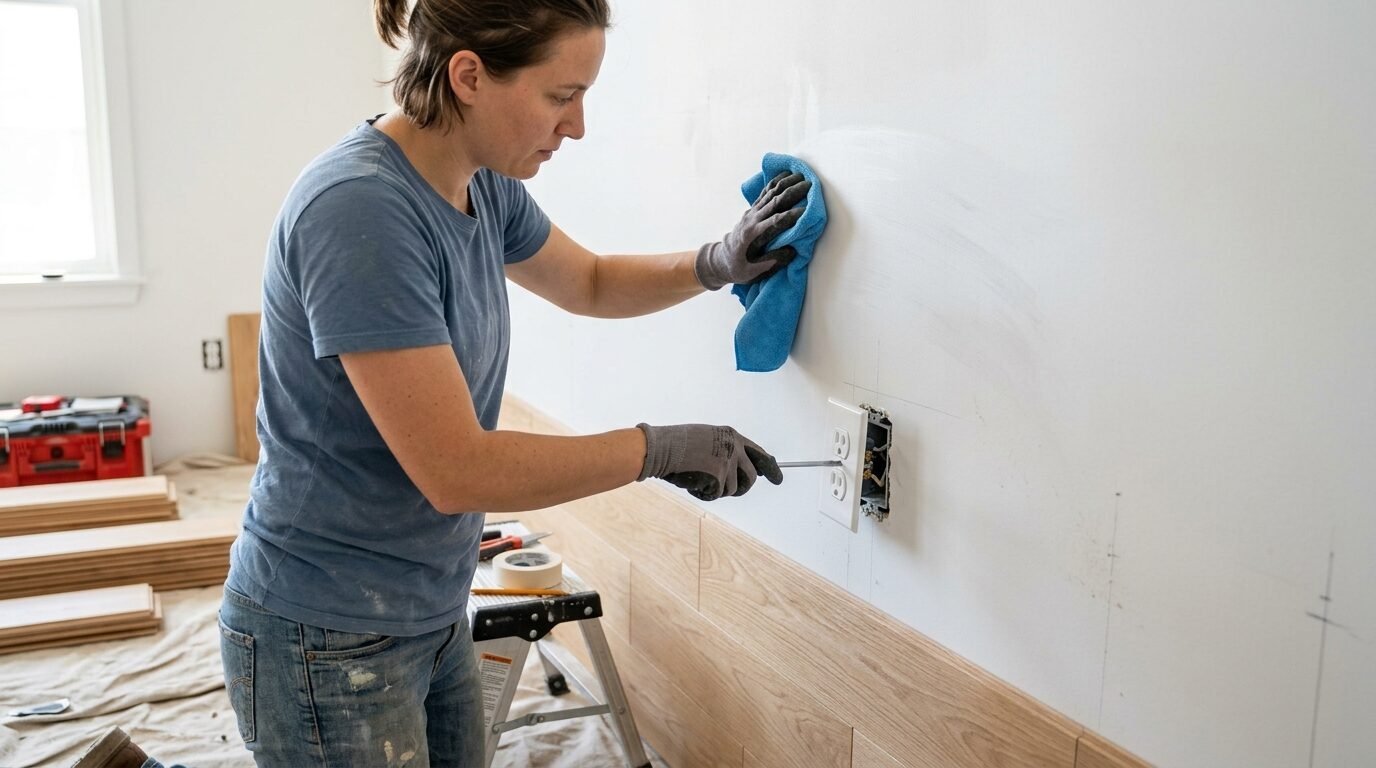
How do I handle electrical outlets?
You can either move the batten slightly to avoid the outlet or cut the wood to fit around it. In my experience it looks best to use an outlet extender so the plate sits flush on top of the new wood.
Summary of ROI and Impact
Building a board and batten wall is one of the highest return on investment projects you can do. It uses inexpensive materials to create a massive visual change. Beyond the financial value the emotional impact is huge. The room feels more intentional and cozy.
I have noticed that homes with custom trim work sell faster and for higher prices. It shows buyers that the home has been cared for and upgraded. But even if you are not selling you get to enjoy a space that feels like a luxury hotel every single day.
Take the leap this weekend. Buy the wood on Friday night and start your measurements Saturday morning. By Sunday evening you will be sitting back with a drink admiring your new favorite room. You have the knowledge and the plan. Now go build it.

Anya Castellan is the Founder and Editor-in-Chief of Home Wall Trends. An art history graduate of the Rhode Island School of Design with twelve years of experience writing for leading American design publications, she specializes in composition, gallery wall theory, and the quiet architecture of domestic space. A former contributing editor at Architectural Digest and guest lecturer at Parsons School of Design, Anya personally reads and signs off on every piece before it is published.