Paint spills. Smudged ink lines. Yellowing paper surfaces. You spend hours making gorgeous wall pieces for your home. Then moisture ruins your hard work. Last winter, I made a beautiful paper collage layout. Two months later, the edges began to curl up. Damp air ruined the entire piece. Surface protection keeps your creations looking fresh for years. This guide offers clear paths to protect your handmade art assets.
This guide delivers precise steps to safeguard your handmade creations from home environment damage. You will preview specific coatings for paper, wood, and dimensional items without complex tools. We check real market prices for protective materials to help your budget planning. This guide excludes professional oil painting restoration to maintain a clear craft focus.
Why Does Handmade Wall Decor Fail Over Time?
Handmade wall decor fails over time due to humidity, ultraviolet light exposure, and physical contact. Moisture causes paper to warp and ripple, while sunlight breaks down color pigments, leading to severe fading. Protecting your art with the correct liquid sealant or spray clear coat creates a protective shield that stops environmental damage and keeps colors bright.
Art pieces face constant danger from the air inside your home. In my experience, ordinary room moisture causes paper fibers to expand. When the room air dries, the fibers contract unevenly. This movement creates annoying wrinkles in your flat pieces.
- Moisture creates waves in light paper materials.
- Sunlight bleaches bright ink color pigments.
- Dust sticks permanently to unsealed glue surfaces.
Environmental Moisture and Paper Warping
Think about the conditions inside a standard home. Air dampness rises during summer months. I’ve noticed this pattern causes thick cardstock to bend. Your projects lose their flat shape when hung on naked walls.
The Threat of Humidity in a Coastal Room
Living near the ocean creates extra difficulties for home decor items. A Coastal Room requires specialized protective choices. High salt content and airborne moisture attack exposed surfaces daily. I once hung an unprotected charcoal sketch in a seaside cottage. Within three months, the paper turned soft and limp. The colors looked dull and dirty. Sealing stops this wet air from reaching your paper base.
UV Ray Damage and Color Fading
Sunlight enters through your glass windows. This light carries ultraviolet rays that destroy chemical bonds in markers and paints. Your bright reds turn to pale pink. Your deep blacks look like faded gray. A clear coat blocks these harmful rays completely.
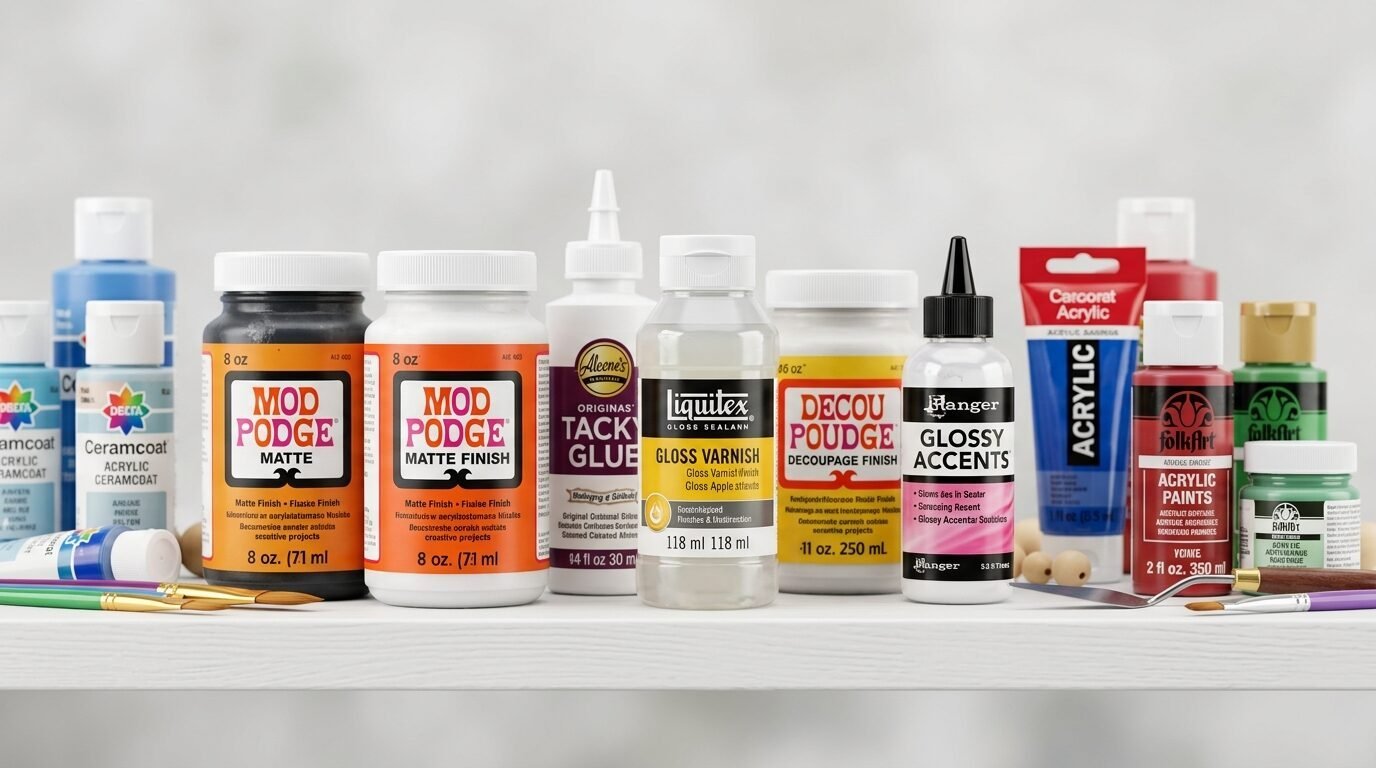
What Supplies Do You Need to Protect Craft Art?
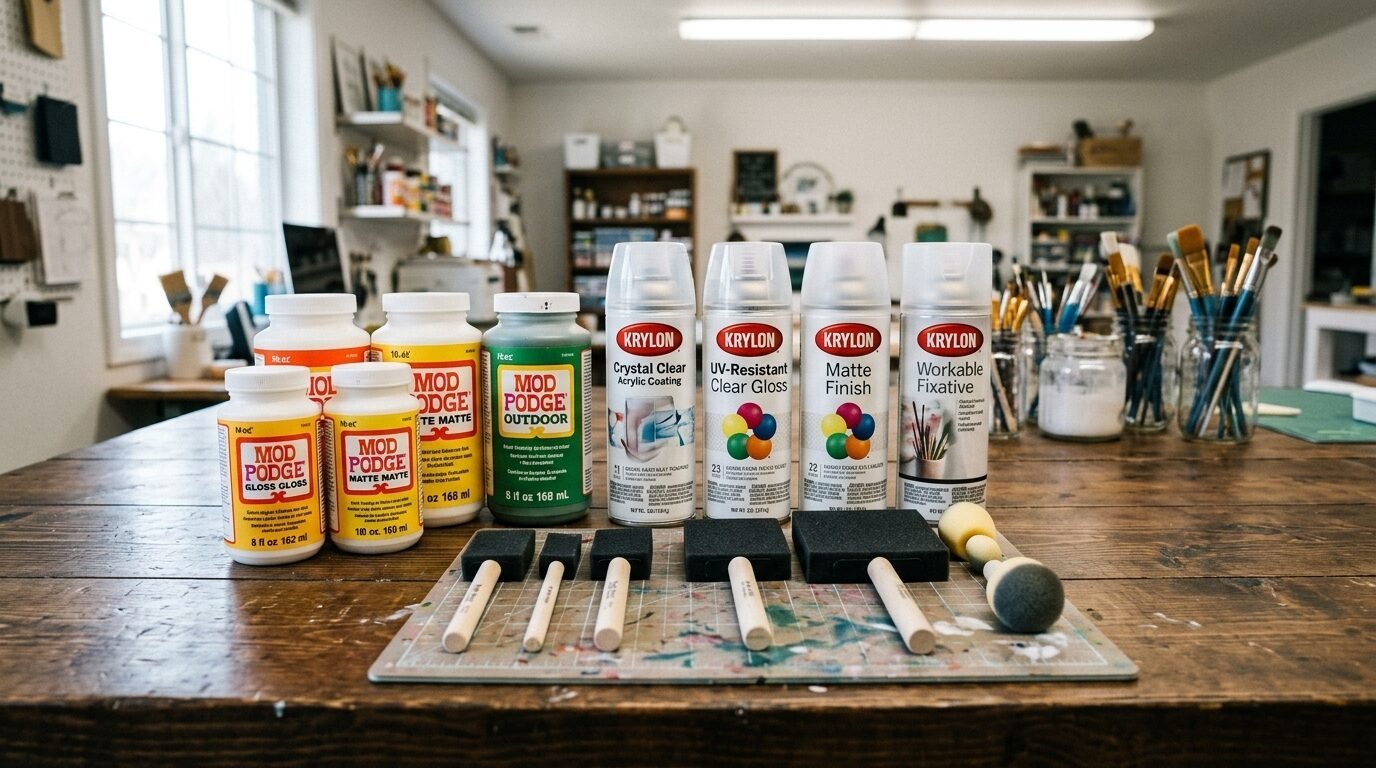
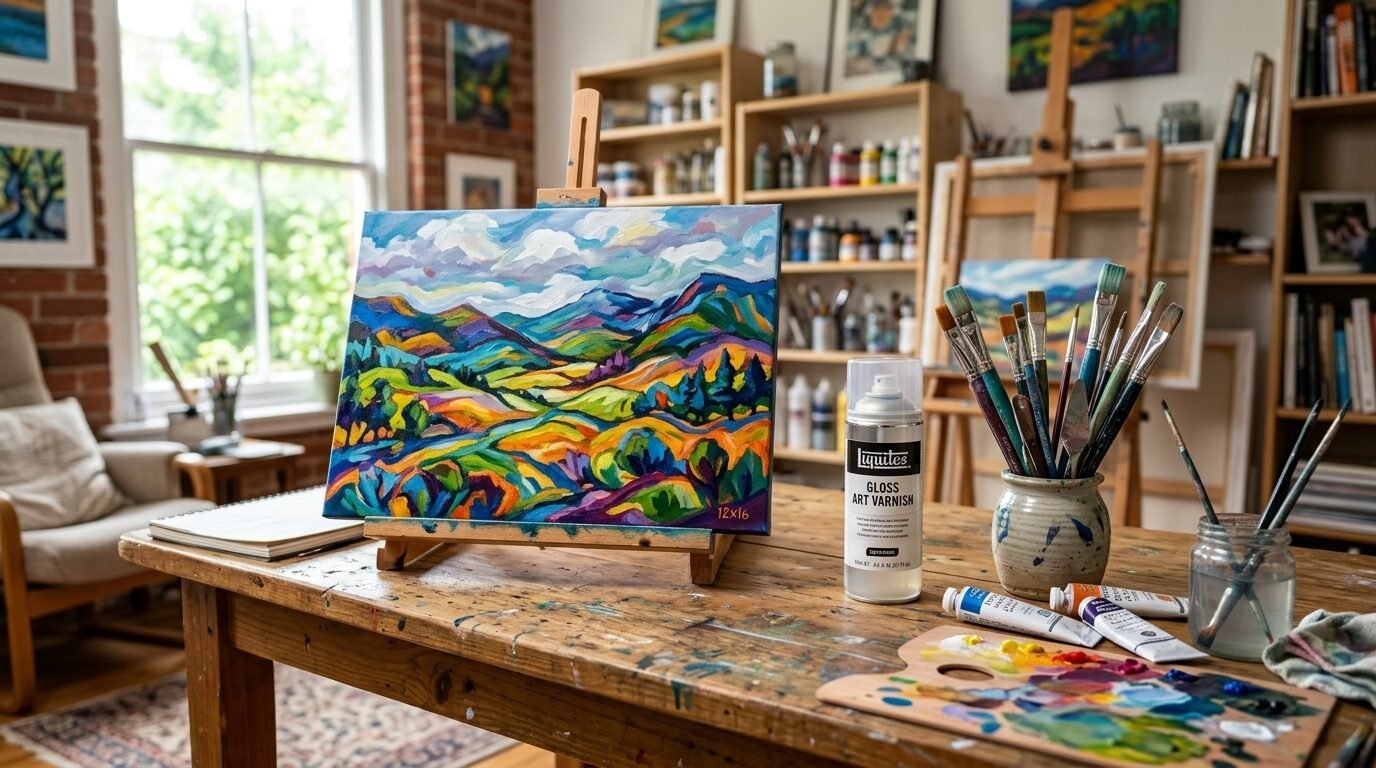
To protect craft art you need high-quality sealants like clear acrylic sprays, liquid varnishes, and foam brushes. Synthetic brushes offer smooth application for liquid coatings, while aerosol sprays work best for delicate surfaces. Having water for cleanup and fine sandpaper ensures a smooth professional finish on your completed project.
Choosing the correct tools saves your project from ultimate ruin. Different mediums require specific coating types. I’ve tried cheap brushes and regretted the outcome every time. Loose synthetic hairs get stuck in the wet clear coat permanently.
- Acrylic sprays dry fast and even.
- Liquid glues create thick physical shields.
- Foam applicators prevent annoying stroke marks.
Top Liquid Sealants for Paper and Cardboard
Liquid coatings offer strong protection for heavy items. Mod Podge Matte costs around nine dollars per bottle. It serves as a dependable choice for paper layers. Minwax Polycrylic costs twenty-four dollars per quart. It provides a crystal-clear top layer that resists yellowing over time.
Best Spray Fixatives for Pencil and Pastel
Delicate drawings need a touchless application method. Krylon Crystal Clear spray protects without touching the paper surface. This spray costs about eleven dollars per can. Winsor and Newton Fixative costs fifteen dollars. It stabilizes loose charcoal particles instantly.
Essential Brushes and Application Tools
Use synthetic flat brushes for liquid sealants. Brand name tools like Wooster brushes offer excellent control. They cost seven dollars each. Foam rollers work well for large flat surfaces. They leave zero brush lines behind.
How Do You Seal Different Types of DIY Art?
Seal different types of DIY art by matching the sealant formula to your specific art medium. Use aerosol fixatives for fragile drawings to prevent smudging ink lines. Apply liquid acrylic varnishes with synthetic brushes on sturdy cardboard and wood projects. Multiple thin coats provide superior protection compared to one single thick layer.
Every material reacts differently to clear coatings. A path that works on wood might ruin a delicate sketch. I always test my materials on small scraps first. This single step saves valuable pieces from accidental destruction.
- Fixatives secure loose surface powder.
- Varnishes seal painted paint layers.
- Acrylics shield heavy card stocks.
Protecting Ink and Color Drawings
Ink runs when it gets wet. Spray fixatives prevent this issue completely. I’ve seen this work on delicate pen sketches. Spray from twelve inches away using light passes.
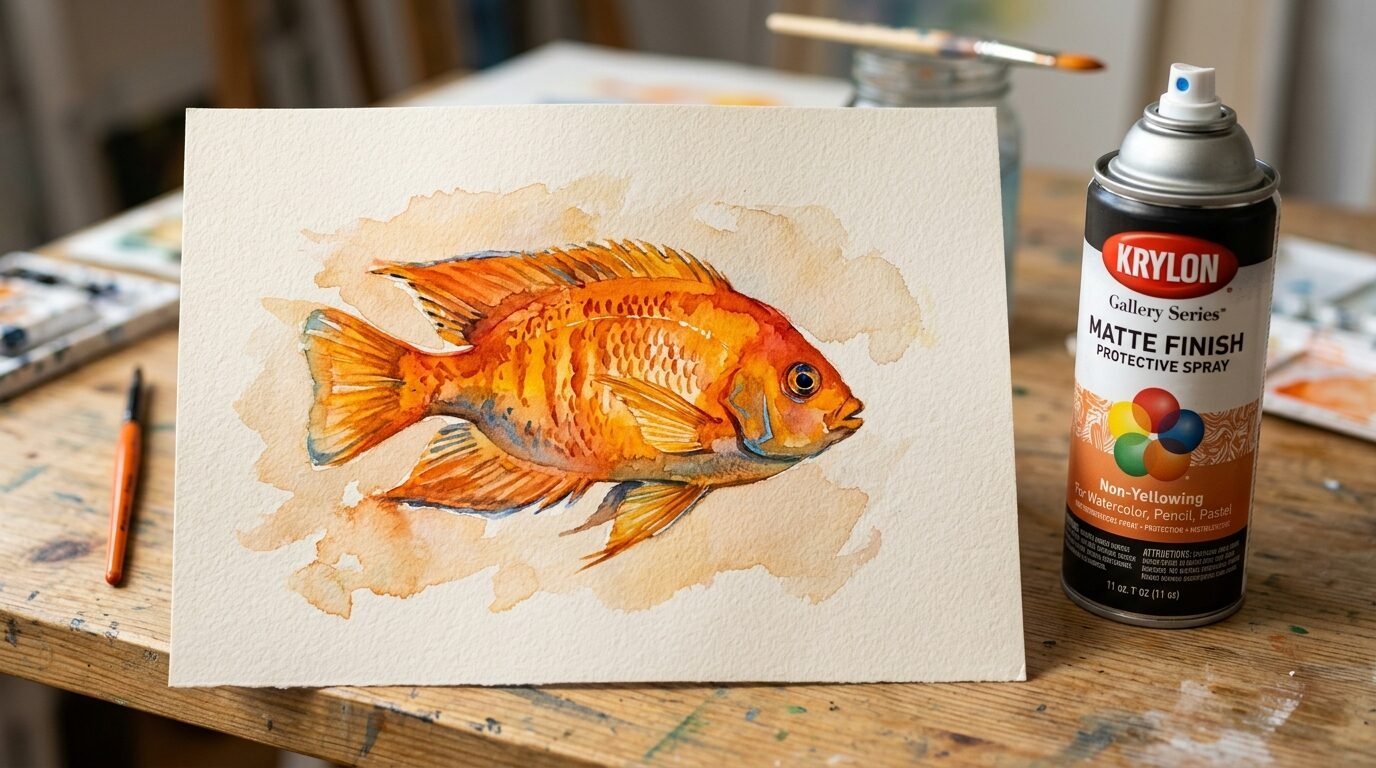
Preserving a Detailed Koi Fish Drawing
Imagine you spent days creating a gorgeous Koi Fish Drawing. The bright orange ink looks beautiful on the white background. If you brush liquid glue directly onto the ink, the lines will bleed. I used Krylon Matte Finish on a fish sketch last spring. Three light coats locked the ink in place safely. The orange tones stayed perfectly bright without running.
Safeguarding Three-Dimensional Materials
Three-dimensional objects have crevices that trap household dust. These items need a full seal to allow for easy cleaning later. Liquid varnishes protect these shapes well.
Coating Cardboard Animals and Cardboard Sea Creatures
Children love creating Cardboard Animals for their bedrooms. These projects often use recycled boxes and poster paints. Making Cardboard Sea Creatures is among the top Fun Crafts To Do during summer breaks. These Sea Animal Crafts need structural strength to last. I’ve noticed that applying two coats of DecoArt DuraClear gives cardboard surprising stiffness. It turns a soft paper craft into a durable wall sculpture. The finished art resists bending when handled by little hands.
Treating Mixed Media and Layered Crafts
Mixed media pieces combine glue, paper, and acrylic paint. This mixture requires a balanced sealant approach. Mod Podge Gloss secures the edges of paper cutouts. It creates a uniform shine across different textures.
Which Sealant Brand Works Best For Craft Projects?
The best sealant brands for craft projects include Mod Podge, Krylon, Liquitex, and Minwax. Mod Podge offers excellent water-based sealing for paper collages. Krylon provides top-tier clear aerosol sprays for delicate drawings. Liquitex and Minwax deliver durable professional varnishes that protect heavy dimensional wood and cardboard wall displays.
Selecting a brand depends on your final finish preference. Some creators love a high-gloss look. Others want a flat matte appearance. Let us check the main choices available in local craft stores today.
- Mod Podge offers great finish variety.
- Krylon provides fast spraying options.
- Liquitex ensures professional archival quality.
Mod Podge Gloss vs Mod Podge Matte
Mod Podge is a classic option for handmade home decor items. The Gloss version creates a shiny reflection on your wall art. The Matte version eliminates glare under bright room lights. Both choices cost under ten dollars for an eight-ounce jar. They clean up easily with warm soapy water.
Krylon Clear Acrylic Coating
Krylon offers excellent aerosol options for swift protection. The spray dries to the touch in ten minutes. It creates a moisture-resistant barrier on paper. A single can covers several medium wall projects. It works well on paper surfaces.
Liquitex Professional Varnish
Liquitex makes high-grade acrylic varnishes for serious artists. Their products cost twenty dollars for eight ounces. They offer permanent protection against dust and sunlight. The liquid flows smoothly and leaves no bubbles behind.
Golden Polymer Varnish
Golden is a premium brand for archival wall protection. This varnish requires dilution with water before use. It costs twenty-eight dollars per bottle. It provides exceptional ultraviolet light filtering to stop colors from fading.
What Are the Steps for Flawless Sealant Application?
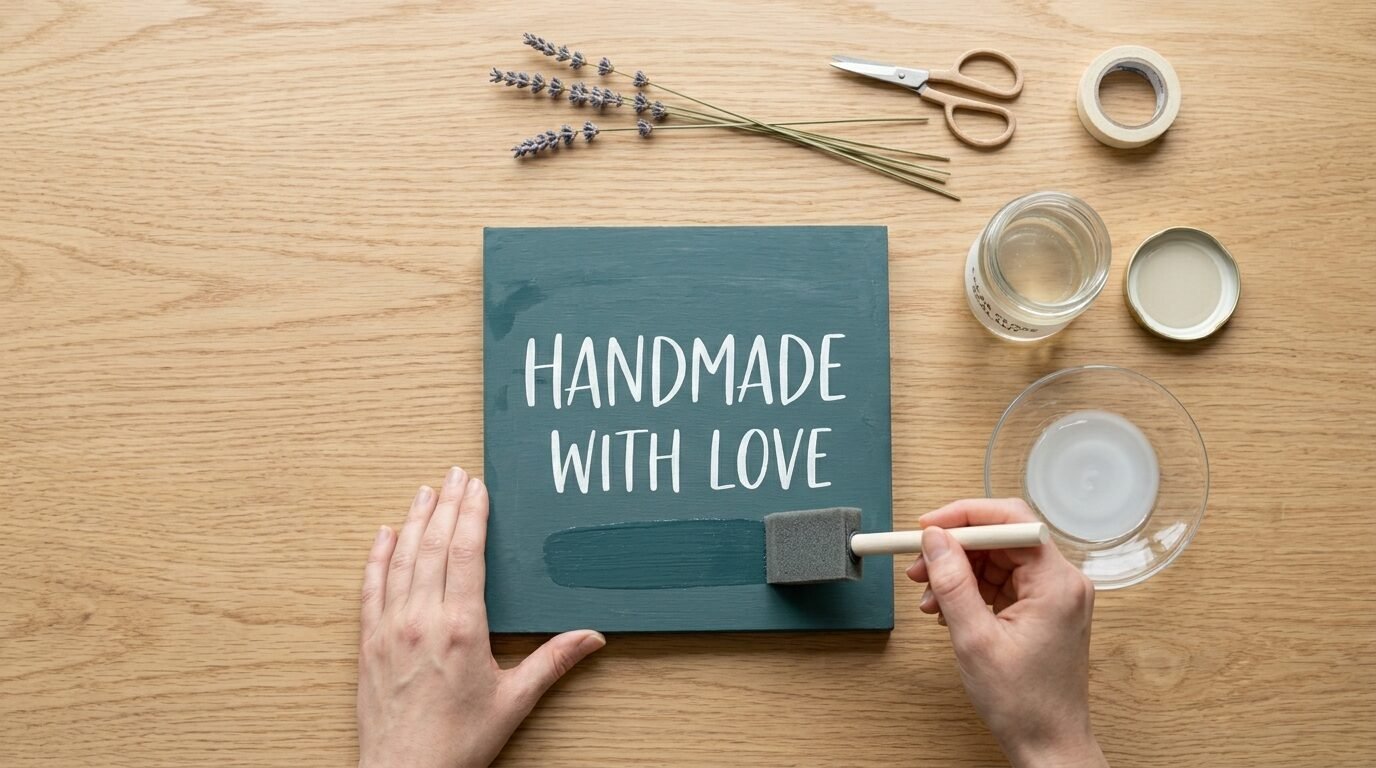
The steps for flawless sealant application involve cleaning the art surface, testing on scrap materials, and applying multiple thin coats. Allow each coat to dry completely before adding the next layer. Working in a dust-free space with good ventilation ensures a smooth professional finish without trapped particles.
Rushing the application process destroys good work. Perfect finishes require patience and clean conditions. I follow a strict sequence every time I coat a new piece of wall decor. This routine ensures consistent results.
- Clean your workspace first.
- Shake aerosol cans well.
- Keep your coats thin.
Step 1 Preparing the Workspace
Dust is the enemy of a smooth clear coat. Wipe your table down with a damp cloth. Work in a room with moving air to avoid breathing fumes. Ensure your art piece is fully dry before starting.
Step 2 Testing on Scrap Material
Never apply a new sealant directly to your finished piece. Create a small sample using the same markers and paper. Apply the clear coat to this sample first. Look for bleeding or paper wrinkling.
Step 3 Applying Thin Layers
Heavy coats pool in corners and create milky patches. Move your spray can across the piece in even lines. If using a brush, apply light pressure. Two thin layers beat one thick layer every time.
Step 4 Curing and Drying Times
Dry to the touch does not mean fully cured. Most acrylic sealants dry in two hours. They require twenty-four hours to cure completely. Leave the art flat during this time to prevent runs.
How to Avoid Common Art Sealing Mistakes?
Avoid common art sealing mistakes by maintaining correct spray distances, checking weather humidity levels, and avoiding thick brush applications. Spraying too close causes runs and drips, while high humidity turns clear coats cloudy. Allowing extended drying times between coats prevents trapped moisture and sticky surfaces.
Mistakes happen to every crafter. Knowing how to fix them saves your hard work from the trash bin. I have ruined several pieces by rushing through the drying phase. Here is how to handle these errors.
- Avoid humid spray days.
- Keep spray cans moving.
- Sand away minor bumps.
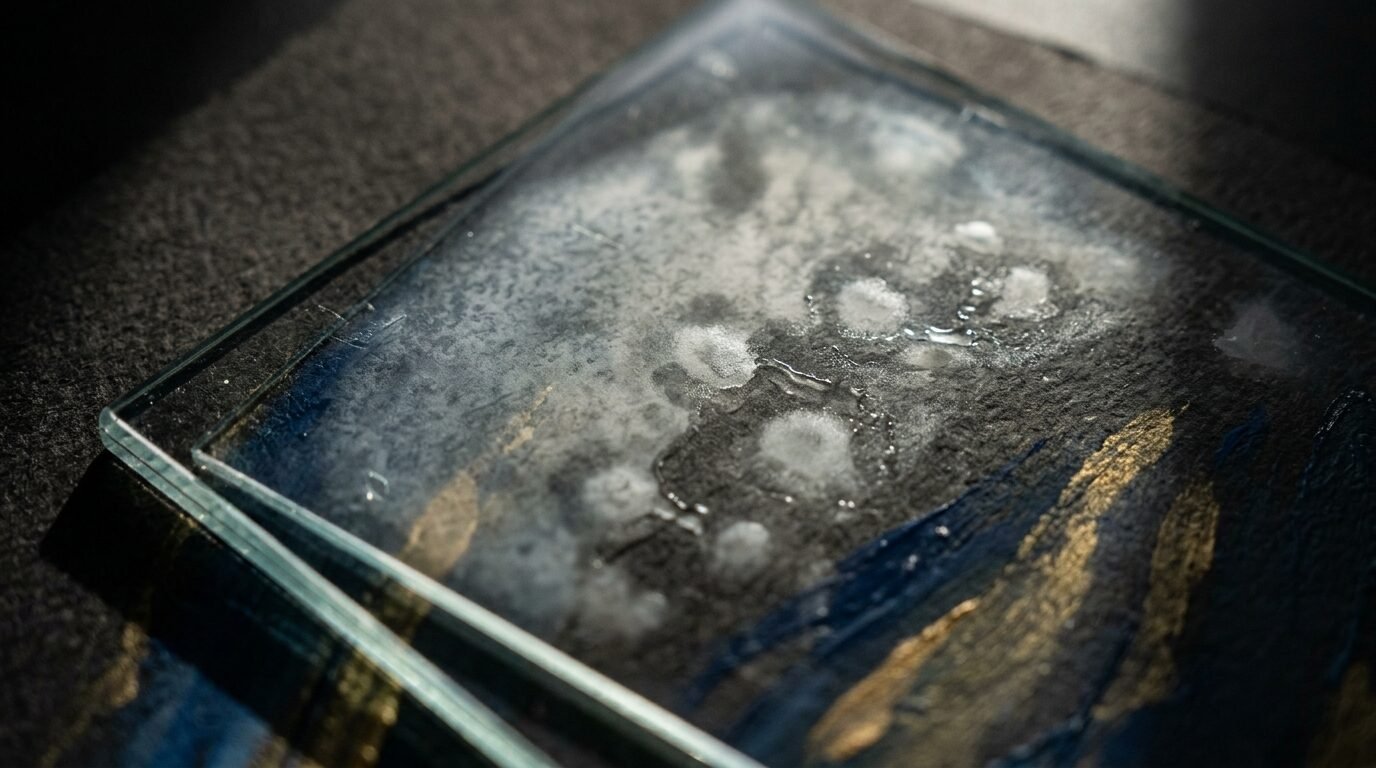
Fixing Cloudy Resins and Bubbles
High humidity causes clear sprays to trap moisture. This trapped wetness looks cloudy or white. If this happens, apply a very light coat of the same spray on a dry day. The fresh solvent often clears up the cloudiness. For bubbles in liquid glue, use a pin to pop them while wet.
Preventing Running Ink and Bleeding Markers
Water-based sealants melt water-based inks. If your marker lines start to bleed, stop immediately. Let the area dry completely. Switch to an alcohol-based or oil-based spray fixative to lock the lines before continuing.
Brand Comparison for DIY Wall Art Sealants
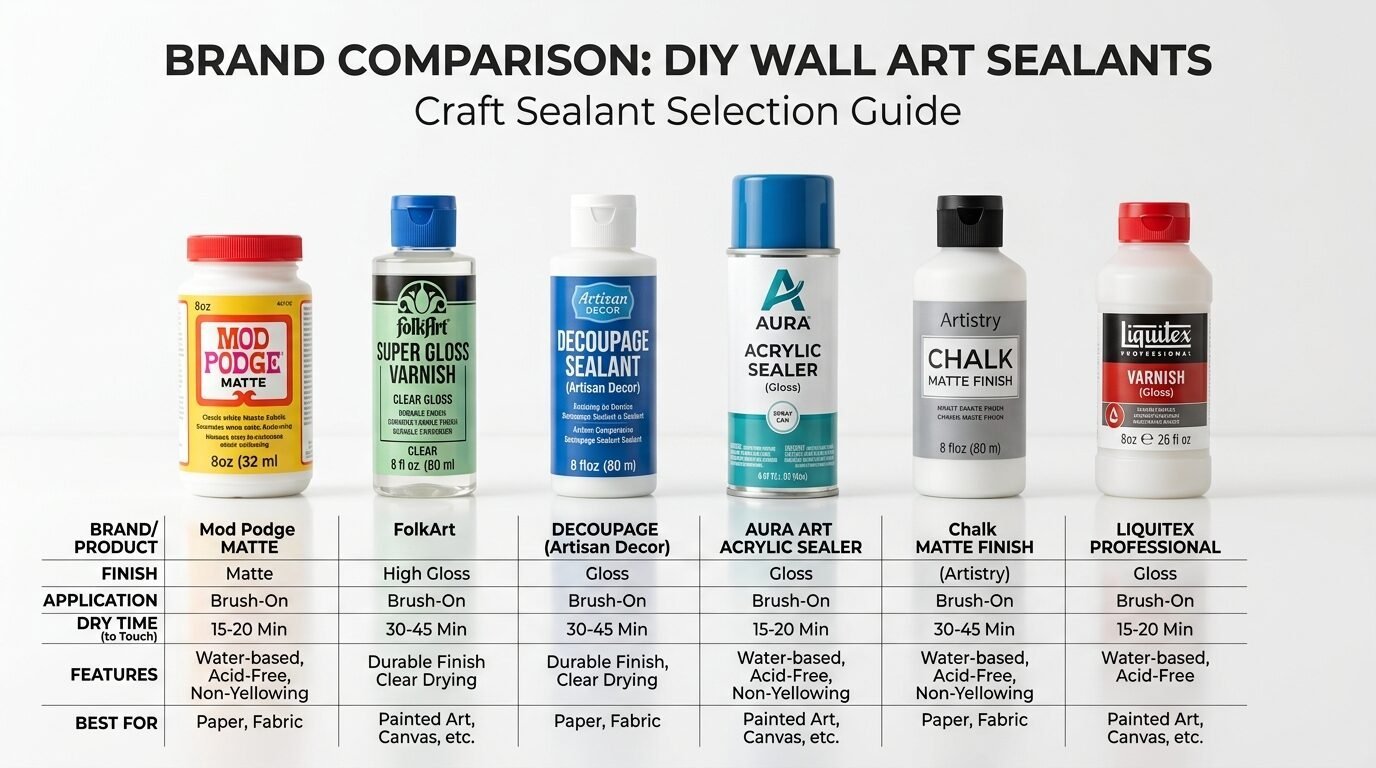
This table shows clear pricing and usage rules for your next project. In my experience, keeping both a liquid and a spray option on your shelf covers every craft need.
| Brand Name | Product Type | Average Price | Best Surface Match | Drying Time |
| Mod Podge Matte | Liquid Water-Based | $9 | Paper Collages | 2 Hours |
| Krylon Crystal Clear | Aerosol Acrylic | $11 | Pencil Ink Drawings | 15 Minutes |
| Liquitex High Gloss | Liquid Varnish | $20 | Painted Canvas | 3 Hours |
| Minwax Polycrylic | Liquid Protective | $24 | Wood Cardboard | 4 Hours |
| Aleene’s Clear Spray | Aerosol Acrylic | $8 | General Crafts | 20 Minutes |
| Golden Polymer | Archival Varnish | $28 | Professional Fine Art | 6 Hours |
Frequently Asked Questions About Art Sealing
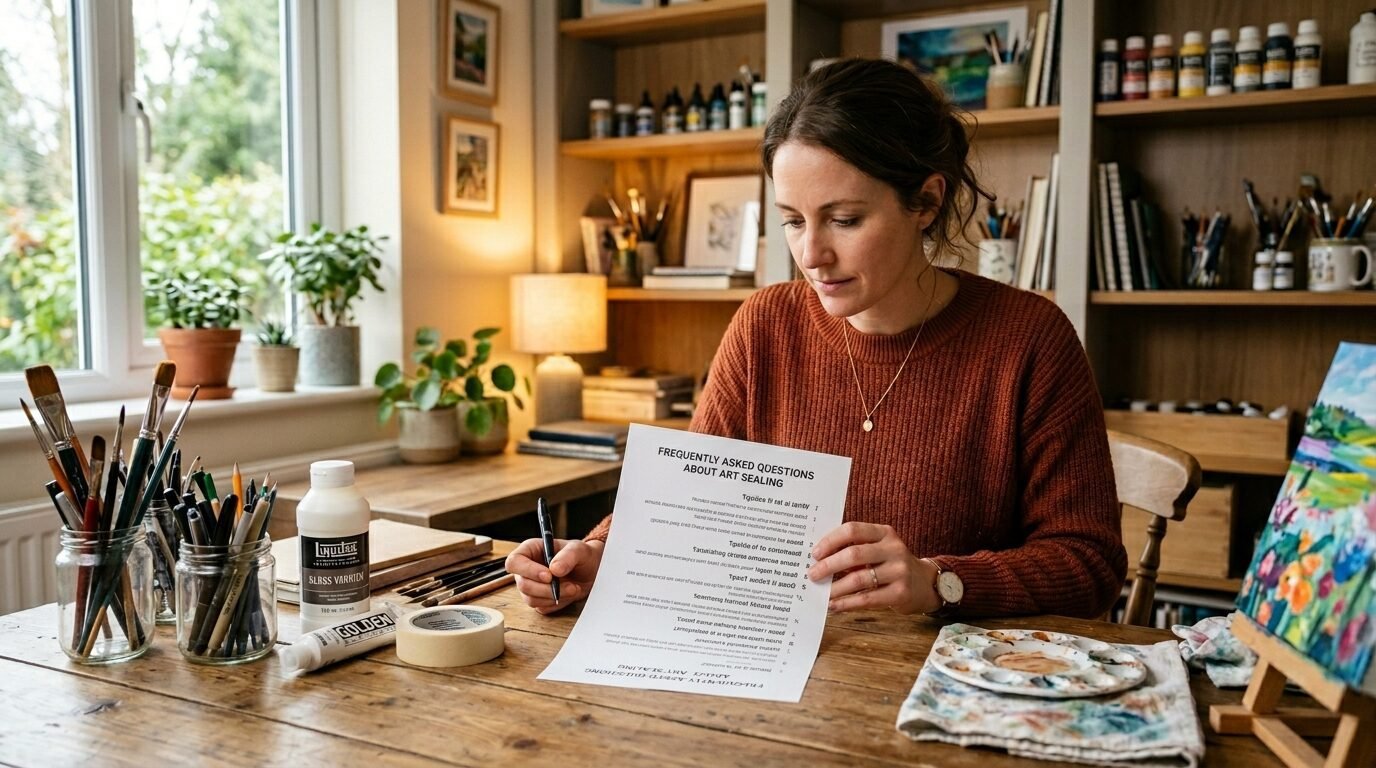
Frequently asked questions about sealing DIY art address drying times, waterproof coatings, ink bleeding prevention, and yellowing issues. Most craft sealants require twenty-four hours to cure completely before wall mounting. Using archival acrylic formulas prevents white paper from turning yellow over several years of display.
Here are direct answers to common problems crafters face when protecting their handmade home decor pieces.
Can I use hairspray to seal an ink drawing?
Hairspray is not a permanent solution for art protection. It contains chemicals that turn paper yellow over time. It attracts environmental moisture, making your art sticky. Use a proper clear fixative instead.
How long does Mod Podge take to cure fully?
Mod Podge dries to the touch in less than one hour. It takes up to four weeks to cure to maximum hardness. Keep your pieces from stacking during this initial month.
Will clear gloss sealer make paper wrinkle?
Liquid sealants contain water which can cause thin paper to swell and ripple. To prevent this issue, apply a light coat of spray sealer first to stiffen the paper sheet.
What sealer works best for a paper Baby Seal craft?
A delicate paper Baby Seal cutout needs a soft finish surface. Use a matte spray sealer to protect the paper edges without adding artificial shine. This keeps the animal appearance soft and natural.
Can I apply acrylic varnish over oil pastels?
Standard acrylic varnish does not stick well to oily surfaces. Oil pastels never dry completely. You need a specialized oil pastel fixative before applying any top clear layer.
How do I stop bubbles from forming in liquid varnish?
Never shake your liquid varnish bottles. Shaking creates thousands of tiny air bubbles. Stir the product gently with a wooden stick before application to keep it smooth.
Is spray sealer safe to use indoors?
Aerosol sealants release strong chemical vapors into the air. Always spray your projects outdoors or in an open garage space. Wear a protective mask to keep your lungs safe.
Does clear coat protect art from bathroom moisture?
Yes, two coats of polyurethane or polycrylic sealer protect paper art from bathroom steam. Ensure all edges are completely coated to block moisture paths.
How do I clean a sealed wall art piece?
Once fully cured, you can wipe the surface with a dry microfiber cloth. A lightly damp cloth works on acrylic varnishes to remove stubborn dust spots safely.
Why did my clear sealer turn white?
Sealer turns white when applied in thick layers or during high humidity. The moisture gets trapped under the top skin layer. Keep your layers thin to avoid this problem.
Can I use Mod Podge on heavy cardboard crafts?
Yes, Mod Podge works beautifully on heavy cardboard structures. It reinforces the seams and provides a uniform surface texture for painting or display.
What is the difference between varnish and topcoat?
Varnishes offer archival protection and can often be removed for art restoration. Topcoats provide a permanent, tough shield meant for heavy handling and wear.
Your Next Steps for Long Lasting Displays
Your next steps for long-lasting wall displays include allowing your sealant to cure completely, choosing appropriate framing, and avoiding direct sunlight exposure. Mounting your protected art with sturdy hardware prevents falling damage. Regular dusting with a soft dry cloth maintains the clarity and brilliance of your handmade projects.
Your handmade wall art deserves a long life on display. Protecting the surface is the first move. Proper placement inside your home is the second move. I’ve seen protected pieces last for years when hung away from direct sunlight.
- Let the piece cure fully.
- Choose a shady wall spot.
- Enjoy your beautiful handmade home.
Would you like to share your latest craft project success? Leave a comment below with your favorite sealing tips.

Anya Castellan is the Founder and Editor-in-Chief of Home Wall Trends. An art history graduate of the Rhode Island School of Design with twelve years of experience writing for leading American design publications, she specializes in composition, gallery wall theory, and the quiet architecture of domestic space. A former contributing editor at Architectural Digest and guest lecturer at Parsons School of Design, Anya personally reads and signs off on every piece before it is published.