Project Overview for Your Literary Wall Transformation
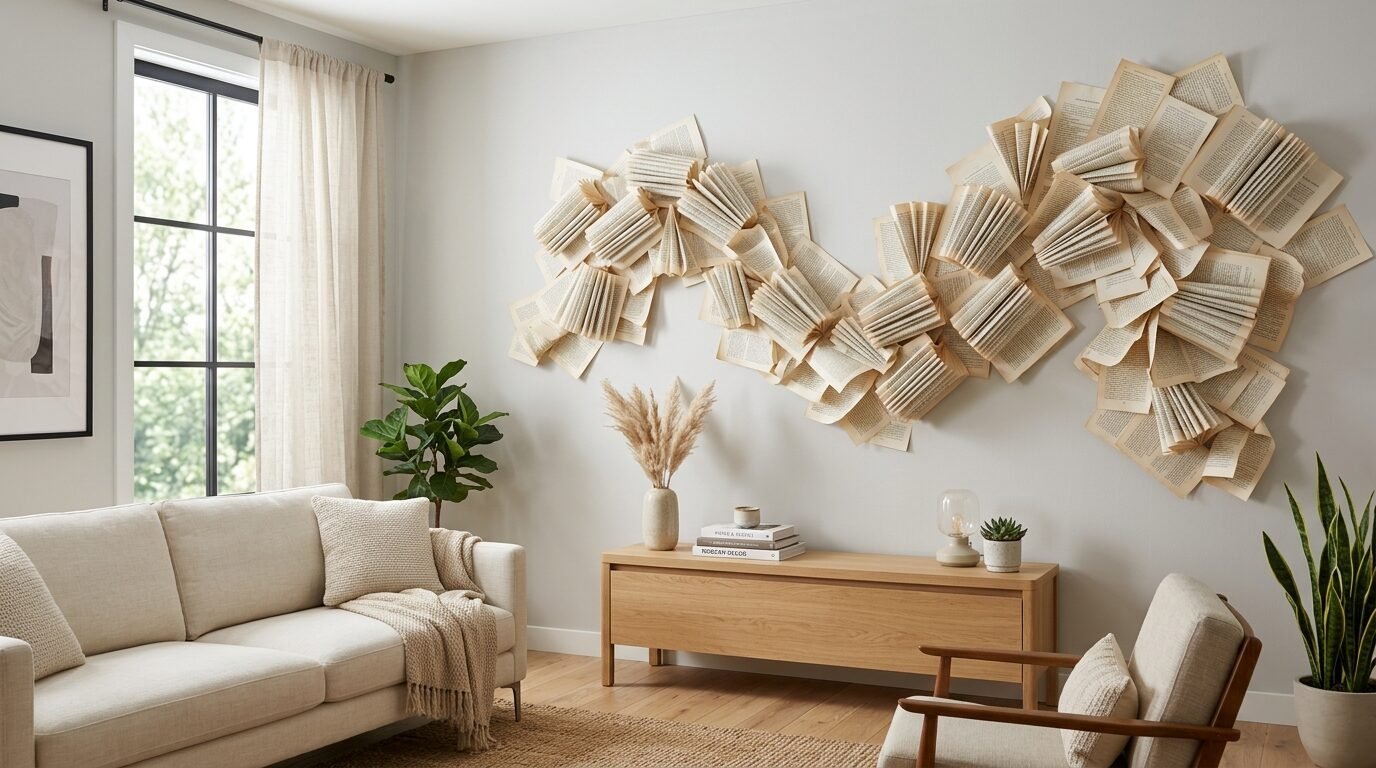
You can make a beautiful paper wall using old book pages, clear glue, and painter tape. This quick home project costs under fifty dollars total. It takes about five hours of work from start to finish. The result turns plain drywall into a classic feature wall that lasts for years without damage.
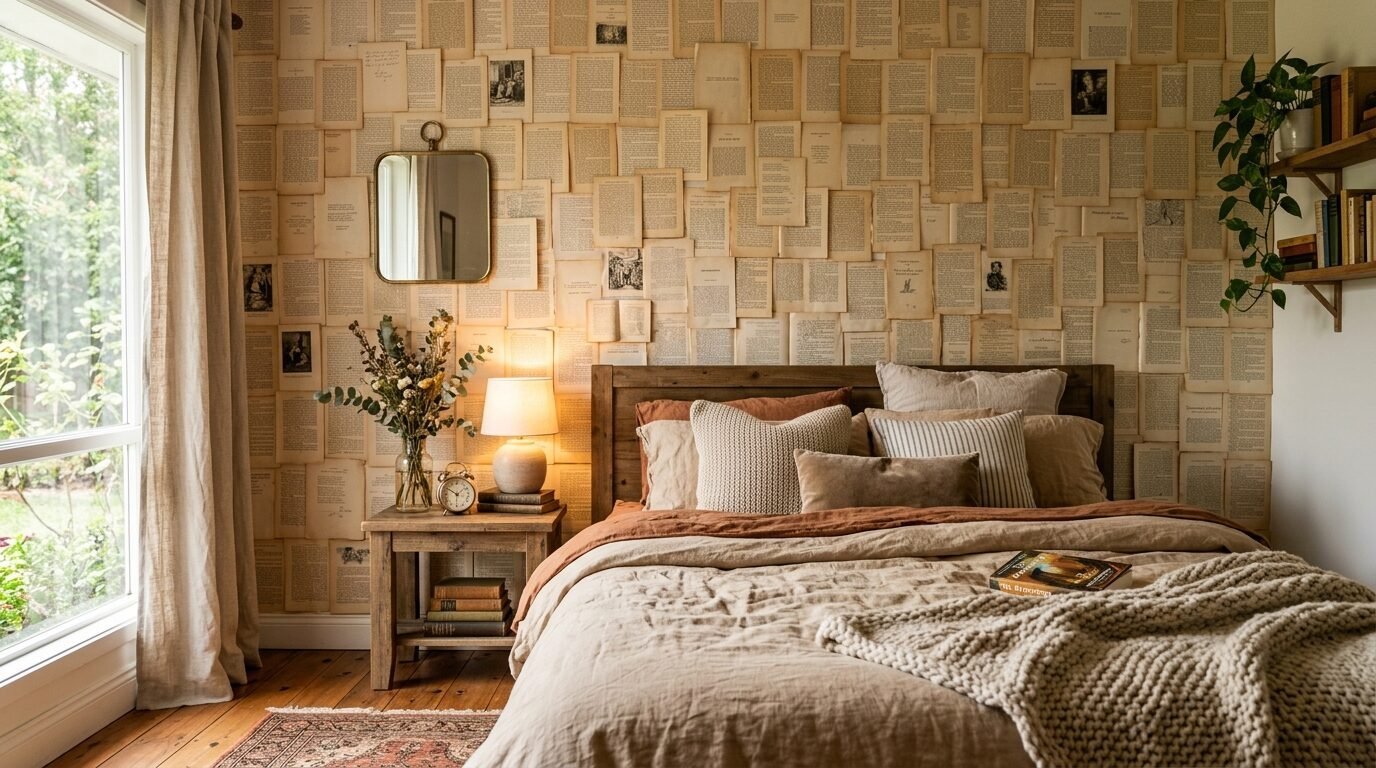
A plain wall feels cold. Last May, my bedroom wall looked blank and boring. I spent forty dollars at a thrift store on old history books. Within three days, my room became a beautiful storybook space. You can change your home using plain paper sheets. This project costs very little money and takes only one weekend.
This guide shows the exact steps to place pages safely on your walls. I tried this system in my own house three months ago. The pages still look perfect today. You do not need expert craft skills for this task.
My friend Sarah wanted a whimsical look for her room. She used old poetry books to cover a small ten foot wall. It changed the entire feel of her space. This text details every tool and step you need to copy her success.
What Materials Do You Need for a Book Paper Wall?
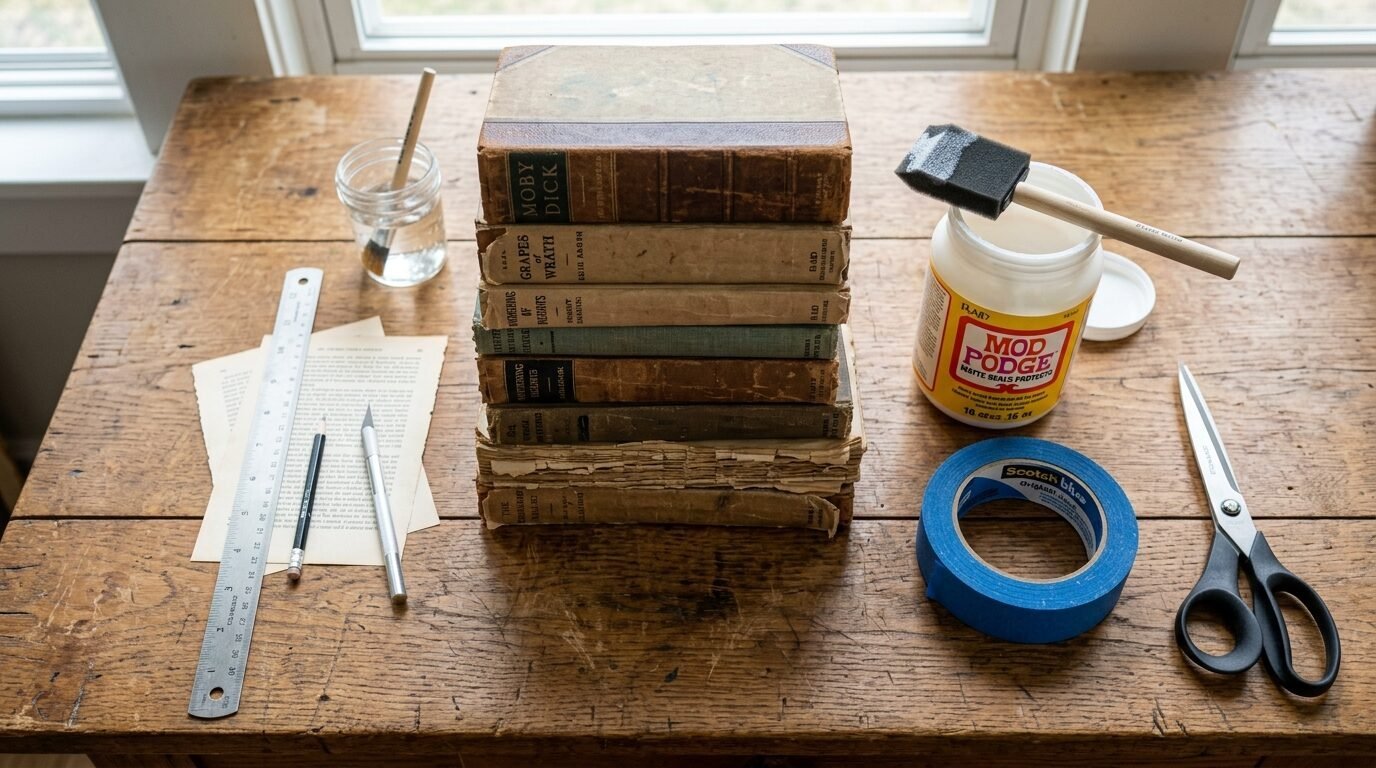
To create a beautiful book paper wall, collect ten to fifteen old thrift store books. You need high quality adhesive like Mod Podge Matte or Lineco Neutral Glue. Grab a roll of Scotch Blue Painter Tape for testing layouts. A Fiskars Paper Trimmer ensures straight cuts for every single sheet you use.
Choosing your items carefully saves money and prevents waste. In my experience, cheap glue causes paper to yellow and wrinkle over time. I recommend buying acid free options to keep the pages crisp.
Let us look at the complete shopping list for this project. You might have some of these items in your kitchen drawer right now.
Choosing the Right Books
Look for books with thick paper pages. Avoid glossy modern textbooks because they reflect too much light. Older novels from yard sales work best. I look for yellowed paper edges to get an instant antique look.
Essential Adhesives and Tools
You must pick a reliable glue brand. Elmer’s Glue is fine for temporary setups. For a permanent wall, choose Lineco Neutral pH Adhesive. This product prevents long term decay and keeps paper safe.
Liquid Glues Versus Tape
Here is a direct choice you must make. Liquid glue holds forever but can damage drywall when removed. Double sided tape allows easy removal later. I use tape when renting an apartment to protect my security deposit.
Let us compare the top tools available for this craft project today.
| Tool Brand Name | Main Use | Current Average Price | Pros | Cons |
| Mod Podge Matte | General sealing | Nine dollars | Dries fast | Strong smell |
| Lineco Neutral Glue | Permanent mounting | Fourteen dollars | Acid free | Takes longer to dry |
| Scotch Blue Tape | Layout testing | Six dollars | Safe for paint | Temporary hold |
| Fiskars Trimmer | Cutting page edges | Twenty dollars | Perfectly straight | Blade dulls fast |
| Gorilla Glue Stick | Quick fixes | Five dollars | Easy to hold | Can clunk up |
| Krylon Matte Spray | Sealing pages | Twelve dollars | Protects from dust | Requires ventilation |
How Do You Prepare Pages for Book Pages Wall Decor?
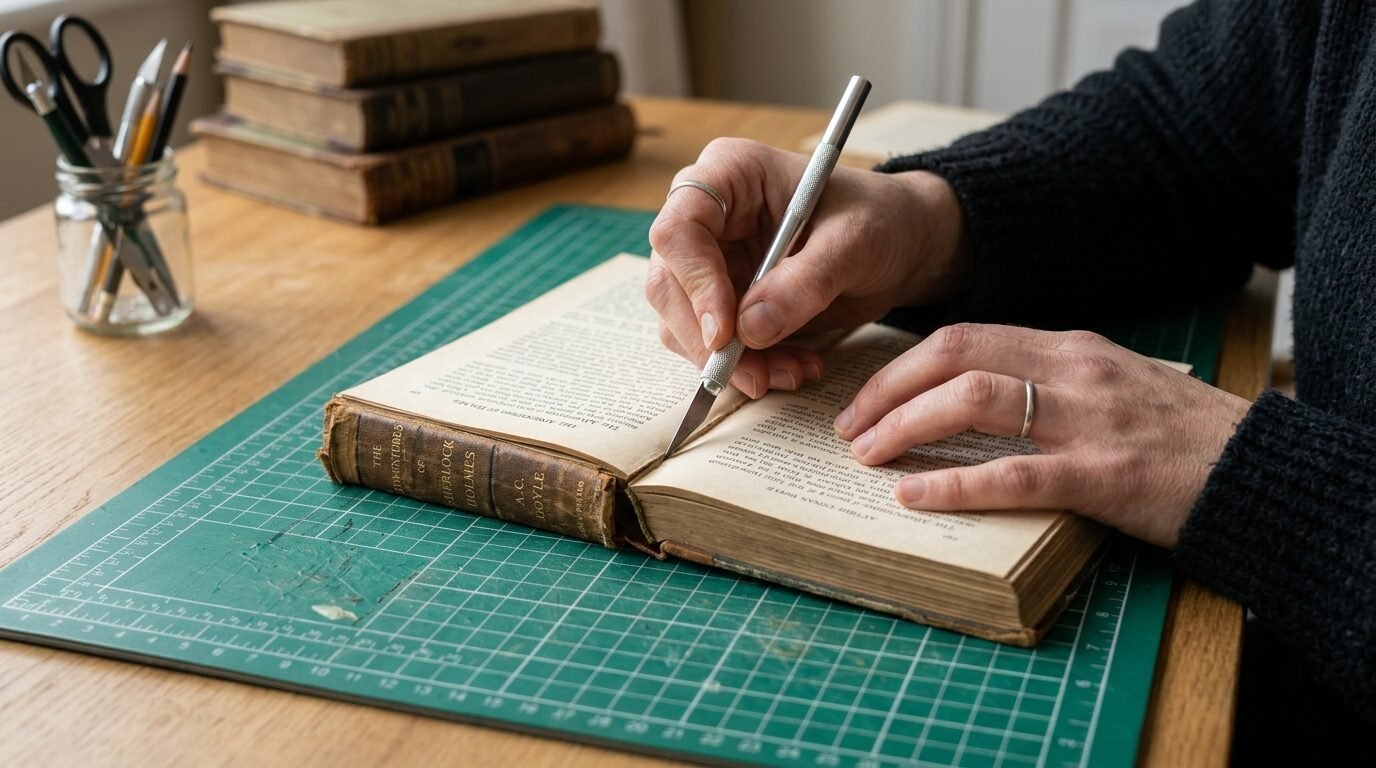
Prepare your book pages wall decor by carefully tearing sheets from the spine of your selected books. Cut away rough or glued edges using sharp crafting scissors or a paper cutter. Lay the flat pages on a table to sort them by color tone, age, and text size before mounting.
Preparation determines the quality of your finished wall. I once rushed this stage and ended up with torn lines. Taking your time makes the final placement look neat and professional.
Some books have tough bindings that resist tearing. I use a utility knife to slice pages close to the center spine.
Clean Page Removal Methods
Open the book flat to the center of a section. Run your knife down the seam gently. Pull the sheet away with even pressure. This prevents jagged tears across your text lines.
Aging Paper with Tea or Coffee
Newer white books can look too modern for a vintage theme. I brew a strong pot of black coffee to age white pages. Dip each sheet into the liquid for five seconds. Let them dry flat on baking sheets overnight.
Step by Step Guide to a Complete Paper Wall Layout
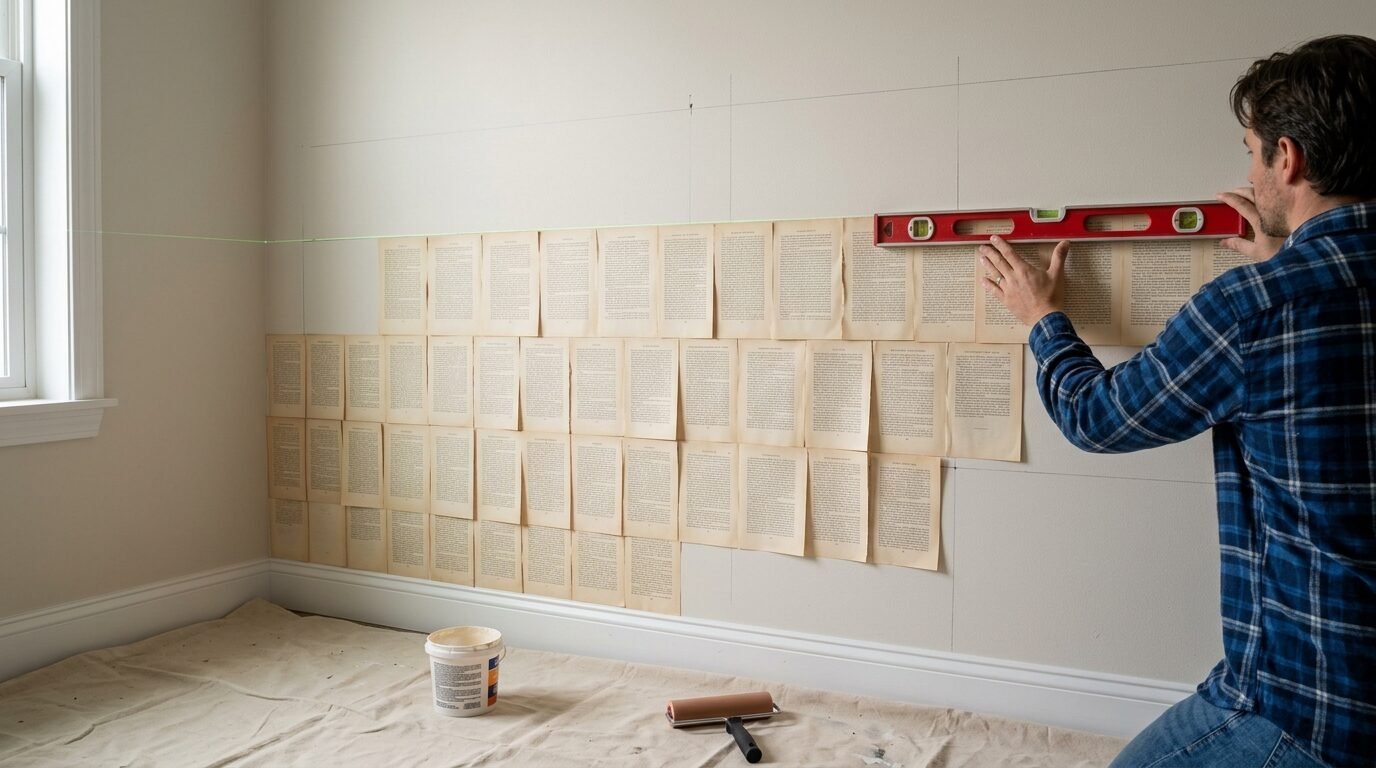
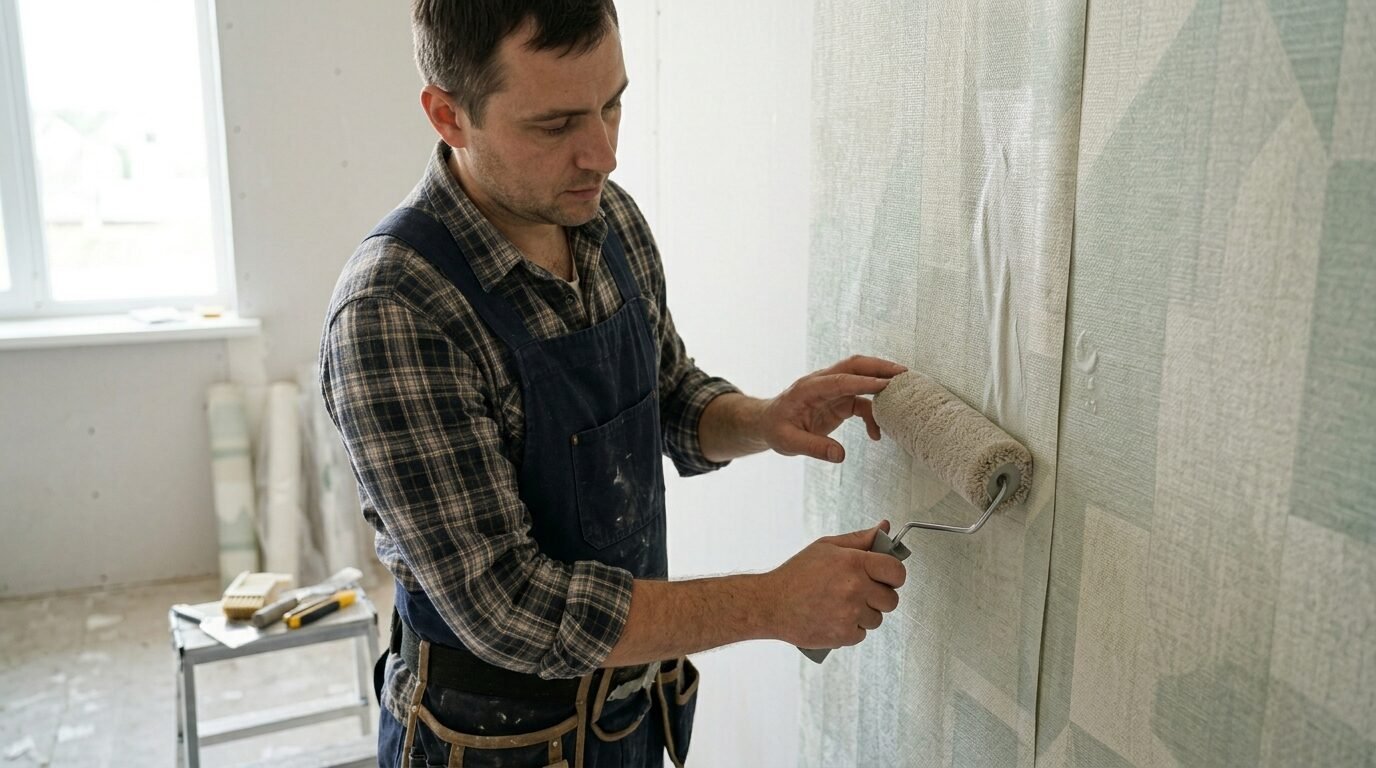
Start your paper wall layout by cleaning your wall with a dry microfiber cloth. Measure the center point of the wall space to establish your straight starting line. Stick pages using light tape to test your layout before applying permanent glue across the full surface.
Layout mistakes are hard to fix once glue dries. In my experience, starting from the center prevents crooked lines at the edges. I saw my neighbor start from the floor, and her rows grew crooked by the top.
Follow these exact steps to complete your design without stress.
Wall Grid Alignment Steps
Use a bubble level to draw a straight pencil line across the middle wall. Place your first row of paper directly along this mark. Work your way upward in straight horizontal rows.
Creating the Overlapping Collage Style
The overlapping style looks organic and classic. Place each sheet so it covers the edge of the previous page by half an inch. This hides any gaps or uneven cuts perfectly.
How to Style a Fairy Tale Nursery Using Vintage Prints
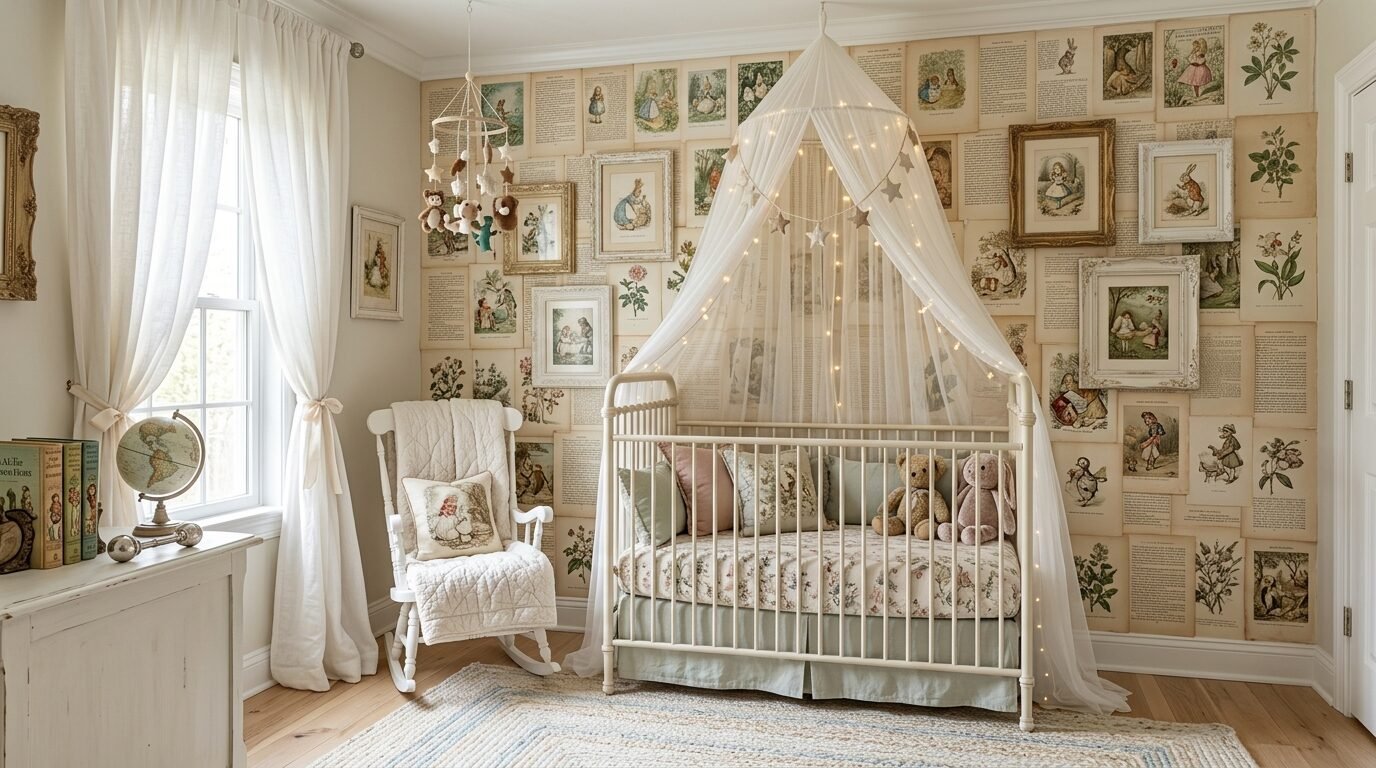
Style a fairy tale nursery by mixing classic storybook sheets with soft pastel illustrations on the main wall. Choose old children books like Peter Pan or Alice in Wonderland for your paper supply. Keep colors soft and pair the walls with light wood furniture for a whimsical feel.
A child room needs a soft and warm feel. I designed a nursery for my cousin last winter using old storybook pages. The room felt like walking into an old library book.
Parents love this theme because it encourages a love for reading early in life.
Pastel Colors and Whimsical Graphics
Pick pages that contain light blue, soft pink, or faded yellow tones. Avoid heavy black text blocks that look too dark for a baby room. Frame a few large colored illustrations to place over the text pages.
Safety Practices for Baby Rooms
Keep all paper projects out of reach from the crib. Use water based, non toxic sealers like Elmer’s or Mod Podge. Ensure the room vents fully for two days before the baby sleeps inside.
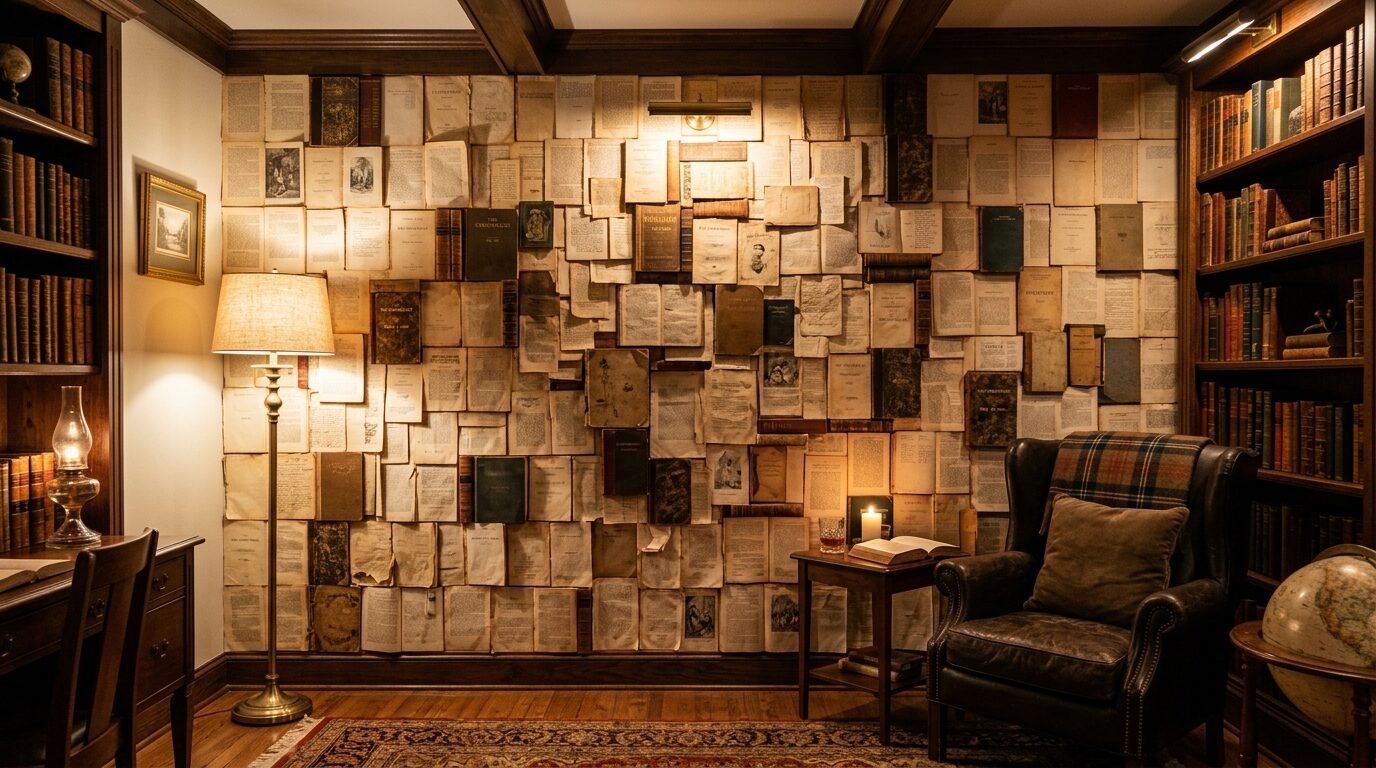
Designing a Cozy Fairy Library in Small Spaces
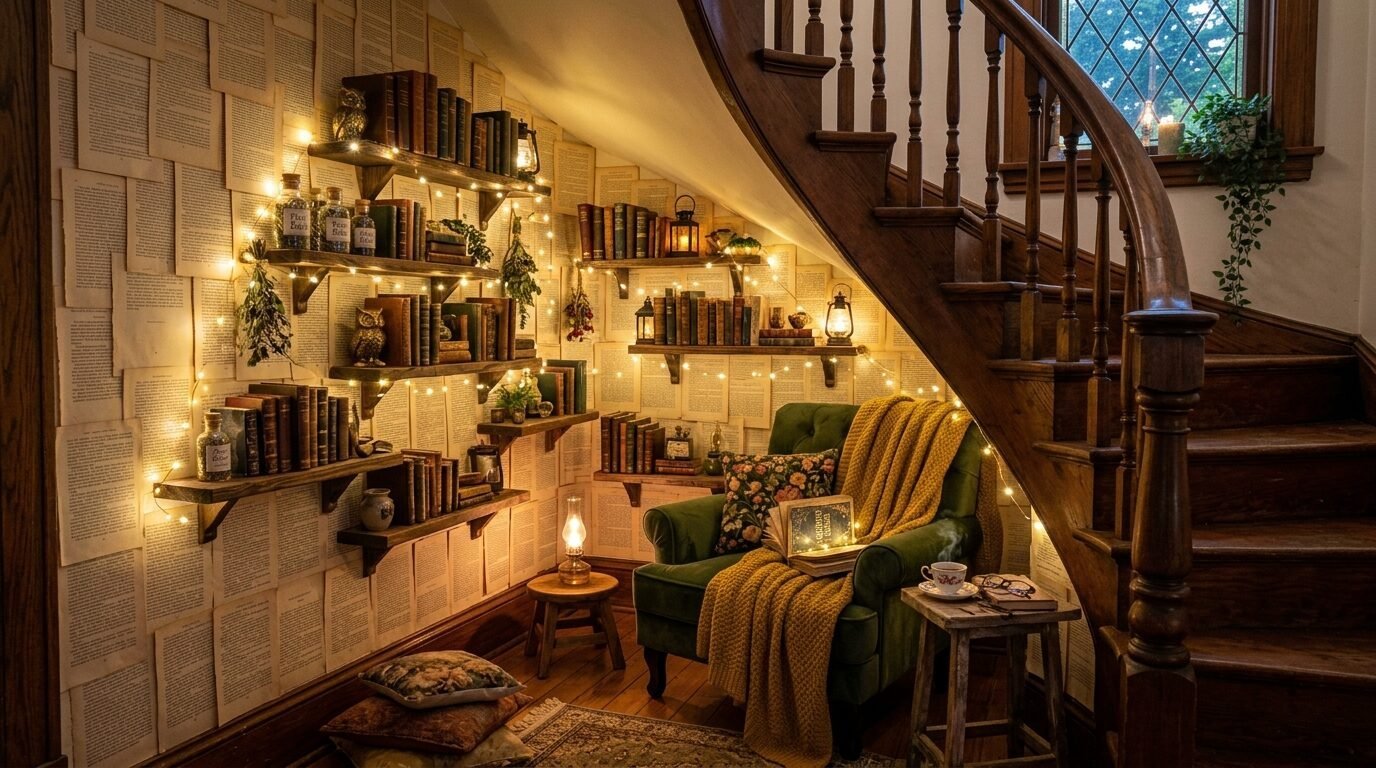
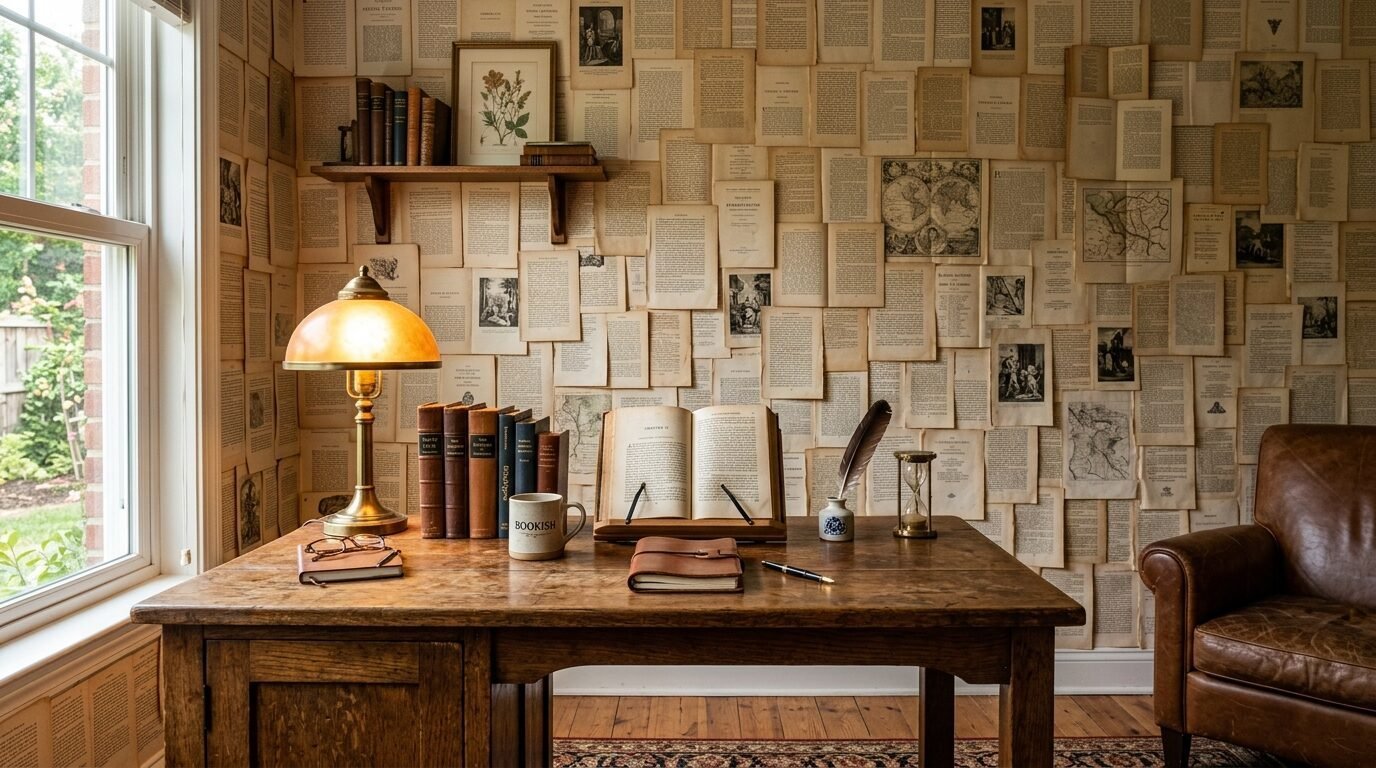
Design a cozy fairy library by applying book paper to a single corner or recessed wall nook. Combine the paper background with warm fairy lights and floating wood shelves. This creates a deep visual backdrop that makes small reading spaces feel larger and more inviting.
Small spaces work perfectly for bold decor ideas. I turned a tiny closet under my stairs into a reading corner last year. The paper walls made the small space feel magical instead of cramped.
You do not need a massive room to create a stunning effect.
Corner Placement Secrets
Wrap your pages around the corner angle by scoring the paper with a bone folder. This keeps the sheets tight against the wall corner without bubbling. It connects two walls into a single reading zone.
Lighting Your Literary Nook
Warm lighting changes how the paper looks at night. Use soft yellow LED bulbs rather than bright white lights. The yellow light catches the warm tones of the aged paper beautifully.
How to Style a Complete Whimsical Fairy Tale Room
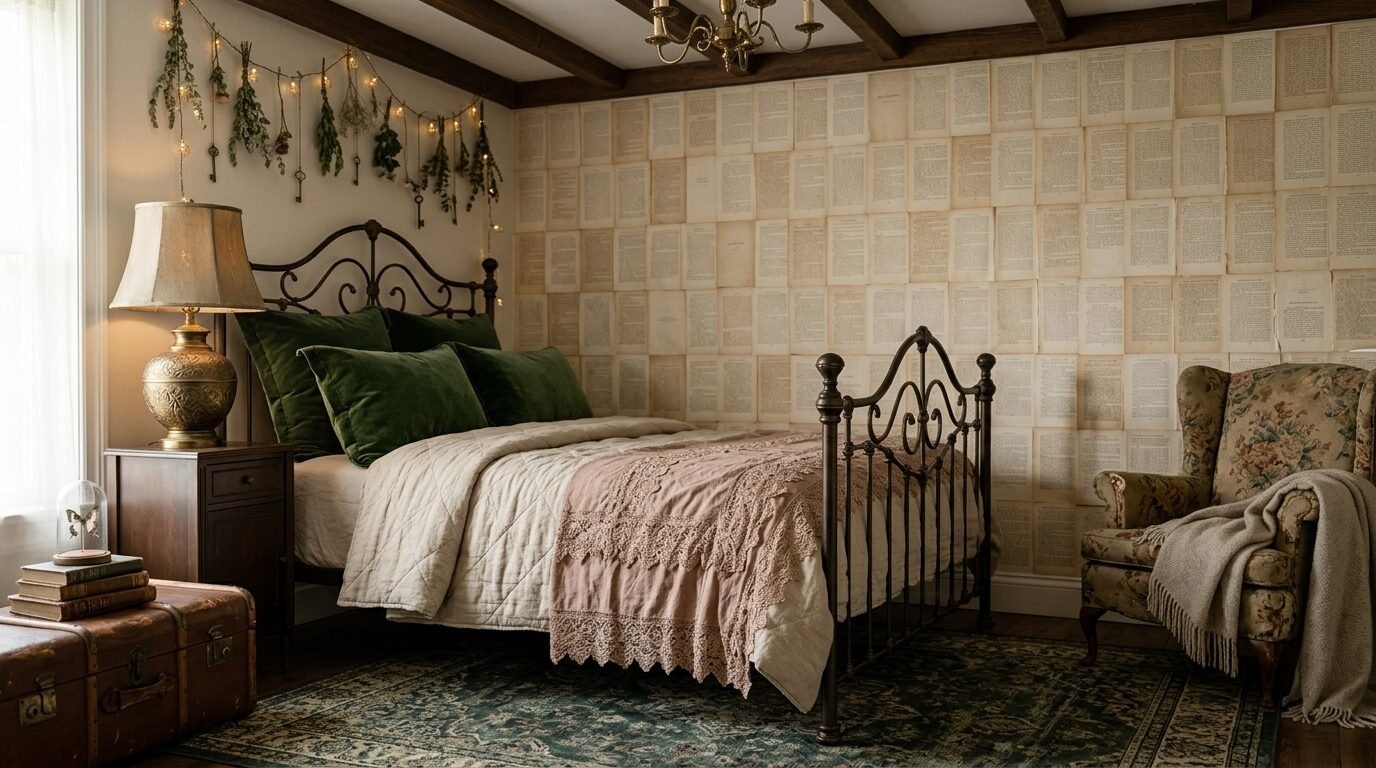
Style a complete fairy tale room by matching your paper walls with vintage brass accessories, velvet pillows, and dark wood furniture. Include natural elements like dried vines or pressed flowers across the borders. This connects the paper theme to a wider mystical forest style.
A paper wall needs the right context to look its best. If your furniture is too modern, the wall might look out of place. I prefer blending old and new elements for a balanced look.
Let us examine how to coordinate your entire room decoration.
Furniture Pairing Options
Antique iron bed frames look excellent against a book wall. Thrifted dressers painted in deep forest green or muted gold also match well. Avoid shiny plastic or chrome pieces.
Accessories to Match Your Walls
Place old leather trunks at the foot of your bed. Hang vintage keys or small oval mirrors over the paper sheets. These small details pull the vintage theme together seamlessly.
Troubleshooting Common Paper Wall Layout Mistakes
Troubleshoot paper wall mistakes by slicing air bubbles with a sharp razor blade and flattening them with extra glue. Fix wrinkled pages by dampening them slightly with a sponge before rolling them smooth. Remove excess wet glue immediately using a damp microfiber cloth.
Errors happen during any DIY project. I made several mistakes on my first try, including spilling glue on my carpet. Knowing how to fix these issues saves your time and sanity.
Most paper issues are easy to correct if you act fast.
Fixing Wrinkled Pages
Wrinkles happen when paper absorbs moisture too quickly. If a page wrinkles, let it dry completely first. Sometimes it flattens out on its own as the glue cures.
Removing Leftover Glue Residue
Dried glue leaves a shiny mark on matte paper. Use a gentle rubber cement eraser to peel away excess glue dried on the surface. Work slowly to avoid tearing the book text.
Frequently Asked Questions About Paper Home Decor
Find answers to top questions about book paper walls here. Learn about building safety, wall removal options, rental rules, and ways to protect your paper from sun damage over time. These answers provide direct help for your home decor project.
Many readers ask about the long term care of paper walls. Here are the clear answers to common questions based on real home tests.
Can you remove book pages wall decor without destroying the drywall?
Yes, if you use temporary adhesive. Use command strips or double sided painter tape for easy removal. If you used liquid glue, you must steam the walls to soften the paste later.
Does the paper turn yellow over time from sun exposure?
Natural paper yellows when exposed to UV light. To stop this, apply a coat of Krylon UV Resistant Clear Spray. This preserves the current color of your pages for years.
How many books do I need to cover a standard wall?
A standard eight by ten foot wall requires about twelve medium novels. This provides roughly three hundred to four hundred pages. Always buy two extra books for backup mistakes.
Is a paper wall a fire hazard in a residential home?
Paper burns easily if exposed to open flames. Keep your paper wall away from candles, heaters, and electrical outlets. You can spray the wall with a fire retardant coating for extra safety.
Can I use glue sticks for a permanent paper wall setup?
Glue sticks lack the strength for large vertical projects. The corners will start to peel within two weeks. Use heavy liquid paste like Mod Podge for permanent results.
How do I clean dust off a book paper wall?
Do not use wet rags or liquid cleaners on bare paper. Use a static duster or a soft dry brush to wipe away dust every month. If sealed with acrylic, a slightly damp cloth works fine.
Can I complete this project in a rental apartment?
You can if you use removable tape. Do not use permanent wallpaper paste or heavy glue. Talk to your landlord before starting any large wall modifications.
What type of book text looks best on a wall?
Old serif fonts look more classic than modern sans serif text. Look for books printed before nineteen eighty for the best typographical style. Poetry books offer beautiful white space layout choices.
Can I mix different book sizes on the same wall?
Yes, mixing sizes creates an interesting collage look. Overlap large sheets with smaller pages to break up rigid grid lines. This makes the overall design look more artistic.
How long does it take for the glue smell to go away?
Most craft glues lose their scent within forty eight hours. Keep your windows open and run a fan during the drying process. Mod Podge dries fast but smells strong initially.
Should I seal the top of the pages after mounting them?
Sealing is smart if you have kids or pets. A thin layer of matte acrylic sealer protects the paper from fingerprints. It also stops moisture from warping the sheets.
Can I use modern magazines instead of old books?
Magazine paper is shiny and thin. It wrinkles easily and reflects light poorly on walls. Stick to matte book paper for a classic vintage texture.
Final Actions for Your Wall
Transform your living space today by gathering your tools and selecting your favorite old books. Start with a small section to build your confidence before tackling an entire feature wall. Your custom storybook room is just a few steps away.
Creating a book paper wall is a relaxing way to personalize your home. My own library corner brings me joy every single evening when I sit down to read.
Take your time, collect your vintage books, and enjoy the crafting journey this weekend.

Anya Castellan is the Founder and Editor-in-Chief of Home Wall Trends. An art history graduate of the Rhode Island School of Design with twelve years of experience writing for leading American design publications, she specializes in composition, gallery wall theory, and the quiet architecture of domestic space. A former contributing editor at Architectural Digest and guest lecturer at Parsons School of Design, Anya personally reads and signs off on every piece before it is published.