You stare at that blank bedroom wall every morning. You crave texture and warmth for your space. You want that high-end Vida De Luxo aesthetic without paying premium contractor prices. You do not own a table saw. You are not alone in this exact situation. I spent months avoiding wall paneling projects. I assumed they required a garage full of loud machinery and a degree in carpentry. I was entirely wrong. You can create a stunning focal point using just a utility knife and the right lightweight materials. This guide shows you exactly how I did it in my own home. You will learn the exact steps to build a beautiful textured wall quietly, cleanly, and safely.
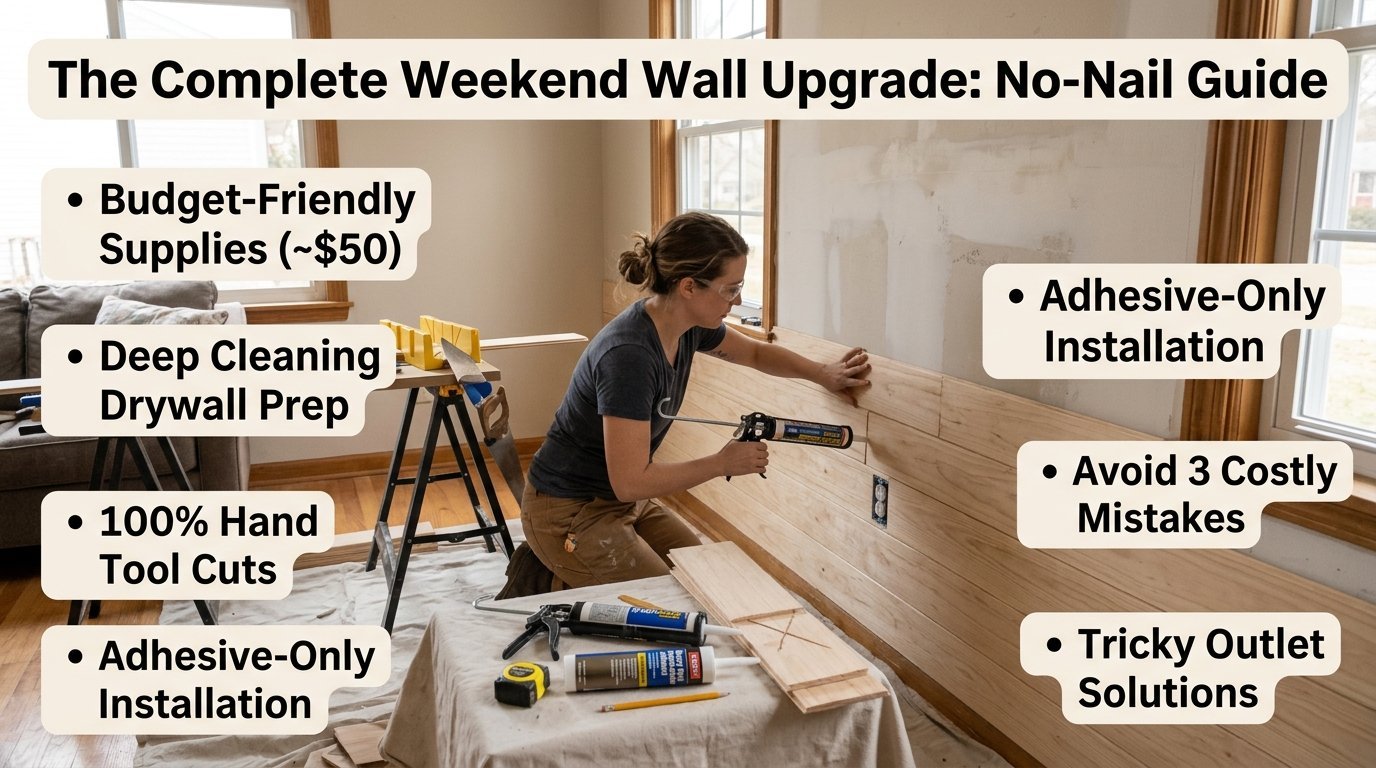
Expect to spend one full weekend on this project. You need about fifty dollars for basic supplies depending on your room size. We cover everything from deep cleaning the drywall to making precision material cuts completely by hand. You will read about the exact adhesives that keep boards permanently secure without a single nail. You get real solutions for navigating around tricky electrical outlets. I share three specific installation mistakes that cost me time and money. You walk away with a clear, tested blueprint for upgrading your own space immediately.
The Truth About A No-Saw Diy Shiplap Wall

Many online DIY tutorials lie about the actual difficulty level. They promise a quick afternoon job for beginners. Then they casually mention firing up an air compressor and a pneumatic nail gun. We skip the heavy machinery entirely here. We use the score-and-snap cutting method. We rely heavily on modern, industrial-strength construction adhesives.
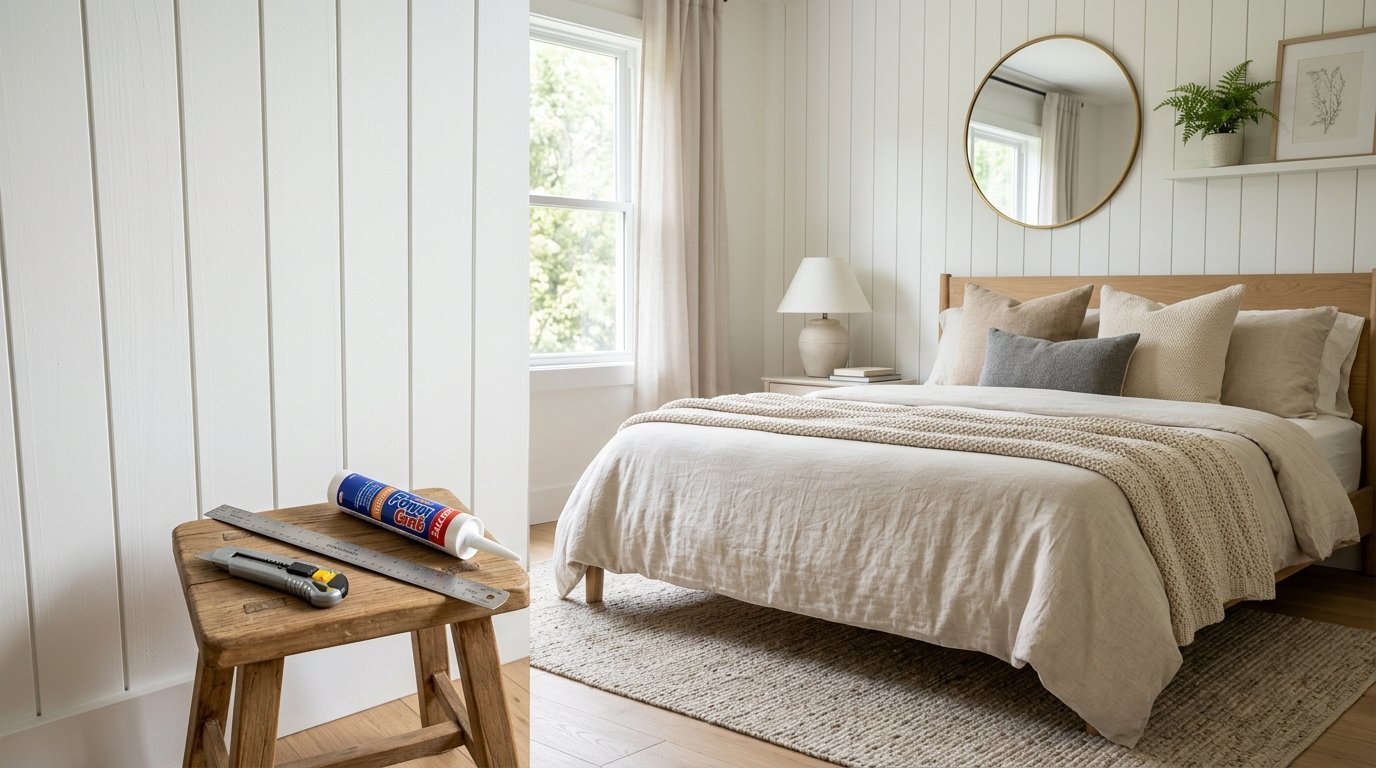
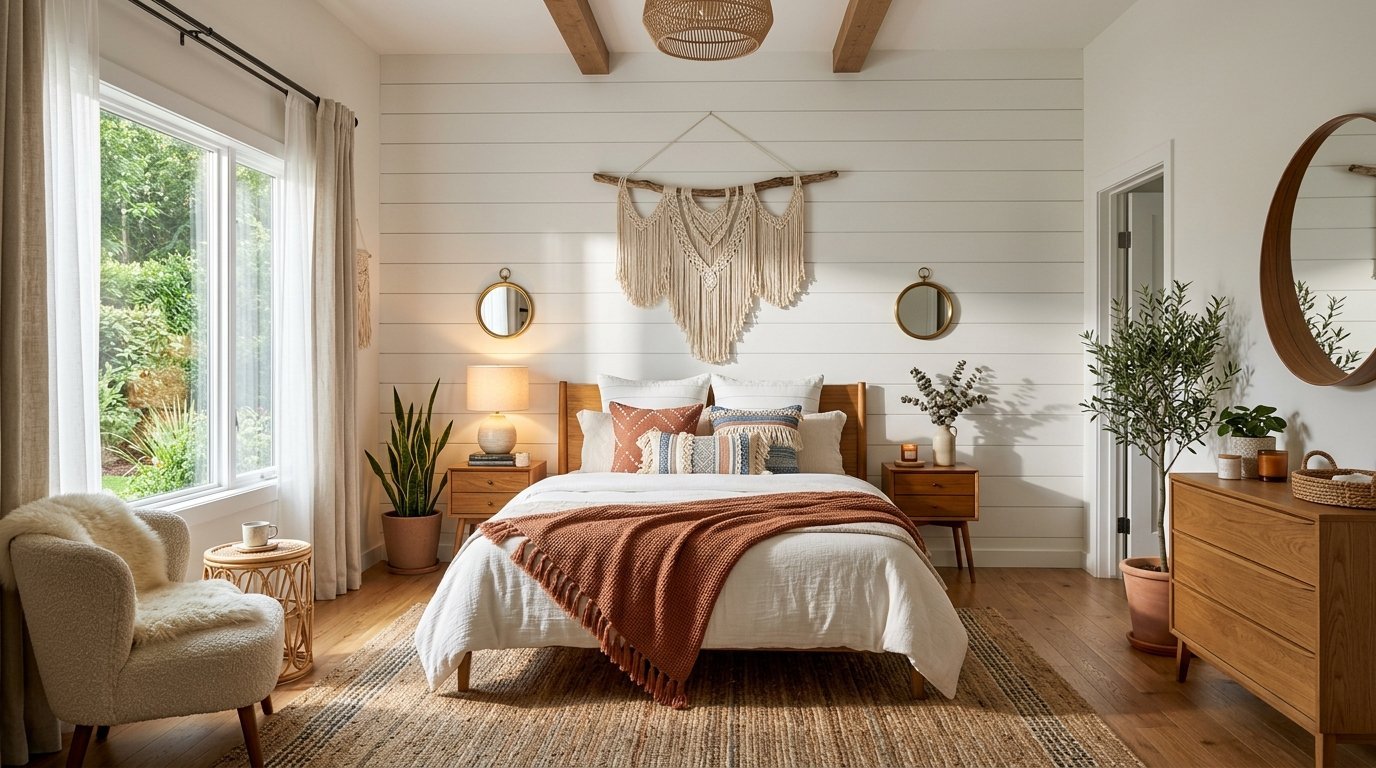
I tested this exact method in my own Classy Bedroom setup last year. The added texture elevated the entire room immediately. The space went from flat and boring to intentionally designed.
My first guest room needed a focal point badly. I bought thin MDF panels from the local hardware store. I used heavy-duty double-sided mounting tape. The panels stayed perfectly flat and secure for three full years. The entire room felt curated. We achieved this without creating massive clouds of sawdust in the house.
How To Plan Your Measurements Correctly

Guessing your material needs leads directly to wasted money. You need exact numbers before you buy anything. Grab a standard metal tape measure. Measure the total width of your target wall in inches. Write that number down. Measure the exact height from the top of the baseboard up to the ceiling. Write that number down.
Divide the total wall height by the width of your chosen planks. This math tells you exactly how many rows you need to reach the ceiling. Most standard pre-cut planks measure about five inches wide.
Buy ten percent more material than your math dictates. You will make cutting mistakes. We all make bad cuts occasionally. Having spare boards in the room prevents mid-project panic trips to the hardware store.
Selecting Your Faux Shiplap Wall Materials
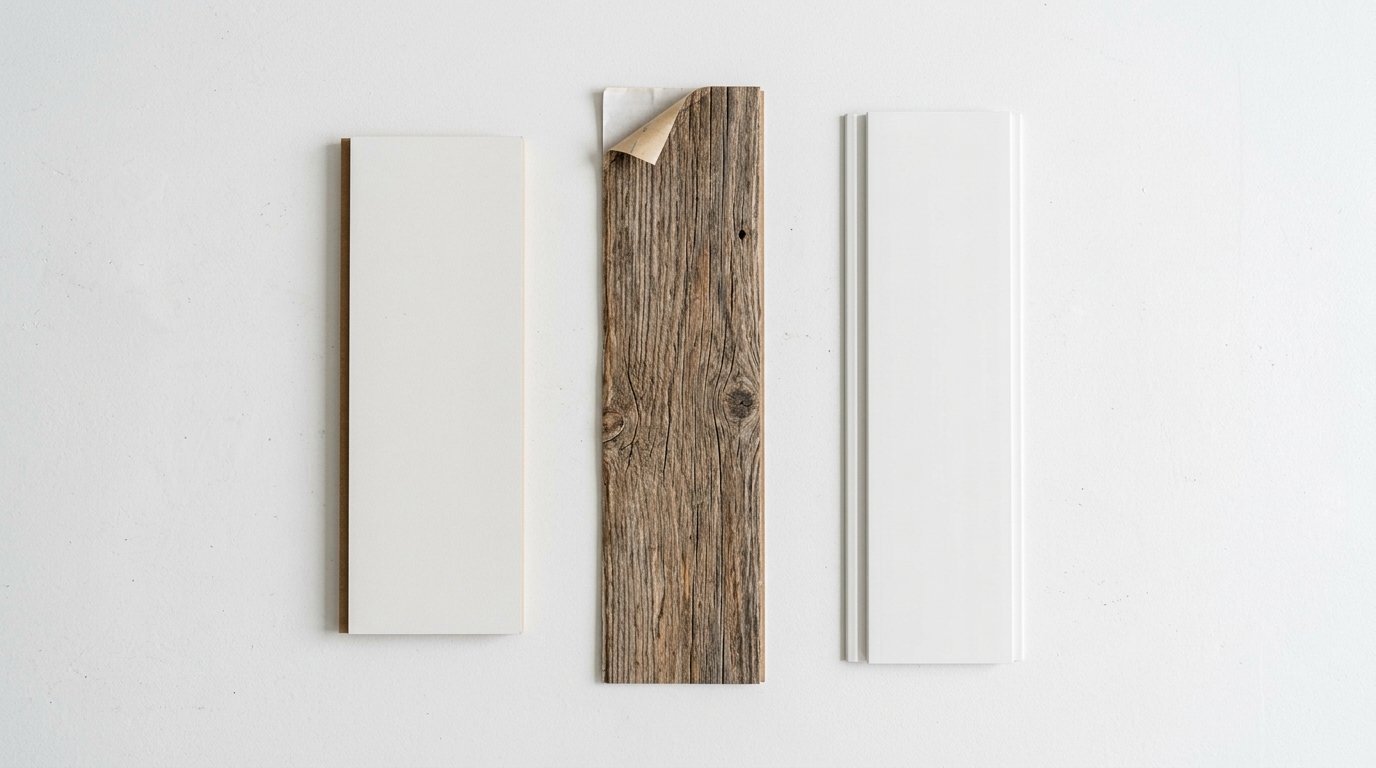
Thick solid wood requires power saws. We need lightweight alternatives for a tool-free project. You have several great options available.
- Peel-and-stick wood planks from brands like Stikwood offer real wood grain without the heavy bulk.
- Thin PVC paneling cuts easily with a sharp blade and resists moisture.
- Pre-primed MDF boards in one-eighth inch thickness provide the absolute smoothest paint surface.
- Vinyl flooring planks work surprisingly well on walls and score cleanly.
I prefer the thin MDF option for a clean, modern aesthetic. The peel-and-stick reclaimed wood works perfectly for a relaxed boho bedroom vibe. Thin materials ensure your utility knife can penetrate the surface easily.
Gathering Your Tool-Free Supplies
You need specific items for a flawless finish. The right brands make the hand-cutting process much easier.
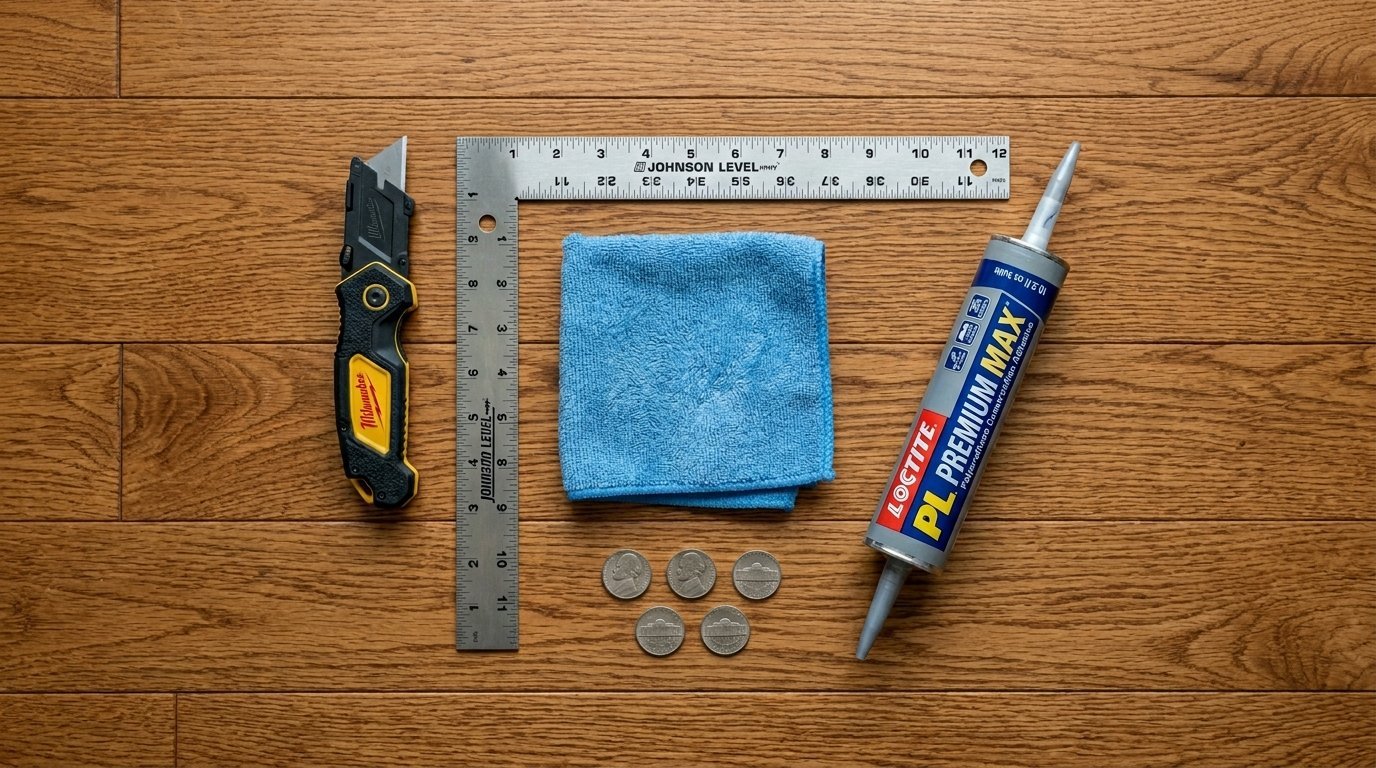
- Heavy-duty utility knife with ten fresh carbon steel blades.
- Liquid Nails panel adhesive in a standard squeeze tube format.
- Sprayway glass cleaner for prepping the dirty baseboard areas.
- Method All-Purpose cleaner for wiping down the dusty drywall.
- Norwex microfiber cloths for catching all the surface dust.
- A metal framing square or a heavy metal ruler for straight lines.
- Spacers for the gaps.
- 3M painter’s tape for holding tricky boards while the adhesive sets.
- Heavy-duty shears for trimming peel-and-stick materials.
- A standard level tool.
Wall Preparation Rules You Cannot Skip
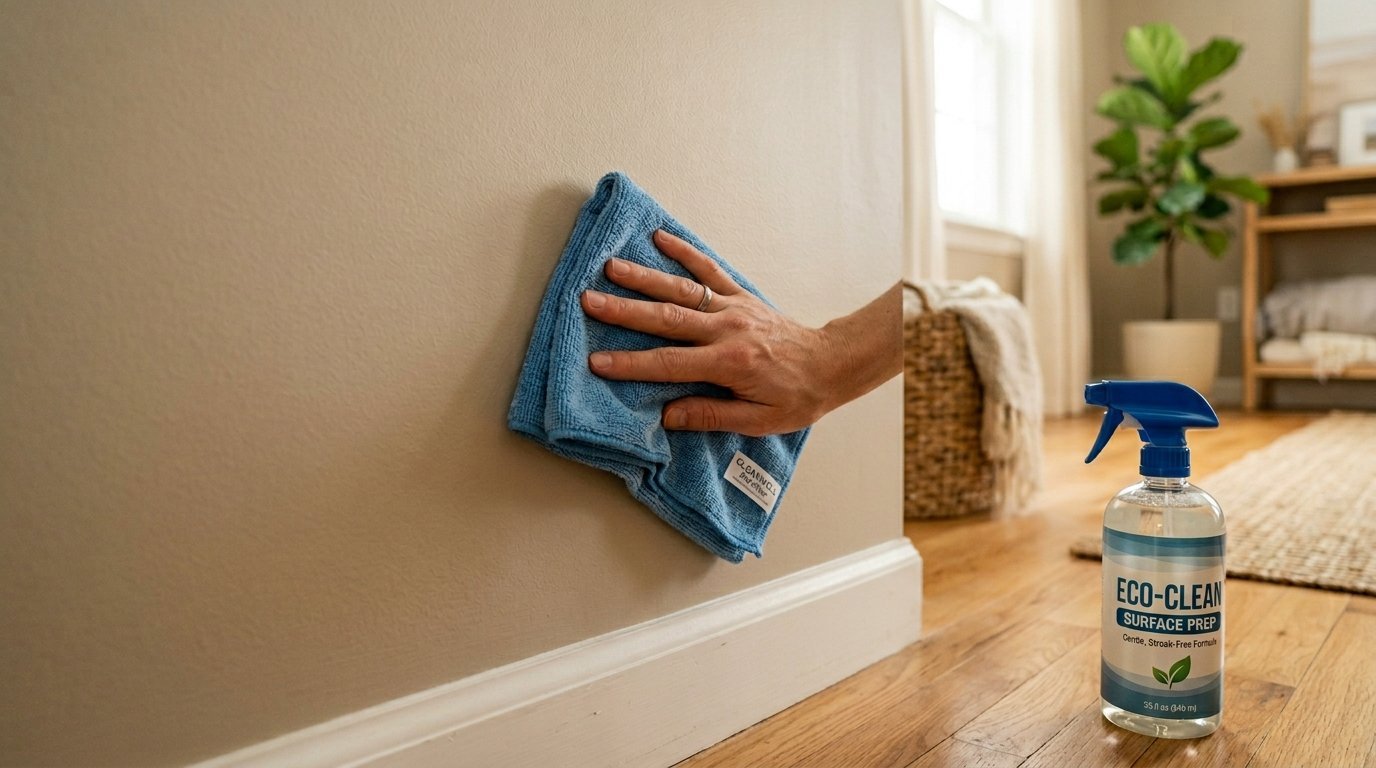
Construction adhesive fails completely on dirty drywall. You must clean the surface thoroughly before sticking anything to it. I treat the wall prep exactly like my weekly antique mirror frame maintenance routine. Moisture control matters deeply.
Spray your Method cleaner directly onto the Norwex cloth first. Do not spray liquids directly onto the porous drywall. Wipe the wall firmly from top to bottom. Let the drywall dry completely for two full hours.
Paint the blank wall the exact color you plan to paint the finished planks. The gaps between the boards will display the drywall behind them. A bright white wall peeking through dark green panels looks terrible. I learned this the hard way during my first installation attempt.
The Score And Snap Method Explained
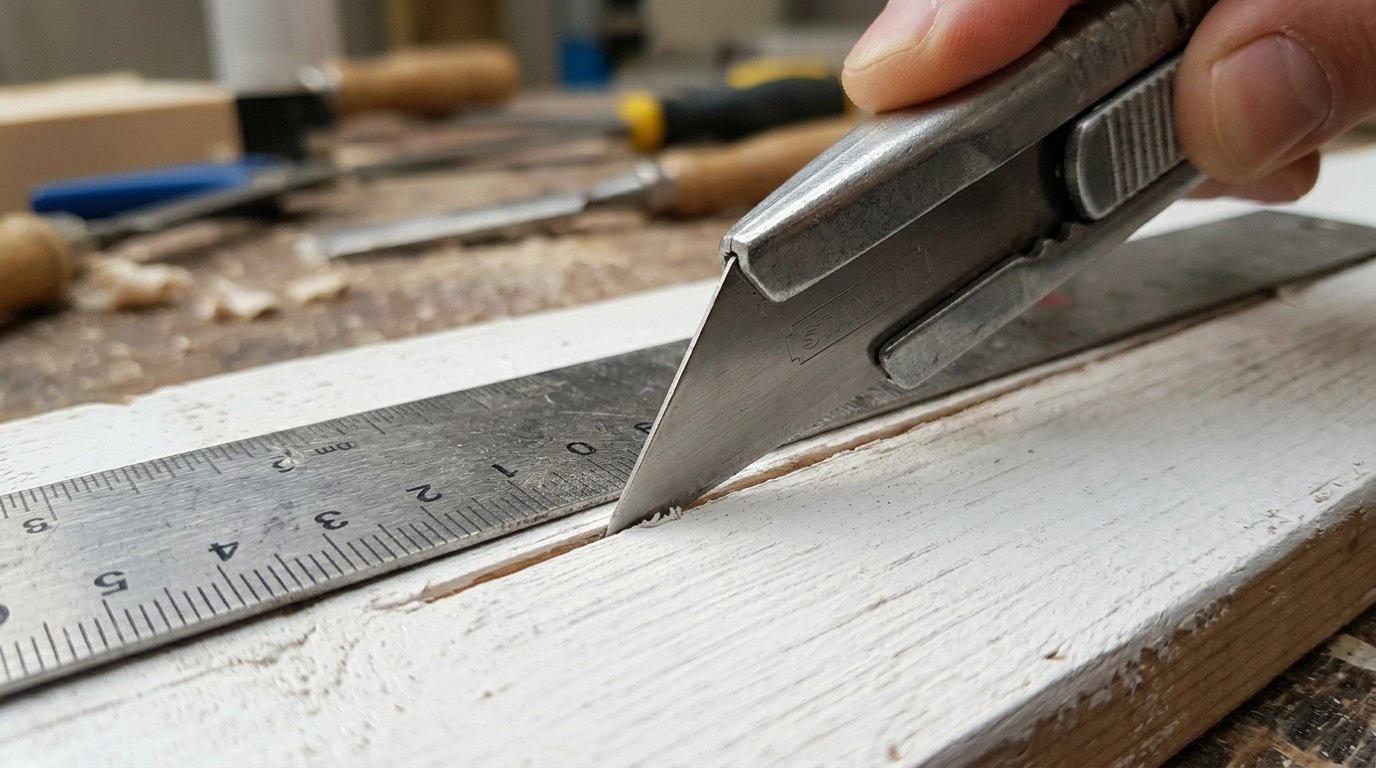
This precise technique replaces the power saw entirely. Place your plank flat on a sturdy table. Mark your specific cut line with a pencil.
Line up your metal square exactly on the pencil mark. Press down firmly on the metal to prevent slipping. Run your utility knife blade down the line. Apply moderate downward pressure. Do not try to cut all the way through the board on the first pass.
Score the exact same line four or five times. The knife groove gets deeper with each pass. Slide the board to the edge of your table. Align the scored line perfectly with the table edge. Push down quickly and firmly on the overhanging piece of the board. The board snaps perfectly clean along your deep scored line.
Starting Your First Row
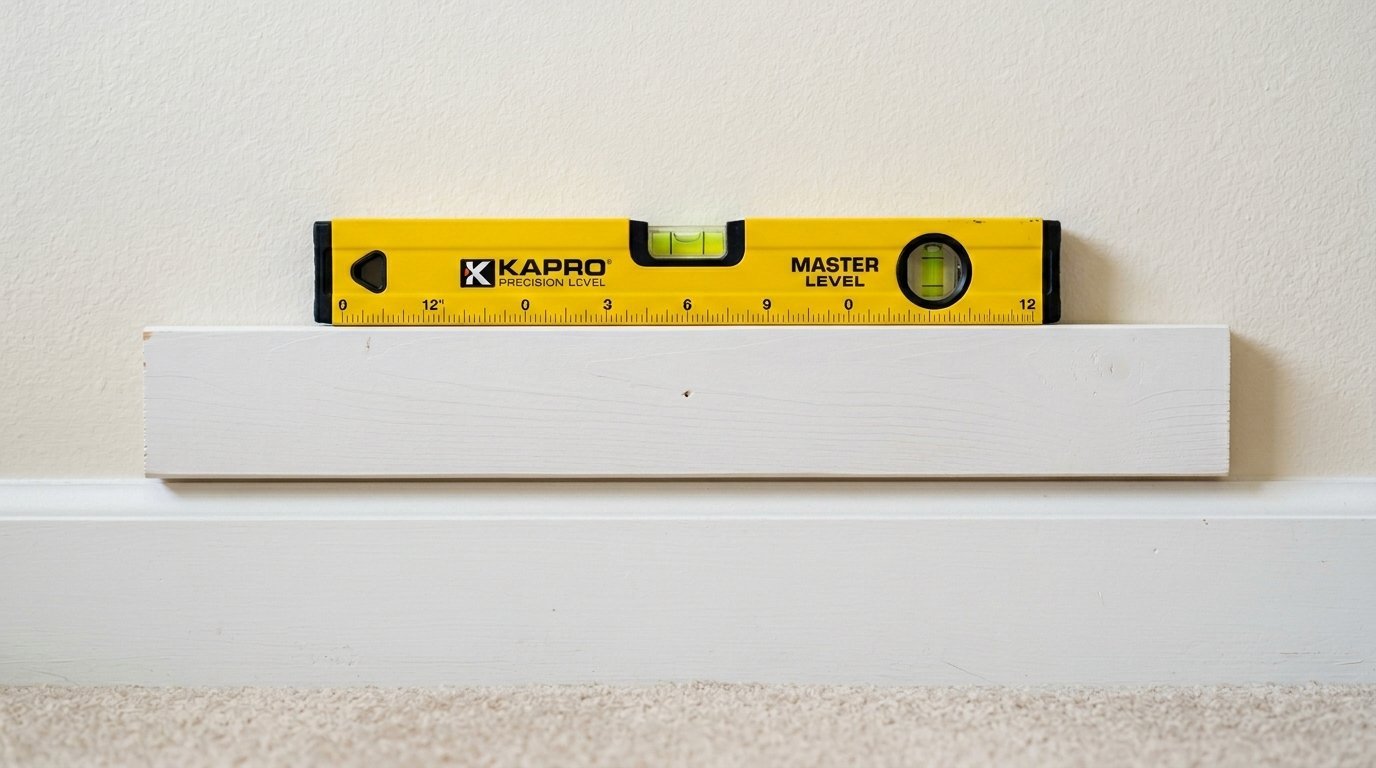
Your house baseboard is probably not level. Never trust a floor to be straight. Place your first board right above the baseboard. Put your level tool directly on top of the board.
Adjust the board up or down until the bubble sits perfectly in the middle lines. Apply your Liquid Nails to the back of the board in a tight zigzag pattern.
Press the board against the wall. Hold it firmly in place for sixty seconds. Use long strips of 3M painter’s tape to secure it tightly to the wall while the adhesive cures overnight.
Building The Diy Shiplap Rows
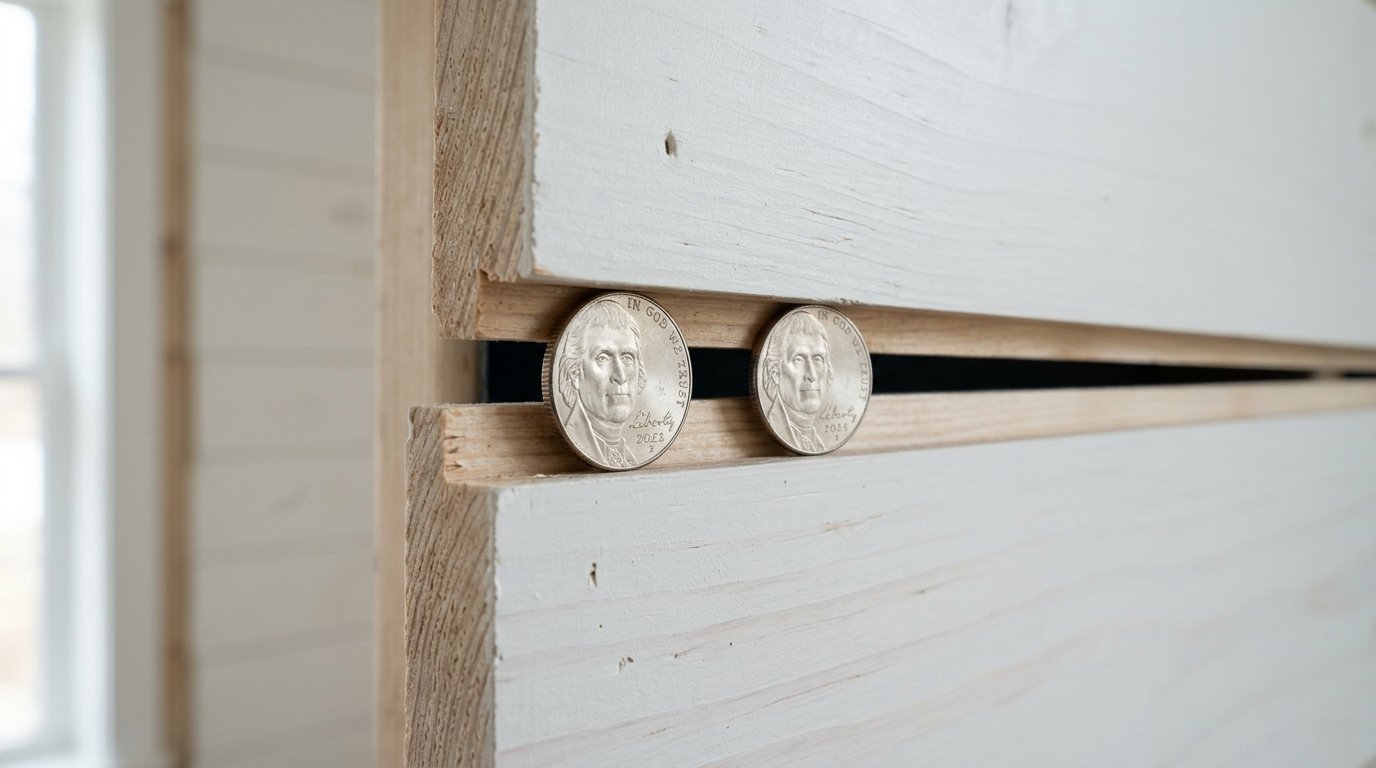
Place two standard nickels on top of your installed bottom board. Rest your next board directly on those nickels. This creates the classic panel gap effortlessly.
Check for level on every single row you install. Small measuring errors compound very quickly. A tiny slant on row two becomes a massive, ugly slope by row ten.
Stagger your vertical seams. Do not line up the vertical cuts perfectly on top of each other. Random staggered seams mimic traditional high-end construction. Cut your starting boards at different lengths to force this staggered pattern.
Horizontal Versus Vertical Shiplap Choices
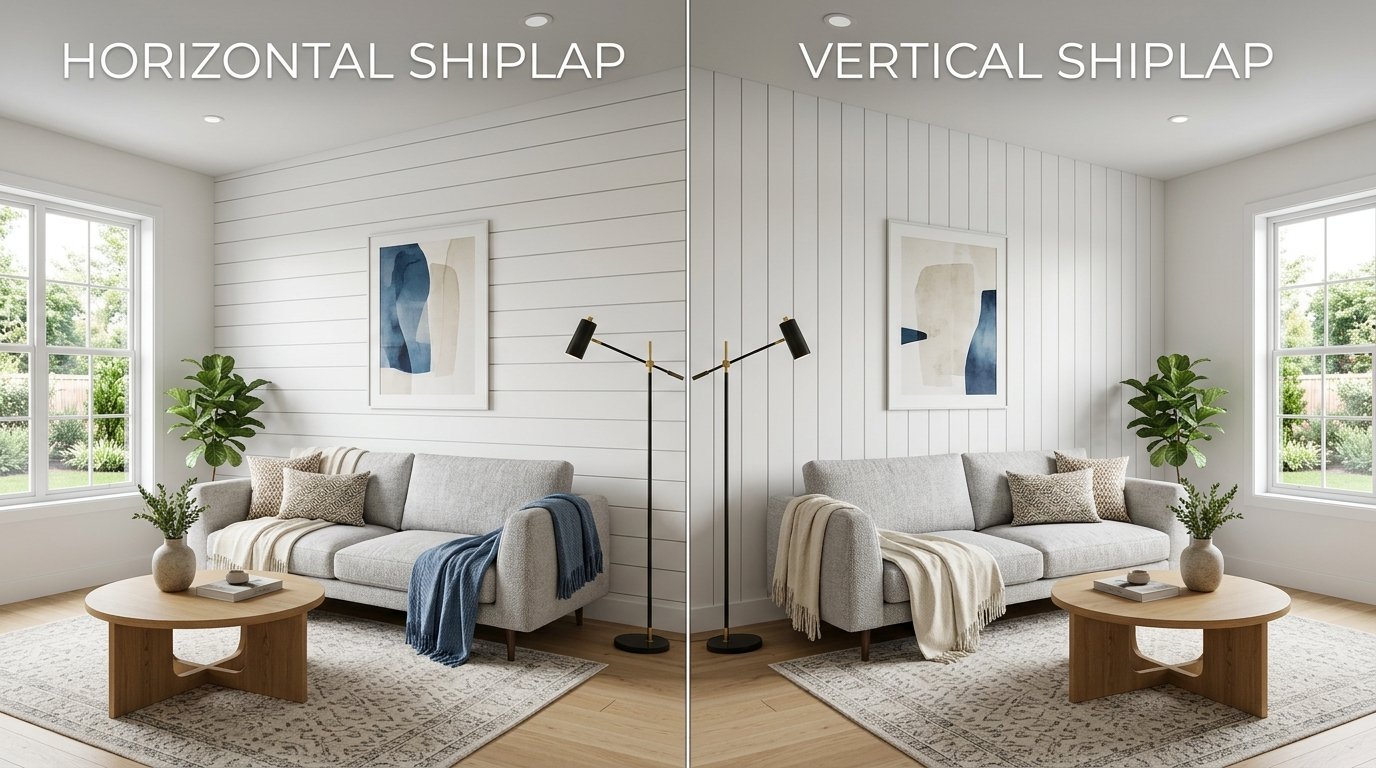
Horizontal panels widen a narrow, cramped room visually. They draw the human eye from side to side.
Vertical Shiplap makes low ceilings feel much taller. It pulls the eye straight up toward the ceiling.
A close friend struggled with a cramped, dark basement office space. We installed vertical panels painted crisp white. The ceiling felt a full foot higher instantly. The tool-free installation process remains exactly the same. You just start in one corner of the room and work your way across the wall side to side.
Handling Outlets And Tricky Corners
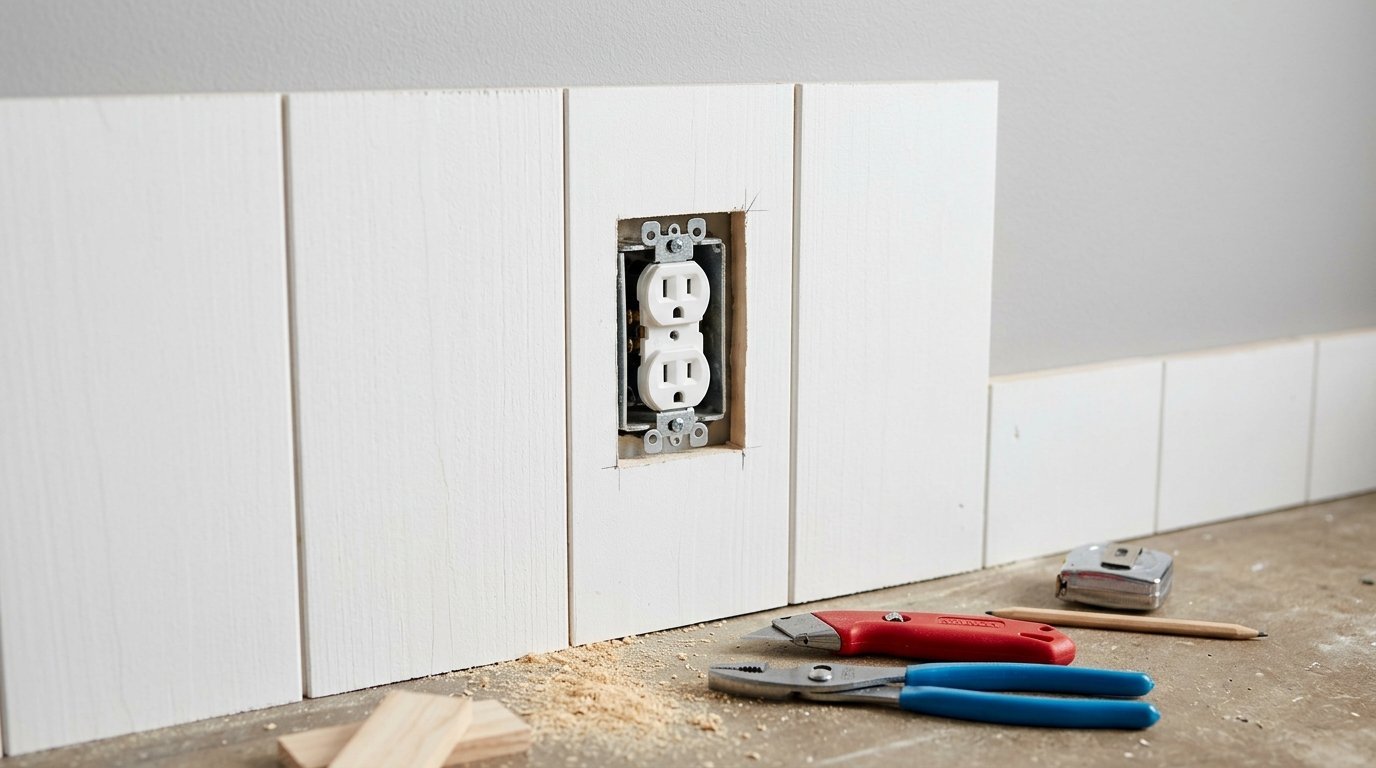
This part scares many beginners. It just requires deep patience and extra blades. Turn off the electrical power to the room first. Remove the plastic faceplates from the wall.
Measure the exact location of the outlet box onto your board. Draw the rectangle lightly on the back of the panel.
Score the outline repeatedly with your utility knife. Make a deep X right through the middle of the drawn rectangle. Snap the small pieces out gently using household pliers.
Install outlet box extenders after the wall goes up. These cheap plastic rings bring the electrical outlet flush with your new, deeper wall surface.
Painting And Finishing Touches
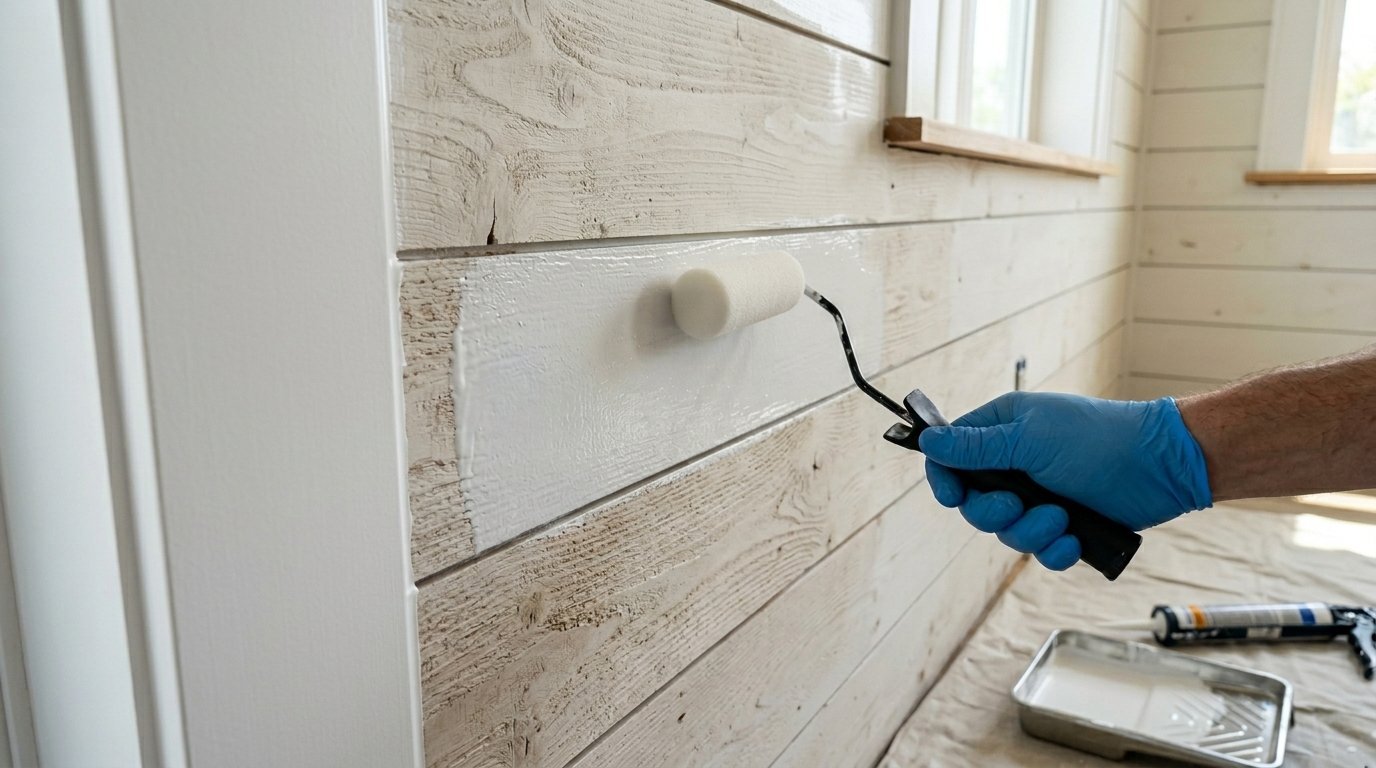
Remove all your nickel spacers from the gaps. Fill any ugly, uneven vertical seams with lightweight spackle. Sand the dried spackle completely smooth.
Run a thin line of paintable white caulk along the edges where the panels meet the adjacent walls. This hides uneven cuts perfectly and creates a seamless look.
Use a high-quality foam paint roller. A thick nap roller pushes way too much paint into your carefully crafted gaps. Keep a damp Norwex cloth nearby at all times to wipe excess wet paint out of the grooves immediately.
My Biggest Diy Shiplap Mistakes
I trusted regular double-sided tape for a humid bathroom installation once. The bathroom humidity destroyed the adhesive bond completely. Three large boards fell off within a single month. Always use heavy-duty construction adhesive in damp spaces.
I rushed the measuring phase around a large bedroom window. I ended up with a half-inch gap I could not hide with caulk. Always measure the space twice before scoring your boards.
I skipped using the level on the third row because I felt confident. By the time I reached the ceiling, my boards sat at a visible diagonal slant. I had to rip down five rows, ruin the drywall, and buy all new material.
Frequently Asked Questions
Can I install this over heavily textured walls?
Yes. Liquid construction adhesive bridges the small gaps created by heavy wall texture. Press the boards very firmly against the wall to ensure solid contact.
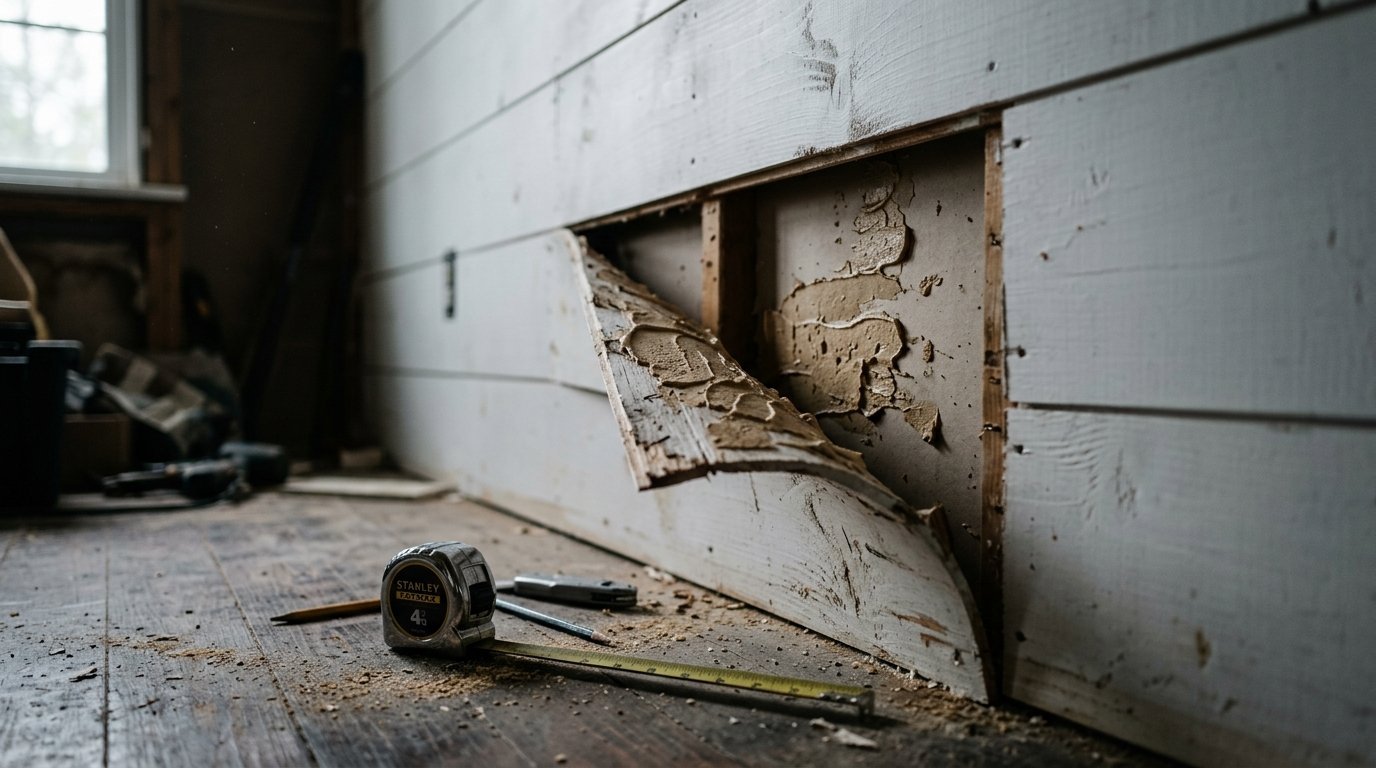
How do I remove the glued panels later?
Removing glued panels damages the paper face of the drywall behind them. Expect to do some heavy mudding, sanding, and repairing if you ever take the wall down.
Do I need to remove my existing baseboards?
No. You can start the bottom panels directly above your existing baseboard. The top edge simply stops at the ceiling line.
What is the absolute best gap size between planks?
A standard nickel provides the perfect traditional thickness. You can use plastic tile spacers if you want a specifically wider gap for a modern look.
Will the utility knife method work on thick pine boards?
No. The score and snap method only works reliably on thin MDF, PVC panels, or vinyl materials. Thick pine requires an actual hand saw at minimum.
Wrapping Up Your Room Refresh
Stand back and look at your new textured wall. You bypassed the loud power tools entirely. You saved hundreds of dollars on professional contractor fees. You kept your bedroom mirrors and furniture completely safe from heavy saw dust. You created a customized, high-end space with your own two hands. The deep texture gives the room a finished, intentional, and grounded feel. Your blank wall problem is officially solved.

Anya Castellan is the Founder and Editor-in-Chief of Home Wall Trends. An art history graduate of the Rhode Island School of Design with twelve years of experience writing for leading American design publications, she specializes in composition, gallery wall theory, and the quiet architecture of domestic space. A former contributing editor at Architectural Digest and guest lecturer at Parsons School of Design, Anya personally reads and signs off on every piece before it is published.