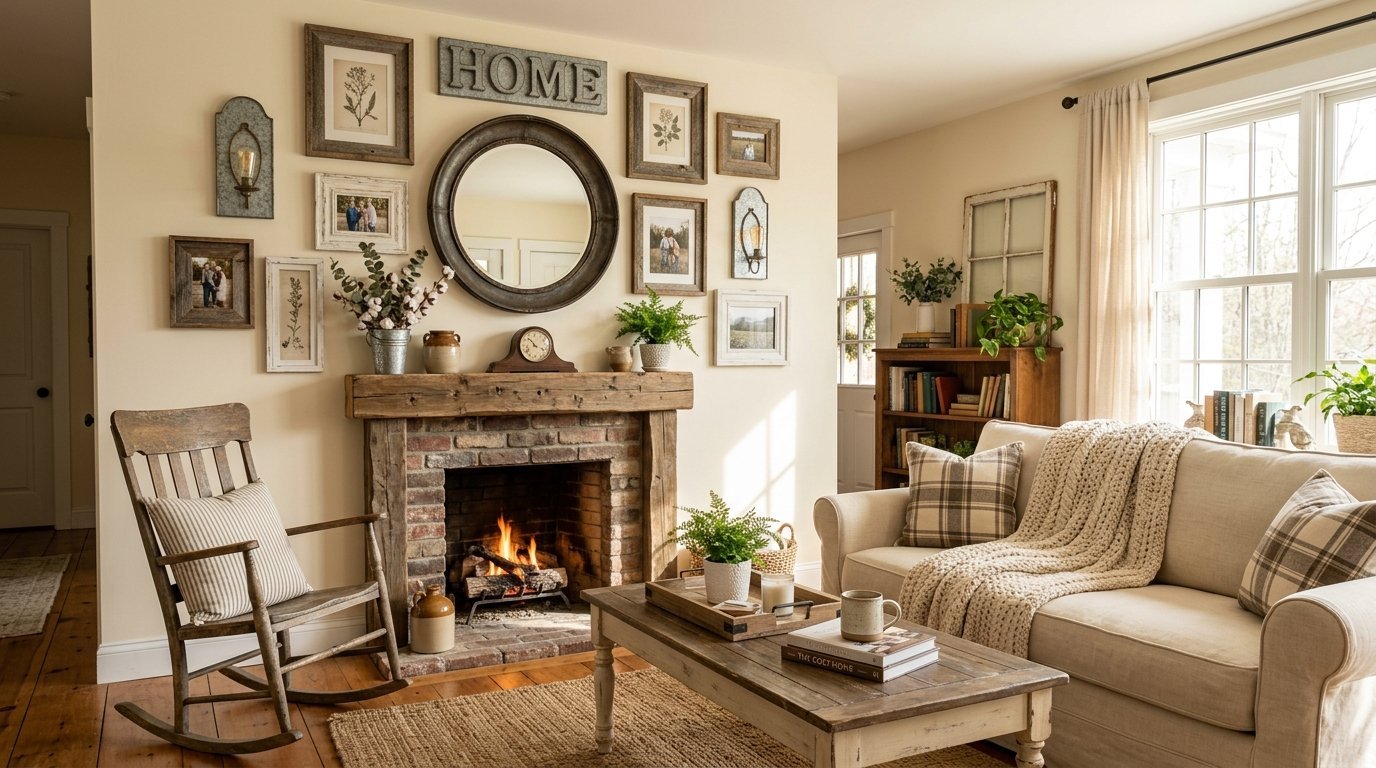
Imagine staring at a massive blank space in your living room. Blank walls feel incredibly cold and unwelcoming. You want warmth and character in your home. I have stood holding a stack of frames feeling completely overwhelmed. Placing pieces randomly never looks right and leaves you with a cluttered mess. Creating a cohesive layout takes a specific plan and precise execution. A beautifully layered arrangement changes the entire feeling of a room instantly. Your space goes from empty to incredibly welcoming. I will walk you through the exact steps to get this project right the first time.
You will get a complete blueprint for arranging your decor pieces perfectly. I will share exactly how to space your items for maximum visual appeal. You will find out which materials work best together for a rustic feel. We will cover exact hanging mechanics using reliable 3M products. You will see how to blend rustic pieces with a classy bedroom vibe effortlessly. I will share my exact glass cleaning routine to prevent long-term damage. We will look at specific layouts for cooking areas and sleeping spaces. By following these exact steps you will save time and money. You will stop buying the wrong items at the store. You will build a space you love looking at every single day.
1. Curating Your Base Materials
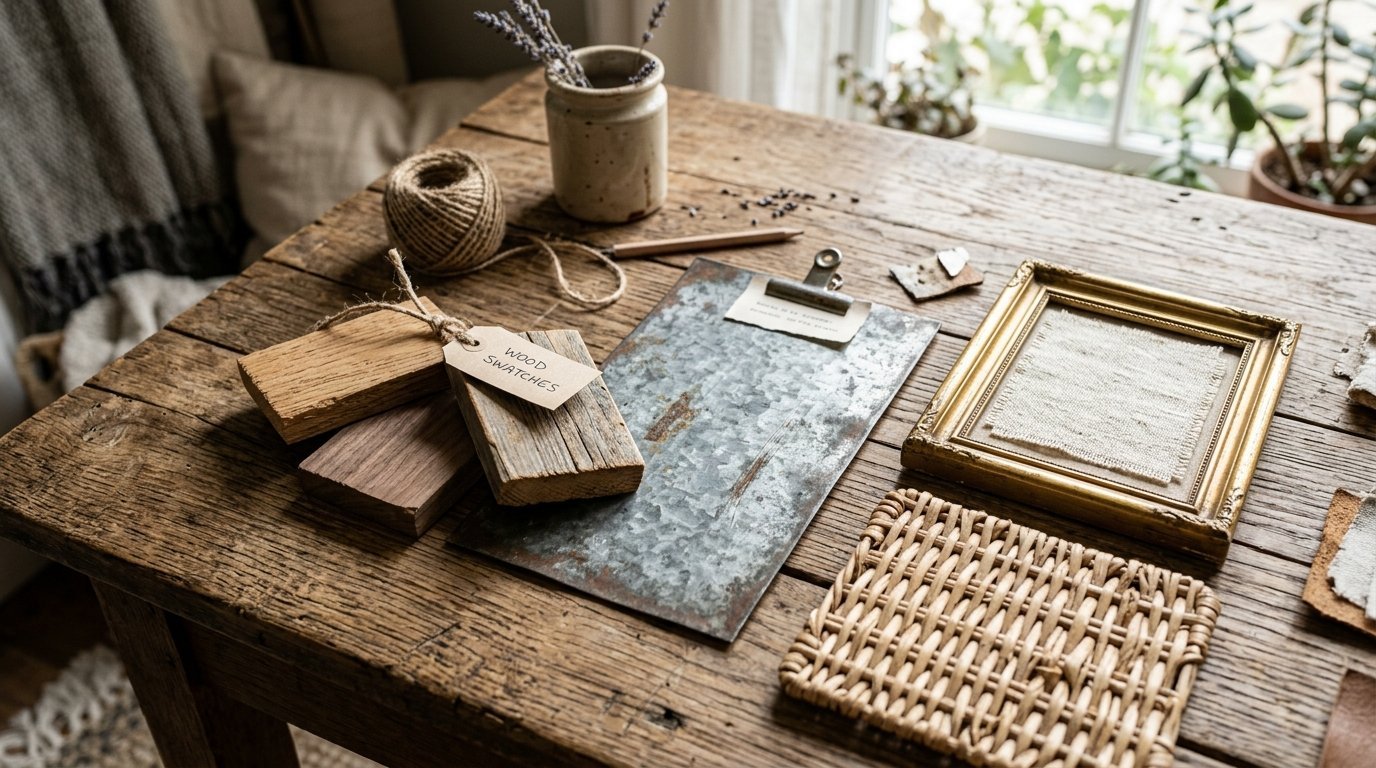
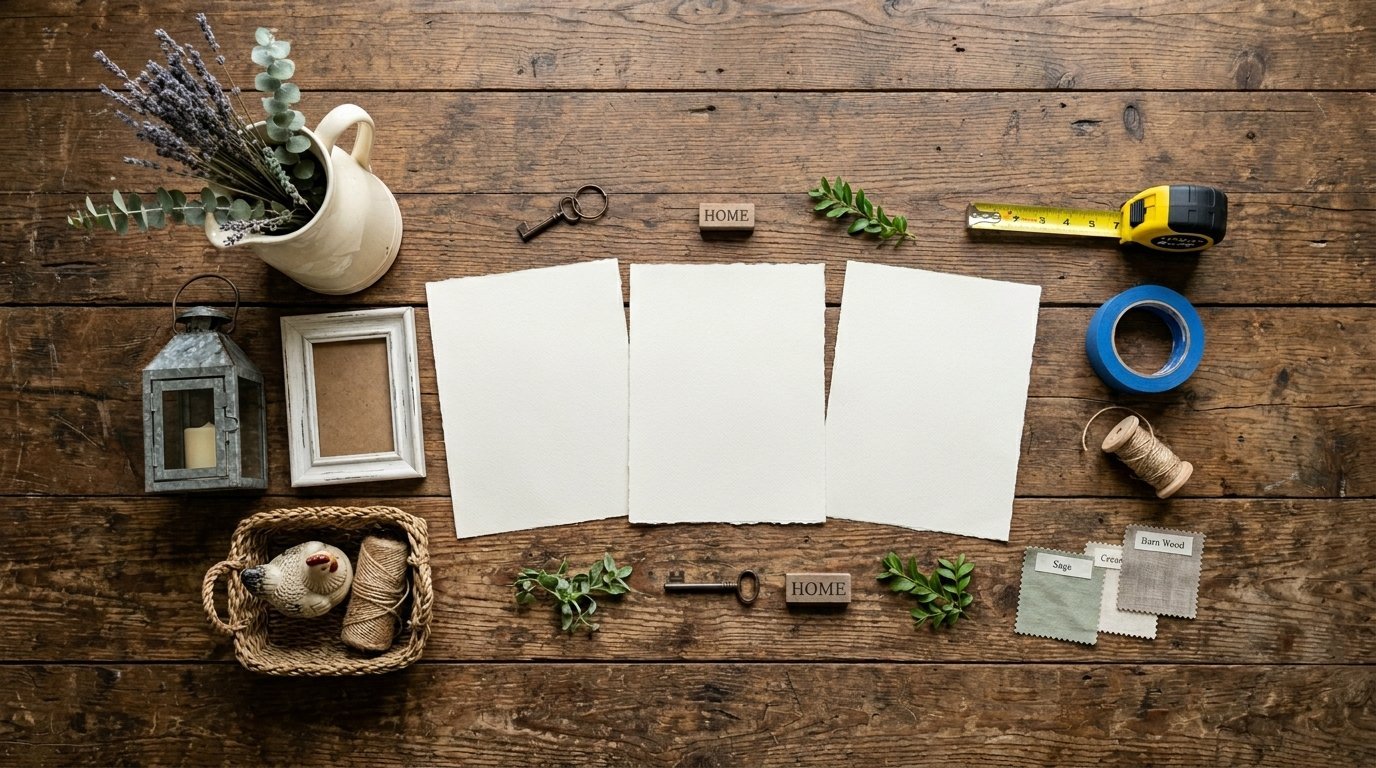
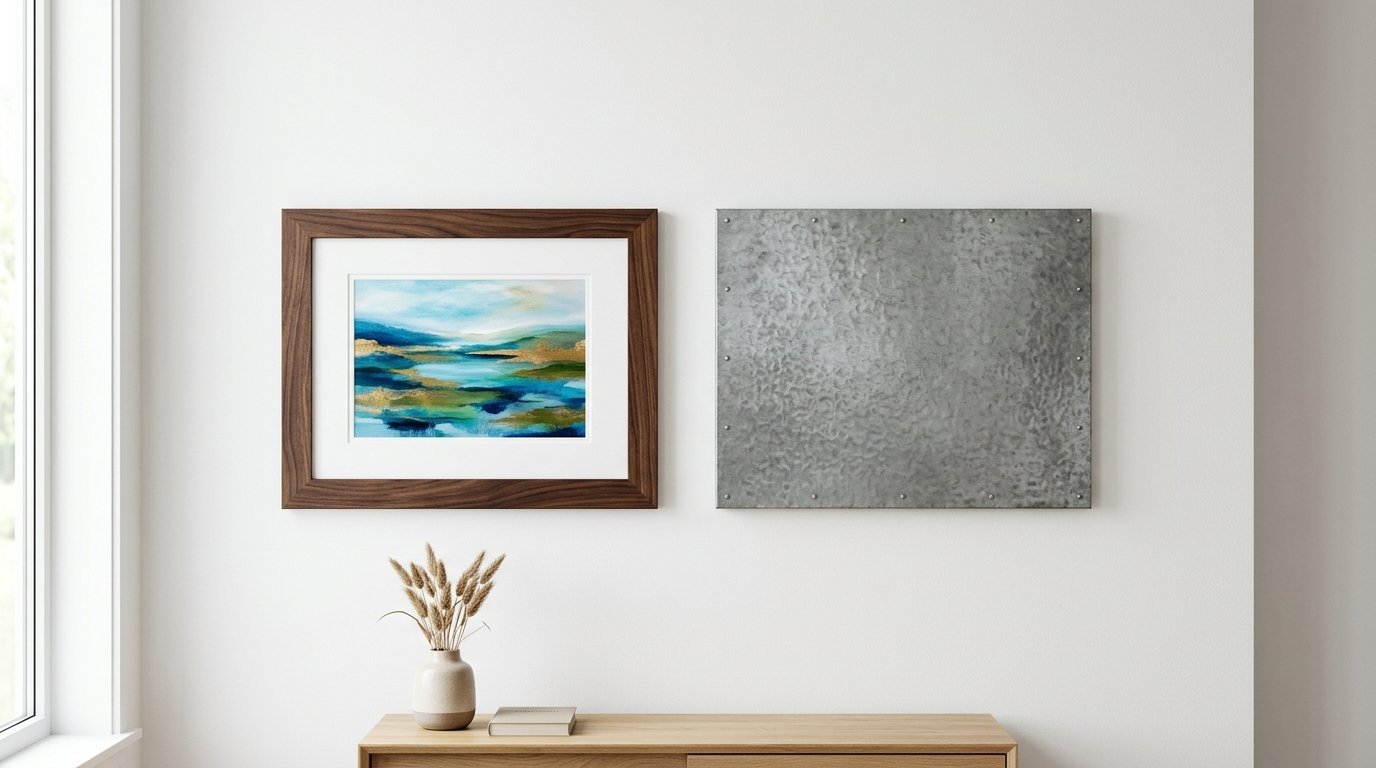
Starting right requires gathering the right materials first. Creating a Farmhouse Moodboard helps you visualize the end result clearly. You want a tight mix of textures and shapes. Think about weathered wood and galvanized metal working together. You need glass elements to reflect light around the room. In my experience gathering pieces slowly works best for this style. Rushing leads to buyer’s remorse and mismatched items.
Selecting Your Anchor Pieces
An anchor piece grounds your entire arrangement securely. This is usually the largest and heaviest item in your collection. A large rustic window pane works perfectly for this job. An oversized clock is another great choice for the center. I love using a large mirror with a slightly sophisticated edge. A gold frame inside a classy bedroom setting looks stunning against rustic wood. Mixing high-end luxury with farmhouse charm creates massive visual interest. It elevates the space into a true Vida De Luxo home aesthetic.
Gathering Secondary Items
Wall Frame Decor Ideas usually involve mixing different sizes. Pick three medium frames and two small ones. Woven baskets create beautiful texture against flat drywall. Metal letters spelling out family names fit this style perfectly. Galvanized metal planters hold faux greenery securely. Keep your color palette incredibly tight and restricted. Stick to warm whites and natural woods and subtle greens. Too many colors ruin the rustic aesthetic quickly.
Getting the Right Hanging Hardware
You need reliable hardware for a secure display.
Here is what you need to gather before starting:
- 3M Command strips for lighter pieces
- Heavy duty drywall anchors
- Painter tape for marking borders
- Large roll of brown craft paper
- Pencil and sharp scissors
- Level and measuring tape
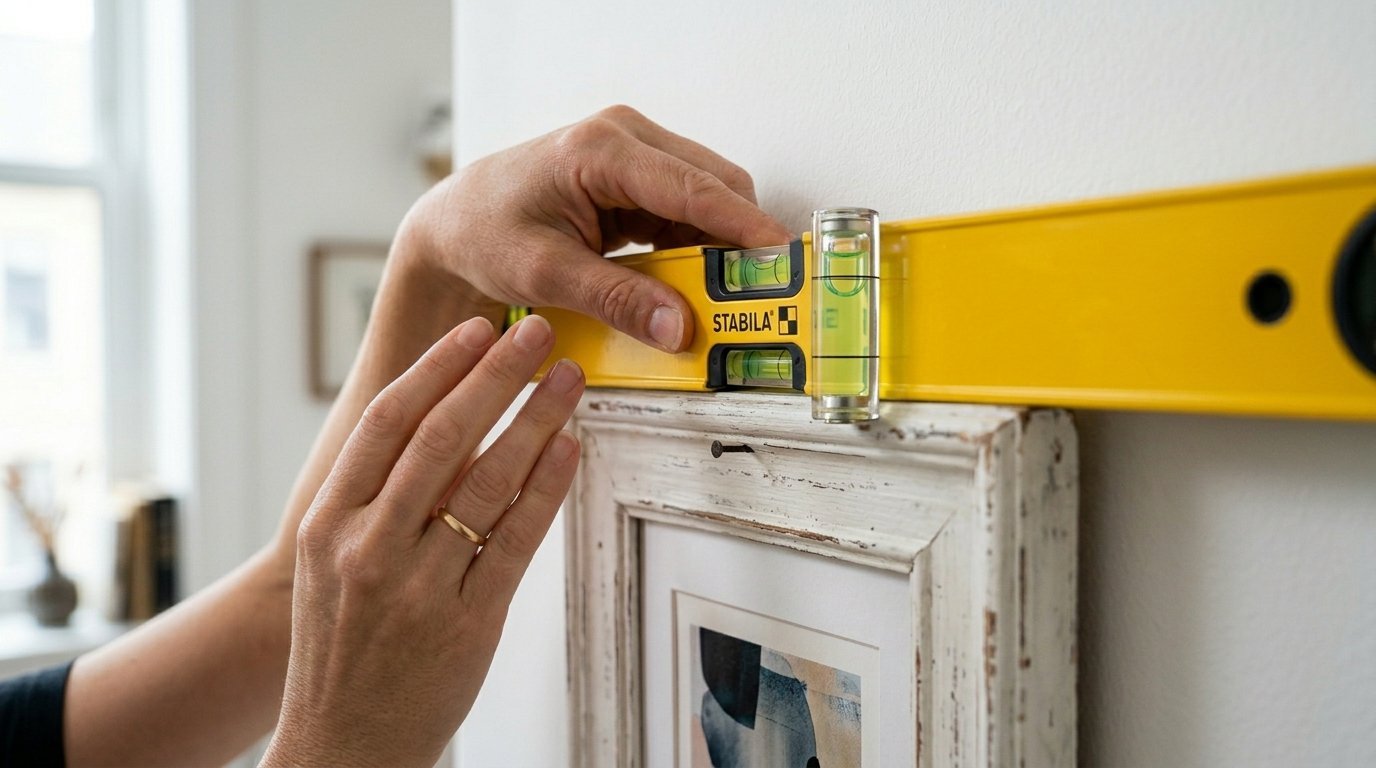
I rely heavily on 3M products for lighter frames. They leave no damage behind when you rearrange. You must use heavy duty anchors for large mirrors. Always locate your studs before hanging heavy glass. Having a level on hand is mandatory for straight lines. A tape measure prevents crooked layouts entirely.
2. Drafting the Perfect Layout on the Floor
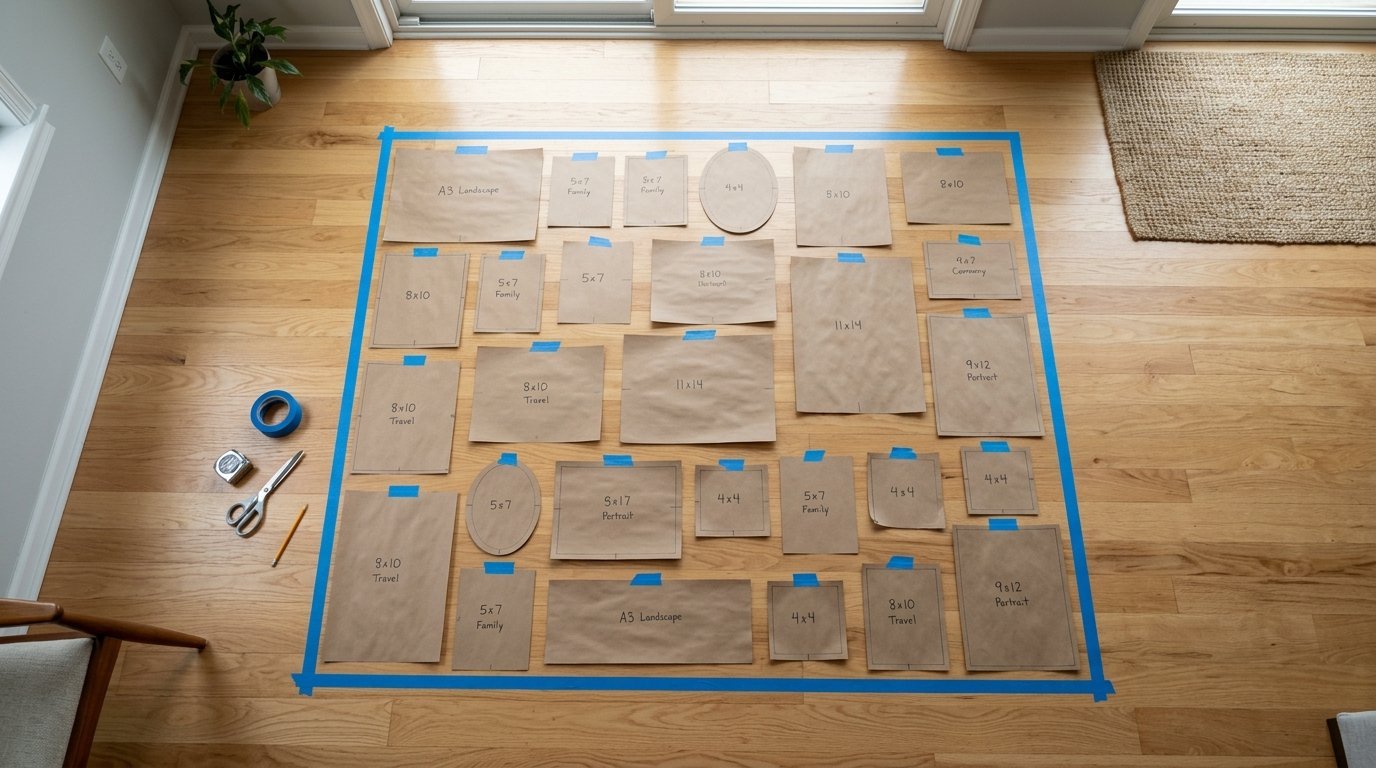
Never put a nail in the wall first. That is a guaranteed recipe for extra patching work later. You must plan the entire layout on the ground. Clear a large space on your floor right now. Mark out the exact dimensions of your empty wall space using painter tape. This gives you a safe testing zone to make mistakes.
Creating the Initial Shape
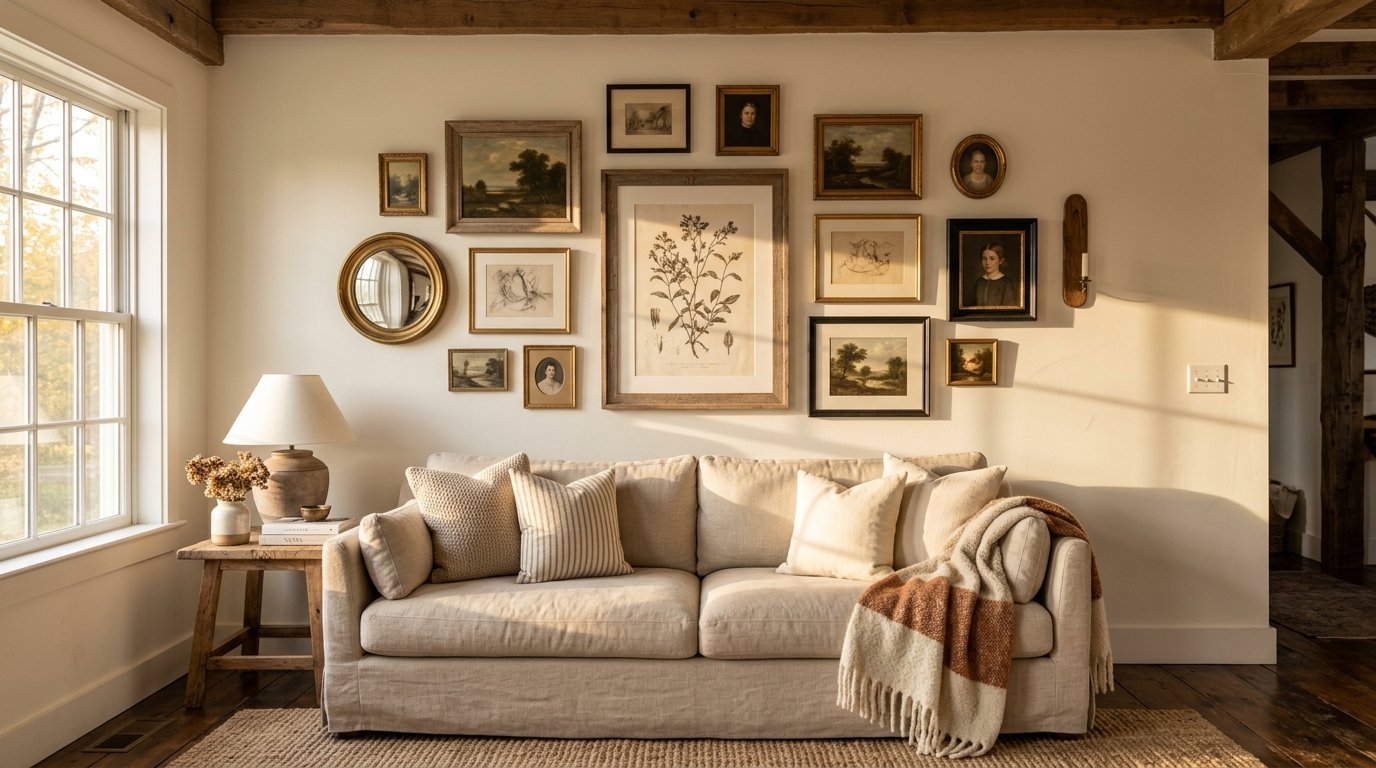
Start by placing your anchor piece right in the center. Build outward from that central point slowly. A Farmhouse Wall Collage looks best with an organic outer shape. Do not try to make a perfect square or rectangle. Let the outer edges stagger naturally. I once tried forcing a perfect grid with mismatched wooden frames. It looked incredibly awkward and forced. Organic shapes feel much more relaxed and authentic.
Spacing Rules for Visual Balance
Spacing dictates how professional your setup looks. Keep two to three inches between every single item. Consistent spacing tricks the eye brilliantly. It makes mismatched items look like a cohesive curated set. Stand on a chair to look down at your floor layout. Take a picture of the layout with your phone. A photo reveals spacing errors your naked eye easily misses.
Tracing and Templating
Once you love the floor layout you must make paper templates. Roll out your cheap craft paper on the floor. Trace every single item with a dark pencil. Cut out each paper shape carefully. Label the front of each paper template with a marker. Mark exactly where the nail needs to go on the paper. This single trick saves countless hours of frustration.
3. Executing the Wall Installation
Moving from floor to wall requires deep patience. Take your paper templates and tape them to the wall. Step back and look at the whole arrangement from afar. Leave the templates up for a full day. The natural lighting changes throughout the afternoon. You might notice a harsh glare exactly where a mirror will hang.
Placing the Center Anchor
Nail right through the paper template for your anchor piece. Tear the paper away gently from the wall. Hang the anchor piece securely on the hook. Check it with your level immediately. If your center piece is crooked everything else will follow that slant. Take your time getting this step perfectly right.
Working Outward in Rings
Move to the pieces immediately touching your anchor. Hang the closest items first to maintain tight spacing. Continue working outward in a circular motion. This keeps the gaps incredibly consistent. Check your level on every single piece you hang. Wall Of Pictures Ideas only work when lines stay crisp and clean. Crooked frames ruin the entire visual aesthetic instantly.
Securing Bottom Edges
Frames tilt when doors close in the house. Use a tiny piece of rolled tape behind the bottom corners. 3M makes small stabilizing strips perfectly suited for this job. Your frames will never shift or rattle again. This tiny detail makes a massive difference in daily life. You will never have to straighten frames again.
4. Maintaining Glass and Wood Pieces
A beautiful display requires proper weekly upkeep. Dust and grime ruin the fresh look quickly. I follow a very specific weekly cleaning routine. You must treat different natural materials with specific care. Using the wrong cleaner destroys vintage pieces permanently.
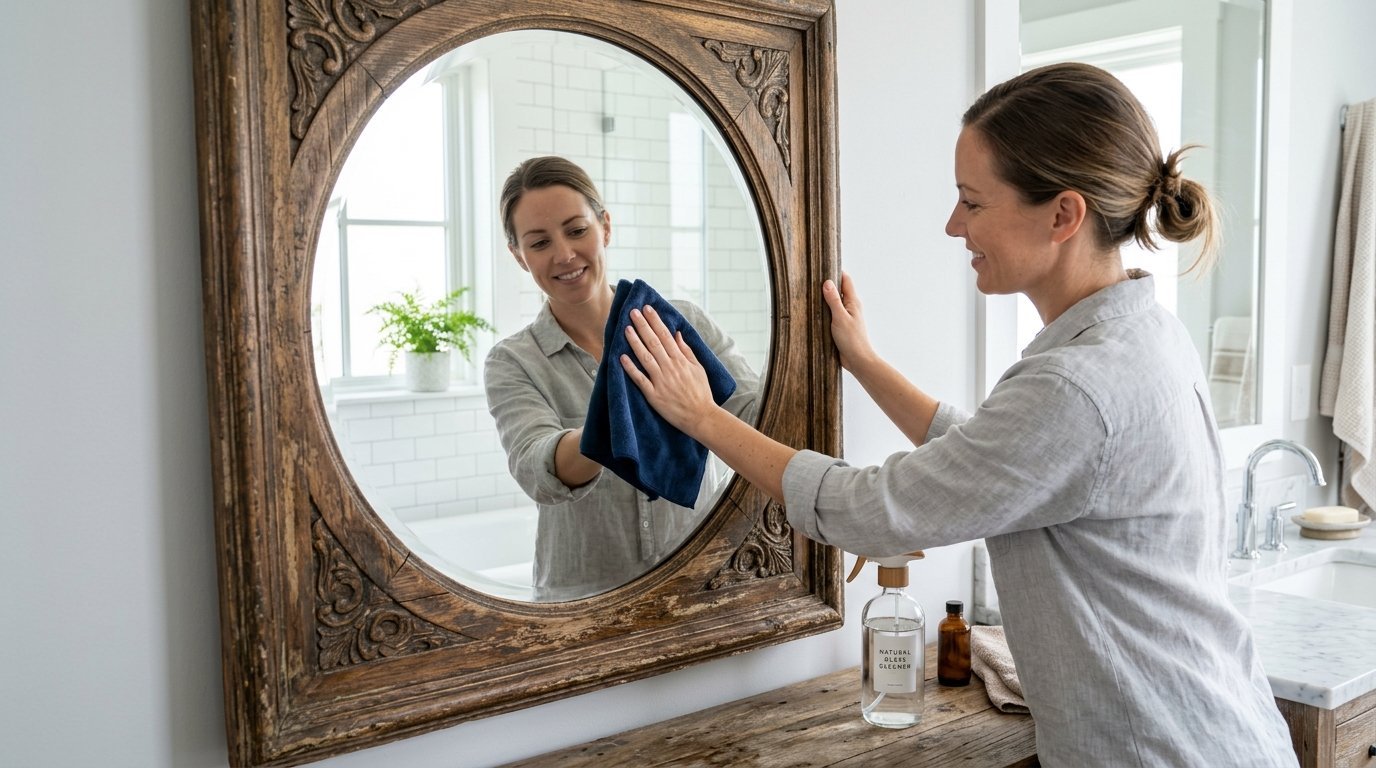
Protecting Antique Mirrors
Mirrors require extreme care to prevent silver rot. Moisture damage ruins the fragile backing of glass pieces. Never spray cleaner directly onto the glass surface. The liquid drips down and destroys the bottom edges.
Here is my exact cleaning supply list:
- Spray bottle with half distilled water and half isopropyl alcohol
- One damp Norwex cloth
- One dry microfiber cloth
- Sprayway glass foaming cleaner
- Method wood cleaner
I mix distilled water with isopropyl alcohol in my spray bottle. I spray this mixture directly onto my Norwex cloth. This prevents any liquid from pooling at the frame edge.
The Right Wiping Technique
Take your damp Norwex cloth and wipe in tight circles. Move slowly from top to bottom across the glass. Finish with a dry microfiber cloth using straight horizontal strokes. This completely eliminates nasty streaks. If you buy store cleaners I highly rate Sprayway glass cleaner. It foams up and stays put perfectly instead of dripping.
Caring for Wooden Frames
Natural wood dries out over time in air conditioned homes. It needs gentle cleaning to stay beautiful. Method wood cleaner works beautifully on rustic pieces. Spray it onto a soft cloth first. Gently wipe away dust from the deep crevices. Do not let liquid sit in the deep grooves of weathered wood. This causes the wood to warp and crack over time.
5. Adapting Layouts for Specific Rooms
Every room has entirely different spatial constraints. You cannot use the exact same layout everywhere. You must adjust your scale and piece selection based on the environment. A massive clock looks great in a living room but terrible in a hallway.
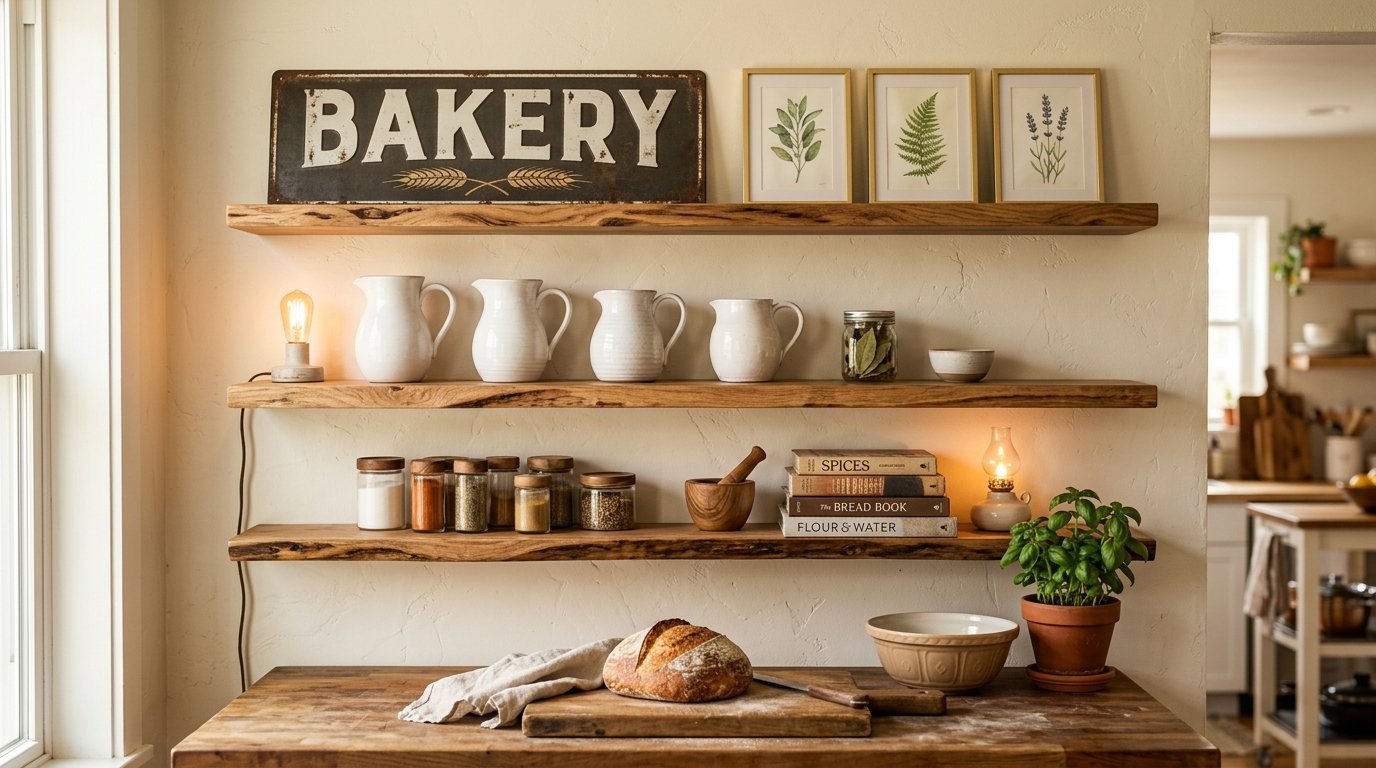
Styling Cooking Spaces
Finding the right Wall Decor In Kitchen settings takes thought. Avoid putting fabric or unprotected art near the stove. Grease and steam will ruin them instantly. Stick to washable items like metal signs and ceramic plates. Floating wooden shelves layered with small framed recipes look amazing. Keep everything high enough to avoid messy food splashes.
Styling Sleeping Areas
Bedrooms need a much softer touch. You want a deeply relaxing atmosphere. Above the bed is a prime location for art. Make sure items are securely fastened to studs. You do not want heavy objects falling at night. I prefer a large horizontal macrame piece surrounded by small wooden frames. It blends perfectly with a cozy aesthetic bedroom vibe.
Styling Hallways and Entryways
Hallways demand flat pieces to save space. People bump into bulky items in narrow spaces constantly. Stick to slim frames and flat metal words. An entryway needs a highly functional focal point. A mirror is perfect here for a quick check before leaving. Surround it with small family photos and a key hook.
6. Sourcing the Best Decor Pieces on a Budget
Decorating an entire wall gets expensive incredibly fast. Buying everything brand new drains your wallet entirely. You can find incredible pieces if you know where to look. I have found my best items by hunting patiently at sales.
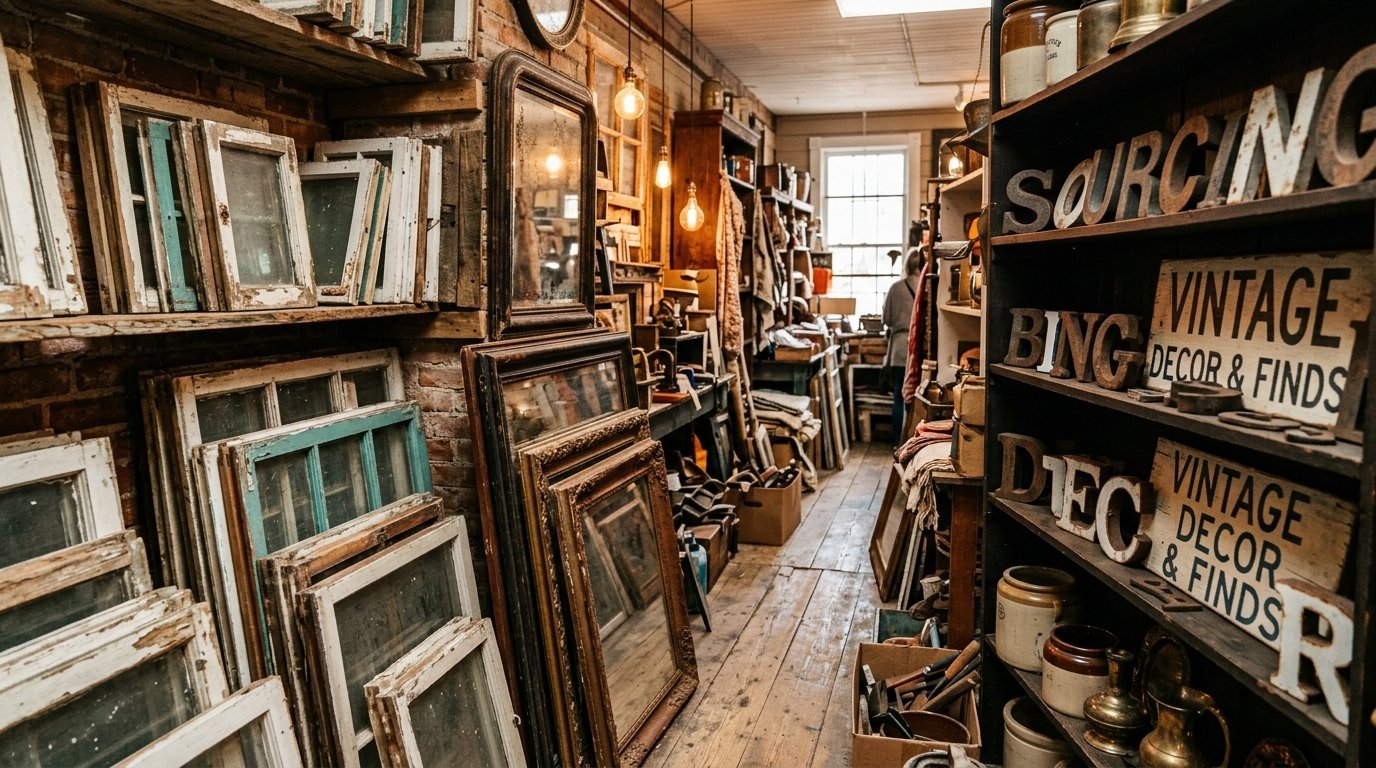
Scouring Thrift Stores and Estate Sales
Secondhand shops hold absolute treasures for this style. You just have to look past ugly paint colors. Focus entirely on the shape and texture of an item. An ugly frame transforms instantly with matte black spray paint. Old wooden window frames are staples in this design style. Estate sales often have vintage mirrors with gorgeous natural aging.
DIY Aging and Weathering Techniques
You can make cheap new items look a hundred years old. Buy inexpensive bright wood frames from a craft store. Water down some dark brown acrylic paint. Brush it on and wipe it right off with a rag. This gives instant aged character to cheap wood. You can lightly sand the edges of painted items too. This exposes the raw material underneath for a distressed look.
Printing Affordable Art
Filling large frames costs a lot if you buy original art. Search online for cheap digital downloads. You can purchase beautiful botanical prints for a few dollars. Send the files to a local print shop. Ask for heavy matte paper. Place these prints in your thrifted frames. The result looks incredibly expensive for pennies on the dollar.
7. Fixing Common Installation Mistakes
Even with a perfect plan things go wrong. Learning how to fix mistakes saves your sanity. Do not panic if a frame looks slightly off. You can easily correct almost any hanging error.
Hiding Extra Nail Holes
Everyone makes a bad measurement eventually. You nail into the drywall and realize you are an inch off. Leave the nail in the correct spot. Take a tiny amount of lightweight spackle on your finger. Rub it over the incorrect hole. Wipe the excess away with a damp rag. Once it dries you will never see the hole again.
Correcting Imbalanced Weights
Sometimes one side of your arrangement feels too heavy. Your eyes keep dragging to the left. You need to balance the visual weight immediately. Swap a dark heavy frame on the left for a light wire basket on the right. Dark colors always carry more visual weight than light colors. Keep adjusting until the wall feels perfectly anchored.
Managing Wall Clutter
There is a fine line between curated and cluttered. If your wall makes you feel anxious you have too many items. Take exactly three items off the wall right now. Step back and look again. Giving pieces breathing room makes the entire arrangement look vastly better. Edit your collection down to your absolute favorite pieces.
Frequently Asked Questions
How high should I hang my central anchor piece?
The center of your anchor piece should sit exactly at eye level. This usually means the center is fifty seven to sixty inches from the floor. If you are hanging it above a sofa leave six to eight inches of space above the furniture.
Can I mix different wood tones on the same wall?
Yes you absolutely can mix wood tones. Having perfectly matching wood looks artificial and cheap. Mix light oak with dark walnut and distressed white wood. Just ensure you spread the different tones out evenly across the arrangement.
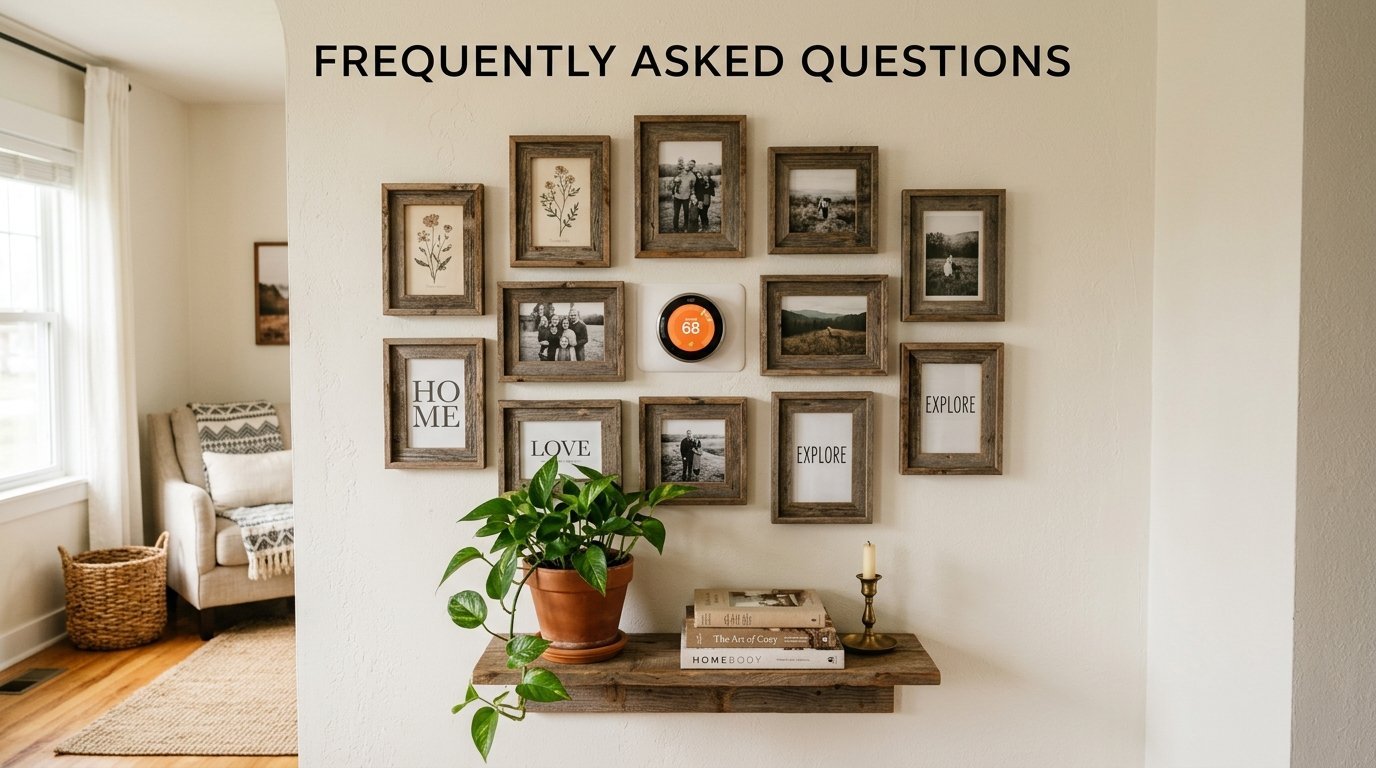
What do I do if I have a thermostat in the middle of my wall?
Treat the thermostat as part of the arrangement entirely. Frame around it with your other pieces. Hang a small wooden shelf right below it. Place a small leaning picture on the shelf to obscure the thermostat slightly from the side. Never try to cover it completely.
How do I stop large mirrors from tilting forward?
Mirrors often tilt due to the wire on the back. Ditch the picture wire entirely. Use D rings attached directly to the wooden frame. Put two heavy duty screws right into the drywall. Hang the D rings straight onto the screws. The mirror will sit perfectly flush against the wall.
What is the best way to clean intricate carved wood pieces?
Dusting intricately carved wood is highly annoying. A regular cloth catches on the sharp splinters. Use a soft bristled clean paint brush. The bristles get deep into the grooves and flick the dust out perfectly. Follow up with a slightly damp microfiber cloth.
8. Finalizing Your Home Space
Completing your wall layout brings immense daily satisfaction. You took a cold blank canvas and gave it a warm soul. Walking into the room will feel completely different now. The space reflects your exact tastes and personal history beautifully. Take a step back and admire your hard physical work. Snap a few photos in natural daylight to capture the vibe. Share your creation online to inspire other people. I love seeing how different people interpret these exact rules. Grab your tools and start planning your floor layout today.

Anya Castellan is the Founder and Editor-in-Chief of Home Wall Trends. An art history graduate of the Rhode Island School of Design with twelve years of experience writing for leading American design publications, she specializes in composition, gallery wall theory, and the quiet architecture of domestic space. A former contributing editor at Architectural Digest and guest lecturer at Parsons School of Design, Anya personally reads and signs off on every piece before it is published.